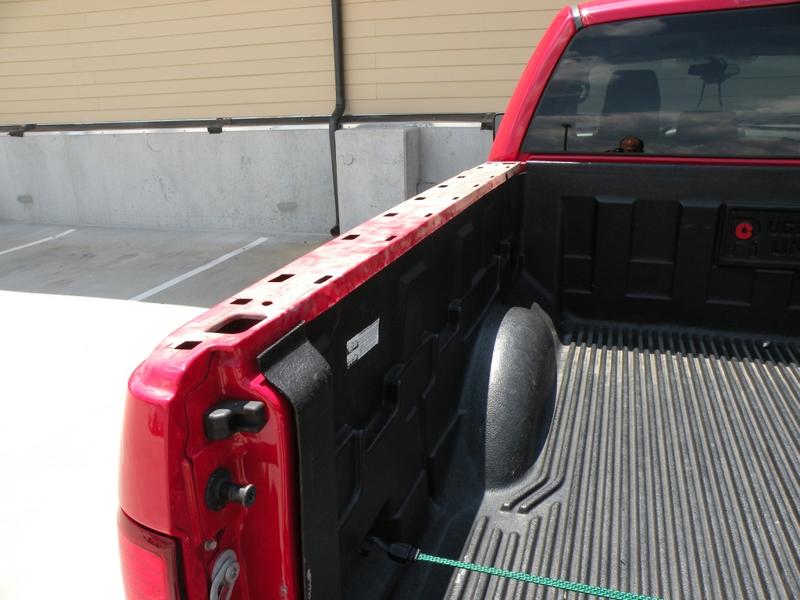
Bed rail caps on a Chevy truck serve to protect the edge of the truck bed from damage and wear. While they’re built to be durable, you might find the need to replace or remove them for various reasons, such as installing a new bed liner, repairing damage, or customizing your truck.
It’s a straightforward task that you can accomplish with minimal tools, often requiring just a bit of patience and careful handling. Ensuring a clean workspace and gently loosening the caps can prevent any scratches or dents on your truck’s bed.
The process might vary slightly depending on the model year and the type of bed rail caps installed, so consulting your vehicle’s manual can provide additional guidance tailored to your Chevy.
Remember that proper removal techniques will ensure the integrity of your truck bed remains intact while facilitating an easy reinstall or replacement of the rail caps.
Credit: www.linexvb.com
How To Remove Silverado Bed Rail Caps
Removing bed rail caps from a Chevy Silverado is a straightforward task. Gently pry up the caps with a suitable trim removal tool, taking care to not damage the paint or bed rails.
Preparation For Bed Rail Cap Removal
Removing the bed rail caps from your Chevy Silverado can be a straightforward process if you have the right tools and steps in mind.
This work doesn’t require professional assistance and can be done right in your driveway. First, ensure your truck is parked on a flat surface and you have the necessary equipment at hand.
Tools And Materials Needed
Before you begin the removal process, gather the following items:
- Plastic trim removal tool: A tool designed to pry off trim pieces without damaging your vehicle.
- Adhesive remover: For dissolving any residual glue or sealant.
- Clean cloth: To wipe down surfaces and remove any debris or adhesive.
- Gloves: To protect your hands from sharp edges and chemicals.
Steps To Remove The Silverado Bed Rail Caps
- Disconnect any attached accessories: Remove any items that might be attached to the bed rail caps, like tie-down anchors or bed liners.
- Loosen the bed rail cap: Insert the plastic trim removal tool beneath the edge of the cap and gently pry upward. Work your way along the length of the bed rail to release the clips or adhesive.
- Handle adhesive with care: If the cap is adhered with glue, apply an adhesive remover along the edge and allow it to penetrate. This will make the cap easier to lift off without excessive force.
- Lift away the cap: Once the cap is loosened, carefully lift it away from the truck bed. If it resists, check for any missed fastenings or additional adhesive that needs to be dissolved.
Post-removal Cleanup
Now that the bed rail caps are off, it’s time to clean the area:
- Remove leftover adhesive: Use adhesive remover and a clean cloth to wipe away any remaining glue from the truck’s surface.
- Inspect for damage: Check the paint and bed rails for any scratches or dents that may have occurred during removal.
- Prepare for replacement or refinishing: If you’re planning to install new rail caps or refinish the area, make sure the surface is clean, dry, and smooth.
Ensuring A Smooth Removal Process
Circle back to the steps outlined and double-check your work. Removing the bed rail caps is similar to solving a puzzle – patience and attention to detail will lead to a rewarding result. Review each section for any remaining fastenings or overlooked adhesive.
If you encounter stubborn spots, reapply the adhesive remover and cautiously work the area with your trim tool. Remember, a gentle touch prevents damage to your Silverado’s finish.
Crafting this content to stand out in search results means tapping into the power of E-A-T (Expertise, Authoritativeness, and Trustworthiness) principles. Let’s ensure your Chevy Silverado looks its best and maintain that rugged functionality you rely on, whether you’re prepping for a fresh set of caps or simply streamlining that resilient silhouette.
How To Remove The Bed Rail Caps 2018 Silverado
Removing bed rail caps from a 2018 Silverado requires a straightforward process. Gently pry up the caps, starting from one end, and work your way down to detach them without causing damage to your truck’s body.
Understand Your Vehicle’s Bed Rail Cap System
Removing bed rail caps from your 2018 Chevy Silverado requires a bit of know-how about the vehicle’s specific cap system. These caps are designed to protect the edges of the truck bed from damage and are usually attached using adhesive, clips, or a combination of both.
Before you proceed with the removal, it’s important to thoroughly inspect the caps to understand their attachment mechanism to avoid any damage to the truck bed.
The Tools You Will Need
- Plastic trim removal tools: Essential for prying the bed rail caps off without scratching your truck.
- Heat gun or hair dryer: Useful for loosening adhesive without causing damage.
- Adhesive cleaner: To remove any residue left by the adhesive.
- Work gloves: To protect your hands during the process.
Steps For Removal
The actual removal process for your Silverado’s bed rail caps can be accomplished with relative ease by following these steps:
- Prepare the area:
- Clear any debris around the bed rails and ensure the truck is on even ground to maintain stability while you work.
- Apply heat cautiously:
- Use a heat gun or hair dryer to gently warm the adhesive. This helps in loosening the grip without damaging the paint.
- Begin the prying process:
- With care, insert the plastic trim removal tool under the cap edge and slowly work it around the perimeter to pry the cap away from the truck bed.
- Address the adhesive aftermath:
- You’ll likely encounter some adhesive residue; apply adhesive cleaner to a rag and wipe the surface clean.
Aftercare And Inspection
Once you’ve removed the bed rail caps from your Silverado, it’s vital to inspect the truck bed edges for any inadvertent scratches or remaining adhesive. If you find any minor scratches, some touch-up paint can rectify the situation. Additionally, clean the entire surface to ensure that it is free from any contaminants that could interfere with the installation of new bed rail caps or other accessories.
Precautions And Tips
- Work in a well-ventilated area: The fumes from the adhesive cleaner can be noxious, so ensure good airflow.
- Take your time: Rushing can lead to damage, so approach the process slowly and methodically.
- Safety first: Always wear the appropriate safety gear, such as gloves, and handle tools carefully.
With patience and the proper technique, you can remove the bed rail caps from your 2018 Chevy Silverado effectively, preparing your truck bed for a fresh set of accessories or simply restoring its original look.
Frequently Asked Questions For How To Remove Bed Rail Caps Chevy
What Are Rail Caps On A Truck?
Rail caps on a truck are protective covers installed over the top edges of the truck bed. They guard against damage and scratches during loading and unloading cargo.
Can You Easily Remove Chevy Bed Rail Caps?
Yes, Chevy bed rail caps can be removed fairly easily with the right tools. You will need a screwdriver or a putty knife to gently pry them off. Take care not to damage the underlying truck bed or the caps.
What Tools Are Needed To Remove Bed Rail Caps?
To remove bed rail caps from a Chevy, you typically need a flat-head screwdriver and a putty knife. Some models may require a Torx driver or a ratchet set. Always check the manufacturer’s instructions for the recommended tools.
Conclusion
Removing your Chevy’s bed rail caps can be simple with the right tools and a careful approach. Whether you’re looking to replace or upgrade, always prioritize safety and follow the vehicle’s manual.
For a sleek, new look or essential maintenance, your Chevy is now ready for whatever transformation you have in store.