Have you ever found yourself driving and suddenly noticed your side view mirror is missing or hanging by a thread? It’s not just frustrating; it’s a safety concern that needs immediate attention.
You might think fixing it requires professional help, but attaching a side view mirror is surprisingly simple with the right guidance. Imagine saving time and money while boosting your DIY skills. In this guide, you’ll discover the straightforward steps to securely attach a side view mirror and get back on the road with confidence.
Don’t let a dangling mirror hold you back. Dive in to learn how you can fix this common car issue quickly and easily.
Credit: www.familyhandyman.com
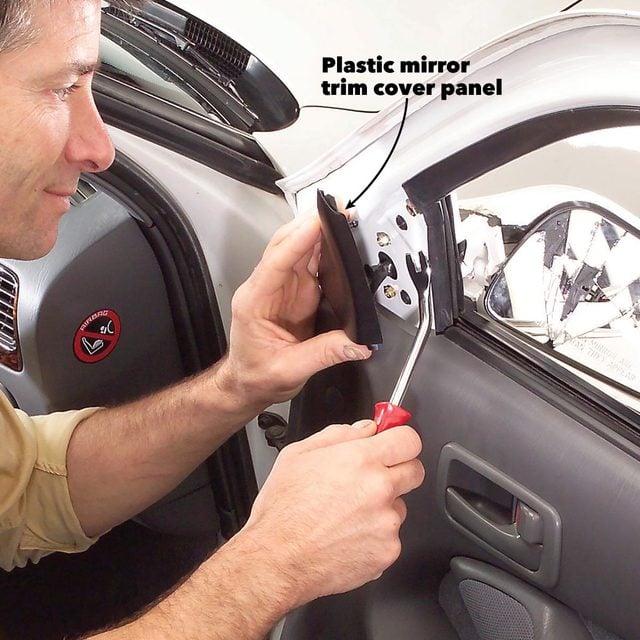
Removing The Damaged Mirror
Removing a damaged side view mirror is a crucial step in car maintenance. A broken mirror affects your visibility and safety while driving. Fixing it restores the car’s functionality and keeps you safe on the road.
Detaching The Old Mirror
Begin by gathering essential tools for the task. You need a screwdriver, pliers, and a wrench. Open the car door to access the screws holding the mirror. Find the screws inside the door panel near the mirror. Use the screwdriver to remove these screws carefully. Hold the mirror while removing the final screw to prevent it from falling. Once unscrewed, gently detach the mirror from the car. Use pliers to unplug any attached wires. Be cautious to avoid damaging the wires.
Cleaning The Attachment Surface
After removing the mirror, focus on cleaning the surface. The area must be clean for the new mirror to attach securely. Use a cloth to wipe away dust and debris from the surface. If there is adhesive residue, use a mild cleaner. Apply the cleaner and scrub gently to remove the residue. Ensure the surface is dry before proceeding. This step ensures the new mirror fits perfectly and holds firmly. A clean surface prevents future problems with the attachment.
Preparing The New Mirror
Attaching a side view mirror involves aligning it with the car’s frame. Ensure the mirror’s wiring is correctly connected. Then, securely fasten the mirror using screws or clips.
Preparing the new mirror is a crucial step in ensuring that your side view mirror replacement goes smoothly. Before you dive into the installation, it’s essential to get familiar with your new mirror. This preparation not only saves time but also helps prevent any mishaps during the process. So, how do you prepare the new mirror effectively? Let’s explore the steps involved.Inspecting The New Mirror
First, take the new mirror out of its packaging. Check for any visible damage such as cracks or chips. Even the smallest crack can compromise the mirror’s performance. Next, ensure all components are included. Look for mounting brackets, screws, and any additional parts that might be necessary for installation. Missing parts could halt your progress. Also, compare it to the old mirror. Is it the right size and model? This simple step can save you from unnecessary frustration later on.Aligning The Mirror Base
Once you’ve inspected the mirror, focus on aligning the mirror base. This is where precision matters. Proper alignment ensures that the mirror fits snugly onto your vehicle. Begin by positioning the mirror on your car. Does it align with the previous mounting holes? If not, minor adjustments might be needed. Use a level to make sure the mirror is straight. A crooked mirror not only looks unprofessional but can also affect your visibility. Take a moment to tighten any loose screws. A secure fit means less chance of the mirror wobbling or falling off while driving. Have you ever struggled with a misaligned mirror? It can be frustrating, but with careful alignment, you can avoid such issues. Taking the time to prepare the new mirror thoroughly makes the installation process much smoother. Are you ready to tackle the installation? With these preparation tips, you’re well on your way to a successful mirror replacement.Installing The New Mirror
Installing a new side view mirror might sound daunting, but it can be surprisingly straightforward. With a little patience and a few tools, you can have your car looking as good as new in no time. Let’s break down the process into manageable steps so you can tackle the job with confidence.
Securing The Mirror
Once you’ve removed the old mirror, it’s time to secure the new one. Hold the mirror in place, ensuring it aligns perfectly with the mounting holes. This step is crucial—misalignment can lead to a wobbly mirror or damage.
Use the screws or bolts you set aside earlier to fasten the mirror. Tighten them firmly, but be careful not to overdo it. Stripping a bolt can lead to a frustrating delay and an extra trip to the hardware store. Remember, a steady hand makes for a secure mirror.
Connecting Electrical Components
If your mirror has electrical components, like heating elements or motorized adjustments, you’ll need to reconnect them. Look for the wiring harness or electrical connector near the mirror housing.
Carefully plug the connectors back into place, ensuring they fit snugly. A loose connection might cause your mirror’s features to malfunction, leaving you scratching your head later on. Test the electrical components before you finish to ensure everything works as it should.
Ever had a moment where you thought, “Did I really reconnect that properly?” Double-checking can save you a heap of trouble. A quick test drive or a flick of the switch can verify your handiwork.
By following these steps, you’ll have a new mirror installed that looks great and functions perfectly. Have any tips or stories from your own experience? Share them in the comments below!
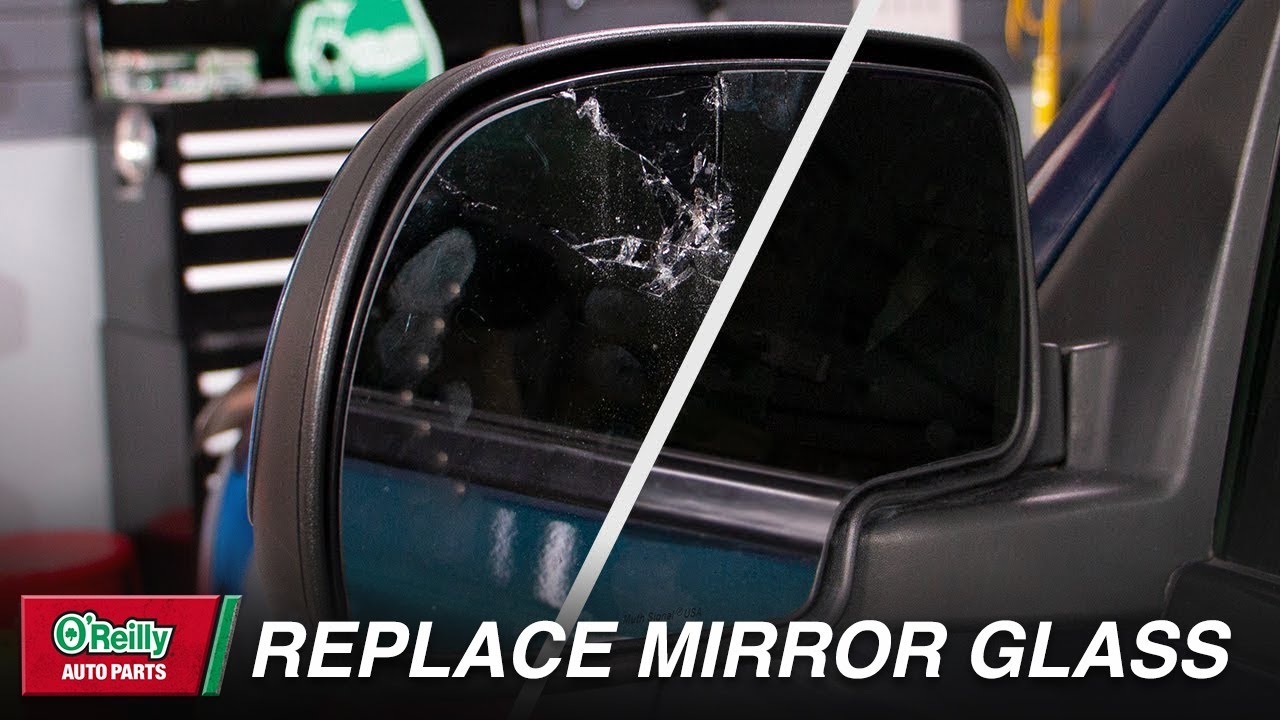
Credit: www.youtube.com
Testing The Mirror
Attaching a side view mirror involves a few straightforward steps. First, gather necessary tools like a screwdriver and adhesive. Next, align the mirror with the mounting bracket, ensuring it fits securely. Finally, tighten screws and check stability, ensuring safe driving visibility.
Testing the mirror is a crucial step after attaching a side view mirror. It ensures that the mirror is not just securely attached but also functional and positioned correctly. You wouldn’t want to hit the road and realize you can’t see what’s behind you, right? Let’s dive into how you can test your side view mirror effectively.Adjusting The Mirror Position
First, sit in the driver’s seat and adjust the mirror to get a clear view of the road behind you. Use the mirror adjustment controls to tilt the mirror up, down, left, or right until you find the perfect angle. Remember, the mirror should cover the blind spot while allowing you to see a part of your vehicle. This balance gives you a comprehensive view, enhancing safety. Have you ever noticed how a slight misalignment can make a huge difference in visibility?Checking For Functionality
Next, test the electronic functions, if your mirror has them. Does it fold in and out smoothly? Are the heating elements working, if applicable? Make sure the mirror adjusts correctly without any jerking or resistance. A friend once shared that their mirror wouldn’t heat up because of a loose wire. Don’t let this be a surprise for you! Ensure everything is working perfectly before you hit the road. Engage with your mirror controls and listen for any unusual sounds, indicating a problem. Are you confident that your mirror is in top shape? If not, it might be time for a double-check. Finally, always keep your mirrors clean for optimal visibility. A clear mirror can be the difference between a smooth drive and a nerve-wracking one. Does this make you rethink how often you check your mirrors?Final Adjustments
After securing the side view mirror, it’s time for final adjustments. This stage ensures the mirror functions correctly. Proper adjustments enhance your driving safety. Let’s dive into the essential steps.
Tightening Screws
First, check the screws on the side view mirror. Use a screwdriver for this task. Tight screws prevent the mirror from wobbling. Loose screws can cause accidents. Ensure each screw is snug. Do not overtighten, as it may crack the mirror housing. Tighten each screw evenly for balance.
Ensuring Proper Alignment
Next, focus on the mirror’s alignment. Sit in the driver’s seat. Adjust the mirror to cover your blind spots. Make sure you see the rear clearly. The mirror should not point upwards or downwards. It must align with your eye level. Check both the horizontal and vertical positions. Proper alignment boosts visibility on the road.

Credit: www.familyhandyman.com
Conclusion
Attaching a side view mirror can seem tough, but it’s doable. Follow each step patiently, and the process becomes simpler. Safety is key, so ensure everything is secure before driving. Double-check the mirror angle to guarantee a clear rear view.
Practice these steps, and next time it will be easier. Remember, having a well-fixed side view mirror improves road safety. Taking the time to do it right saves hassle later. Share your experience with friends who might need help. A little effort now keeps your car in top shape.
Happy driving!