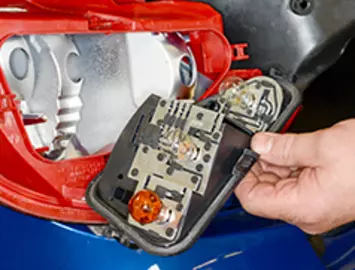
Changing a taillight might seem daunting, but it’s simpler than you think. A little guidance can make the process smooth and hassle-free.
In this blog post, we’ll walk you through the steps to change a taillight. Whether you drive a Chevy Silverado or another vehicle, the basic process remains similar. By following our guide, you’ll save time and avoid potential fines from having a broken taillight.
We’ll cover the tools you’ll need, safety tips, and a step-by-step process. So, grab your toolkit and let’s get started on making your car road-ready again!

Credit: www.youtube.com
How To Change A Taillight On A Chevy Silverado
Changing a taillight on a Chevy Silverado is a simple task. First, open the tailgate to access the screws holding the taillight assembly. Use a screwdriver to remove these screws carefully. Once the screws are out, gently pull the taillight assembly away from the truck.
You will see the bulb socket; twist it counterclockwise to remove it. Take out the old bulb and insert the new one into the socket. Twist the socket back into the assembly, ensuring it is secure. Finally, reattach the taillight assembly to the truck and tighten the screws.
Your new taillight should now be working properly.

Credit: haynes.com
Conclusion
Changing a taillight is a simple task. Follow the steps outlined above. Save money and learn a new skill. Always ensure your vehicle lights work properly. This ensures safety on the road. Check your taillights regularly. It prevents accidents and legal issues.
Need help? Ask a friend or consult a manual. Keep tools handy for quick fixes. Now, you can change a taillight with confidence.
