Have you ever found yourself driving with a broken or cracked driver side mirror? It’s not just an inconvenience; it’s a safety hazard.
You rely on your side mirrors every time you change lanes, merge, or park. A damaged mirror can lead to blind spots, making driving risky and stressful. But don’t worry—changing your driver side mirror is easier than you think, and you don’t have to be a car expert to do it.
Imagine the peace of mind you’ll have knowing your mirrors are in perfect condition, enhancing your safety on the road. In this guide, you’ll learn step-by-step how to change your driver side mirror. Whether you’re a DIY enthusiast or simply trying to save money, this article is tailored for you. Let’s make your driving experience safer and more enjoyable!

Credit: www.tiktok.com
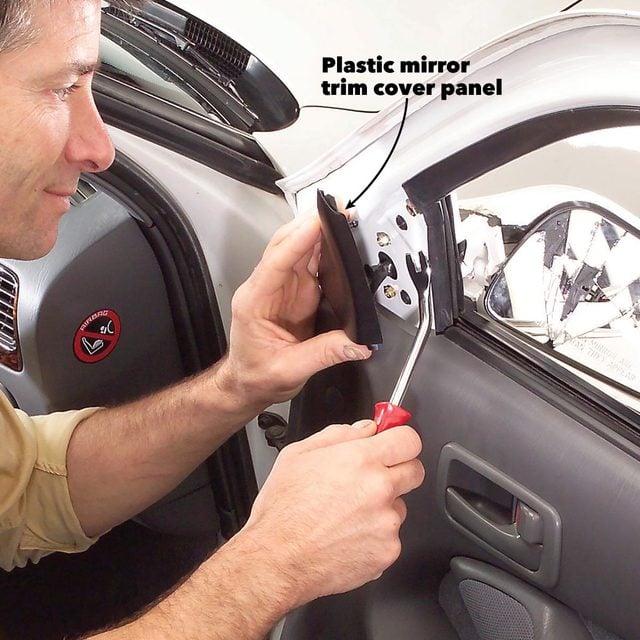
Removing The Old Mirror
Removing the old driver side mirror might seem daunting at first, but with the right approach, it becomes a straightforward task. Whether you’re dealing with a cracked mirror or simply upgrading, knowing how to efficiently remove the old mirror can save you time and potential frustration. Let’s break down the steps involved, focusing on loosening the fasteners and disconnecting electrical connections.
Loosening The Fasteners
First, locate the fasteners that hold your mirror in place. These are usually screws or bolts found on the inside of the door panel.
Use a screwdriver or socket wrench to gently loosen them. Remember, you don’t need to remove them completely right away.
Have you ever tried to rush through unscrewing only to strip the screw? Patience is your ally here. Loosen each fastener evenly to prevent the mirror from suddenly falling.
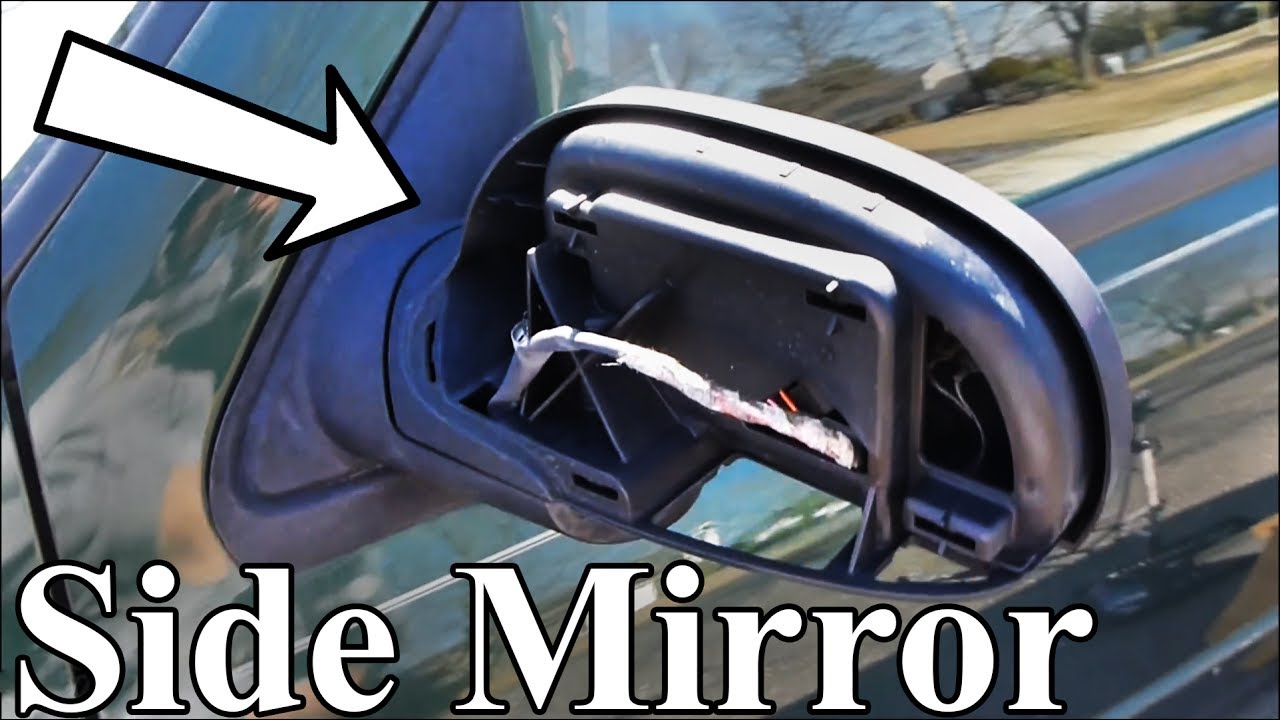
Disconnecting Electrical Connections
If your vehicle has electric mirrors, you’ll need to disconnect the wiring. Look for a small connector attached to the mirror’s back.
Carefully unplug it, ensuring you don’t damage any wires. This might be the moment where you realize how intertwined technology is with simple car parts.
Isn’t it fascinating how a small connector can control the mirror’s movements? Handle it with care, and make sure you remember the position of each wire for later reassembly.
By following these steps, you’ll have your old mirror off in no time, making room for the new one. What challenges have you faced when removing a car mirror? Your insights might help others in their DIY endeavors!
Credit: www.familyhandyman.com
Preparing The New Mirror
Removing the old mirror is the first step. Carefully unscrew it from the door. Check new mirror fits well before final installation.
When you’re ready to replace your driver side mirror, preparing the new mirror is a crucial step to ensure a smooth installation. Imagine this: you’ve just purchased your new mirror, and you’re eager to get your car looking pristine again. But before you jump into the installation, let’s make sure you’re set up for success. Here’s a breakdown of the preparation process.Checking Compatibility
Before you start, verify that the new mirror is compatible with your vehicle model. Check the part number against your car’s specifications. This tiny detail can save you from a lot of hassle later. Ask yourself: Is this mirror designed for my car’s year and model? If unsure, consult your car’s manual or the seller for clarity. Sometimes, mirrors come with additional features like heating or electric adjustments. Ensure these match your car’s existing functionalities.Inspecting The New Mirror
Once compatibility is confirmed, inspect the mirror thoroughly. Look for any cracks or scratches. Even the smallest imperfection can affect visibility. Examine the mounting points. Are they intact and aligned? This ensures a stable fit when installed. A personal tip: I once received a mirror with a loose wire connector. Had I installed it without checking, it might have failed, leaving me stranded. In essence, preparing your new mirror with these checks can prevent future headaches. What would you rather have: a seamless drive or unexpected pitfalls due to overlooked details?Installing The New Mirror
Installing the new driver side mirror can seem daunting. But with clear steps, it’s manageable. After removing the old mirror, it’s time to install the new one. This involves aligning the mirror, securing the fasteners, and reconnecting the electrical connections. Each step requires precision for the best results. Let’s break it down into simple steps.
Aligning The Mirror
Start by positioning the new mirror into the mounting area. Ensure it aligns with the existing holes and frame. A correct alignment makes the next steps easier. Gently hold the mirror in place. Check that it sits flush against the door. This prevents vibration while driving.
Securing The Fasteners
Insert the fasteners into the aligned holes. Use a screwdriver to tighten them. Make sure they are snug, but avoid overtightening. This can crack the mirror housing. Double-check each fastener for stability. A secure fit ensures the mirror remains steady.
Reconnecting Electrical Connections
Locate the electrical connectors that you disconnected earlier. Reattach them to the new mirror’s socket. Match the colors of the wires for correct connections. Secure the connectors firmly. Test the electrical functions, like adjustment and heating. Ensure everything works as expected. If not, check the connections again.
Testing The New Mirror
After installing your new driver side mirror, testing is vital. It ensures everything works correctly. This step guarantees your safety on the road. Make sure the mirror is secure and functional.
Adjusting The Mirror Position
Sit in the driver’s seat. Check the mirror’s angle. Adjust it until you have a clear view. You should see the road and any vehicles behind you. Ensure the mirror covers your blind spot. Move it up, down, left, or right as needed. Your comfort is key. A well-positioned mirror reduces accidents.
Checking Electrical Functions
If your mirror has electrical features, test them now. Turn on the ignition. Use the control buttons to move the mirror. Check each direction: up, down, left, and right. Make sure the heater works if available. If the mirror has indicators, test them too. Confirm they blink with the turn signals. All functions should operate smoothly.
Credit: www.youtube.com
Conclusion
Changing your driver side mirror is simple with the right steps. Start with the right tools and the correct replacement mirror. Remove the old mirror with care. Attach the new mirror securely. Test to ensure it’s positioned correctly. Safety is crucial, so double-check everything.
This task saves time and money. Boosts your confidence in car maintenance. Now, you’re ready to drive safely again. Remember to maintain your mirrors regularly. Keep your car in top shape for every journey. Happy driving!