Imagine sliding into your car on a chilly morning, your fingers wrapping around a steering wheel that’s not just functional, but a cozy, handmade masterpiece. Creating your own crochet steering wheel cover isn’t just about adding a personal touch; it’s about bringing warmth and style to every drive.
Do you want to transform your driving experience with a splash of creativity and comfort? You’re in the right place! In this guide, you’ll discover how easy it is to crochet a steering wheel cover that suits your taste and personality.
Whether you’re a seasoned crochet enthusiast or a curious beginner, you’ll find simple steps and tips tailored just for you. Ready to turn your car’s interior into a reflection of your unique flair? Let’s get started on this delightful project that’s sure to make every journey a little more special.
Materials Needed
To crochet a steering wheel cover, gather a few simple materials. You’ll need some yarn. Choose a color that you like. Make sure it feels soft. A crochet hook is important too. The size matters. An H/8 (5mm) hook works well. A pair of scissors is handy. You will need to cut the yarn. A tape measure helps. Measure your steering wheel. Know its size. Stitch markers are useful. They keep your place in the yarn. Finally, a darning needle is needed. It helps to weave in the yarn ends. Once you have all these materials, you are ready to start. Happy crocheting!
Choosing The Right Yarn
Yarn comes in many types. Each type has a different use. Cotton yarn is soft and absorbent. It is great for summer. Wool yarn is warm and cozy. Perfect for winter days. Acrylic yarn is cheap and easy to care for. It is good for beginners. Blended yarns mix two or more fibers. They offer the best of both worlds.
Choose a color that matches your car. Bright colors stand out. Dark colors hide dirt. Texture is important too. Smooth yarn gives a sleek look. Textured yarn adds a fun feel. Think about the look and feel you want. Experiment with different yarns. Find what suits your style best.
Crochet Techniques
Start with a slip knot on the hook. Use a chain stitch to make the base. The single crochetstitch is tight and simple. Yarn over, pull through loop. The double crochetstitch is taller. Yarn over, insert hook, pull through two loops. Practice makes stitches neat and even.
Combine stitches for unique designs. Try shell stitchfor waves. Make five double crochets in one stitch, skip, then repeat. The V-stitchforms a V shape. Crochet one double, chain one, and another double in the same stitch. Experiment with colors for fun patterns.
Measuring The Steering Wheel
First, find the center of the steering wheel. Use a ruler or a tape measure. Measure from one side to the other. This is the diameter. Write down the number. It helps to have a friend hold the tape.
Steering wheels can be thick or thin. Check how thick yours is. Use a soft measuring tape. Wrap it around the wheel. This is the thickness. The yarn you choose should fit this measurement. This will make the cover snug.
Creating The Pattern
Start by measuring your steering wheel. Use a tape measure for accuracy. Write down the circumference and width. These numbers are important. Next, cut a piece of paper. Make it the same size as your steering wheel. This is your template. It’s like a pattern guide.
Place the paper on the wheel. Check if it fits well. Adjust the paper if needed. Too tight or too loose is bad. Keep adjusting until perfect. This step ensures your cover will fit. Double-check your measurements. This is important for a snug fit.
After making the template, check its fit on the wheel. Ensure the edges align. Adjust the template if needed. Fold the paper to fit curves. Make sure it hugs the wheel nicely. Adjust the template as required. A perfect fit means your crochet will look neat. Check again for any gaps. These gaps can cause loose fitting.
Credit: www.crochet365knittoo.com
Step-by-step Crochet Instructions
Begin with a slip knot on your crochet hook. Chain enough stitches to wrap around your wheel. Use a measuring tape to check the length. Connect the last chain with the first. This forms a circle. Make sure it’s not twisted. Start the first row using a single crochet stitch. Crochet into each chain stitch around the circle. Keep the tension even.
Continue with the single crochet stitch. Build up rows to cover the wheel’s depth. Check your work against the wheel often. Add more stitches if needed. Reduce stitches if it’s too big. Count the stitches each row to stay consistent. Change colors if you want a pattern. Just tie the new yarn to the old one. Weave in the yarn ends as you go.
Once it fits, finish the last row. Cut the yarn and pull it through the last loop. Weave in any loose ends with a yarn needle. Make sure all ends are hidden. Try the cover on the wheel. Adjust if needed. Add any decorations like buttons or tassels. Your cover is now ready to use. Keep it clean to last longer.
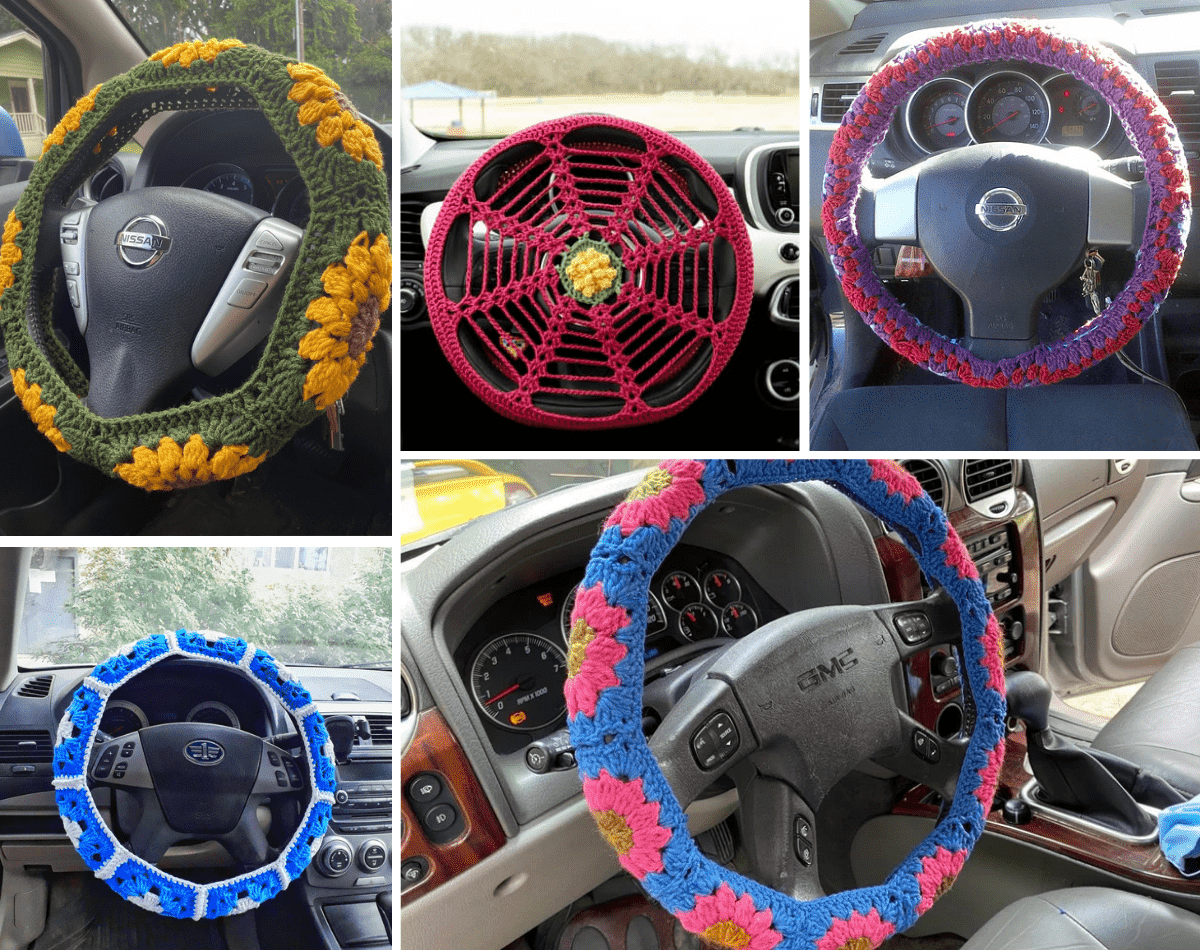
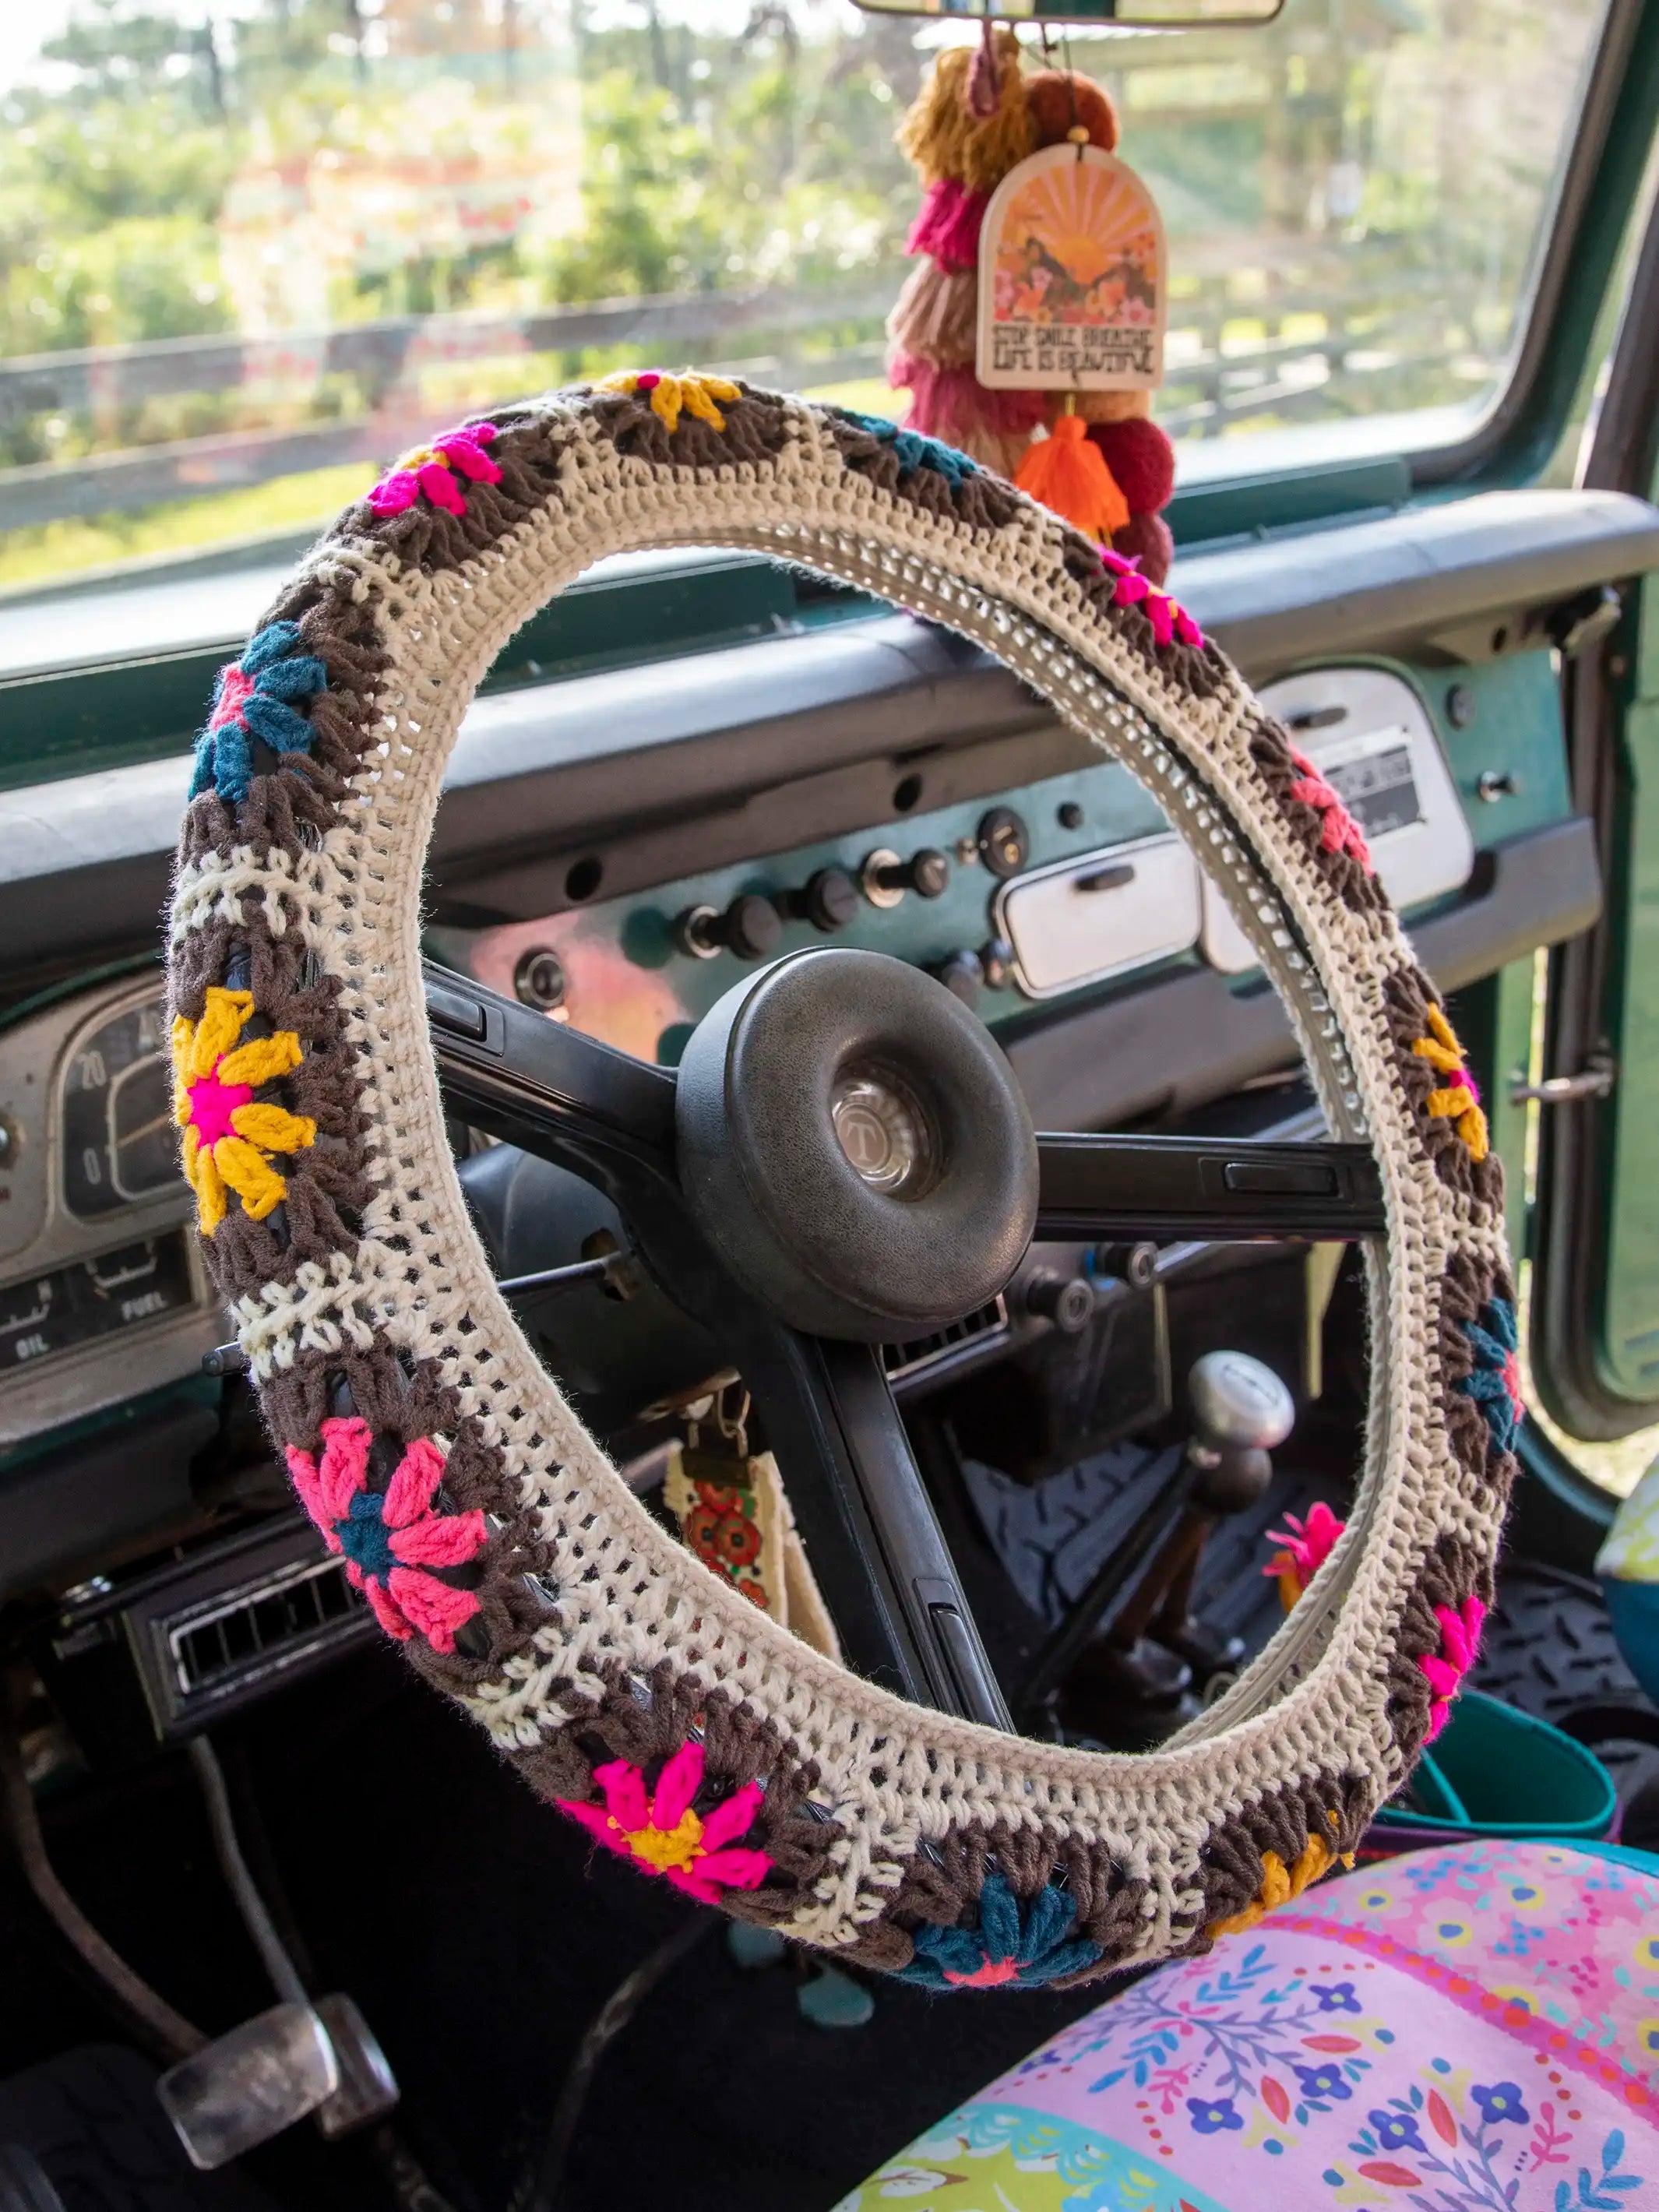
Customizing Your Cover
Adding flowers or small toys can make your cover unique. Use different shapes to catch the eye. Beads and buttons can add sparkle. Choose safe items that won’t get in the way while driving. Think about how they will feel in your hands. Soft decorations are nice to touch. Hard ones might not feel good. Arrange them neatly for a tidy look. Glue or sew them on tightly. This way, they will stay in place.
Pick colors that you love. Bright colors can make you smile. They add fun to your driving time. Mix and match colors for a playful look. You can choose your favorite team’s colors. Or match your car’s interior. Changing colors is easy with yarn. Just switch to a new yarn when you want a new color. Experiment with patterns like stripes or zigzags. This can make your cover look cool.

Credit: www.youtube.com
Troubleshooting Common Issues
Encountering issues while crocheting a steering wheel cover can be frustrating. Adjusting tension might resolve uneven stitches. Double-checking the pattern ensures proper size and fit.
Correcting Mistakes
Mistakes happen. Don’t worry if stitches look uneven. Gently pull the yarn to fix them. Use a crochet hook to adjust loops. Undo wrong stitches carefully. This will keep the yarn from tangling. Practice makes perfect. Mistakes will lessen with time.
Ensuring Proper Fit
A snug fit is important for safety. Measure your steering wheel first. Choose yarn that stretches well. Use a flexible measuring tape. Check your work often while crocheting. Adjust tension if the cover seems loose. Add or remove stitches if needed. Secure the edges tightly. This will prevent slipping while driving.
Care And Maintenance
Keep your crochet steering wheel cover looking fresh. Use a gentle detergent. Fill a basin with warm water. Add the detergent. Soak the cover for a few minutes. Rinse it well with clean water. Let it air dry. Avoid using a dryer. Heat can damage the yarn.
Store your cover when not in use. Fold it neatly. Place it in a dry place. Use a ziplock bag to keep it clean. Avoid direct sunlight. Sunlight can fade the colors. Keep it away from moisture. Moisture can lead to mold. Store it safely for a long life.
Credit: www.naturallife.com
Conclusion
Creating your own crochet steering wheel cover is rewarding and fun. It adds a personal touch to your car’s interior. Plus, it provides extra comfort while driving. With the right materials and simple steps, anyone can make one. Remember to choose colors and patterns you love.
They will make each drive more enjoyable. Practice and patience are key to success. Soon, you’ll have a unique cover to show off. Start your project today and enjoy the creative process. Happy crocheting!