You’re all set for a drive, but when you try to change a tire, you encounter a stripped lug nut. Frustrating, right?
Not only can it throw a wrench in your plans, but it might also seem like a daunting problem to solve. But here’s the good news: you can fix it without breaking a sweat. Imagine the satisfaction of handling this issue yourself, saving time and money, and getting back on the road with confidence.
In this guide, we’ll walk you through the steps to fix a stripped lug nut, using tools you likely already have. Say goodbye to stress and hello to empowerment as you master this essential skill. Ready to take the first step? Let’s dive in and get your wheels turning smoothly again!
Identifying Stripped Lug Nuts
Dealing with stripped lug nuts can be frustrating. First, assess the damage carefully. Use a socket that fits snugly. Consider a lug nut remover tool if needed. Ensure tools are clean and well-maintained. Always follow safety guidelines when working on vehicles.
Proper care ensures smooth repairs and avoids further issues.
Identifying stripped lug nuts can be a frustrating yet crucial skill for any car owner or enthusiast. Imagine planning a weekend getaway, only to find yourself stranded because your wheel won’t budge. Recognizing the tell-tale signs early can save you from unexpected hassles. Let’s delve into how you can spot and understand stripped lug nuts, ensuring your car’s wheels remain securely fastened.Signs Of Stripped Lug Nuts
Stripped lug nuts often reveal themselves through a few obvious signs. One key indicator is difficulty in removing the nut using a standard wrench or socket. If it feels like the tool is slipping or not gripping, the nut may be stripped. Another sign is visible damage to the nut itself. Look for rounded edges or metal shavings around the nut. These are clear signs it’s been worn down. You might also notice an unusual noise when driving. If the wheel is not properly secured, it can result in a rattling sound, alerting you to potential lug nut issues.Causes Of Stripped Lug Nuts
Understanding what leads to stripped lug nuts can help prevent future occurrences. Over-tightening is a common cause. Using excessive force can damage the threads, making the nut difficult to remove. Cross-threading is another culprit. This occurs when the nut is improperly aligned with the bolt, causing damage as you force it on. Using the wrong tools can also lead to problems. A mismatched socket or wrench may not fit snugly, leading to wear and tear over time. Have you ever been in a rush and misaligned a lug nut? Such simple mistakes can lead to big issues. Recognizing these causes empowers you to take preventive measures, ensuring your wheels stay securely in place.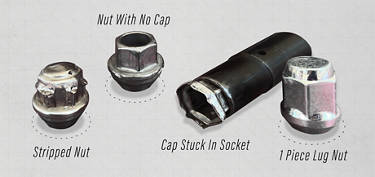
Credit: www.discounttire.com
Tools Required For Repair
To fix stripped lug nuts, gather essential tools like a socket wrench, lug nut extractor, and penetrating oil. These tools help in safely removing and replacing damaged lug nuts on your vehicle. Ensure you have a sturdy jack and safety gear for a smooth repair process.
When you’re dealing with a stripped lug nut, having the right tools can make a world of difference. It’s like going into a battle well-prepared. You’ll feel more confident and efficient, and there’s less chance of further damaging your vehicle. Here’s a breakdown of the tools you’ll need and some that can make the job easier.Essential Tools
Start with a lug wrench. This tool is your go-to for loosening and tightening lug nuts. If the nut is stripped, a regular wrench might not do the trick, so you might need a specialized lug nut extractor socket. This socket is designed to grip onto stripped nuts securely. Next, you’ll need a breaker bar. This is a long bar that gives you more leverage, making it easier to turn stuck nuts. Trust me, this can be a lifesaver when the lug nut refuses to budge. A hammer is crucial too. Sometimes, a gentle tap can help set the extractor socket properly on the nut. It’s a simple tool, but its role in this repair is indispensable.Optional Tools For Ease
Consider using a penetrating oil. Spraying this on the lug nut can help loosen rust or debris, making removal smoother. It’s not absolutely necessary, but it can save you from a lot of frustration. If you’re like me and prefer efficiency, a power drill with a lug nut remover attachment can make the job quick. It’s a bit of an investment, but it pays off when you’re in a rush. A torque wrench is another handy tool. It helps ensure that lug nuts are tightened correctly when you’re putting everything back together. This can prevent future stripping and ensure safety. Now, have you ever considered how much easier repairs are when you have the right tools on hand? Think about it next time before starting a repair. It might be time to evaluate and update your toolbox.Safety Precautions
Fixing stripped lug nuts demands careful attention to safety. Avoiding accidents and injuries is crucial during this process. With proper safety precautions, you ensure a smooth and risk-free operation. Let’s delve into some key safety measures before getting started.
Personal Protective Equipment
Wear safety goggles to protect your eyes from metal shavings. Gloves shield your hands from sharp edges and provide grip. Use a sturdy pair of shoes to protect your feet from falling objects. Ear protection is vital when using loud tools. Ensure your clothing is snug and not loose to prevent it from catching in machinery.
Safe Work Environment
Choose a clean and clutter-free area. Ensure there is adequate lighting for visibility. Keep your tools organized and within easy reach. Make sure your work surface is stable and firm. Avoid working in extreme weather conditions. Check that the vehicle is securely elevated with jack stands. This prevents any movement or collapse.
Methods To Remove Stripped Lug Nuts
Stripped lug nuts can be a real headache. They make changing tires difficult. Fortunately, there are effective methods to remove them. You don’t need fancy tools for some of these methods. With patience and the right technique, you can get the job done. Below, we explore three approaches that can help.
Using A Lug Nut Extractor
A lug nut extractor is a useful tool. It grips the lug nut tightly. Start by placing the extractor over the stripped lug nut. Use a wrench to turn the extractor counterclockwise. This should loosen the lug nut. Make sure to apply steady pressure. The lug nut should come off smoothly.
Hammer And Chisel Technique
The hammer and chisel technique is an old-school method. Place a flat chisel on the edge of the lug nut. Strike the chisel with a hammer. Aim to make a groove in the lug nut. Once a groove forms, angle the chisel. Hit the chisel to turn the lug nut counterclockwise. This method requires patience and precision.
Welding A Nut To The Stripped Lug
This method involves welding. Weld a new nut onto the stripped lug nut. Ensure a strong bond. Once welded, use a wrench to turn the new nut. The stripped lug nut should turn with it. Be careful with this method. It requires welding skills and safety precautions.
Repairing And Replacing Lug Nuts
Stripped lug nuts can be a hassle. Start by cleaning the area around the nut. Use a specialized socket to gently remove it. Replace it with a new nut to ensure safety. Regular checks can prevent future issues.
Repairing and replacing lug nuts might seem daunting, but it’s a crucial skill for anyone who loves to keep their vehicle in top shape. Imagine you’re on a road trip, and you hear an odd noise. You pull over, only to discover a stripped lug nut. Suddenly, the adventure takes a turn. Knowing how to handle this situation efficiently can save you time, money, and frustration. Let’s dive into the steps to repair and replace those troublesome lug nuts.Inspecting The Studs
Before jumping into solutions, inspect the studs carefully. This is the base where the lug nuts sit. Are they bent or damaged? A damaged stud might cause the lug nut to strip again. Use a flashlight to get a good look, and check for any unusual wear or tear. If you find damage, consider replacing the stud to ensure safety.Installing New Lug Nuts
Once you have checked the studs and ensured they’re in good condition, it’s time to install new lug nuts. Pick up a set that’s compatible with your vehicle’s specifications. This is crucial; the wrong size can lead to further stripping. When installing, tighten each nut with a torque wrench to the recommended pressure. This ensures a snug fit and reduces the risk of future problems. Have you ever tightened a lug nut only to realize it’s not fully secure? That feeling can be unnerving. Using a torque wrench, you avoid guesswork and ensure each nut is properly fastened. This tool is a game-changer for car maintenance. Are there other tools or tricks you use when dealing with lug nuts? Share your experiences and solutions. Knowing more tips can empower you and others to handle roadside fixes with confidence. It’s not just about fixing the problem; it’s about preventing it from happening again. Proper installation and regular inspections can keep you on the road safely.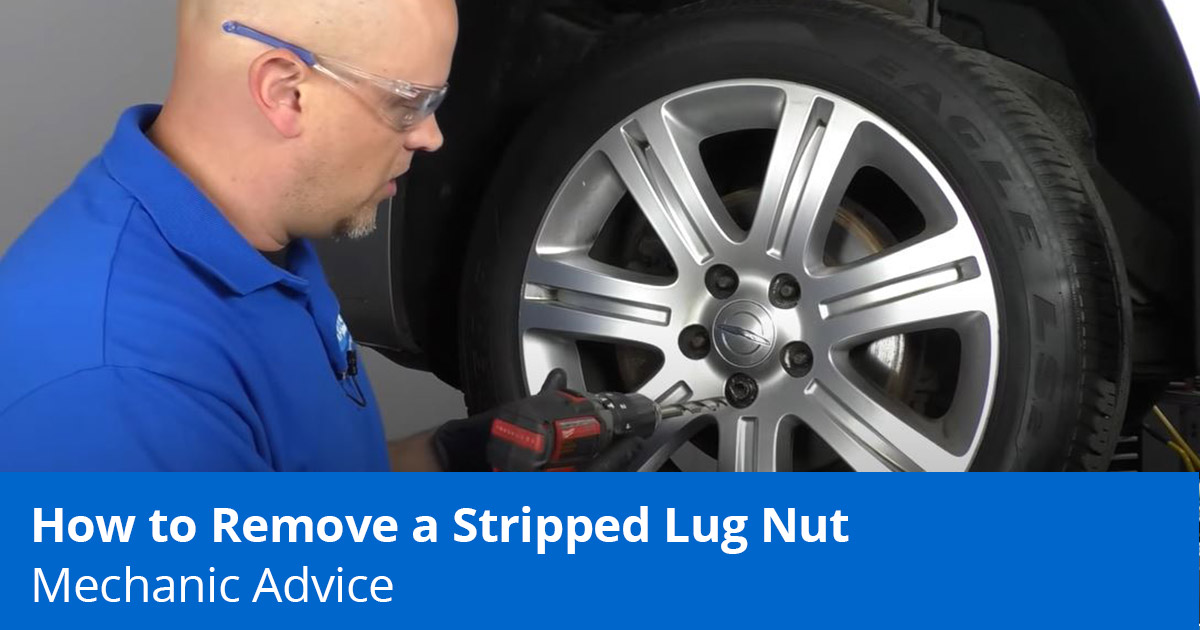
Credit: blog.1aauto.com
Preventing Future Issues
Avoid future headaches by addressing stripped lug nuts promptly. Use proper tools to safely remove and replace them. Regular maintenance checks can prevent this issue, ensuring your wheels stay secure and your vehicle runs smoothly.
Preventing future issues with stripped lug nuts ensures safe and efficient vehicle maintenance. It saves time and reduces stress. Follow simple steps to avoid recurring problems. Proper torque application and regular maintenance are key. Let’s explore these strategies.Proper Torque Application
Using the correct torque prevents lug nuts from stripping. Check the vehicle manual for the recommended torque settings. Use a torque wrench to tighten nuts accurately. Avoid over-tightening or under-tightening. Both can cause damage. Listen for a click from the wrench. It signals the right torque level.Regular Maintenance Tips
Regular checks keep lug nuts in good condition. Inspect nuts for wear or damage often. Replace any that show signs of stripping. Clean threads to remove dirt and rust. Lubricate the threads with anti-seize compound. This helps prevent future stripping. Rotate tires regularly to ensure even wear. Keep lug nuts tight and secure.Common Mistakes To Avoid
Stripped lug nuts can be a real hassle. Fixing them requires patience and technique. Yet, many make common mistakes. Avoiding these errors can save time and effort. Let’s explore the most common mistakes and how to steer clear of them.
Over-tightening
Over-tightening is a frequent error. It can strip the threads easily. Always use a torque wrench to tighten lug nuts. Check the manufacturer’s torque specifications. This ensures you apply the right amount of force. Too much force can damage the lug nuts. It might also harm the wheel studs.
Over-tightening can also make removal difficult. This leads to more strain on tools. You might end up needing professional help. Avoid this by using the correct tightening technique. Remember, less is often more.
Using Incorrect Tools
Using incorrect tools is another common mistake. Many use pliers or adjustable wrenches. These tools can damage the lug nuts. They might slip and cause injury. Always use a socket wrench that fits properly.
A six-point socket offers a better grip. It reduces the risk of slipping. Avoid using a worn-out wrench. It won’t grip the nut correctly. This increases the risk of stripping.
Investing in the right tools saves time and money. It also ensures safety. Keep your tools in good condition. This makes fixing stripped lug nuts easier and safer.
Credit: www.youtube.com
Conclusion
Fixing stripped lug nuts can be simple with the right tools. Always check your equipment before starting any repair. Using the right socket and wrench helps avoid further damage. Regular inspections prevent future issues and keep your vehicle safe. Practice patience and ensure each nut is properly aligned.
Remember, safety first when working with vehicles. Consult a professional if the task feels challenging. Proper care extends the life of your car and saves money. Maintain regular routines for a smooth driving experience. Keep your vehicle in top shape with these easy steps.