Is your horn switch acting up, leaving you stranded in silence on the road when you need to alert others? You’re not alone.
Many drivers face this frustrating issue, and the good news is you can fix it yourself with a little guidance. Imagine the relief of restoring your horn’s functionality with ease, feeling empowered and in control. You’ll discover simple steps to get your horn switch working again, making your driving experience safer and smoother.
Don’t let a faulty horn switch keep you from being heard; dive in and learn how you can solve this common problem efficiently. Your car’s safety features are just a few steps away from being restored, so let’s get started!
Tools And Materials Needed
Gather essential tools like a screwdriver, wrench, and pliers. Have replacement parts ready, including wires and a new horn switch. Make sure to work in a well-lit area with a steady hand.
When your car horn stops working, it’s not just an inconvenience—it can be a safety hazard. Fixing the horn switch in your steering wheel might seem like a daunting task, but with the right tools and materials, you can tackle it with confidence. Before diving into the process, it’s crucial to gather everything you need. This preparation will save you time and prevent the frustration of stopping mid-repair to hunt down a missing tool. ###Basic Tool Kit
Having a well-stocked basic tool kit is your first step. Ensure you have screwdrivers, both flathead and Phillips, because different car models might require different types. A set of wrenches is also essential to tackle various bolts and nuts you might encounter. ###Multimeter
A multimeter is indispensable for checking electrical connections. It helps you verify if the horn switch is receiving power and ensures you don’t overlook any electrical issues. You can find affordable options at your local hardware store. ###Replacement Horn Switch
If your current horn switch is faulty, you’ll need a replacement. Make sure to purchase one compatible with your car model. Check online forums or your car’s manual for the correct part number to avoid the hassle of returns. ###Needle-nose Pliers
These pliers will help you manipulate small components and remove wires safely. They’re particularly useful in tight spaces within the steering wheel assembly. If you don’t already have a pair, they are a worthy addition to your toolbox. ###Safety Gear
Safety should never be an afterthought. Wear gloves to protect your hands and safety goggles to shield your eyes from any debris or unexpected sparks. It’s easy to overlook safety gear, but it can prevent minor mishaps from becoming serious injuries. ###Electrical Tape
Use electrical tape to secure any loose wires. It helps prevent short circuits and keeps your connections neat. Keep a roll handy as you inspect the wiring, because you never know when you’ll need it. ###Work Light
Good lighting is often underestimated. A work light or flashlight ensures you can see clearly inside the steering wheel compartment. This is crucial, especially if you’re working in a dimly lit garage or at night. ###Personal Experience Insight
Once, I found myself stuck with a non-functional horn just before a long road trip. Without the right tools at hand, a simple fix turned into a full-day ordeal. Having the correct equipment not only speeds up the process but also boosts your confidence to handle the repair efficiently. Are you ready to get started? Double-check your tool kit and materials list, and set yourself up for success. What other tools have you found essential in car repairs? Share your thoughts in the comments!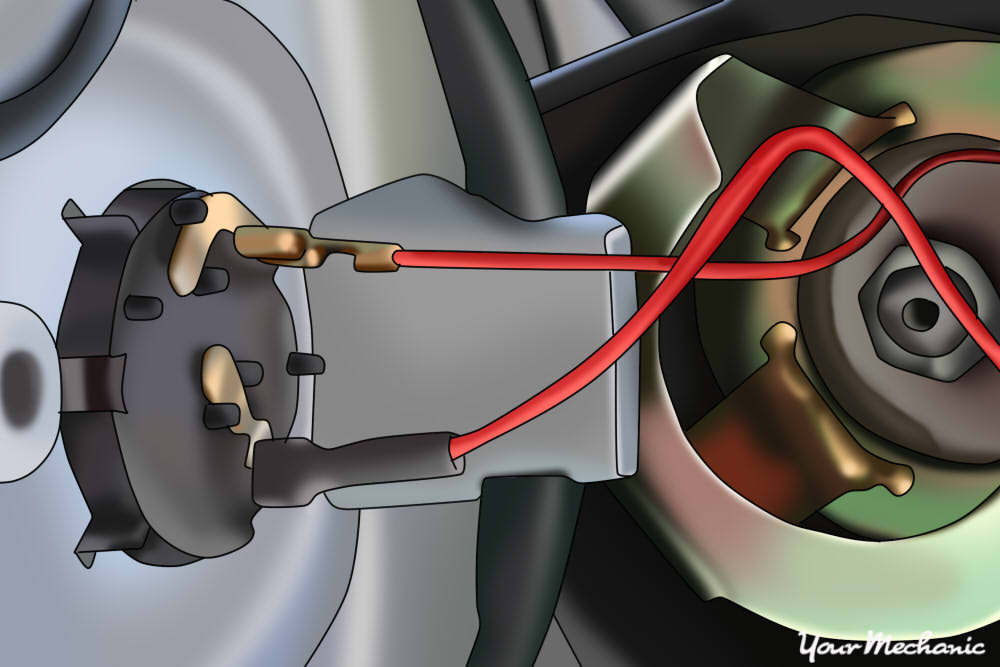
Credit: www.yourmechanic.com
Safety Precautions
Fixing a horn switch requires careful handling to ensure safety. Disconnect the battery to prevent accidental horn activation. Use insulated tools to avoid electrical shocks during the process.
Safety is crucial when working on car repairs. Fixing a horn switch in the steering wheel involves several components. Take precautions to avoid injuries or damage.Disconnect The Battery
Always disconnect the car battery before starting. This prevents electrical shocks. It stops accidental airbag deployment. Use a wrench to loosen the bolt on the negative terminal. Remove the cable completely.Wear Safety Gear
Protect yourself with safety glasses. Gloves can prevent hand injuries. They also offer a better grip. Wear comfortable, non-loose clothing. Loose clothes can get caught in parts.Secure The Steering Wheel
Ensure the steering wheel doesn’t move. Use a steering wheel lock or wedge. This prevents unexpected movement. A stable wheel is essential for safety.Use Proper Tools
Select tools designed for car repairs. Avoid makeshift tools. They might slip or break. Proper tools ensure precision. They also reduce strain and injury risks.Check For Airbags
Be cautious of airbags. They are sensitive and can deploy. Locate them before starting. Avoid direct pressure on airbag areas. Follow vehicle guidelines closely.Work In A Safe Environment
Choose a well-lit area for work. Ensure proper ventilation. Keep the workspace clean and organized. Remove unnecessary items. This minimizes tripping hazards.Accessing The Horn Switch
Fixing the horn switch in your steering wheel starts with accessing it carefully. Begin by removing the steering wheel cover to locate the switch. Ensure the car battery is disconnected to safely proceed with repairs.
Accessing the horn switch in your steering wheel might seem like a daunting task, but it’s quite manageable with the right guidance. Imagine the satisfaction of successfully fixing your car horn, saving both time and money. Ready to take the first step? Let’s break down the process into simple, actionable steps. ###Removing The Steering Wheel Cover
Start by ensuring your car is off and the battery is disconnected. This step is crucial for your safety. Then, grab your screwdriver. Most steering wheel covers are held in place by screws on the back. Remove these screws carefully. Once the screws are out, gently pull the cover towards you. It should come off easily, revealing the components underneath. If it feels stuck, check for any missed screws. ###Identifying The Horn Switch Location
With the cover removed, take a moment to observe the revealed setup. Can you spot the horn switch? Typically, the horn switch is a small button or contact pad located in the center of the steering wheel. It’s often surrounded by other buttons or controls, depending on your car model. If you’re unsure, refer to your car manual. It provides a detailed diagram of your steering wheel’s inner workings. Accessing the horn switch might seem like a small step, but it’s a critical one in fixing your horn. Have you ever thought about how many times a day you use your horn? Ensuring it’s functional means you’re better equipped for safe driving. By tackling this task, you’re not just repairing a part of your car; you’re enhancing your understanding of it. What other small fixes could you confidently handle next?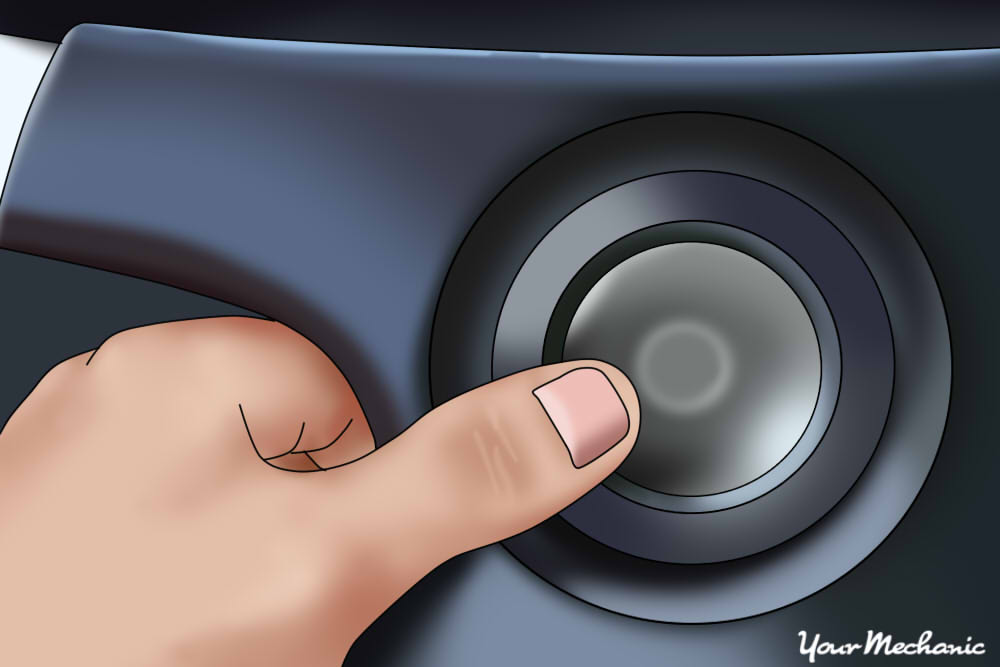
Credit: www.yourmechanic.com
Inspecting The Horn Switch
Inspecting the horn switch is a crucial step in fixing it. This task involves checking for any visible damage and ensuring proper electrical connections. Understanding how to inspect the horn switch can save time and money. It helps in identifying whether the problem needs professional help or a simple DIY fix.
Checking For Physical Damage
First, examine the horn switch for any visible damage. Look for cracks, dents, or loose parts. These can cause the horn to malfunction. Gently press the horn button. Ensure it moves smoothly without resistance. If it sticks or feels loose, it might need replacing.
Testing The Electrical Connection
Next, test the horn switch’s electrical connection. Use a multimeter to check for continuity. Disconnect the battery before starting this test. Attach the multimeter probes to the horn switch terminals. The reading should show a complete circuit when the button is pressed. If not, there might be a break in the connection.
Check the wires connected to the horn switch. Ensure they are not frayed or broken. A damaged wire can disrupt the electrical flow. Tighten any loose connections to restore proper function. This simple check can often fix horn issues.
Repairing Or Replacing The Horn Switch
Fixing a horn switch involves inspecting the steering wheel for loose connections. Replace the faulty horn switch if necessary. Ensure all components are securely fastened to restore functionality.
Repairing or replacing the horn switch in your steering wheel might seem intimidating, but it’s a task you can tackle with some patience and a few tools. Whether your horn has mysteriously stopped working or the switch feels sticky, dealing with the horn switch can restore functionality and safety. Imagine the reassurance of knowing that when you hit the horn, it works without a hitch. So, are you ready to dive into the world of car maintenance and get your horn back in action?Cleaning The Contacts
Dirty contacts can prevent your horn from working efficiently. Begin by disconnecting your car battery for safety. Next, locate the horn switch inside the steering wheel. This might involve removing the cover, but don’t worry—it’s usually held by screws or clips that are easy to manage. Once you’ve accessed the switch, examine the contacts. If they’re covered in grime, clean them gently using a cloth and some electrical contact cleaner. This process can solve many horn problems, and you’ll likely notice an immediate improvement.Replacing The Damaged Switch
Sometimes, cleaning isn’t enough, and the switch itself might be damaged. If that’s the case, you’ll need a new horn switch. Before purchasing, check your car’s manual to ensure compatibility with your vehicle model. To replace the switch, you’ll need to remove the old one carefully. After disconnecting it, attach the new switch by following the reverse process. Don’t forget to reconnect the battery once you’re done. You might be surprised by how straightforward this process is, and how satisfying it feels to hear your horn blaring again. Have you ever fixed a part of your car yourself? What was the most rewarding part of the experience?
Credit: www.youtube.com
Reassembling The Steering Wheel
Fixing the horn switch in your steering wheel involves reassembling it correctly. Ensure all components are aligned properly. Tighten screws securely to avoid loose connections.
Reassembling the steering wheel is a crucial part of fixing the horn switch. It’s like putting together a puzzle, where each piece needs to fit perfectly to ensure everything works as it should. After you’ve successfully replaced or repaired the horn switch, it’s time to put everything back in place. This step requires attention to detail and patience. A well-reassembled steering wheel means a safer drive and a reliable horn.Securing The Steering Wheel Cover
Start by gently placing the steering wheel cover back onto the wheel. Ensure all the clips and screws are aligned properly. This is where precision matters. If you’ve ever mistakenly put a piece of furniture together and wondered why it wobbled, you’ll understand the importance of getting this right. Double-check that everything is snug and secure. You don’t want the cover to come loose while driving. Tighten any screws that were removed earlier. A loose cover can not only be annoying, it can be dangerous. So, take your time.Testing The Horn Functionality
Once the cover is securely attached, it’s time to test the horn. This is the moment of truth. Press the horn gently. Does it sound as it should? If it doesn’t, recheck your connections. Sometimes, a wire might not be fully connected, or a screw might be too tight, affecting the horn’s functionality. Remember when you were a kid and had to fix that toy before it worked again? The satisfaction when it did was immense. You’ll feel the same once your horn blares loud and clear. What if the horn sounds, but it’s not as loud as before? Consider if there’s any obstruction or if the wiring needs another look. Your horn is your voice on the road. Make sure it’s heard. Reassembling the steering wheel may seem daunting, but with careful attention, you’ll be back on the road in no time. Have you ever fixed something that seemed impossible? How did it feel when it worked again?Troubleshooting Common Issues
Encountering problems with your car’s horn switch can be frustrating. Before replacing parts, try troubleshooting. This process often uncovers simple solutions. Many horn issues arise from basic faults. Understanding these can save you time and money. Let’s explore common problems and how to fix them.
Persistent Horn Problems
Sometimes, the horn may sound continuously. This can be due to a stuck switch. Check if the horn button is jammed or sticky. Dirt or debris might cause this. Clean around the button using a cloth and mild cleaner. Ensure the button moves freely. If the problem persists, inspect the horn relay. A faulty relay can cause constant horn noise.
Electrical System Concerns
Horn issues often link to electrical problems. First, examine the fuse. A blown fuse will prevent the horn from working. Replace it with a new one of the same rating. Next, check the wiring for any visible damage. Look for frayed or broken wires. Repair or replace damaged wires as necessary. Ensure all connections are tight and secure.
Also, test the horn itself by connecting it directly to the battery. If it sounds, the issue lies elsewhere in the system. If not, the horn may need replacement. A multi-meter can help check voltage at various points. This can identify where the electrical flow stops.
Maintenance Tips For Horn Switch
Maintaining the horn switch in your steering wheel is essential for safety. A well-functioning horn helps you communicate with other drivers on the road. Regular maintenance can prevent sudden failures and costly repairs. Here’s how you can keep your horn switch in top condition.
Check For Loose Connections
Loose connections can cause the horn to fail. Inspect the wiring for any signs of looseness. Tighten any loose screws or connectors to ensure proper contact. Regular checks can prevent unexpected horn failures.
Clean The Contact Points
Dirt and grime can accumulate on contact points over time. Use a clean cloth to wipe these areas gently. This ensures a good electrical connection for your horn. Avoid using water, as it might damage the electronics.
Inspect For Wear And Tear
Regular use can lead to wear and tear on the horn switch. Check for visible signs of damage on the switch. If you find any, consider replacing the switch. This simple step can prevent more serious issues later.
Test The Horn Regularly
Make it a habit to test your horn regularly. This helps identify issues before they become serious problems. If the horn sounds weak, it might need attention. Regular testing can save you from unexpected failures.
Use Protective Covers
Protective covers can shield the horn switch from dust. They help in maintaining the cleanliness and functionality of the switch. Choose a cover that fits well without hindering usage. This small accessory can prolong the life of your horn switch.
Conclusion
Fixing the horn switch is simple with the right steps. Follow the guide above to ensure a smooth process. Remember to check all connections carefully. Safety is important, so disconnect the battery first. Use proper tools for efficiency. Test the horn after repairs to confirm success.
Regular maintenance prevents future issues. Stay informed on car tips for better vehicle care. Share your knowledge with others who might need help. With patience, anyone can fix a horn switch easily. Your steering wheel horn will be working in no time.