Installing AVS window deflectors is a straightforward process. You can complete it in a few simple steps.
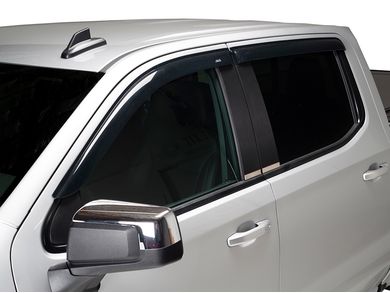
These deflectors help reduce wind noise and rain entering the car when windows are slightly open. Window deflectors, also known as vent visors, are a great addition to any vehicle. They offer comfort by allowing fresh air in while keeping the elements out.
AVS, a trusted brand in automotive accessories, offers reliable and durable window deflectors that are easy to install. This guide will walk you through the steps to install AVS window deflectors properly. You’ll learn how to prepare your car, align the deflectors, and secure them in place. By the end, your ride will be quieter and more comfortable, no matter the weather.
Credit: realtruck.com
How To Install Avs Ventvisor Window Deflectors
Begin by cleaning the window edges with alcohol wipes. Peel the adhesive backing and align the deflectors with the window frame. Press firmly to ensure they stick well.
Installing AVS Ventvisor window deflectors is a straightforward process that can enhance your driving experience. These deflectors help reduce wind noise, keep rain out, and allow fresh air to circulate. Let’s dive into the steps to get them installed quickly and correctly.
Gather The Necessary Tools
Before you start, ensure you have all the tools:
- Isopropyl alcohol: For cleaning the window area.
- Clean cloth: To wipe the surfaces.
- Masking tape: To help with alignment.
- The AVS Ventvisor kit: Includes the deflectors and installation instructions.
Clean The Window Area
Cleanliness is crucial for a strong bond. Follow these steps to prepare the surface:
- Wipe the window frames: Use isopropyl alcohol and a clean cloth.
- Ensure no dirt or debris: This ensures the adhesive sticks properly.
- Allow the area to dry: This takes a few minutes.
Position The Deflectors
Next, align the deflectors correctly:
- Hold the deflector up to the window: Check the fit and alignment.
- Use masking tape: Mark the position to guide the installation.
- Double-check the alignment: Make sure it’s perfect before proceeding.
Remove The Adhesive Backing
Prepare the deflectors for installation:
- Peel back a small section: Expose only a few inches of adhesive at first.
- Align the deflector with the tape: Ensure it matches your marks.
- Slowly peel off more backing: Press the deflector onto the frame as you go.
Secure The Deflectors
Finally, make sure they are firmly attached:
- Press firmly along the edges: Ensure a strong bond.
- Check for gaps or loose areas: Press again if needed.
- Let the adhesive cure: Wait for 24 hours before exposing to water.
By following these steps, you’ll have your AVS Ventvisor window deflectors installed in no time. Enjoy a quieter, more comfortable ride!

Credit: www.youtube.com
Frequently Asked Questions
How To Install Avs Bug Deflector?
Clean the hood. Align the bug deflector. Use the provided clips or screws. Secure tightly. Double-check stability.
What Temperature Should Avs Vent Visors Be Installed?
Install AVS vent visors at temperatures between 60°F and 85°F for optimal adhesion. Clean surfaces thoroughly before installation.
How Do You Install Window Deflectors?
Clean the window edges thoroughly. Align the deflectors with the window frame. Peel off the adhesive backing. Press the deflectors firmly onto the window edges. Allow the adhesive to set for a few hours.
Is Avs Or Weathertech Better?
Both AVS and WeatherTech are reputable brands. AVS offers affordable and durable options. WeatherTech provides high-quality, custom-fit products. Choose based on budget and preference.
Conclusion
Installing AVS Window Deflectors is simple and quick. Follow the steps carefully. Make sure to clean the area first. Align the deflectors properly for a snug fit. Press firmly to secure them. Enjoy better air circulation and reduced wind noise.
You can now drive comfortably, even with the windows slightly open. This small upgrade can make a big difference. Happy driving!