Imagine cruising down a dark, winding road, your vehicle illuminated by a powerful beam of light, cutting through the night like a beacon. Installing a light bar with a switch can transform your driving experience, enhancing visibility and safety.
But you might be wondering how to tackle this task without professional help. Luckily, it’s easier than you think, and you can do it yourself with a little guidance. You’ll discover step-by-step instructions to install a light bar with a switch, ensuring a seamless setup that adds both functionality and flair to your ride.
Get ready to unlock the secrets to brighter drives and safer adventures. Dive in, and let’s light up your world!
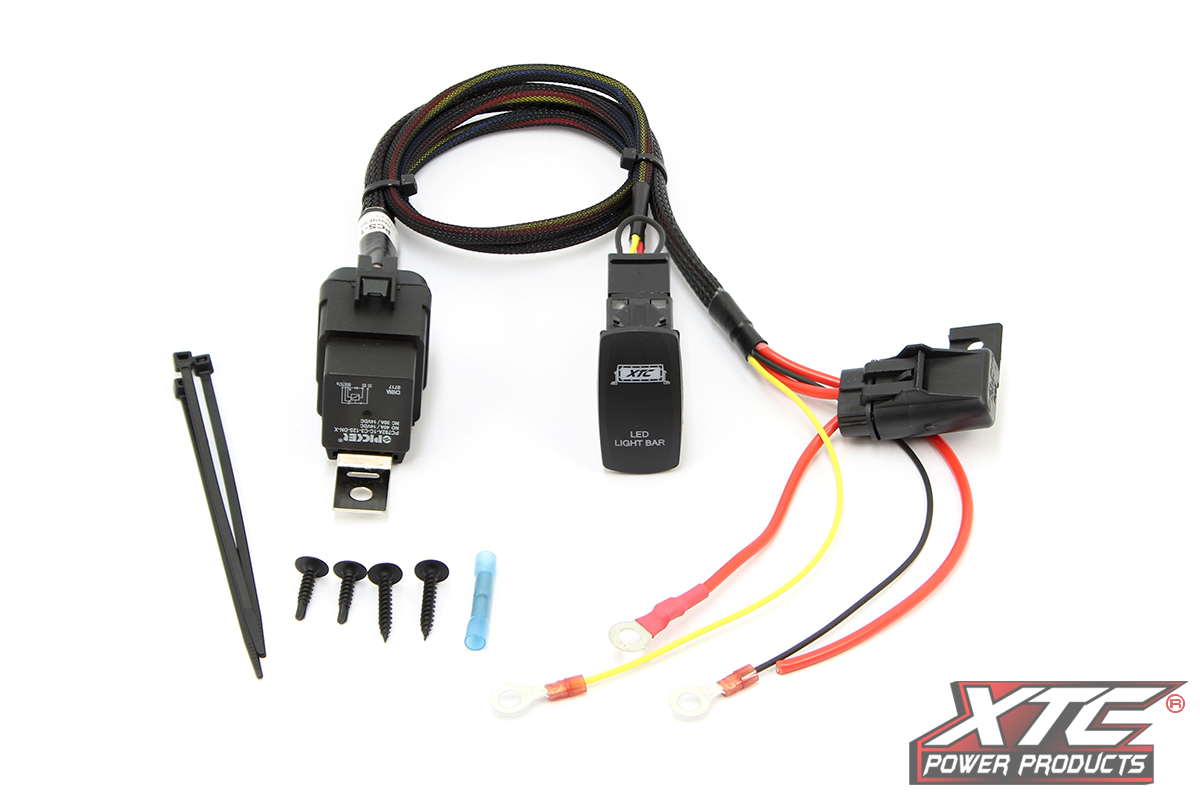
Credit: xtcpowerproducts.com
Tools And Materials Needed
First, gather all tools and materials. Get a screwdriver and a drill. You will need wire cutters for trimming wires. Keep electrical tape handy for covering wire ends. A multimeter helps check voltage. Ensure you have the light bar and switch ready. Wiring harness is essential for connecting everything. Don’t forget the mounting brackets. Screws and bolts are needed to secure the light bar.
Use a wrench to tighten bolts. Safety glasses protect your eyes while working. Gloves keep your hands safe. Zip ties help manage wires neatly. Finally, have a user manual for reference. Prepare all these before starting.

Credit: lexbern.com
Choosing The Right Light Bar
Choosing a light bar is important. It should be bright enough. Make sure it fits your vehicle. Check the length and width. Measure carefully before buying. Some light bars use a lot of energy. Others are energy-saving. Look for LED bars. They last longer and save power.
Think about where you will install it. On the roof or bumper? Some bars are waterproof. This is important for rainy days. Check if it comes with a warranty. Good warranties protect your investment. Read reviews from other users. They share honest opinions. Choose wisely!
Preparing The Vehicle
Start by parking the vehicle on a flat surface. This ensures safety and stability. Turn off the engine to avoid any electrical issues. Gather all tools needed for the installation. You will need a wrench, screwdriver, and wire cutters. Make sure the light bar and switch kit are complete. Check the vehicle’s battery; it should be fully charged. Disconnect the battery’s negative terminal to prevent shocks. This step is crucial for safety.
Find a suitable location for the light bar. The roof or front bumper are common spots. Ensure the spot has enough space and is easy to reach. Clean the area to remove dirt or debris. This helps the light bar stick better. Mark the spots where you will drill holes. Double-check the alignment to ensure it is straight. This preparation step makes the installation smoother.

Credit: www.youtube.com
Mounting The Light Bar
Choose a spot on your vehicle. Make sure it’s flat and stable. Check that the light bar can fit. Ensure it’s not blocked by anything. Visibility is key for your light bar. Pick a spot where it shines well. The location must handle the light bar’s weight. Think about wiring too. It should be close to the battery. Avoid places with too much heat.
Use a drill to make holes for the screws. Align the light bar with the holes. Use a screwdriver to secure it. Tighten the screws firmly. Check that the light bar does not move. Test its stability by shaking it gently. Ensure all bolts are tight. Secure the wires with clips or ties. Keep the wires neat and tidy. Safety is important. Make sure everything is in place.
Wiring The Light Bar
Start by finding the car’s battery. Connect the red wire to the positive terminal. This gives power to the light bar. Use a fuse for safety. Connect the black wire to the negative terminal or the car body. This completes the circuit. Make sure all connections are tight. Loose wires can cause problems later.
Plan a safe path for the wires. Avoid hot engine parts. Use zip ties to hold the wires in place. Keep them neat and tidy. This prevents them from getting tangled. Check the wires are not in the way of moving parts. Test the lights to ensure they work. Fix any issues before driving.
Installing The Switch
Pick a spot close to the driver. This makes it easy to reach. The switch should be safe from water. Avoid places that get wet often. A dry area is best. Make sure the switch does not block other controls. It should fit well in its place. Check that wires can reach the switch easily. This helps in easy connection.
Connect the switch to the power source. This gives it energy to work. Use proper wires for the connection. They should be the right size. Connect wires from the light bar to the switch. This helps turn the light on and off. Secure the wires well. Loose wires can cause problems. Ensure the connections are tight. This prevents any issues. Test the switch to see if it works. It should turn the light bar on.
Testing The Installation
Ensure your light bar functions properly by testing the installation. Flip the switch to check the light. If it turns on, everything is correctly installed.
Checking The Light Functionality
Turn on the switch to test the light bar. Check if the light is bright and steady. Ensure all connections are secure. If the light flickers, check the wiring. Loose wires can cause problems. Make sure the switch is working properly. Press the switch a few times. See if the light responds quickly. This checks the switch’s function.
Troubleshooting Common Issues
Sometimes lights do not turn on. Check the battery first. Make sure it has power. Inspect the wiring for cuts or breaks. Broken wires stop electricity flow. Tighten any loose connections. Loose wires may affect performance. If the light is dim, check the voltage. Low voltage can cause dim lights. Always ensure correct installation. Proper setup avoids many issues.
Maintenance Tips
Keep the light barclean. Dirt can block the light. Use a soft cloth to wipe it. Check the wiringoften. Loose wires can cause problems. Make sure connections are tight. Look for any signs of wear.
Inspect the switchregularly. Ensure it works smoothly. If it feels stiff, it might need fixing. Protect the bar from water. Water can damage electrical parts. Use waterproof covers if needed.
Test the light bar every month. Make sure it shines bright. Dim lights might need new bulbs. Replace any faulty bulbs quickly.
Keep an eye on the battery. Weak batteries can dim the light. Charge them often for best performance. Regular checks can save time and money.
Follow these tips for a safe and bright light bar.
Conclusion
Installing a light bar with a switch can seem tricky. But it’s manageable with the right steps. Follow the instructions carefully. Use the right tools for the job. Double-check your connections for safety. Test the setup before finalizing everything. A proper installation ensures long-lasting performance.
Enjoy your new light setup. It enhances your vehicle’s look and function. Remember, patience is key. Take your time and do it right. Happy driving with your new light bar!