Are you looking to enhance your vehicle’s appearance and functionality with a light bar, but feel overwhelmed by the technical jargon? You’re not alone.
Many people assume installing a light bar requires complex wiring and a relay, turning a simple upgrade into a daunting task. But what if you could skip the relay altogether and get that sleek, powerful illumination without the hassle? Imagine cruising down the road, confidently illuminating your path, knowing you’ve mastered a straightforward installation process.
This guide is designed just for you, focusing on simplicity and efficiency. Keep reading to discover the secrets to installing a light bar without a relay, ensuring you can enjoy your upgrade without stress or confusion.
Choosing The Right Light Bar
Light bars come in various types. There are single-rowand double-rowbars. Single-row bars are thinner. Double-row bars offer more light. Some bars have spot beams. Others have flood beams. Spot beams focus light far away. Flood beams spread light wide. Consider your needs before choosing.
Size matters. Measure space on your vehicle. Check the powerof the light bar. More power means more light. Look at the material. Strong materials last longer. Think about the colorof the light. White is common. Blue or red might be better for some uses. Ensure the light bar is waterproofif used outdoors.
Credit: extremeledlightbars.com
Gathering Necessary Tools
Having the right tools makes the job easier. A screwdriver is needed for tight screws. Use a wrench to fit nuts and bolts. A wire stripper helps to remove wire coverings. Electrical tape is important for safety. A drill makes holes for mounting. Keep a multimeter handy to check connections. Zip ties can tidy up loose wires. A small flashlight helps in dark spaces.
Safety is very important. Gloves protect your hands. Safety glasses keep your eyes safe from debris. Ear plugs protect from loud noises. Wear a dust mask to keep dust away. Steel-toed boots keep feet safe from heavy objects. Coveralls protect your clothes. Make sure to have a first-aid kit nearby. Always work in a well-lit area for better visibility.
Preparing Your Vehicle
Choose a spot for your light bar. This spot must be clean. Dirt can cause issues. Use a soft cloth. Clean the area gently. Ensure no dust remains. A clean surface helps secure the light bar. Check for rust. Rust can damage your light bar. Use a rust remover if needed. Avoid using harsh chemicals. They can harm the car paint. A clean area will ensure proper installation.
Decide where the wires will go. Keep wires safe from damage. Avoid moving parts. They can cut wires. Use zip ties to hold wires. Keep wires neat. Plan the shortest route. Short routes save wire length. Longer routes need more wire. More wire means more cost. Secure wires away from heat. Heat can melt wires. A well-planned route keeps wires safe.
Mounting The Light Bar
Choose a spot on the car for the light bar. Make sure it is clear of any obstructions. The spot should be easy to reach. Avoid areas with wires or delicate parts. You want a flat surface. This helps in keeping the light bar secure.
Use bolts to lock the light bar in place. Make sure the bolts are tight. Loose bolts can cause the light bar to fall. Check if the light bar is straight. Proper alignment is important. It helps the light shine in the right direction. Keep all tools handy for adjustments.
Connecting The Wiring
Begin by locating the battery in your vehicle. Find the positive and negative terminals. Use a wire with the right thickness. Too thin wires can overheat. Attach the wire to the positive terminal. Use a connector or clamp. Make sure it’s tight and secure. Connect the other end to the light bar’s positive wire.
Now, do the same for the negative terminal. Attach the wire to the negative side. Connect it to the light bar’s negative wire. Check all connections. Ensure there are no loose parts. Test the light bar to see if it works. Always be careful when working with the battery.

Credit: www.youtube.com
Testing The Light Bar
Start by checking all the wires. Make sure they are tight. Loose wires can cause problems. Use a testerto check the voltage. This helps in finding any broken wires. If you see a problem, fix it.
Turn on the light bar. See if it lights up. If not, check the switch. Sometimes switches can be faulty. Replace the switch if needed. Ensure the light bar is bright. It should be clear and strong.
Troubleshooting Common Issues
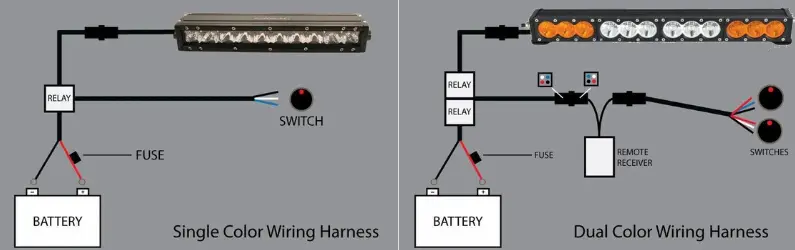
Installing a light bar without a relay can be tricky. Direct connection to the battery might work, but risks overheating. Always check connections for secure and safe wiring.
Dealing With Flickering Lights
Flickering lights can be very annoying. They often happen because of poor connections. Check the wires. Are they loose or broken? Fix them. Loose wires can’t carry power well. Secure them tight. Also, look for any corroded connectors. Clean them carefully. Corrosion blocks electricity flow. Use a wire brush or sandpaper. Make sure all the parts are dry.
Addressing Wiring Problems
Wiring issues often cause light problems. Check all connections first. Ensure that wires are not tangled. Tangled wires can break easily. Use wire ties to keep them neat. Also, inspect the wire insulation. Is it worn out? Replace any damaged parts. Bare wires can cause short circuits. Short circuits are dangerous. Ensure that all connections are tight and secure. This will help your lights work well.
Maintenance Tips
Dirt and grime can build up fast. Clean the light bar often. Use a soft cloth. Avoid harsh chemicals. They can damage the light surface. Cleaning helps the light shine bright. Keep the lenses clear for best visibility.
Check all connections regularly. Make sure they are tight. Loose wires can cause problems. Look for frayed wires. Replace damaged wires quickly. This prevents short circuits. Inspect connections every month. This keeps the light working well.
Credit: www.oznium.com
Conclusion
Installing a light bar without a relay is simple. First, gather all necessary tools. Then, follow the wiring instructions carefully. Connect the light bar to your vehicle’s battery. Ensure all connections are secure and tight. Test the light bar to confirm it works.
If not, double-check your wiring. Always prioritize safety when working with electricity. This process requires patience and attention. With these steps, enjoy a brighter driving experience. No relay needed. Just straightforward installation.