Are you tired of that heart-stopping moment when your lowered car scrapes against your driveway? You’re not alone.
Many car enthusiasts face this frustrating challenge. But imagine a solution that saves your car from those unwanted scratches and dents. In this guide, you’ll learn how to make a driveway ramp tailored for lowered cars. By following these simple steps, you can protect your vehicle and enjoy a smoother ride into your garage.
Don’t let your car suffer anymore—discover how you can build your own driveway ramp and give your prized possession the care it deserves. Ready to dive in? Let’s make your driveway a safe haven for your car!
Assessing Your Needs
Lowered cars often need custom driveway ramps. Consider your car’s clearance and driveway slope. Choose materials like rubber or metal for durability.
Before you start building a driveway ramp for your lowered car, it’s crucial to take a step back and assess your needs. Understanding what you require will save you time, money, and potential frustration. Let’s dive into the specifics of what you need to consider, starting with evaluating the slope of your driveway and understanding your car’s specifications.Evaluating Driveway Slope
Begin by examining the slope of your driveway. Is it steep or gentle? A steep slope can be challenging for lowered cars and might require a more thoughtfully designed ramp. Use a simple tool like a level or a smartphone app to measure the angle of the slope. This information will help you decide how much of a ramp you need and what materials are best suited for your situation. Consider how water flows during rain. You don’t want your new ramp to create water pooling or drainage issues. Addressing these concerns early on can prevent bigger problems later.Considering Car Specifications
Your car’s ground clearance is another crucial factor. Lowered cars often have unique specifications that require a tailored ramp design. Check the manual or consult with your car dealer to understand the minimum clearance needed. This ensures the ramp doesn’t scrape or damage your vehicle. Think about any modifications you might have added, like body kits or spoilers. These can affect how your car interacts with the ramp, so plan accordingly. As you evaluate these aspects, remember that every car and driveway is unique. Personal experience can be a valuable guide. I once overlooked a minor detail in my car’s specifications, which led to a scratched bumper. It was a costly lesson but taught me the importance of thorough preparation. What challenges have you faced with your driveway or car specifications? Addressing these now can make your ramp-building process smoother and more successful.Gathering Materials
Building a driveway ramp for lowered cars requires the right materials. Proper materials ensure the ramp is safe and durable. This section will guide you on gathering the necessary items. Let’s dive into choosing wood, tools, and hardware.
Choosing The Right Wood
Wood is a key component of your ramp. Select hardwood for durability and strength. Oak or maple work well. These types withstand weight and resist weather damage. Avoid softwoods like pine. They can warp and wear quickly. Consider the thickness of the wood too. Thicker pieces provide better support.
Selecting Tools And Hardware
Gathering the correct tools is essential. You’ll need a saw for cutting the wood. A power drill is also important for securing pieces together. Ensure you have a measuring tape for accurate cuts. Screws and brackets are necessary hardware. They hold the ramp together. Choose rust-resistant screws for longevity. Brackets should be sturdy and fit well.
Designing The Ramp
Designing a driveway ramp for lowered cars requires careful planning. A well-designed ramp ensures your car moves smoothly without scraping. The process involves precise measurements and planning.
Measuring Dimensions
Start by measuring your car’s ground clearance. This is the space between the ground and the car’s lowest point. Use a ruler or tape measure for accuracy. Measure the height of the curb or step where the ramp will be placed. Note these measurements carefully.
Next, determine the length of the ramp. This depends on the height of the step and the angle of incline you prefer. A gentler slope protects your car’s underbody. Use a protractor or angle finder for precise angle measurements.
Drawing A Blueprint
With measurements ready, sketch a simple blueprint. Begin by drawing a side view of the ramp. Include the curb or step height and the ramp’s length. Mark the angle of incline clearly.
Consider the width of the ramp. It should be wide enough for your car’s wheels. Add this detail to your blueprint. Ensure you account for any obstacles or irregularities on the driveway. This will help avoid unexpected issues during construction.
A clear blueprint guides you in building the ramp. It helps communicate your design to others, ensuring everyone understands the plan.
Cutting And Preparing Wood
Crafting a driveway ramp for lowered cars requires precise wood cutting and preparation. Measure your driveway’s slope carefully. Then, cut the wood to fit the incline perfectly. Sand the edges smooth to prevent damage to car undercarriages.
Creating a driveway ramp for lowered cars can be a rewarding DIY project, especially when you understand how to cut and prepare the wood properly. This stage of the process is crucial because it sets the foundation for the ramp’s durability and functionality. Whether you’re a seasoned DIY enthusiast or a beginner, mastering the art of cutting and preparing wood can be both fulfilling and practical.Safety Precautions
Before you start cutting, prioritize your safety. Wear protective gear like goggles and gloves to prevent injuries. Make sure your workspace is well-lit and clutter-free to avoid accidents. It’s essential to use tools that are in good condition. Dull blades or faulty equipment can lead to mistakes or even cause harm. Keep a first aid kit nearby, just in case.Precise Cutting Techniques
Accurate measurements are key to a successful ramp. Use a measuring tape to ensure each piece of wood is the right length and width. Mark your measurements clearly with a pencil before making any cuts. Choose the right saw for your cuts. A miter saw can provide clean and precise cuts, especially for angled pieces. If you’re cutting multiple pieces, stack them to cut several at once, saving time and ensuring uniformity. Cutting wood can sometimes feel like an art form. You may find that patience and precision can make a big difference in your project’s outcome. Have you ever noticed how a slight miscalculation can throw off the whole structure? Taking time to double-check your measurements can prevent costly errors down the line. Engaging with the process can teach you a lot about craftsmanship. It’s not just about building something functional but about taking pride in every cut and joint. Have you experienced the satisfaction of seeing a perfectly cut piece fit seamlessly into your project? That moment is often worth the extra effort.Assembling The Ramp
Building a driveway ramp for lowered cars involves choosing durable materials and ensuring a smooth incline. Proper measurements help prevent scraping and ensure a safe drive.
Assembling a driveway ramp for your lowered car can feel like a rewarding DIY project. With the right materials and guidance, you can craft a ramp that makes navigating steep driveways a breeze. This section will take you through the crucial steps of aligning the wood pieces and securing them with screws and bolts.Aligning Wood Pieces
Before you start, ensure you have all your wood pieces cut to the correct dimensions. Lay them out on a flat surface like your garage floor. This setup allows you to visualize the structure and make any necessary adjustments. Next, align the wood pieces to form a seamless transition from the ground to your driveway. Make sure the edges are flush and the incline is smooth. A laser level can be a handy tool to ensure evenness, but a simple spirit level works too. Do you remember the last time you assembled furniture without aligning the pieces properly? It’s a lot like that—small misalignments can lead to bigger headaches down the road. Take your time to get it right.Securing With Screws And Bolts
Once your wood pieces are perfectly aligned, it’s time to secure them. Use wood screws to hold the pieces together initially. Start by drilling pilot holes to prevent the wood from splitting. After securing with screws, reinforce the joints with bolts for extra strength. A wrench will help you tighten the nuts securely. This step is crucial as it ensures the ramp can support the weight of your car. Have you ever faced the frustration of a wobbly desk? A poorly secured ramp can cause similar issues. Double-check your work by gently applying pressure to ensure everything is tight and sturdy. Now that you have your ramp assembled, give it a test run. Drive your car over it slowly to check for stability and ease of use. Adjust any loose or uneven parts. Your patience and attention to detail will pay off with a smooth driveway experience.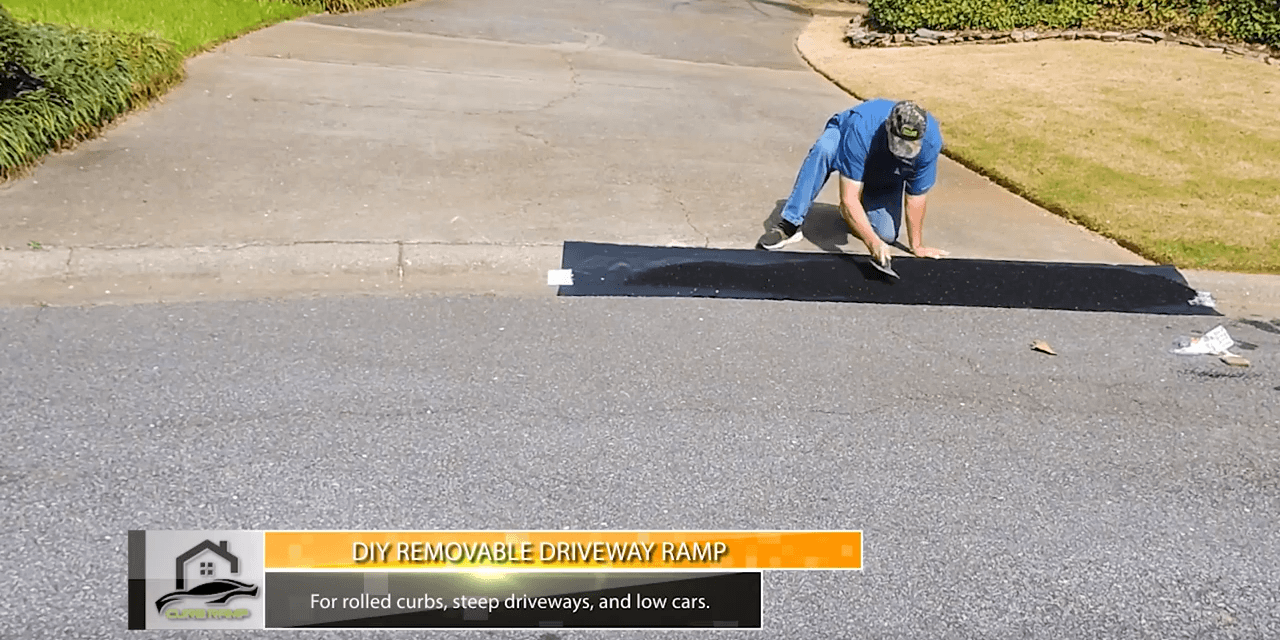
Credit: curbramp.us
Finishing Touches
Creating a driveway ramp for lowered cars is an essential task. It ensures smooth access without damaging your vehicle. Once the main structure is complete, the finishing touches are crucial. These details make a significant difference in the ramp’s functionality and appearance.
Sanding For Smoothness
Sanding the ramp is vital for a smooth surface. Rough edges can cause tire damage. Use a fine-grit sandpaper for the best results. Focus on the areas where the car makes contact. This process enhances the ramp’s usability and safety.
Take your time to sand thoroughly. Pay attention to corners and curves. This ensures a seamless transition for your vehicle. Smooth surfaces provide a safer driving experience. They also enhance the ramp’s durability.
Applying Protective Coating
Once sanding is complete, apply a protective coating. This layer guards against weather elements. It also adds a sleek finish to your ramp. Choose a coating designed for outdoor use. It must withstand sun, rain, and temperature changes.
Apply the coating evenly across the ramp. Use a brush or roller for precision. Let it dry completely before use. This step extends the ramp’s lifespan. It also maintains its appearance over time.
These finishing touches ensure your ramp is ready for use. Proper sanding and coating enhance functionality. They also improve the ramp’s appearance and durability.
Installing The Ramp
Installing a driveway ramp for your lowered car is a project that combines practicality with precision. You want to ensure your car glides smoothly without scraping its underbelly. By carefully positioning and securing the ramp, you can protect your vehicle and enhance your driving experience. Let’s walk through the steps of installing your driveway ramp.
Positioning On The Driveway
Start by selecting the best spot for your ramp. Ideally, it should align with the path your car takes when entering and exiting the driveway. This ensures a smooth transition without any awkward maneuvers.
Consider the gradient of the driveway. A steeper slope might require a longer ramp for a gradual ascent. Measure the width of your car and ensure the ramp accommodates it comfortably.
Ask yourself: is there enough space for the ramp without blocking other areas? A well-positioned ramp should integrate seamlessly into your daily routine, not disrupt it.
Anchoring For Stability
Once positioned, securing the ramp is crucial for stability. Use heavy-duty bolts or anchors to fix the ramp to the driveway. This prevents any shifting that could cause damage or accidents.
Ensure the ramp’s material suits your driveway’s surface. For concrete driveways, concrete anchors work best. For asphalt, consider using specific asphalt anchors to avoid cracking.
Think about weather conditions. If your area experiences heavy rain or snow, additional grip or texture on the ramp can prevent slipping. Have you considered rubberized coatings for added traction?
By following these steps, you ensure a stable and functional ramp for your lowered car. Each detail, from positioning to anchoring, plays a vital role in protecting your vehicle and enhancing your driveway experience. Enjoy the peace of mind that comes with a well-installed ramp.

Credit: m.youtube.com
Testing The Ramp
Once you’ve built your driveway ramp, testing is crucial. This step ensures safety and functionality. You want a smooth transition for your lowered car. Testing helps you spot issues early. It allows you to make necessary adjustments. Follow these simple steps for effective ramp testing.
Conducting A Trial Run
Start by slowly driving your car onto the ramp. Listen for any unusual sounds. Look for bumps or jarring motions. Pay attention to how your car moves. Ensure the ramp supports the car’s weight. If the ramp feels unstable, stop immediately. Make sure you have someone watching from outside. This helps spot potential problems.
Adjusting For Optimal Fit
After the trial run, assess the ramp’s fit. Check if the car clears the ramp smoothly. Note any areas needing improvement. If adjustments are needed, modify the ramp’s height or angle. Ensure the ramp aligns perfectly with your driveway. Small changes can make a big difference. Test again after each adjustment. Repeat until the ramp feels perfect.
Maintenance Tips
Maintaining a driveway ramp for lowered cars is crucial for safety and durability. Regular upkeep ensures the ramp serves its purpose effectively. It also extends the lifespan of the ramp. Simple maintenance practices can prevent major issues and save money in the long run. Follow these easy tips to keep your ramp in top shape.
Regular Inspections
Inspect the ramp visually every month. Look for cracks, chips, or uneven surfaces. These signs might indicate wear or damage. Pay attention to joints and connections. These areas often show early signs of trouble. Clean the ramp surface to spot hidden issues. Dirt can conceal small cracks or damage. Use a flashlight for better visibility during inspections.
Repairing Wear And Tear
Address damage immediately to avoid costly repairs. Small cracks can be filled with sealant. This prevents them from growing larger. For larger issues, consider professional help. Repairing promptly maintains ramp safety and functionality. Replace damaged parts if necessary. This ensures the ramp remains sturdy and reliable. Regular upkeep helps prevent accidents and ensures smooth driving.
Credit: www.reddit.com
Conclusion
Creating a driveway ramp for lowered cars can be straightforward. First, assess your driveway’s slope. Then, choose durable materials like concrete or rubber. Consider your car’s clearance and weight. DIY ramps save money and ensure safety. Proper measurements prevent damage to your vehicle.
Local hardware stores often have helpful tools. Take your time and follow instructions carefully. A well-built ramp eases access to your home. It also protects your car from scrapes. Enjoy smoother drives and peace of mind. Your car deserves the best care.
A little effort goes a long way. Happy driving!