Have you ever struggled to lift your furry friend into the car? You’re not alone.
Many pet owners face this challenge, especially when dealing with larger or older animals. It’s a common problem, but there’s a simple solution: building your own pet ramp. This not only ensures your pet’s safety and comfort but also makes your life easier.
Imagine the relief of seeing your pet comfortably walk into the car without any stress or strain. With just a few materials and some basic tools, you can create a sturdy ramp that suits your car and your pet’s needs. Curious about how to get started? Keep reading to discover a step-by-step guide that will have your pet ramp ready in no time, saving you both time and hassle.

Credit: www.ebay.com
Benefits Of A Pet Ramp
Creating a pet ramp for your car can bring numerous benefits to both you and your furry friend. A ramp can make travel easier and safer for pets. It can be especially helpful for older pets or those with mobility issues. Pet ramps offer convenience and peace of mind during trips.
Improved Accessibility
Pet ramps provide easy access to cars. Pets can enter and exit smoothly without jumping or straining. This reduces stress on their joints and muscles. Ramps are especially useful for larger breeds. They ensure safe vehicle entry.
Enhanced Safety
Safety is a top priority for pet owners. Ramps minimize the risk of injury from falls or slips. They prevent pets from trying to leap into the car. This reduces accidents and ensures pets stay safe. A ramp offers a secure path for your pet.
Support For Aging Pets
Older pets often face mobility challenges. Ramps make travel easier for them. They reduce the effort needed to climb or jump. This is vital for pets with arthritis or hip issues. A ramp helps them maintain independence.
Preservation Of Vehicle Interior
Jumping in and out can scratch car interiors. Ramps prevent this damage by providing a smooth transition. They protect your car from wear and tear. A ramp preserves the vehicle’s condition over time.
Easy Storage And Portability
Pet ramps are designed for easy storage. They can be folded and kept in the trunk. Lightweight designs make them portable. You can take the ramp anywhere with your pet. Storage is simple and convenient.
Choosing The Right Materials
Selecting sturdy and lightweight materials is crucial for building a pet ramp for your car. Wood and plastic are good options, offering durability and ease of handling. Ensure the surface is non-slip for your pet’s safety.
Choosing the right materials for your pet ramp is crucial for ensuring safety, durability, and comfort. You want to create something that not only serves its purpose but also stands the test of time. Let’s dive into the essentials of selecting materials that will make your DIY project a success.Wooden Base: The Foundation Of Your Ramp
A sturdy wooden base is a great starting point. Plywood is often a popular choice due to its strength and affordability. Ensure it’s thick enough to support your pet’s weight but light enough to handle easily. If you’re unsure, a quick visit to your local hardware store can provide clarity on the best type of wood for your needs.Non-slip Surface: Safety First
Your pet’s safety should be a top priority. Adding a non-slip surface is essential. Rubber mats or carpet remnants are excellent options. They provide the necessary grip for your pet’s paws, preventing slips and falls. Have you ever had a pet hesitate on a slippery surface? A secure footing can make all the difference.Lightweight Metals: Balancing Strength And Portability
If you need something more portable, consider lightweight metals like aluminum. They offer strength without the bulk, making the ramp easier to transport. This is especially useful if you frequently travel with your pet. Just imagine how much easier life would be if your ramp could fold up and fit in your trunk.Fasteners And Hinges: Keeping It All Together
Don’t overlook the small parts. High-quality fasteners and hinges are vital to keep your ramp stable. Opt for rust-resistant materials, especially if your ramp will be exposed to the elements. Remember, it’s the little details that often make a big impact on the overall durability of your project.Paint Or Sealant: Protecting Against The Elements
A coat of paint or sealant can protect your ramp from weather damage. Choose a product that’s pet-safe and resistant to wear. This not only extends the life of your ramp but also keeps it looking fresh and appealing. Wouldn’t you want your ramp to stay in top shape for years to come? Choosing the right materials can transform your pet ramp from a basic structure into a reliable aid. With careful selection, you ensure safety and longevity, giving your pet the confidence to use it with ease. What materials will you choose for your ramp project?Tools Needed For Construction
Creating a pet ramp for your car requires basic tools. Gather a saw, drill, screws, and sandpaper. These will help you build a sturdy and safe ramp for your furry friend.
Creating a pet ramp for your car can be a rewarding DIY project, especially when you see your furry friend easily hop in and out without any struggle. Before you dive into crafting this helpful tool, gathering the right tools is crucial. Having the correct tools on hand ensures the project goes smoothly and makes your ramp sturdy and reliable.1. Measuring Tape
A measuring tape is your best friend in this project. It ensures you get the dimensions right, making the ramp fit perfectly for your car and pet’s needs. Measure twice, cut once—that’s the key to precision.2. Saw
You’ll need a saw to cut the wood to your desired size. Whether you use a hand saw or a power saw depends on your comfort and availability. Remember, safety first—wear goggles to protect your eyes.3. Drill
A drill is essential for making holes to fasten pieces together. A cordless drill can be particularly handy, allowing you to move freely around your workspace. Ensure you have the right drill bits for the screws you plan to use.4. Screwdriver
While a drill can help with most of the screwing, a good old screwdriver is still necessary. It helps with tightening screws for a secure hold. Plus, it’s useful for any adjustments that might be needed.5. Sandpaper
Nobody wants splinters! Sandpaper smooths out rough edges and surfaces, making the ramp safe and comfortable for your pet. Choose a medium to fine grit for a nice finish.6. Paintbrush And Paint
If you want to add a splash of color or weatherproof your ramp, a paintbrush and some outdoor paint are needed. Not only does it enhance the ramp’s look, but it also adds a protective layer against the elements.7. Carpenter’s Square
A carpenter’s square helps in keeping your angles right and your cuts straight. This tool is crucial for ensuring the ramp is stable and balanced. Proper alignment can prevent mishaps in the future.8. Safety Gear
Don’t overlook safety gear like gloves and goggles. Protecting your hands and eyes is paramount while working with tools. Safety measures ensure you finish the project without any injuries. Having these tools ready will set you on the path to crafting a reliable pet ramp. Do you have any other tools that you find indispensable for DIY projects? Share your thoughts and let’s make pet mobility a breeze together!Measuring And Cutting The Wood
Creating a pet ramp for your car starts with precise measurements. Accurate dimensions ensure the ramp fits well and supports your pet safely. Use simple tools to measure and mark your wood pieces. This process may seem basic, but it’s crucial for the ramp’s success.
Choosing The Right Wood Type
Select sturdy wood like plywood or pine. These woods provide strength and are easy to cut. Avoid soft woods that may break under pressure. Ensure the wood is smooth to prevent splinters.
Measuring The Ramp Length
Measure the height from the ground to your car’s entry point. This will determine the ramp’s length. A longer ramp offers a gentler slope. Calculate the length based on your pet’s ability to climb.
Determining The Ramp Width
Consider the width your pet needs for comfortable movement. Measure your pet’s width and add extra space. A wider ramp provides stability and ease of use.
Marking The Wood For Cutting
Use a pencil to mark the wood according to your measurements. Ensure lines are straight and visible. Double-check measurements before cutting to avoid mistakes.
Cutting The Wood Pieces
Use a saw to cut along the marked lines carefully. Hold the wood steady to ensure straight cuts. Safety comes first, so wear protective gear while cutting.
Assembling The Ramp Structure
Creating a pet ramp for your car can be a rewarding DIY project. It ensures your furry friend travels safely and comfortably. Assembling the ramp structure is a crucial step. This process involves putting together various parts for a sturdy design. With simple materials and tools, you can build a reliable ramp.
Gather Your Materials
Start by collecting essential materials. You need strong wood or aluminum for the frame. These materials ensure durability. Choose a non-slip surface for your pet’s safety. Rubber matting or carpet works well. Assemble screws and bolts for the joints. These will hold the structure firmly.
Prepare The Tools
Have your tools ready before assembling. You need a drill for making holes. Use a screwdriver for tightening screws. A measuring tape is essential for accuracy. A saw will cut the wood or aluminum to size. Ensure all tools are in good condition.
Build The Frame
Start by cutting the frame materials to length. Use your measurements for precision. Connect the pieces using screws and bolts. Ensure all joints are tight. This gives the ramp its basic shape. Keep the frame stable and balanced.
Add The Non-slip Surface
Attach the non-slip surface to the frame. This provides grip for your pet. Use adhesive to secure the matting or carpet. Ensure the surface covers the entire ramp. Test its stability before use.
Adding Non-slip Surface
Creating a safe pet ramp requires adding a non-slip surface. This feature helps pets walk without slipping. A secure grip prevents falls and injuries. It ensures pets feel confident using the ramp.
Choosing The Right Material
Select a material that provides traction. Rubber is a popular choice. It offers a firm grip and is durable. Carpet can also be used. It is soft and provides good friction.
Easy Installation Techniques
Start by measuring the ramp. Cut the non-slip material to fit. Use strong adhesive to secure it. Ensure no gaps are left. This prevents the material from shifting.
Maintenance Tips
Regularly check for wear and tear. Replace worn-out sections promptly. Clean the surface to remove dirt. This keeps the ramp functional and safe.
Testing The Ramp For Safety
Testing the ramp for safety is a crucial step. It ensures your pet’s security when using the ramp. This process helps identify any potential hazards. By testing the ramp, you can make necessary adjustments. This enhances its reliability and functionality.
Check The Stability
Ensure the ramp is stable on the ground. It should not wobble or shake. Test the ramp on different surfaces. Ensure it maintains stability on each one. A stable ramp gives your pet confidence to use it.
Test The Weight Capacity
Check the ramp’s strength with weights. Use objects to simulate your pet’s weight. This helps verify the ramp can hold your pet safely. Ensure it doesn’t sag or bend under pressure.
Ensure Proper Traction
Inspect the ramp’s surface for grip. Test it by running your hand over it. A textured surface prevents slipping. Your pet needs a firm grip for safe movement.
Simulate Pet Usage
Encourage your pet to use the ramp. Observe their movement and comfort. Look for any hesitation or difficulty. Adjust the ramp angle if needed for ease of use.
Observe Your Pet’s Reaction
Watch your pet’s response to the ramp. Are they comfortable and relaxed? If they seem stressed, make necessary changes. A calm pet is more likely to use the ramp confidently.
Training Your Pet To Use The Ramp
Training your pet to use the ramp is essential for safety. Many pets may feel unsure about the ramp at first. With patience and practice, they can learn to use it confidently.
Follow these steps to make the process smooth and stress-free for both you and your pet.
Start With Familiarization
Place the ramp on a flat surface. Let your pet sniff and explore it. This helps them become familiar with the ramp without any pressure.
Use Treats And Praise
Encourage your pet with treats. Place a treat at the base of the ramp. Gradually, place more treats along the ramp’s length. Praise them when they show interest or step on it.
Guide Them Gently
Hold your pet’s collar or harness gently. Lead them up the ramp with treats. Keep your voice calm and reassuring to ease their nerves.
Practice Regularly
Practice using the ramp daily. Short sessions work best. Consistency builds your pet’s confidence.
Be Patient
Some pets learn quickly, while others need more time. Stay patient and encouraging throughout the training process.
Maintaining Your Pet Ramp
Building a pet ramp for your car ensures easy access for your furry friend. Use sturdy materials like wood or plastic. Keep the ramp’s surface non-slip to prevent accidents. Regularly check for wear and tear, ensuring a smooth and safe experience for your pet every time.
Maintaining your pet ramp is crucial for ensuring your furry friend’s safety and comfort during car rides. A well-kept ramp can last for years, providing reliable support for your pet. Let’s dive into how you can keep your ramp in top condition, so every trip with your pet is smooth and secure.Regular Cleaning
Keeping your pet ramp clean is essential. Dirt and debris can make the surface slippery, posing a risk for your pet. Use a damp cloth to wipe down the ramp after each use, especially if your dog loves muddy adventures. Consider using a mild soap solution for deeper cleaning every few weeks. This helps remove any stubborn grime that could affect the ramp’s grip.Inspect For Wear And Tear
Regularly inspect your ramp for any signs of damage. Look for cracks, loose screws, or any other issues that could compromise its strength. Catching these early can prevent accidents. Check the hinges and joints, especially if your ramp is foldable. Ensure they’re functioning smoothly and aren’t rusting. A quick check can save you a lot of trouble down the line.Ensure Stability
Make sure your ramp is stable every time you set it up. Uneven or wobbly ramps can be dangerous. Test the ramp’s stability by placing it on the ground before your pet uses it. If you notice any wobbling, adjust the ramp or secure it with straps. Your pet’s safety should always come first.Store Properly
Proper storage can extend the life of your ramp significantly. Store it in a dry place to prevent moisture damage. Moisture can lead to mold or rot, especially if your ramp is made of wood. If you’re storing it in your garage, keep it off the floor to avoid contact with water during rainy seasons. This small step can save your ramp from unnecessary wear.Consider Your Pet’s Comfort
Think about your pet’s comfort while using the ramp. Is the surface too hard or slippery for them? Adding a non-slip mat or carpet can make it more comfortable and secure. Watch your pet as they use the ramp. If they seem hesitant or uncomfortable, it might be time to make some adjustments. Your pet’s comfort is a clear indicator of the ramp’s condition. Maintaining your pet ramp doesn’t have to be a chore. With these tips, you can ensure it’s always ready for your pet’s next adventure. What other steps do you take to maintain your pet gear?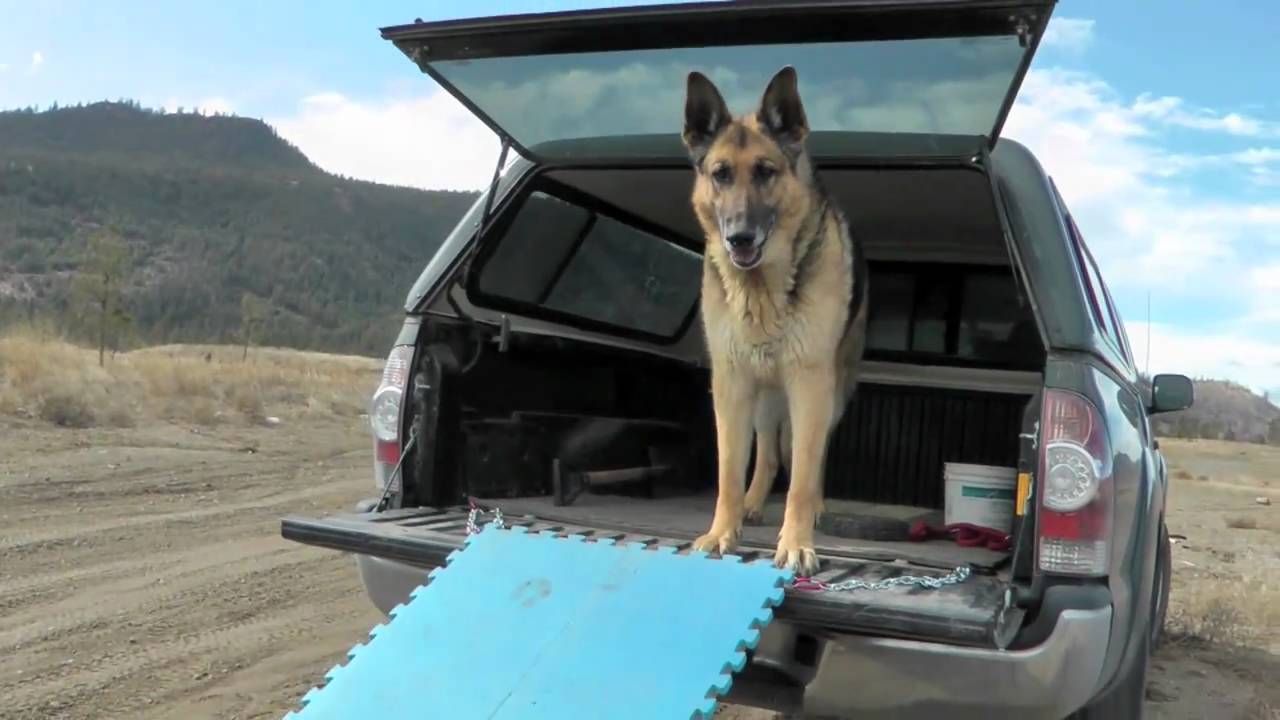
Credit: articles.hepper.com
Customizing For Different Pets
Crafting a pet ramp for your car can be simple and fun. Tailor the ramp’s size and slope to fit your pet’s needs. This ensures easy access and comfort for your furry friend.
Creating a pet ramp for your car can be both a fun project and a practical solution to help your furry friends travel comfortably. But how do you ensure the ramp suits your pet’s unique needs? Customizing your ramp based on your pet’s size, age, and mobility is crucial for their safety and comfort. Let’s dive into the details of tailoring a pet ramp for different animals.Understanding Your Pet’s Needs
Before you start building, take a moment to observe your pet’s behavior and abilities. Does your dog have arthritis or is your cat a sprightly climber? These characteristics will guide you in deciding the ramp’s angle and surface material. If your pet is older or has mobility issues, a gentle slope and a non-slip surface are essential.Adjusting Ramp Length And Width
The ramp’s size can significantly impact its usability. A smaller dog might need a narrower ramp, while a larger breed requires more width for stability. Measure your car’s height and consider the space you have available. A longer ramp can provide a gentler incline, which is easier for pets with joint issues.Selecting The Right Materials
Material choice affects not only the durability but also the safety of the ramp. Consider using lightweight yet sturdy materials like aluminum or reinforced plastic. For traction, think about adding a carpet or rubber matting. Will your pet feel secure walking up and down? Test different materials to find what your pet prefers.Including Safety Features
Safety should always be a priority. Think about incorporating side railings to prevent your pet from slipping off. Adding a non-slip surface will give your pet more confidence. Ask yourself: Is the ramp stable enough? Ensure it has a secure grip when placed against your car.Personalizing For Comfort
Every pet is unique, and adding personal touches can make the ramp more inviting. Maybe your pet responds well to certain colors or textures. Consider these preferences when choosing materials. This small detail can make a big difference in how eagerly your pet uses the ramp.Testing And Adjusting
Once your ramp is ready, introduce it to your pet gradually. Encourage them with treats and praise as they try it out. Be prepared to make adjustments based on their feedback. Is there a section they hesitate on? Modify it to ensure their confidence and safety. By paying attention to these details, you can create a ramp that’s not just functional but also a comfortable and safe path for your pet. What features will you prioritize for your pet’s ramp?
Credit: www.amazon.com
Conclusion
Creating a pet ramp for your car is simple and rewarding. Your furry friend deserves comfort and safety during travel. Building a ramp helps prevent injuries. It also makes trips easier for aging pets. With basic tools and materials, you can craft a sturdy ramp.
Follow the steps carefully and your pet will thank you. Remember, a well-built ramp enhances your pet’s quality of life. Keep your pet’s needs in mind as you design. Enjoy the process and the benefits it brings to your beloved companion.
A homemade ramp is a thoughtful solution for happy travels.