Struggling to put the car seat cover back on your Graco Extend2Fit? You’re not alone.
The thought of wrestling with fabric, straps, and buckles can be daunting. But don’t worry; it doesn’t have to be a challenge. Imagine the relief of knowing your car seat is secure and clean, ready for any journey. In this guide, we’ll walk you through each step, ensuring you can easily reassemble your car seat cover with confidence.
Say goodbye to frustration and hello to a smooth, hassle-free process. Ready to discover the secrets that will make your life easier? Let’s dive in.
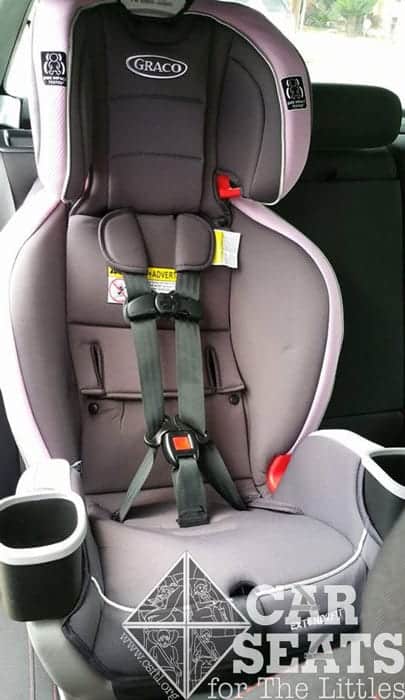
Credit: csftl.org
Gather Necessary Tools
Gathering the right tools is crucial for reinstalling the Graco Extend2Fit car seat cover. Essential items include a screwdriver, cleaning cloths, and the car seat manual. These items simplify the process, ensuring a secure and snug fit.
Putting a car seat cover back on can feel like an intricate puzzle, especially with models like the Graco Extend2Fit. A well-fitted car seat cover not only keeps the seat clean but also ensures your child’s safety. Before you dive into the process, it’s vital to gather the necessary tools. This step might sound simple, but it’s the foundation for a smooth, hassle-free experience.Understanding The Importance Of Preparation
Preparation is key. Have you ever started a project only to find yourself running around looking for tools? It’s frustrating, right? Gathering everything you need beforehand saves time and reduces stress.Checklist Of Essential Tools
Start with a checklist. A couple of items you definitely need are your car seat manual and a set of screwdrivers. The manual is your guide—it’s your map through the maze of straps and buckles. Screwdrivers might be needed to remove or adjust any fasteners.Cleaning Supplies For A Fresh Start
Consider cleaning supplies as part of your toolkit. A clean cover goes back on easier and makes the seat look and feel new. Keep a mild detergent and a soft cloth handy. You might also want a small brush for those stubborn crumbs.Optional But Handy Tools
Think about what else might help. A flashlight can be invaluable for seeing in those awkward, shadowy spots. Have you ever tried to fit a cover in a dimly lit garage? Not fun. And if you have them, a set of pliers can help with stubborn clips or hooks.Setting Up Your Work Area
Where you work matters. Choose a spot with good lighting and ample space. A kitchen table or a clean garage floor can work well. Ensure you have easy access to everything you need. You’ll thank yourself later when you’re not tripping over clutter or squinting in the dark.Engage With The Process
As you gather your tools and supplies, think about the task ahead. Are you ready to tackle it with patience and precision? This mindset can transform an ordinary task into a fulfilling activity. What’s your attitude towards reassembling your car seat cover? Having everything you need at your fingertips can turn a daunting task into a manageable one. You’re now equipped to put the car seat cover back on the Graco Extend2Fit without the usual frustration. Are you ready to start?Remove The Car Seat From The Vehicle
Safely detach the Graco Extend2Fit car seat by loosening the straps and lifting the seat from its base. Ensure the cover’s edges align with the seat’s contours, securing it with the provided fasteners. Adjust the straps for a snug fit, ensuring comfort and safety for your child.
Removing the car seat from your vehicle can feel like a daunting task, especially if you’ve never done it before. But trust me, with the right steps, it’s simpler than you might think. Before you know it, you’ll be a pro at taking out your Graco Extend2Fit car seat and putting it back in with ease.Step 1: Prepare Your Tools
Before you begin, gather any necessary tools. Often, you’ll need just your hands, but sometimes a flathead screwdriver can help with stubborn latches. Having these ready can make the process smoother and faster.Step 2: Clear The Area
Ensure the area around the car seat is clear of toys, snacks, or anything else that might get in the way. A clear space not only helps you work more efficiently but also keeps the car seat clean. Plus, you’ll avoid the frustration of stepping on that rogue Lego piece!Step 3: Locate The Latch System
Modern car seats, like the Graco Extend2Fit, often use a LATCH system for secure installation. Find the LATCH connectors, typically at the base of the car seat. Knowing exactly where these are can save you time and effort.Step 4: Unclip The Latch Connectors
Press the release button on the LATCH connectors to unclip them from your vehicle’s anchors. If they’re hard to release, a little wiggle usually does the trick. If you’re struggling, remember the last time you had to release a stubborn buckle on a suitcase—it just takes patience.Step 5: Release The Seatbelt
If you’ve used a seatbelt for installation, unbuckle it now. Pull the seatbelt all the way out to ensure it’s not locked in place. It’s always a good idea to double-check that it’s completely released before attempting to remove the car seat.Step 6: Lift Out The Car Seat
Grab the car seat firmly with both hands and lift it out of the vehicle. It’s best to lift with your knees, especially if the seat feels heavy. Think of it as picking up a cherished piece of furniture—careful and steady wins the race.Step 7: Inspect The Car Seat
Once out, give your car seat a quick inspection. Look for any signs of wear or damage that might need attention. This simple step can ensure your child’s safety and extend the life of your car seat. How do you feel about removing the car seat now? By following these steps, you not only make the task manageable but also ensure your child’s safety is uncompromised. Ready to tackle the next part of the process? Let’s dive in!Identify The Parts Of The Seat Cover
Putting a car seat cover back on the Graco Extend2Fit might seem like a puzzle. However, once you identify the parts, the process becomes straightforward. Knowing each component is crucial for ensuring safety and comfort for your little one. Let’s dive into the details of identifying the parts of your Graco Extend2Fit seat cover.
1. Main Fabric Cover
The main fabric cover is the largest piece you’ll deal with. It usually encompasses the backrest and the seat area. This part often has elastic edges to fit snugly around the seat. Pay attention to the holes designed for the harness straps.
2. Headrest Cover
The headrest cover is vital for protecting the adjustable headrest. It’s typically smaller and may require some maneuvering to fit correctly. Look for Velcro or snap fasteners that secure it in place.
3. Armrest Covers
Armrest covers can be overlooked but are essential for complete protection. These pieces are usually smaller and padded. They often come with elastic bands or clips for attachment.
4. Harness Strap Covers
Harness strap covers are the unsung heroes for comfort. They’re designed to fit over the shoulder straps, cushioning your child’s neck and shoulders. Make sure these are properly aligned with the straps to avoid discomfort.
5. Buckle Cover
The buckle cover serves as a protector for the central buckle. It’s usually a small, padded piece. Ensure it’s securely fitted around the buckle for added safety and comfort.
Once you can identify these parts, putting your Graco Extend2Fit seat cover back becomes a breeze. Have you ever struggled with this task? Share your stories or tips in the comments below!
Position The Seat Cover Correctly
Ensure the seat cover aligns with the Graco Extend2Fit’s contours. Secure it using straps and fasteners provided. This guarantees a snug fit, enhancing both safety and comfort.
Positioning the seat cover correctly on your Graco Extend2Fit car seat can seem daunting, but it’s a task you can master with a little guidance. Getting it right ensures your child’s comfort and safety during every ride. Plus, a snug fit keeps your car looking sharp and organized. Have you ever tried to put a car seat cover back on and found yourself wrestling with fabric, straps, and clips? You’re not alone. Many parents find this process tricky, but understanding the steps can make a world of difference.Understanding The Seat Cover Layout
Before you begin, take a moment to familiarize yourself with the cover. Lay it flat and identify the different parts. This includes the seat section, backrest section, and any additional pieces like headrest covers or armrest flaps. Knowing where each part goes helps you avoid confusion.Aligning The Cover With The Seat
Start by aligning the cover with the seat. The seat section should match the base of the car seat. Ensure that the holes for the straps and harnesses are positioned correctly. This step is crucial for ensuring the cover fits snugly and securely.Smoothing Out Wrinkles And Creases
Once aligned, smooth out any wrinkles. A tightly stretched cover not only looks better but also stays in place more effectively. Use your hands to flatten out any creases, ensuring a neat appearance.Securing The Cover To The Seat
After positioning and smoothing, secure the cover. Most covers have elastic edges or clips. Attach these securely to the seat. This step prevents the cover from slipping or bunching up, which can be distracting while driving.Double-checking Strap Placement
Finally, double-check the placement of the straps. They should thread through the correct holes in the cover. If they are misaligned, adjust them before securing the seat back into your vehicle. This ensures your child’s safety harness functions correctly. Have you ever wondered how a small adjustment can impact comfort and safety? Paying attention to these details can make every drive more pleasant for both you and your little one. Take a moment to appreciate the peace of mind that comes with a well-fitted car seat cover.Attach The Seat Cover To The Backrest
Attaching the seat cover to the Graco Extend2Fit backrest requires precision. Slide the cover over the backrest, aligning the openings with the harness slots. Secure the edges snugly around the seat, ensuring a tight fit for comfort and safety.
Putting the seat cover back on your Graco Extend2Fit can be a bit of a puzzle, especially when it comes to attaching the cover to the backrest. This part is crucial for ensuring a snug fit, which in turn provides comfort and safety for your little one. Let’s dive into the process and make it as straightforward as possible.Step 1: Align The Cover With The Backrest
Start by laying the seat cover flat on the ground. Make sure you identify the top part of the cover that aligns with the backrest. This is usually the section with the headrest cut-out. Now, align this section with the backrest of the car seat. Ensuring alignment from the start makes the rest of the process smoother.Step 2: Secure The Elastic Bands
Locate the elastic bands on the sides and bottom of the cover. These are your primary tools for securing the cover. Begin by stretching the bands over the backrest corners. This might require a bit of pulling, but it ensures a tight fit. Don’t be afraid to use some muscle—it’s designed to handle it!Step 3: Fasten The Hooks
Check if there are any hooks or loops at the bottom or sides of the cover. These are usually meant to fasten onto the corresponding parts of the backrest. Secure these hooks to the loops or slots on the backrest. This step is crucial for preventing the cover from slipping during use.Step 4: Tuck In The Edges
Once the cover is mostly in place, start tucking in any loose edges. Pay special attention to the areas around the headrest and armrests. Tucking the edges gives the cover a neat look. It also ensures no uncomfortable bumps for your child.Step 5: Double-check The Fit
After everything is in place, do a quick double-check. Ensure the cover is snug and secure all around the backrest. If something feels off, don’t hesitate to make adjustments. A well-fitted cover not only looks good but also functions better. Have you ever struggled with a car seat cover before? Share your experiences in the comments! Your insights might help others facing the same challenges.Secure The Seat Cover To The Seat Bottom
Securing the seat cover to the seat bottom is crucial. It ensures comfort and safety for your little one. Proper attachment prevents slipping and keeps the seat looking neat. With the Graco Extend2Fit, the process is straightforward. Follow these steps to secure the seat cover efficiently.
Align The Seat Cover
Start by aligning the seat cover with the seat bottom. Ensure all edges are even. This alignment prevents wrinkles and uneven stretches. Check that the openings for straps match perfectly.
Attach The Elastic Bands
Locate the elastic bands on the cover’s edges. Stretch them around the seat bottom. These bands hold the cover firmly in place. Ensure each band is securely fastened.
Secure The Hooks
Find the hooks underneath the seat cover. Attach them to the designated spots on the seat bottom. These hooks add extra security. Double-check to ensure they are tightly fixed.
Smooth Out Wrinkles
Gently smooth out any wrinkles on the cover. Use your hands to flatten it. A wrinkle-free cover enhances the seat’s appearance. It also ensures a snug fit.
Check For Firm Attachment
Test the cover’s attachment by pressing on it. It should feel firm and unmoving. If it shifts, readjust the bands and hooks. A firmly attached cover provides safety.
Reconnect Harness Straps
Fitting the car seat cover back on the Graco Extend2Fit involves reconnecting harness straps. Start by threading the straps through the designated slots. Secure the cover by aligning it properly with the seat’s contours, ensuring all clips are fastened.
Putting the car seat cover back on your Graco Extend2Fit can feel like solving a puzzle. One crucial step in this process is reconnecting the harness straps. These straps are essential for keeping your little one safe and secure, so getting this part right is vital. Let’s dive into this task with precision and ease.Step-by-step Guide To Reconnect Harness Straps
Before starting, ensure you have a clear view of the harness system. This will help you identify where each strap needs to go. 1. Locate the Harness Slots: Find the slots on the back of the seat where the harness straps thread through. These are usually marked, making them easier to locate. If they aren’t visible, adjust the seat cover slightly to reveal them. 2. Thread the Straps: Once located, thread the straps through the slots. Ensure they are not twisted or tangled. This ensures the harness will adjust smoothly when you’re securing your child. 3. Attach to the Buckle: Connect the straps to the buckle at the bottom of the seat. Listen for a click, which indicates the strap is securely fastened. A loose connection can compromise safety, so double-check this step.Check The Harness Alignment
After reconnecting, adjust the harness to align properly. Pull the straps and check for even tension on both sides. An uneven harness may be uncomfortable for your child and affect the seat’s safety features. 4. Adjust the Harness Height: Ensure the harness is at the correct height for your child. This will depend on their size and age. Typically, the harness should be at or just above shoulder height.Test The Harness Functionality
Before calling it a day, test the harness. Engage the buckle and pull the straps to see if they adjust smoothly. If there is resistance or a snag, you might need to recheck the threading. 5. Final Safety Check: Ensure the harness is snug but comfortable. You should be able to fit two fingers between the strap and your child’s shoulder. This ensures safety without compromising comfort.Common Mistakes To Avoid
6. Twisting Straps: Twisted straps can affect the harness’s effectiveness. They might also cause discomfort during longer rides. 7. Incorrect Slot Usage: Using the wrong slots can lead to improper harness height. Always verify you’re threading through the correct slots for your child’s size.Personal Insight: The First Time I Did It
I remember the first time I struggled with the harness straps on my Graco Extend2Fit. I mistakenly threaded them through the wrong slots, and the harness wouldn’t adjust. It was frustrating, but it taught me the importance of double-checking each step.Your Turn
Take a moment to look at your Graco Extend2Fit. Are the harness straps correctly threaded and adjusted? This step not only ensures safety but also peace of mind for you and comfort for your child. Wouldn’t you agree that a few minutes of careful adjustment is worth the safety it provides? By following these steps, you can confidently reconnect the harness straps on your Graco Extend2Fit car seat, ensuring both safety and comfort for your child.Check For Proper Fit And Adjustments
Ensuring a snug fit for the Graco Extend2Fit car seat cover is crucial. Adjust straps and fasteners carefully, securing all edges. Proper alignment ensures comfort and safety for your little one during travel.
Ensuring your Graco Extend2Fit car seat cover fits properly is crucial. A snug fit guarantees safety and comfort for your child. After reattaching the cover, it’s essential to check and adjust as needed. This section will guide you through ensuring a proper fit and making necessary adjustments.Check For Gaps Or Loose Areas
Examine the car seat cover for any gaps. These could compromise safety. Ensure the cover wraps tightly around the seat. No part should hang loose or feel baggy. Use your hands to smooth out any wrinkles. A smooth cover protects better and looks neat.Align The Straps And Buckles
Ensure all straps and buckles align correctly with the cover. Misaligned straps can cause discomfort or affect safety. Check that buckles easily snap into place. Adjust the cover if buckles struggle to fit. Everything should work seamlessly.Test The Harness System
Secure the harness and test it. Pull gently to ensure it tightens correctly. A good fit means the harness doesn’t twist or snag. Adjust the cover if the harness feels restricted. The harness should move freely for maximum safety.Ensure The Headrest Fits Well
Check the headrest area for a snug fit. The headrest should not push the cover out of place. Adjust the cover around the headrest as needed. A well-fitted headrest ensures comfort for your child.Inspect The Seat Padding
Look at the seat padding for any bulges or uneven spots. The padding should lie flat under the cover. Adjust the padding if necessary. A flat seat ensures your child’s comfort and safety.Final Adjustments
After checking each area, make final adjustments. Ensure everything feels tight and secure. A well-adjusted cover stays in place during travel. This ensures your child’s safety and comfort.Reinstall The Car Seat In The Vehicle
Putting the car seat cover back on the Graco Extend2Fit is simple. Begin by aligning the cover with the seat’s contours. Ensure all straps and buckles fit snugly through their designated slots. Secure the cover by fastening it tightly, checking for wrinkles or loose areas.
Reinstalling the car seat back into your vehicle can seem daunting, especially after successfully putting the cover back on your Graco Extend2Fit. However, with a few clear steps, you can ensure the seat is secure and your child is safe. It’s all about understanding the process and taking it one step at a time. Imagine the peace of mind you’ll gain knowing your child is seated securely on every journey.Step 1: Position The Car Seat Correctly
Before securing the car seat, ensure it’s placed in the rear seat of your vehicle. The back should face the rear of the car for infants and young toddlers. Older children might need the seat facing forward, depending on their weight and height.Step 2: Use The Latch System
Locate the LATCH anchors in your vehicle, usually found between the seat cushions. Clip the LATCH straps from your car seat to these anchors. Pull the straps tight to remove any slack and ensure a snug fit.Step 3: Check The Angle
The Graco Extend2Fit has a built-in level indicator. Ensure the indicator shows that the seat is at the correct angle. Adjust if necessary to achieve a perfect fit.Step 4: Secure With The Seat Belt
Alternatively, use the vehicle’s seat belt if you prefer. Thread the belt through the designated path on the car seat. Buckle the seat belt and pull tight to eliminate any movement.Step 5: Double-check For Tightness
Wiggle the car seat side-to-side and front-to-back. It should not move more than an inch in any direction. If it does, tighten the LATCH system or seat belt further.Step 6: Confirm The Harness Fit
Place your child in the seat and fasten the harness. Ensure the harness is snug with the chest clip at armpit level. A snug harness keeps your child safe and secure.Step 7: Final Inspection
Give the car seat a final check. Look over each strap and buckle for any issues. Ensure everything is in place for a safe ride. Reinstalling a car seat might seem like a chore, but it’s a vital step to protect your little one. Have you ever felt the relief of knowing your child is buckled in safely? This process ensures not only their safety but your peace of mind.
Credit: www.youtube.com
Maintenance Tips For Seat Covers
Putting the car seat cover back on the Graco Extend2Fit can be simple. First, ensure the cover is clean and dry. Then, align the cover with the seat’s contours. Secure it with the provided straps and clips, ensuring a snug fit for safety and comfort.
Maintaining your Graco Extend2Fit car seat covers is crucial for their longevity and your child’s comfort. With the hustle and bustle of daily life, these covers can quickly accumulate dust, spills, and stains. Regular care not only keeps them clean but also ensures they remain in top condition for years to come.Inspect Regularly For Wear And Tear
Take a moment each month to check your seat covers for any signs of damage. Look for rips or frays, especially around the edges and seams. Address any small issues promptly to prevent them from becoming bigger problems.Vacuum To Remove Dirt And Debris
Use a handheld vacuum cleaner to suck up any crumbs or dirt trapped in the fabric. This simple task can make a big difference in preventing stains. Do this once a week to keep your seat covers looking fresh.Spot Clean Stains Immediately
Spills happen, but leaving them can lead to stubborn stains. Grab a damp cloth and mild soap to gently blot away any spills as soon as they occur. Quick action can save you from a more daunting cleaning task later.Machine Wash With Care
When it’s time for a deeper clean, refer to the manufacturer’s instructions. Most covers are machine washable but use a gentle cycle and cold water. Avoid using bleach or harsh detergents to preserve the fabric’s color and texture.Air Dry To Prevent Shrinkage
After washing, let your seat covers air dry completely before putting them back on. Avoid the dryer, as high heat can cause shrinkage and ruin the fit. Lay them flat on a clean surface to maintain their shape.Consider Protective Measures
Think about adding a protective spray to your seat covers. A fabric protector can help repel future spills and stains. It’s a small step that offers big rewards in the long run.Rotate Use For Even Wear
If you have multiple covers, rotate their use to ensure even wear. This can help prolong their life and keep your car looking fresh. It’s like giving your seat covers a well-deserved break. By making these maintenance tasks a regular part of your routine, you’re investing in the longevity and appearance of your car seat covers. Have you noticed any other tips that work well for you? Share your insights and help others keep their Graco Extend2Fit seat covers in pristine condition!
Credit: www.tiktok.com
Conclusion
Putting the car seat cover back on Graco Extend2Fit is simple. Follow the steps carefully, and you’ll succeed. Ensure each part fits snugly. Double-check all straps and fastenings. A secure fit means safety for your child. Practice makes perfect, so don’t worry.
With time, this process becomes easier. Your efforts ensure a clean, comfortable seat. A well-maintained seat lasts longer. Keep these tips handy for next time. Happy parenting and safe travels!