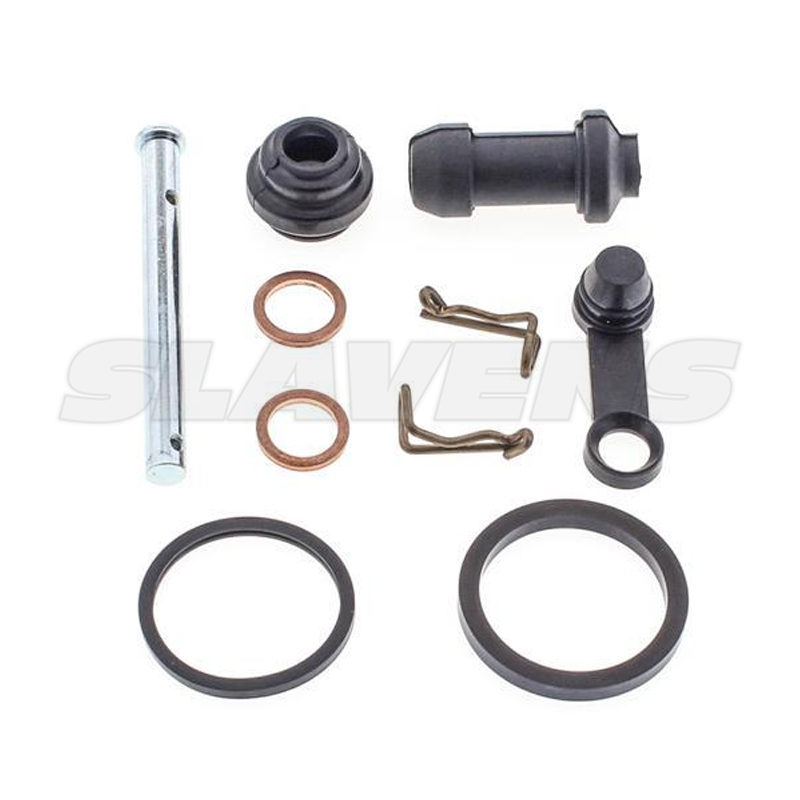
Brake calipers play a crucial role in the braking system of a vehicle, ensuring the efficient operation and safety of the brakes.
Over time, calipers can become worn, damaged, or develop leaks, requiring a rebuild. Rebuilding a brake caliper kit involves disassembling and cleaning the components, inspecting for any necessary replacements, and reassembling the caliper.
This comprehensive process helps restore the caliper’s functionality and prolong its lifespan.
We will guide you through the step-by-step process of rebuilding a brake caliper kit, ensuring reliable brake performance and peace of mind while on the road.

Credit: slavensracing.com
Disassembling The Brake Caliper Kit
Whether you’re a car enthusiast or a skilled mechanic, understanding how to disassemble a brake caliper kit is essential for proper maintenance and repair.
Here are the steps to disassemble a brake caliper kit:
- Gathering necessary tools and materials: Before diving into the disassembly process, gather all the required tools and materials. These may include a socket wrench set, a C-clamp, brake cleaner, gloves, and a brake caliper piston compressor tool.
- Safety precautions to consider: As with any automotive task, safety should be the top priority. Make sure to wear protective gloves and goggles when working with brake components to prevent any injuries.
- Removing the caliper from the vehicle: First, locate the brake caliper on the wheel assembly. Using a socket wrench, remove the caliper bolts and carefully detach the caliper from the brake rotor.
- Steps to disassemble the brake caliper kit: The brake caliper kit typically consists of various components such as pistons, seals, and boots. Refer to the vehicle’s service manual to determine the specific disassembly steps for your caliper model. Generally, you’ll need to remove the caliper pins and extract the pistons from the caliper housing.
- Inspecting the components: Once disassembled, carefully inspect each component for signs of wear, damage, or corrosion. Replace any worn-out or damaged parts to ensure optimal performance and braking efficiency.
Rebuild And Assemble The Brake Caliper Kit
Cleaning the caliper components: Before rebuilding the brake caliper kit, thoroughly clean all the caliper components with a suitable brake cleaner to remove any dirt and debris.
Using the rebuild kit: carefully follow the instructions included in the rebuild kit to ensure all necessary parts are replaced and installed correctly to ensure proper function.
Applying lubrication and sealants: Apply the appropriate lubricants and sealants to the caliper components as per the manufacturer’s recommendations to ensure smooth operation and prevent leaks.
Assembling the components: Reassemble the caliper components in the correct order and torque the fasteners to the recommended specifications to ensure proper function.
Reinstalling the caliper on the vehicle: Once the caliper is rebuilt and assembled, reinstall it on the vehicle following the proper procedure to ensure it is securely and correctly positioned.
Testing the rebuilt brake caliper: Perform a thorough inspection of the rebuilt brake caliper to ensure there are no leaks, and the brakes function correctly before operating the vehicle.
Conclusion
Rebuilding a brake caliper kit can improve your vehicle’s safety and performance. By following the steps outlined in this guide, you can save money and gain a sense of accomplishment. Remember to prioritize safety, use the right tools, and consult a professional if needed.
Happy wrenching!
