Are you tired of the annoying squeaks and rattles coming from your vehicle’s suspension? It’s frustrating, isn’t it?
You might have tried everything, but the sound just won’t go away. The culprit could be worn-out leaf spring bushings. Removing these bushings might seem daunting at first, but with the right guidance, you can do it yourself and save some cash.
Imagine driving smoothly without those irritating noises. Sounds like a dream, right? Dive into this article to discover step-by-step instructions that will make the process easier than you ever thought possible. You’ll gain confidence in tackling this task, ensuring your vehicle runs quietly and smoothly. Get ready to roll up your sleeves and transform your driving experience!
Credit: siberianbushing.com
Tools And Materials Needed
Removing leaf spring bushings requires specific tools and materials. A socket wrench is essential. Use it to loosen bolts. Lubricant spray helps in easing tight bushings. Hammer can be handy for tapping bushings out. Safety gloves protect your hands. You also need a jack to lift the vehicle. A bushing removal tool is crucial for this job. Make sure you have replacement bushings ready. Safety goggles are important to protect your eyes. A torque wrench ensures bolts are tight enough. Keep a rag nearby to clean any mess. Lastly, a bucket can hold removed parts.
Safety Precautions
Work safely to avoid accidents. Wear protective gloves and goggles. Secure the vehicle with jack stands. Ensure the parking brake is on. Keep tools organized for easy access. Use a torch with care. It can get very hot. Ventilate the area when using chemicals. Keep children away from the work zone. Double-check all safety gear before starting. Ensure the workspace is clean and dry. Inspect all equipment for damage. Avoid distractions while working. Focus on the task at hand.
Preparing The Vehicle
Start by securing the vehicle on a stable surface. Next, carefully loosen and remove the leaf spring bolts. Finally, extract the bushings using a bushing removal tool, ensuring no damage to surrounding components.
Lifting The Vehicle
First, make sure you have a jack and jack stands ready. Place the jack under the vehicle’s frame. Pump the jack handle to lift the vehicle. The vehicle needs to be high enough for safe work. Double-check if the vehicle is stable before you proceed.
Securing The Vehicle
Use jack stands to keep the vehicle in place. Put the stands under the frame. Lower the jack slowly until the vehicle rests on the stands. Make sure the stands are firmly positioned. This prevents the vehicle from falling or moving. Safety first!
Accessing The Leaf Springs
Leaf springs are under the vehicle. They are attached to the axle. Look for long strips of metal. These are the leaf springs. Remember, they might be dirty. Clean them first. Check both sides of the vehicle. Leaf springs are on both sides.
Clear any dirt or grime from the springs. It helps you see better. Remove any bolts that are in the way. Use a wrench for this. Watch for rusted or stuck parts. They might need extra care. Be careful not to damage nearby parts.
Removing The Leaf Spring
First, find the leaf spring bolts. These bolts hold the spring in place. Use a wrench to unbolt them carefully. Remember, these bolts can be very tight. You might need extra strength. Once unbolted, place the bolts in a safe spot. You will need them later.
After unbolting, the spring is still attached to the axle. Gently lift the spring from the axle. You might need a helper for this step. The spring can be heavy. Be careful not to drop it. Once free, set the spring aside. Now you are ready for the next steps.
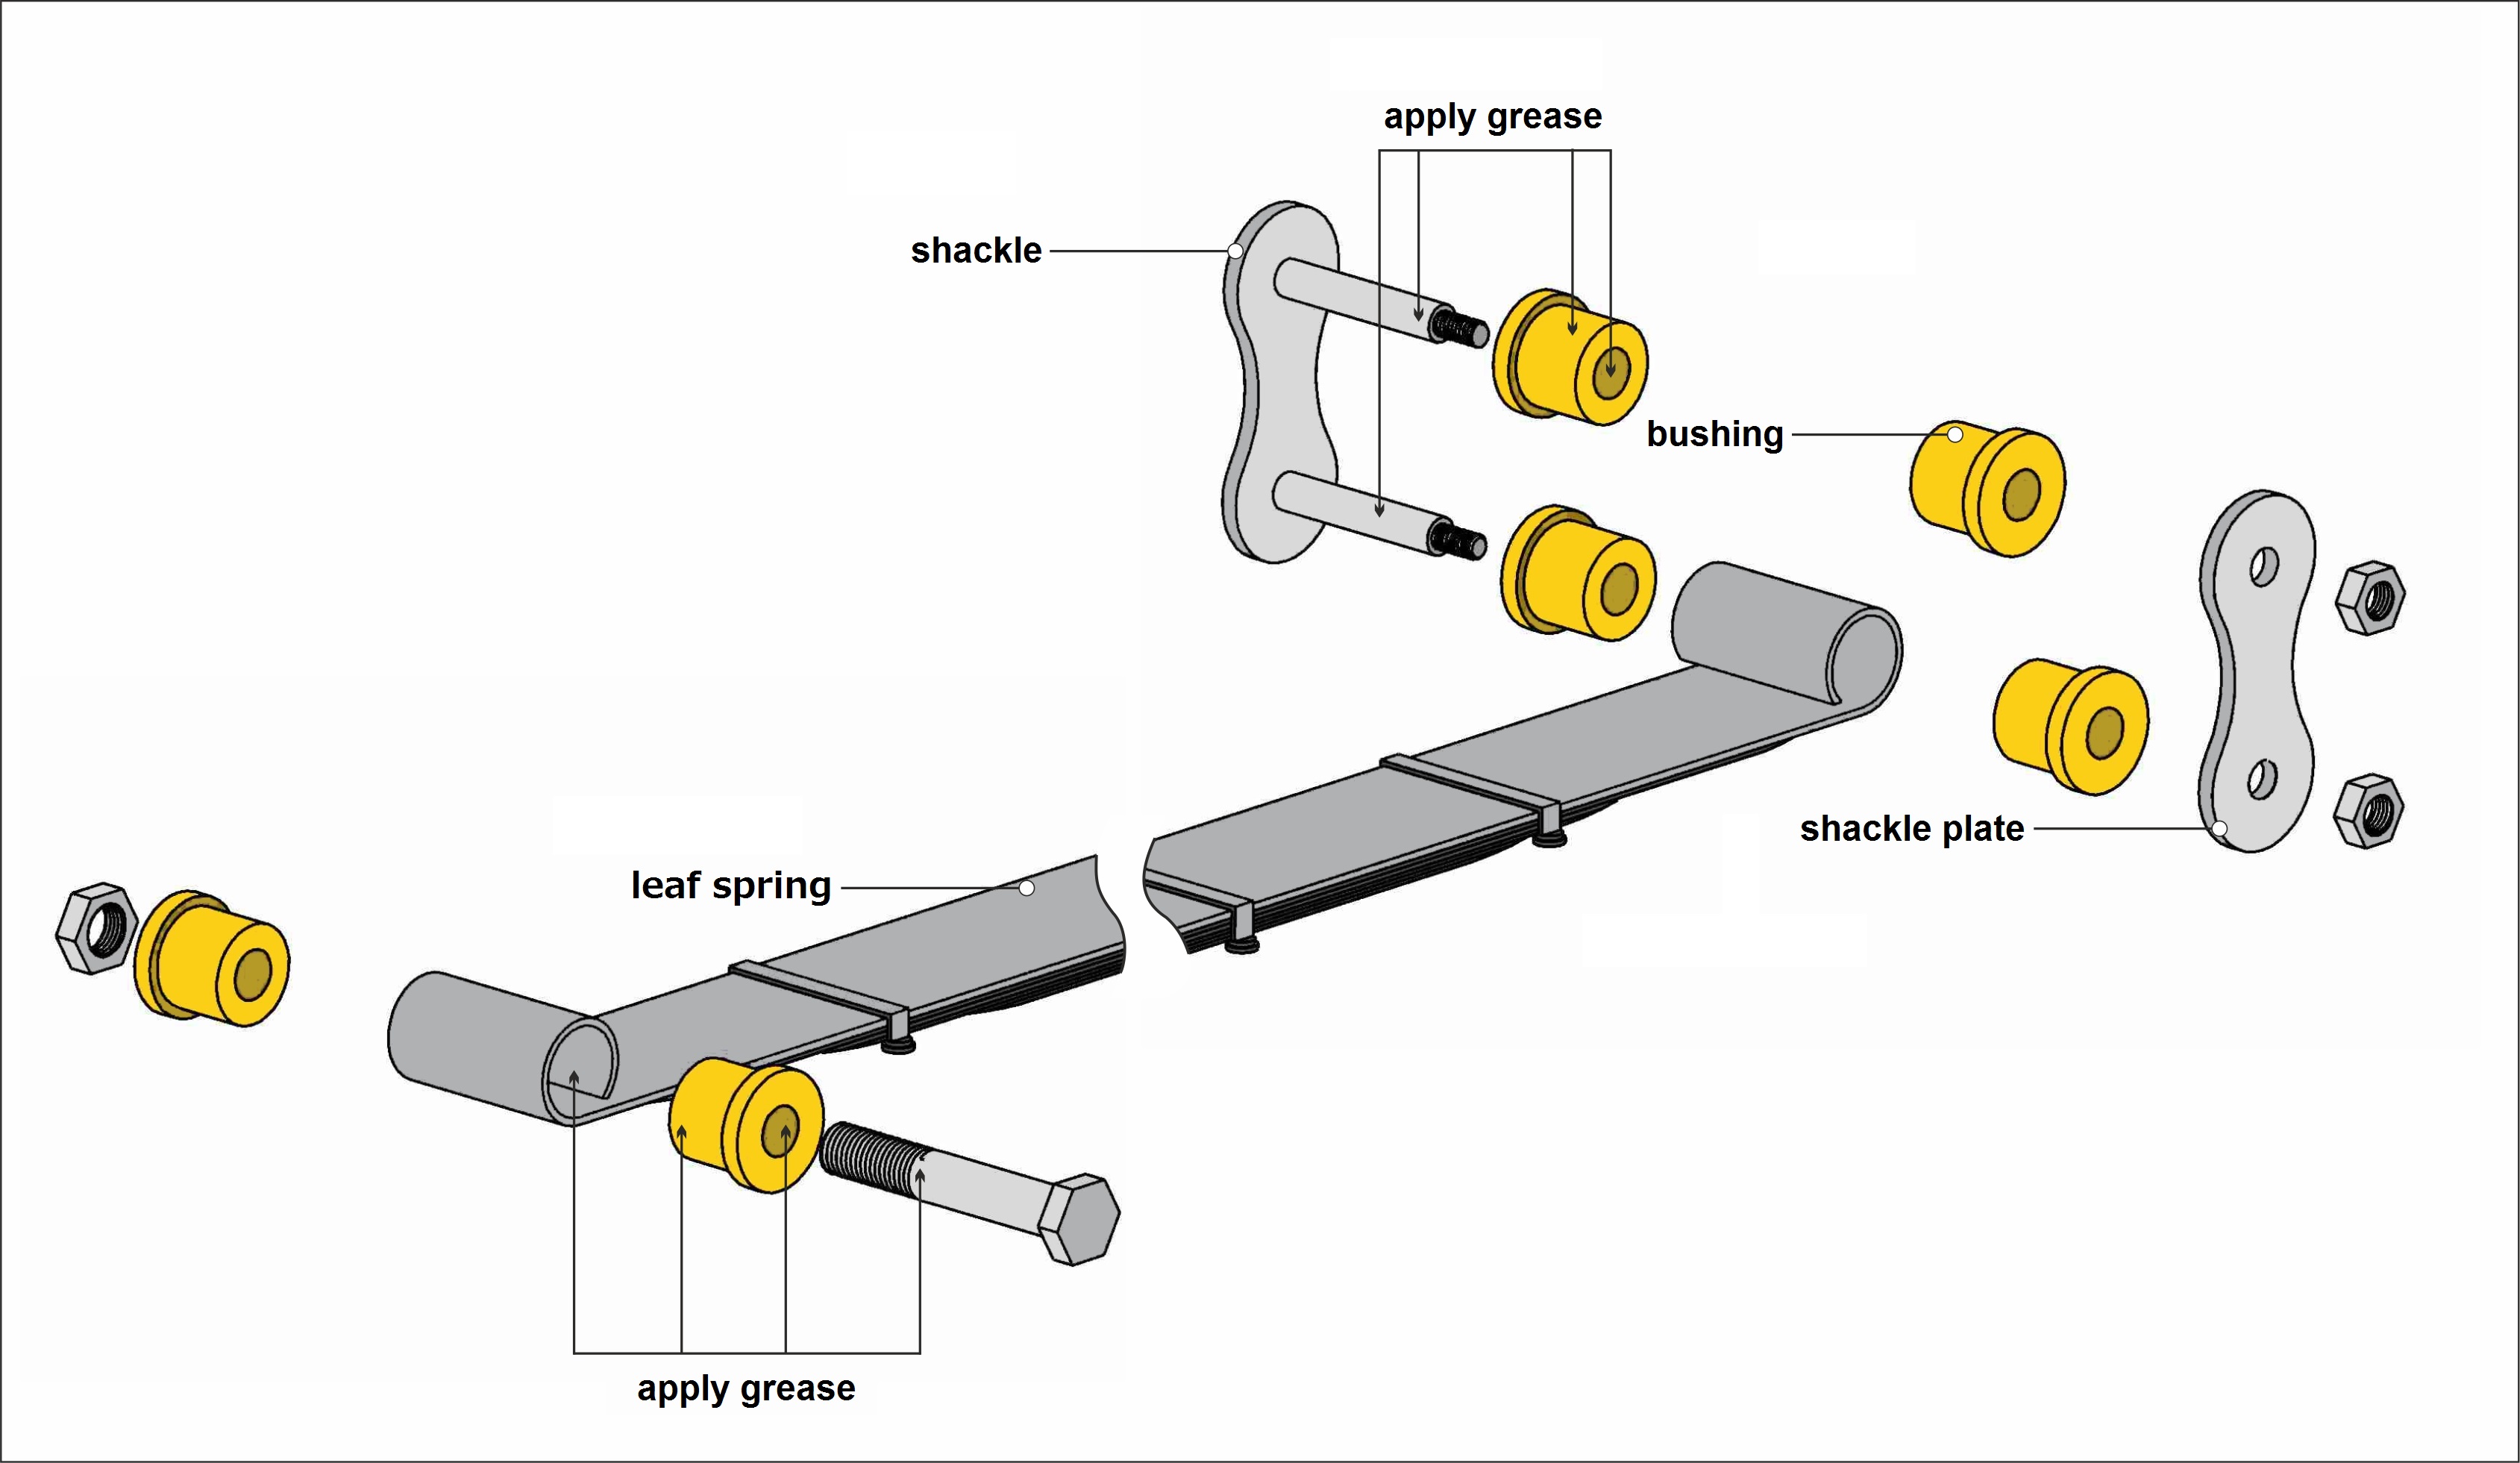
Extracting The Old Bushings
First, gather your tools. A bushing removal tool is very helpful. Place the tool on the bushing. Turn the handle to grip it tightly. Pull the old bushing out with care. Make sure not to damage the leaf spring. If the bushing is stuck, try applying a little oil. Oil can help the tool slide better. Be patient during this process. Take your time to avoid mistakes.
Sometimes, tools are not available. You can remove bushings by hand. Use a hammer and chisel. Place the chisel at the bushing edge. Tap gently with the hammer. Rotate the chisel around the bushing. Keep tapping until the bushing loosens. Be cautious not to hit the leaf spring. Safety is very important. Wear gloves to protect your hands. Keep your eyes safe with goggles. Manual removal takes more time and effort.
Cleaning The Bushing Housing
Rust and debris can hide inside the bushing housing. Use a wire brush to scrub away rust. Take your time to clean thoroughly. Debris can affect the bushing’s performance. Clean it with a cloth or an air blower. Safety goggles protect your eyes from dust.
Check the housing for cracks or wear. Damaged areas may need repairs. Look carefully for signs of wear. Small cracks can become big problems. If you find damage, consider replacing the part. An undamaged housing ensures smooth performance.
Installing New Bushings
Aligning the New Bushingsis a crucial step. First, make sure the bushings match the holes. Use a ruler to check measurements. Bushings must be straight. If not, they can wear out quickly. Place bushings in the center of the holes. This prevents uneven stress. Double-check alignment before moving on. Correct alignment ensures smooth operation.
Pressing Bushings into Placerequires patience. Use a press tool for accuracy. Avoid using a hammer. This can damage the bushings. Apply gentle pressure with the press. Move slowly and check progress. Stop if bushings become misaligned. Press until bushings sit flush with the surface. Proper pressing avoids future issues. Take time to ensure a snug fit.
Reattaching The Leaf Spring
First, make sure the leaf spring is in place. Line it up with the axle. Use a jack to lift it if needed. Take the U-bolts and slide them over the axle. Tighten the nuts to keep everything firm. Check the alignment as you work. Ensure the spring sits flat against the axle. This keeps it from moving.
Get the bolts ready. Slide them through the holes in the leaf spring. Secure them with nuts. Use a wrench to tighten each bolt. Make sure they are tight and secure. Double-check each bolt. They must be firm and won’t loosen. This keeps the ride smooth and safe.

Credit: www.youtube.com
Final Checks And Adjustments
Perform final checks and adjustments after removing leaf spring bushings. Ensure proper alignment of all components. Tighten all bolts securely to prevent future issues.
Tightening All Bolts
Check if all bolts are secure. Loose bolts can cause problems. Use a wrench to tighten each bolt properly. Start from one end and move to the other. Make sure the bolts are not too tight. Over-tightening can damage parts. Always follow the recommended torque settings. This keeps everything in place. Double-check all bolts once done. It’s important for safety.
Testing Vehicle Stability
After tightening, test the vehicle’s stability. Move the vehicle slowly at first. Listen for any unusual noises. If the vehicle wobbles, check the bolts again. Drive on different surfaces. This helps in checking the suspension system. Ensure the vehicle feels steady and smooth. Stop if anything feels off. Inspect the bushings again if needed. Safety is the most important thing.

Credit: spitfiremk3.wordpress.com
Conclusion
Removing leaf spring bushings isn’t hard. With patience and basic tools, anyone can do it. Follow the steps carefully for success. Ensure safety by wearing gloves and goggles. Proper handling prevents damage to bushings or springs. Remember to check for wear and tear.
Regular inspection keeps your vehicle running smoothly. This task can save you money on repairs. Practice makes perfect. Confidence grows with each attempt. Soon, you’ll handle car maintenance with ease. Happy fixing! Your vehicle will thank you.