Imagine cruising down the road, feeling the freedom of the open highway, when suddenly you realize your side mirror glass is cracked or missing. It’s not only annoying but can also be dangerous.
You might think replacing it is a complex task, best left to the professionals. But what if I told you, you could do it yourself, saving time and money? That’s right, whether you drive a Toyota Highlander, Tundra, Avalon, or RAV4, you can easily replace the side mirror glass on your own.
In this guide, you’ll discover simple, step-by-step instructions tailored to each Toyota model. By the end, you’ll feel confident tackling this task, ensuring your safety on the road. Ready to regain full visibility and peace of mind? Let’s dive in and get your Toyota back in top shape!
Credit: parts.olathetoyota.com
How To Replace Toyota Highlander Side Mirror Glass
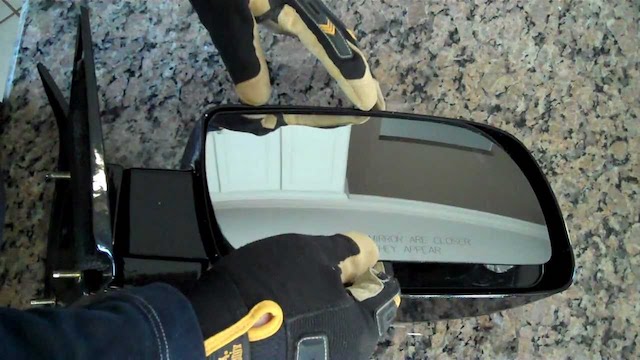
Replacing the side mirror glass on a Toyota Highlander is simple. First, gently pry off the old glass. Then, attach the new mirror by aligning it with the backing plate. Securely press until it clicks into place.
Replacing a Toyota Highlander side mirror glass doesn’t have to be a daunting task. With the right guidance, you can fix it yourself without hassle. Let’s dive into how you can efficiently replace the side mirror glass and ensure a safe driving experience.
Tools You’ll Need To start, gather a few essential tools. You’ll need these to make the replacement process smooth: – Screwdriver: Helps remove screws holding the mirror. – Adhesive: Secures the new mirror in place. – Safety gloves: Protects your hands during the replacement.
– Clean cloth: Ensures the surface is dust-free before attaching the new glass. Removing the Damaged Mirror Glass Carefully take out the broken mirror. This step requires precision to avoid further damage: – Locate screws: Check for screws around the mirror housing.
– Unscrew gently: Use a screwdriver to loosen and remove screws. – Detach broken glass: Carefully pull out the damaged mirror glass. Installing the New Mirror Glass With the old glass removed, it’s time to install the new one. Follow these steps to ensure a perfect fit: – Clean surface: Use a cloth to wipe any dust or debris.
– Apply adhesive: Place adhesive on the back of the new mirror glass. – Align and press: Align the mirror correctly and press firmly to secure. Safety Precautions Safety is key when handling glass. Consider these precautions to avoid accidents: – Wear gloves: Prevents cuts from sharp glass edges.
– Handle with care: Fragile glass requires gentle handling. – Check alignment: Ensures proper visibility once installed. By following these steps, you’ll successfully replace your Toyota Highlander’s side mirror glass, restoring clarity to your driving view.
How To Replace Toyota Tundra Side Mirror Glass
Replacing the Toyota Tundra side mirror glass is a simple task. First, remove the old glass carefully. Next, attach the new mirror by aligning it properly and snapping it into place. Make sure it fits snugly for safe driving.
Replacing the side mirror glass on your Toyota Tundra can seem daunting. But with a few tools and some patience, it’s quite manageable. This guide will walk you through the process, ensuring you feel confident and ready to tackle the task.
Gather the Necessary Tools Before diving in, make sure you have everything you need. Preparation is key: – Screwdriver: Helps remove screws holding the mirror. – Replacement mirror glass: Ensure it’s the correct fit for your Tundra. – Adhesive: Secures the new glass in place.
– Safety gloves: Protects your hands from sharp edges. Removing the Old Mirror Glass Carefully taking off the old glass is crucial. Follow these steps to avoid damage: – Pry the mirror: Gently use a screwdriver to lift the mirror from the edges.
– Detach wiring: If your mirror is heated, disconnect the wires. – Remove remaining pieces: Clear out any glass fragments left behind. Installing the New Mirror Glass Now it’s time to fit the new glass. Here’s how to do it efficiently: Apply adhesive on the back of the new mirror.
Make sure to cover the surface evenly. Align the new glass with the frame. Press firmly to secure it. Reconnect any wiring if your mirror is heated. Testing the Mirror After installation, ensure everything works properly. Here’s what to check: – Adjust the angle: Move the mirror to test its range.
– Check heating: If heated, ensure it warms up correctly. – Ensure stability: Make sure the mirror is securely attached. Final Touches After ensuring everything is in order, tidy up the workspace: – Clean the mirror: Use a soft cloth to wipe away smudges.
– Dispose of old glass: Safely discard the broken pieces. – Store tools properly: Keep everything organized for future tasks. With these steps, you’ll have your Toyota Tundra’s side mirror replaced efficiently.
How To Replace Toyota Avalon Side Mirror Glass
Replacing the Toyota Avalon side mirror glass involves removing the old glass carefully. Gently pry it off the mirror housing. Secure the new glass by aligning it properly and pressing firmly until it clicks into place. Ensure everything is intact and test the movement.
Replacing the side mirror glass on a Toyota Avalon is a task many drivers can tackle. With some patience and the right guidance, this can be done efficiently. Let’s dive into the steps needed to get that mirror fixed. Gather the Necessary Tools To start, you’ll need some basic tools: – Screwdriver: Helps to remove and secure screws.
– Replacement Mirror Glass: Make sure it’s the correct size for your Avalon. – Adhesive Glue: Holds the new glass in place. Remove the Old Mirror Glass First, you need to remove the damaged glass: – Wearing gloves: Protects your hands from broken glass.
– Prying gently: Use a screwdriver to carefully lift the glass. – Removing clips: Release any clips holding the glass. Prepare the New Mirror Glass Now, prepare your new mirror: – Check fit: Ensure it matches the old glass. – Apply adhesive: Place glue on the back of the new glass.
– Let dry: Wait a few minutes for the glue to become tacky. Install the New Mirror Glass Once prepared, install the new piece: – Align carefully: Position the glass with precision. – Press firmly: Ensure it adheres well to the base.
– Secure clips: Fasten any clips to hold it in place. Final Check After installation, do a quick check: – Adjust mirror: Ensure it moves freely. – Inspect for gaps: Confirm there are no spaces. – Test on the road: Make sure visibility is clear.
With these steps, your Avalon’s side mirror will be as good as new. Safe driving!
How To Replace Toyota Rav4 Side Mirror Glass
Replacing the side mirror glass on a Toyota RAV4 is simple. Gently pry off the old glass using a flat tool. Align and press the new glass into place until it clicks securely.
Replacing a side mirror glass on your Toyota RAV4 is simpler than it seems. With a few tools and some patience, you can do it yourself. This guide provides clear steps to ensure the process is smooth and successful. Tools You Will Need Before you start, gather these essential tools.
They will make the task easier and prevent damage: – Safety gloves: Protect your hands from sharp edges. – Flathead screwdriver: Help with prying off the old glass. – Replacement mirror glass: Ensure it matches your RAV4 model. – Adhesive strips: Secure the new mirror glass in place.
Removing the Old Mirror Glass First, you’ll need to remove the broken or damaged mirror glass. Follow these steps carefully to avoid injury or further damage: – Wear safety gloves: Shield your hands from sharp shards. – Use the flathead screwdriver: Pry around the edges to loosen the glass.
– Gently pull the glass: Once loose, remove it from the housing. – Clean the housing: Clear any debris or adhesive residue. Installing the New Mirror Glass With the old glass removed, it’s time to install the new one. This part requires precision to ensure a snug fit: Begin by aligning the new mirror with the housing.
Check that it fits correctly before securing it. Then, use adhesive strips to hold the glass in place. Make sure the strips cover all corners for a secure hold. Finally, press the mirror into the housing. Use firm, even pressure to ensure it stays in place.
Final Checks After installation, perform a few checks to ensure everything is in order. These checks help confirm the mirror is securely fitted and functional: – Test the mirror movement: Adjust it to see if it moves smoothly. – Check for secure placement: Ensure the glass doesn’t wobble.
– Examine the reflection quality: Verify the clarity and alignment. Replacing your RAV4 side mirror glass can be a rewarding DIY task. With these steps, you’ll have it done in no time.

Credit: www.youtube.com
Conclusion
Replacing Toyota side mirror glass is simple. Follow step-by-step instructions for each model. Highlander, Tundra, Avalon, or RAV4—each has unique details. Gather necessary tools first. Carefully remove the old glass. Install new glass with precision. Double-check alignment for safety. Ensure tight fit to avoid vibration.
Test the mirror’s functionality. Proper maintenance extends its life. Save money by doing it yourself. Feel confident with each replacement. Enjoy clear views while driving. Keep your Toyota looking great. Safety and visibility matter most. Regular checks prevent issues. Stay prepared for any road trip.