Do you ever find yourself staring at your OBD2 scanner, wondering why it’s not functioning as it should? You’re not alone.
Many people face this issue, and resetting your scanner might be the solution you need. Imagine the relief of seeing those error codes disappear and your vehicle running smoothly again. By understanding how to reset your OBD2 scanner, you’re not only saving time but potentially avoiding costly mechanic fees.
This article will guide you step-by-step through the process, ensuring you can tackle any scanner hiccup with confidence. Dive in, and let’s get your vehicle diagnostics back on track.
Why Reset Your Obd2 Scanner
Resetting your OBD2 scanner clears old error codes and refreshes the system for accurate diagnostics. It helps in ensuring the device operates effectively, providing current vehicle information. Regular resets can prevent confusion and improve overall performance of the scanner.
Resetting your OBD2 scanner might seem like a small task, but it can make a big difference in keeping your vehicle running smoothly. Whether you’re a car enthusiast or just someone who wants to ensure their vehicle is in top shape, understanding why resetting your OBD2 scanner is essential could save you time, frustration, and even money. Let’s dive into the reasons why this simple action is more important than you might think.Improves Diagnostic Accuracy
When your OBD2 scanner is cluttered with old error codes, it can lead to inaccurate diagnostics. Clearing these codes through a reset ensures your scanner reads only the most current issues. This helps you pinpoint the exact problems without confusion.Enhances Scanner Performance
Over time, your OBD2 scanner’s memory can get bogged down with too much data. A reset can clear this memory, allowing the device to function more efficiently. This means faster scanning and quicker results whenever you plug it in.Prevents Misleading Alerts
Sometimes, your scanner might alert you to problems that have already been resolved. If you’ve fixed an issue and the scanner still shows an error, a reset can help. This prevents unnecessary worries and helps you focus on actual, unresolved issues.Facilitates Software Updates
Updating your scanner’s software is crucial for optimal performance. However, old data can interfere with these updates. Resetting your scanner clears the path for smooth and successful software installations.Reflects Recent Repairs
After making repairs, your vehicle should ideally have no error codes. Resetting the OBD2 scanner ensures it reflects the current state of your vehicle. This gives you peace of mind knowing your repairs were successful.Encourages Regular Maintenance
Resetting your scanner regularly can prompt you to be more proactive with vehicle maintenance. It’s a small act that reinforces a habit of checking your vehicle’s health. This can prevent bigger problems down the road. Have you ever found yourself questioning the reliability of your scanner’s readings? Resetting it might be the simple solution you need. Taking this step can help you maintain trust in your diagnostic tool, keeping your vehicle in top form.Tools Required
Resetting an OBD2 scanner can seem challenging without the right tools. Having the proper equipment ensures a smooth reset process. This section lists essential tools needed for a successful reset. Proper tools help in maintaining your scanner’s performance.
1. Obd2 Scanner Manual
The manual guides you through the reset process. It provides detailed instructions. Keep it handy to understand specific steps.
2. Usb Cable
A USB cable connects your scanner to a computer. It facilitates software updates and data transfer. Ensure it’s compatible with your scanner model.
3. Computer Or Laptop
A computer helps in running diagnostic software. It supports updating and resetting your scanner. Make sure it has the necessary software installed.
4. Diagnostic Software
Diagnostic software is vital for resetting the scanner. It identifies issues and provides solutions. Ensure it’s updated and compatible with your scanner.
5. Internet Connection
An internet connection allows software updates. It helps download necessary updates for the scanner. Ensure a stable connection during the reset process.
6. Battery Charger
A battery charger prevents your vehicle’s battery from draining. It ensures the vehicle stays powered during the reset. Connect it before starting the process.
7. Basic Toolkit
A basic toolkit includes screwdrivers and pliers. These tools help in accessing the OBD2 port. Keep them ready for any adjustments needed.
Preparation Steps
Resetting an OBD2 scanner involves simple steps. Start by turning off the vehicle’s ignition. Disconnect the scanner from the diagnostic port. Wait for a few minutes before reconnecting it. Power on the scanner and follow the on-screen instructions for a reset.
Resetting your OBD2 scanner can seem like a daunting task, but with the right preparation steps, it becomes straightforward and manageable. Whether you’re troubleshooting a persistent error code or simply refreshing your device, taking the time to properly prepare can save you from potential frustrations. Let’s walk through the essential steps to ensure your reset process is smooth and effective.Check Battery Level
Before diving into any reset procedure, it’s crucial to check the battery level of your vehicle. A low battery can lead to incomplete or failed resets, causing more issues than solutions. Make sure your battery is sufficiently charged. You wouldn’t want your vehicle dying halfway through the process, right? A simple voltmeter can help you assess if the battery is in good shape. If it’s low, consider charging it or using a jump starter.Ensure Proper Connections
Once you’re confident that the battery is charged, it’s time to ensure proper connections. This step is all about making sure your scanner is accurately linked to the vehicle’s OBD2 port. A loose connection can lead to miscommunication between the scanner and your car. Think of it like a conversation between two friends; if one isn’t listening, the message gets lost. Firmly connect the scanner and double-check that it’s seated correctly. If you’re unsure, refer to your scanner’s manual for guidance on establishing a stable connection. By ensuring these connections, you’re laying the groundwork for a successful reset, leaving no room for errors. — Have you ever faced issues due to improper preparation when resetting your scanner? What steps do you take to avoid mishaps? Engaging with these questions can help you refine your approach and learn from others’ experiences.
Credit: www.amazon.com
Basic Reset Procedure
Resetting your OBD2 scanner can seem like a daunting task if you’re new to using vehicle diagnostic tools. Whether your scanner is acting up or you just want to clear old data, performing a basic reset can often do the trick. It’s a straightforward process, and once you’ve done it, you’ll wonder why you ever hesitated. Let’s walk through the steps to get your scanner back in shape.
Accessing The Menu
Start by powering on your OBD2 scanner. Most scanners have a simple interface—often just a few buttons or a small touch screen. Look for a button labeled “Menu” or a gear icon. Press it to access the settings menu. You might feel like you’re poking around in the dark at first, but once you find the menu, everything starts to make sense.
Have you ever found yourself stuck in an unfamiliar menu on a device? It can be frustrating. But with your scanner, the menu is usually designed to be intuitive. Take your time to explore the options available. If you’re unsure, consult the user manual or search online for your specific model. You’ll soon find the reset option nestled among other settings.
Selecting Reset Option
Once you’re in the menu, look for the “Reset” or “Factory Reset” option. It’s often listed among other maintenance options like “Update” or “Clear Codes.” Selecting this will initiate the reset process. Have you ever wondered why it’s called a ‘factory reset’? It’s because it restores your device to its original settings, just like when it left the factory.
Before you proceed, make sure you understand what a reset will do. It typically clears stored data and resets configurations. This is perfect if your scanner’s memory is full or it’s behaving oddly. Ensure your vehicle is safe to diagnose post-reset; sometimes clearing codes can affect diagnostics. Once you’re ready, confirm the reset—your scanner will usually prompt you for confirmation before proceeding.
Now, your OBD2 scanner should be back to its original state, ready for fresh diagnostics. Have you ever thought about the peace of mind a simple reset can bring? It’s like hitting the refresh button on your car’s health. So why not give it a try and see the difference it makes?
Advanced Reset Techniques
Resetting an OBD2 scanner is crucial for accurate diagnostics. Advanced reset techniques can enhance the scanner’s functionality. They ensure your tool performs optimally and efficiently. This section explores two effective methods: Factory Reset and Software Update. These techniques provide a fresh start and improve performance.
Factory Reset
Performing a factory reset restores the scanner to its original settings. It’s ideal for resolving persistent issues or errors. To begin, locate the reset option in the scanner’s menu. Follow the on-screen instructions carefully. This process clears all stored data and configurations. The scanner returns to its factory state.
A factory reset is useful when the scanner behaves erratically. It eliminates bugs and glitches. After the reset, reconfigure settings as needed. This ensures the scanner is ready for use again. Always check the user manual for specific reset steps.
Software Update
Updating the scanner’s software enhances its capabilities. It provides access to the latest features and fixes. Start by connecting the scanner to a computer with internet access. Visit the manufacturer’s website to download updates. Follow the update guide provided on the site.
Software updates improve compatibility with newer vehicles. They fix known bugs and enhance performance. Regular updates keep your scanner reliable and efficient. It is crucial to check for updates periodically. Ensure your scanner is running on the latest version.
With these advanced reset techniques, your OBD2 scanner will operate smoothly. It remains a valuable tool for vehicle diagnostics.
Troubleshooting Common Issues
Resetting an OBD2 scanner can sometimes be tricky. Different issues can arise, affecting the process. Addressing these problems is essential for a smooth reset. This section explores common issues and their solutions.
Connectivity Problems
Connectivity problems are frequent when resetting an OBD2 scanner. First, check the cable connections. Ensure they are secure and properly plugged in. A loose connection can disrupt communication. If using Bluetooth, verify the device is paired correctly. Weak signals can lead to failed connections. Also, consider the vehicle’s battery charge. A low battery might affect the scanner’s performance.
Error Messages
Error messages can be confusing. They often indicate underlying issues. Start by checking the OBD2 scanner’s manual. It usually contains a list of error codes. Understanding these codes helps in resolving problems. If an error persists, try restarting the scanner. This simple step can clear temporary glitches. If problems continue, consider updating the scanner’s software. Outdated software may not function correctly.
Maintenance Tips
Resetting an OBD2 scanner can help clear error codes and ensure accurate diagnostics. Start by turning off the vehicle’s ignition. Disconnect the scanner, wait for a few minutes, and reconnect it. Follow the device instructions to complete the reset process effectively.
Maintaining your OBD2 scanner ensures it continues to deliver accurate diagnostics and prolongs its lifespan. Just like a car needs regular check-ups, your scanner requires consistent attention to perform optimally. Let’s dive into some practical maintenance tips that can keep your OBD2 scanner in top shape.Regular Updates
Keeping your OBD2 scanner software up to date is crucial. Manufacturers frequently release updates to fix bugs and improve functionality. Imagine your scanner is a smartphone; without updates, it might miss out on new features or even malfunction. Regular updates ensure your scanner can diagnose newer car models effectively. Set a reminder to check for software updates monthly. This simple habit can save you from potential headaches later.Proper Storage
Proper storage is key to extending the life of your OBD2 scanner. Avoid leaving it in extreme temperatures, such as inside a car on a hot summer day or a freezing winter night. Consider where you store your scanner at home. A cool, dry place is ideal. This prevents damage to the electronic components inside. Have you ever noticed how gadgets stored well tend to last longer? Treat your scanner like any prized possession. Wrap it in a soft cloth or case to protect it from dust and scratches. These maintenance tips are not just about extending your scanner’s life but ensuring it provides reliable diagnostics every time you use it. Are you ready to give your OBD2 scanner the care it deserves?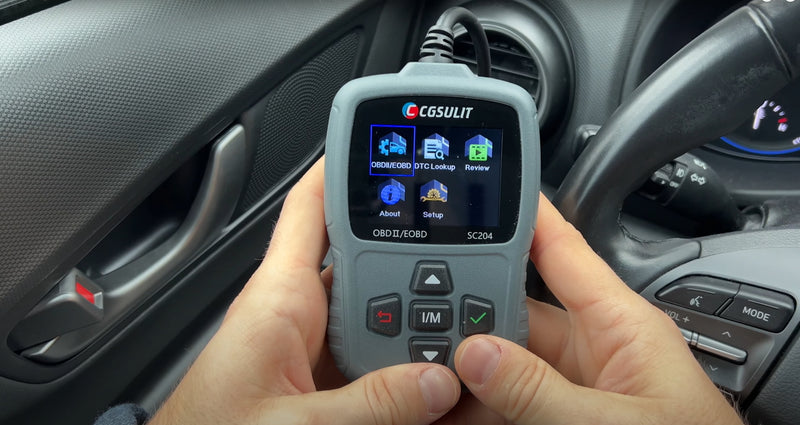
Credit: www.cgsulitstore.com

Credit: www.youtube.com
Conclusion
Resetting an OBD2 scanner is simple and effective. Follow the steps carefully to avoid errors. Start by turning off your car. Disconnect the scanner from the OBD2 port. Reconnect after a few moments. This resets the device. Ensure the scanner is updated for accurate results.
Regular maintenance of your scanner helps keep it reliable. Use this guide to troubleshoot minor issues easily. A well-functioning scanner aids in vehicle maintenance. Keep your car running smoothly. Stay informed about your car’s health. It’s a valuable skill for every driver.