Tinting your headlights and taillights can enhance your vehicle’s look. It adds a sleek, custom touch.
Car enthusiasts often seek ways to personalize their rides. Tinting headlights and taillights is a popular option. It not only looks cool but also protects the lights. With the right materials and some patience, you can do it yourself. This guide will show you how to tint your lights step-by-step.
You don’t need to be a pro to achieve a professional finish. So, get ready to give your car a fresh, unique appearance. Let’s dive into the process and transform your vehicle’s look.

Credit: www.reddit.com
Introduction To Headlight And Taillight Tinting
Tinting your headlights and taillights can enhance your car’s look. It adds a sleek and modern touch. Tinting also reduces glare from other cars. This can make night driving more comfortable. Tinted lights can also protect against scratches and cracks. The film acts as a shield. Tinting is a cost-effective way to personalize your vehicle.
Check your local laws before tinting. Some places have strict rules. The tint level must be within legal limits. Too dark can be unsafe. It can reduce visibility. Always ensure your lights are visible to others. Safety should be a top priority. Consult a professional if unsure.
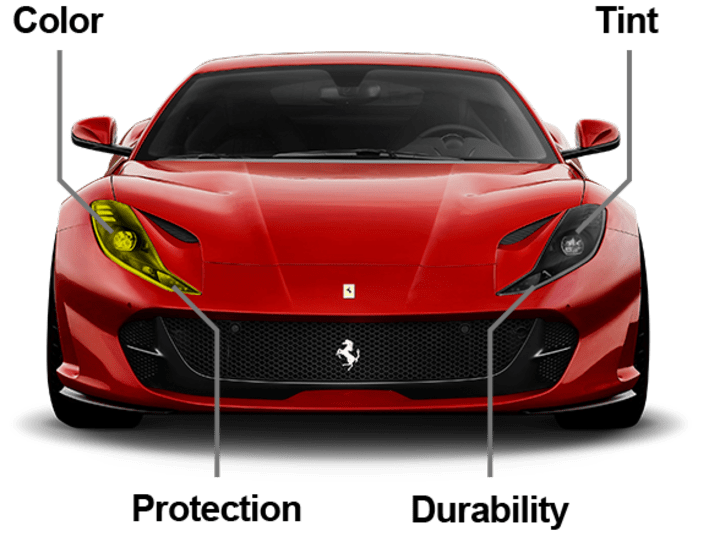
Credit: www.tintworld.com
Materials And Tools Needed
You need a few essential tools. Heat gun to apply the tint. Squeegee to remove air bubbles. Microfiber cloth for cleaning. Utility knife to trim the tint. Tape to mark areas. Spray bottle with soapy water for applying the tint. Gloves to keep the tint clean.
Select a high-quality film for better results. Check local laws about tint darkness. Smoke tint gives a sleek look. Yellow tint for a unique style. Clear tint can protect without changing color. Pre-cut kits can save time. Ensure the tint is UV resistant.
Preparation Steps
Start by washing the lights with soap and water. Dry them with a clean cloth. Use a glass cleaner to remove any residue. Ensure no dirt or grease remains. Clean lights ensure better tint adhesion. Repeat the cleaning if necessary.
Use painter’s tape to cover nearby areas. Protect the car’s body and trim. Masking prevents unwanted tint on these parts. Press the tape firmly to ensure it sticks well. Cover all the edges carefully. This will save time later.
Applying The Tint
First, clean the headlight or taillight surface. Use a cloth to remove dirt. Next, place the tint film over the light. Make sure it covers all edges. Use a blade to cut the film. Follow the light’s shape closely. Cut slowly to avoid mistakes. The film should fit perfectly.
Start by spraying water on the light. This helps the film move easily. Place the film on the light. Use a squeegee to remove air bubbles. Begin from the center and push outwards. Keep the film smooth and flat. Trim any extra film around the edges. Let the film dry for a few hours. Now, your lights should look great.
Heat Shrinking The Tint
Heat shrinking the tint helps achieve a smooth finish on your headlights and taillights. This method ensures the film adheres well, eliminating bubbles and wrinkles.
Using A Heat Gun
Use a heat gun to make the tint fit perfectly. Hold the gun 6 inches away from the tint. Move it back and forth slowly. This will make the tint soft. Press the tint gently with your hand. Remove any bubbles. Be careful not to burn the tint. Move the heat gun to another area. Repeat the process until done. Ensure the entire tint is smooth.
Ensuring A Snug Fit
After heating, press the edges of the tint firmly. Use a plastic card to push out any air bubbles. Check for any wrinkles. If found, use the heat gun again. Trim any extra tint with a sharp blade. Make sure the tint fits snugly.
Trimming Excess Tint
Use a precision knife to trim the excess tint. Be gentle and careful while cutting. Make sure to follow the edges of the light closely. This ensures a neat and professional look. Always cut away from your body to avoid accidents. Avoid pressing too hard to prevent damaging the light.
Keep the knife sharp for clean cuts. A dull knife can tear the tint. Work slowly and take your time. Carefully remove any small pieces left behind. These steps help in avoiding damage to the light.
Final Touches
Gently press out any air bubbles with a squeegee or credit card. This will help the tint look smooth and clean. Start from the center and move towards the edges. Be patient. Sometimes bubbles can be stubborn. Use a needle to pop big bubbles if needed. Then smooth out the area again.
Inspect the headlights and taillights for any imperfections. Check for dust, dirt, or any missed bubbles. Make sure the tint is evenly applied. If you see any flaws, fix them immediately. Use a cloth to clean the surface and make it shine. Good lighting helps to see any missed spots.

Credit: m.youtube.com
Maintenance Tips
Tinting your headlights and taillights can improve your car’s look. Start by cleaning the lights thoroughly. Apply the tint film smoothly to avoid bubbles.
Cleaning Tinted Lights
Keep tinted lights clean for better visibility. Use a soft cloth with mild soap and water. Avoid harsh chemicals. They can damage the tint. Dry the lights with a clean towel. Regular cleaning helps maintain the shine. Clean lights look better and last longer.
Prolonging Tint Life
Park in the shade to protect your tint. Sunlight can fade the color. Avoid using abrasive materials. They scratch the surface. Wax the lights occasionally. This adds a protective layer. Check the tint for any bubbles. Fix them quickly to prevent more damage.
Conclusion
Tinting your headlights and taillights can add a sleek look. It’s a simple process with the right tools and patience. Always follow safety guidelines to avoid any issues. Ensure your tint is legal in your area. Now, you can confidently enhance your vehicle’s appearance.
Enjoy your new, stylish lights. Happy tinting!