When you find yourself facing a stubborn tie rod end that refuses to budge, frustration can quickly set in. You’re not alone.
Many people struggle with this common automotive repair challenge, wondering if there’s an easier way to tackle it. The good news is, there is a tool designed to make your life simpler: the tie rod end puller. Imagine saving time and avoiding unnecessary stress while getting the job done right.
This tool is your key to effortlessly removing tie rod ends without damaging surrounding parts. By mastering the use of a tie rod end puller, you not only simplify your repair process, but also protect your vehicle from potential harm. Intrigued? Let’s dive in and discover how this handy tool can transform your repair experience, offering you efficiency and peace of mind. You’re just steps away from becoming a more confident DIY mechanic. Keep reading to unlock the secrets of using a tie rod end puller effectively and ensure your vehicle’s performance remains top-notch.
What Is A Tie Rod End Puller
A tie rod end puller is a tool used in car repair. It helps remove the tie rod ends from the steering linkage. Tie rod ends connect the steering rack to the wheels. They play a big role in steering the car. Over time, these parts might wear out. They need replacing when worn out.
This tool makes the job easier. It grips the tie rod end tightly. Then it pulls it out from the steering linkage. Using a tie rod end puller is safe. It prevents damage to other parts of the car. It is a must-have tool for anyone working on car steering systems. Easy and simple to use. Just follow the instructions on the tool.
Essential Tools And Equipment
A tie rod end puller is vital for removing tie rods. It helps avoid damage during removal. You need a wrench for loosening bolts. A socket set is handy for different sizes. A screwdriver is useful for smaller parts. A hammer might be required to free stubborn parts. Keep pliers ready for gripping tasks. An adjustable spanner is useful for varying sizes. Ensure all tools are in good condition. Broken tools can be dangerous.
Safety gear keeps you safe while working. Wear gloves to protect your hands. Safety glasses shield your eyes from debris. Use a dust mask if there’s dirt flying around. Wear a sturdy apron to protect your clothes. Ensure good lighting for better visibility. Comfortable shoes prevent slips and falls. Always work in a clean, organized space. Proper gear reduces risk of injury.
Preparation Steps
Begin by securing your vehicle on a flat surface. Loosen the lug nuts slightly before lifting it with a jack. Ensure the jack stands are placed securely. Remove the wheel to access the tie rod end. Align the puller correctly and tighten it to detach the tie rod end safely.
Park And Secure The Vehicle
First, park the car on a flat surface. Turn off the engine. Make sure the parking brake is engaged. This keeps the car from moving. Place chocks behind the rear wheels. Chocks prevent rolling. Safety is important.
Lift And Support The Vehicle
Use a strong jack to lift the car. Place the jack under the car’s frame. Lift the car until the wheels are off the ground. Once lifted, use jack stands. Jack stands hold the car up safely. Never rely on a jack alone.
Remove The Wheel
Locate the wheel nuts. Use a wrench to loosen them. Remove the nuts completely. Take the wheel off the car. Place the wheel aside. Now, you can see the tie rod end. You are ready to use the puller.

Credit: eclassics.com
Locating The Tie Rod End
Find the car’s front wheels. The tie rod is behind them. It looks like a metal bar. The tie rod connects to the wheel’s steering part. Check both sides of the car for tie rods. They are on the passenger and driver sides.
Look at the tie rod ends. Search for cracks or bends. A damaged tie rod can cause steering problems. Make sure it is straight and smooth. Check the rubber parts too. They should not be torn or missing. A good tie rod keeps you safe.
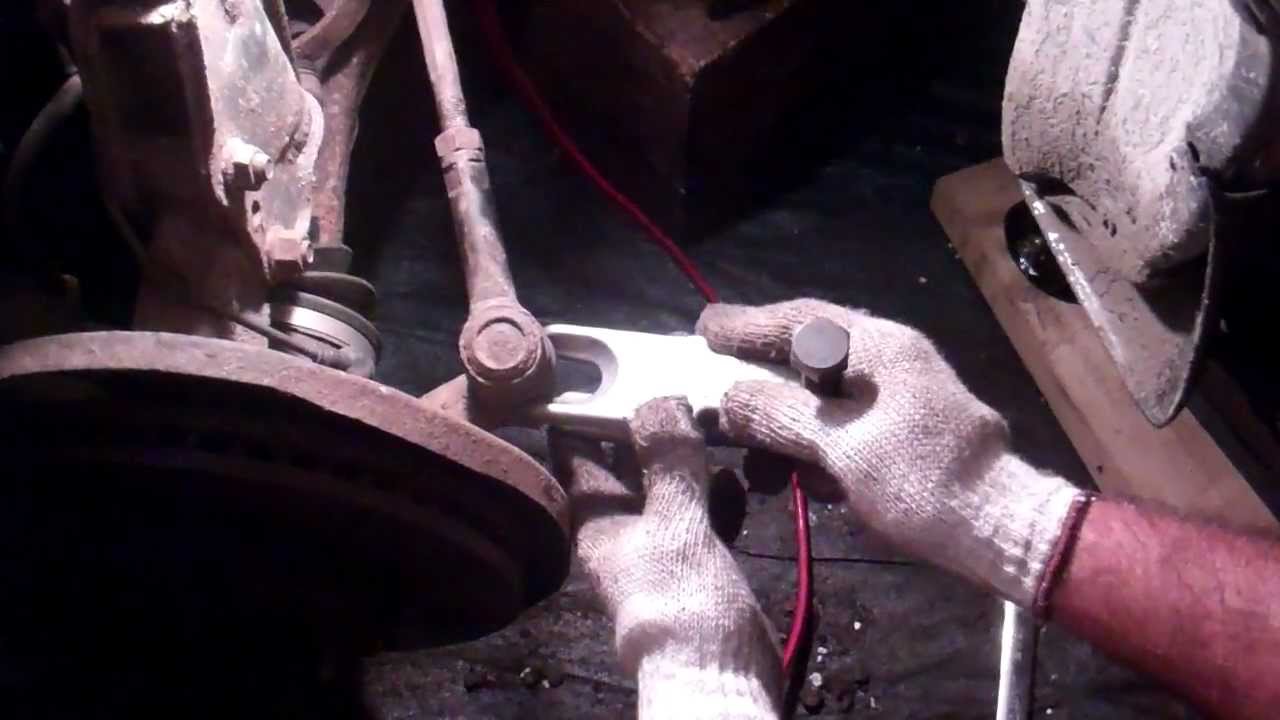
Using The Tie Rod End Puller
Place the puller over the tie rod end. Make sure it fits well. The arms should hold the tie rod securely. Check that the screw aligns with the rod end. This ensures a firm grip.
Turn the screw with a wrench. Turn it slowly to increase pressure. Watch the tie rod end closely. The pressure will help to loosen it. Be careful not to overturn. This could damage the parts.
Once loose, the tie rod end can be removed. Gently pull it away from its position. If it sticks, apply a bit more pressure. Ensure all parts are still intact. This completes the removal process.
Credit: www.youtube.com
Installing The New Tie Rod End
Easily remove old tie rod ends using a puller. Secure it around the joint and apply steady pressure. This tool ensures a smooth and safe removal, preparing your vehicle for the new installation.
Align The New Tie Rod
Place the new tie rod in the correct spot. Make sure it aligns perfectly. This ensures smooth steering. Check if it’s level and even. Misalignment can cause issues. Always double-check its position. The car’s alignment should be correct.
Secure And Tighten
Use a wrench to tighten the bolts. Secure them properly so they don’t loosen. Tight bolts keep the tie rod steady. Make sure each bolt is firmly in place. Never leave any bolt loose. Loose bolts may cause steering problems. Recheck all bolts after tightening. This ensures they are secure.
Finalizing The Process
Reattach the Wheelsecurely to the car. Tighten the lug nuts evenly. This keeps the wheel balanced. Use a wrench to ensure they are tight. Check each nut twice. This prevents the wheel from coming loose.
Lower the Vehiclegently to the ground. Use a jack for this step. Do it slowly to avoid any accidents. Ensure the car is stable before removing the jack. Safety is important here. Keep your hands clear of the wheel area.
Test Drive for Alignmenton a safe road. Drive slowly at first. Listen for any strange noises. If the car pulls to one side, alignment may be off. A proper test drive confirms the fix. Pay attention to how the steering feels. It should be smooth and steady.

Credit: www.amazon.com
Tips And Precautions
Always read the tool’s manual first. It shows you how to use it. Never force the tool. You might break it. Check the size of the puller. It should match the tie rod end. Wear gloves to protect your hands. Safety glasses are a must. Keep your tools clean and ready. This helps them last longer. Make sure the car is stable. A wobbly car can be dangerous. Practice makes perfect. Use the tool a few times to get better.
Keep the puller in a dry place. Moisture can cause rust. Oil the moving parts. This keeps them working smoothly. Inspect the tool for any damage before use. Damaged tools can cause accidents. Tighten all bolts and screws. Loose parts can make the tool unsafe. Store the puller in its case. This prevents dust and scratches. Check the manual for any special care tips.
Conclusion
Using a tie rod end puller makes car maintenance easier. This tool simplifies removing tie rod ends. Following the steps ensures safety and efficiency. Always check the manual for specifics. Practice caution while handling the puller. Regular maintenance keeps your vehicle running smoothly.
Proper tools save time and effort. Remember, patience leads to better results. Don’t rush the process. With the right tools, tasks become manageable. Keep your workspace organized for ease. A tidy area reduces stress. Stay informed and prepared for any task.
Enjoy a smoother experience with the right equipment.