If you’ve ever found yourself struggling with changing your car’s brake pads, you’re not alone. Many car owners face this challenge, often leading to frustration and costly trips to the mechanic.
But what if there was a tool that could make this task easier and quicker for you? Enter the brake pad spreader—a simple yet powerful tool designed to make your brake maintenance experience smoother and more efficient. Imagine the satisfaction of confidently handling your car’s brake system, saving time, and cutting down on expenses.
In this guide, we’ll walk you through the step-by-step process of using a brake pad spreader. By the end of this article, you’ll have the knowledge and confidence to tackle brake pad changes like a pro. Stick with us, and unlock the secrets to mastering your car maintenance tasks, ensuring your vehicle stays safe and reliable on the road.
What Is A Brake Pad Spreader?
A brake pad spreader is a tool. It helps change brake pads easily. The spreader opens brake calipers. This creates space for new pads. It is simple and handy. Many mechanics use it for a quick brake fix.
Using a spreader is safe. It prevents damage to brake parts. The tool is easy to use. It requires little strength. Even beginners can use it.
Always check the spreader size. It must fit the brake calipers. Different cars may need different spreaders. Getting the right tool is important.
Brake pad spreaders save time. They make brake changes smooth. It is a must-have for car repairs.
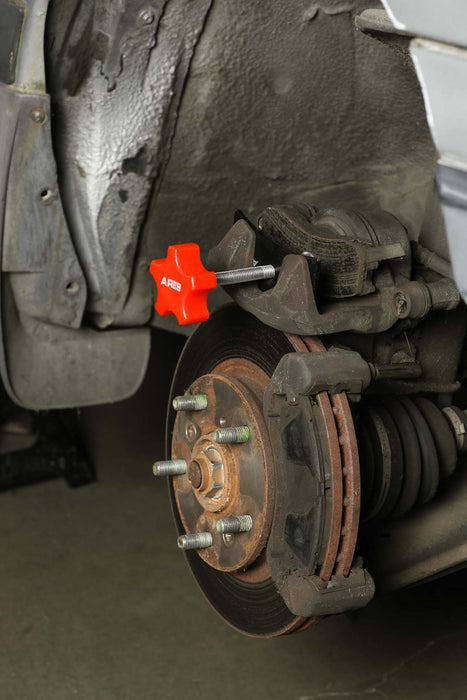
Credit: www.arestool.com
Types Of Brake Pad Spreaders
Manual spreaders need physical force to work. They are easy to use. You turn a handle to spread the pads. Affordable and simple. Good for home mechanics. No power tools needed.
Fits most brake systems. Great for small jobs. Lightweight and portable. Perfect for quick fixes. Convenient for those who like to do it themselves.
Hydraulic spreaders use fluid power. Strong and efficient. Best for big jobs. Professional mechanics use them. Fast and easy. Saves time and energy.
Precise control with hydraulic force. Handles tough tasks easily. Reliable for heavy-duty work. A bit expensive. Worth the investment for professionals.
Tools And Materials Required
A brake pad spreader is the main tool you need. It helps push the brake pistons back. A jack lifts the car safely. You also need a lug wrench to remove the wheel nuts. A socket set is useful for different bolt sizes. A c-clamp can be an alternative to a spreader. Having a torque wrench ensures the bolts are tight enough. Brake cleaner helps keep things tidy.
Safety first! Always wear gloves to protect your hands. Goggles keep your eyes safe from dust. Closed-toe shoes protect your feet. A dust mask can keep you from breathing in brake dust. Having a first aid kit nearby is always smart. Ear protection might be needed if using noisy tools. Stay safe while working.
Preparing The Vehicle
First, make sure the car is on a flat surface. Use a jack to lift the car. Place the jack under the car’s frame. Lift the car slowly and carefully. Check that the car is stable. Use jack stands to hold the car up. Safety is important.
Start by loosening the lug nuts with a wrench. Do not remove them yet. Once loose, take the wheel off carefully. Keep the lug nuts safe in a container. Remember, wheels can be heavy. Ask for help if you need it. Now, the brake is ready to be checked.
Removing The Brake Caliper
Start by locating the caliper bolts. These bolts hold the caliper in place. Use a wrench to turn the bolts. Turn them in a counter-clockwise direction. Make sure you loosen the bolts but do not remove them yet. The caliper needs to stay attached for now. Keep all tools handy for the next steps.
Once the bolts are loose, support the caliper with a strong wire. This keeps the caliper from hanging by the brake line. Hanging can cause damage to the line. Use a sturdy piece of wire or a bungee cord. Attach it to a safe spot on the vehicle. Make sure it holds the caliper securely. Avoid putting stress on any brake parts.
Credit: www.greatnecksaw.com
Using The Brake Pad Spreader
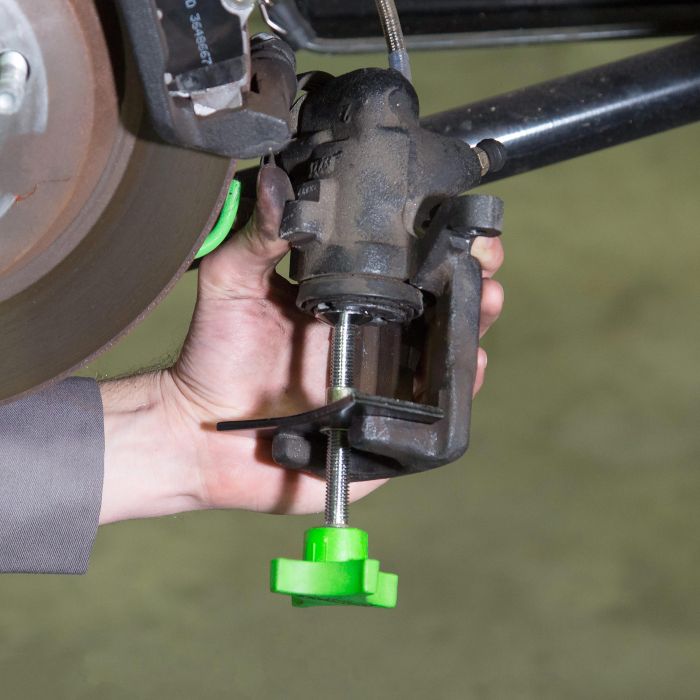
First, place the brake pad spreader between the brake pads. Ensure it fits well. It should sit snugly without wobbling. This will help in pushing the pistons back. Proper positioning is crucial for safety. Keep an eye on its alignment. Make sure it stays centered. This will prevent damage to the pads.
Once the spreader is in place, turn the handle. This will expand the brake pistons. Do it slowly and steadily. Fast movements can cause issues. Watch as the pistons move back. They should move evenly. If not, stop and check the alignment. Even expansion ensures good braking. Always be gentle. Force can break parts.
Reinstalling The Brake Components
Hold the new brake pads in your hand. Place them in the caliper bracket. Make sure they fit well. The pads should be snug but not tight. Double-check their position. Ensure the pad surface faces the rotor. This helps in stopping the car.
Align the caliper over the brake pads. Use your hands to guide it. Press down gently until it sits right. Insert the caliper bolts into their holes. Tighten them with a wrench. Ensure they are secure. This prevents the caliper from moving.
Testing The Brake System
Press the brake pedal gently. Feel the pressure. It should be firm. Soft or spongy pedals mean trouble. There could be air in the brake lines. Check for leaks around the brake system. Look under the car. See if there’s any fluid. Fluid loss can make brakes weak. Always ensure brake fluid is enough.
Start the car slowly. Drive at low speed. Apply the brakes gently. Listen for any strange noises. Feel the car as it stops. It should stop smoothly. If it pulls to one side, check alignment. Test the brakes in a safe area. Ensure they work well at all speeds.
Common Mistakes To Avoid
It’s important to keep the caliper securewhile working. If it moves, it can damage parts. Always use a wire or a hook to hold it. This stops it from hanging freely. A dangling caliper can pull and stretch the brake hose. That can lead to leaks or failures.
After using a brake pad spreader, air might get trapped. This can make the brakes feel soft. It’s crucial to bleed the brake system. This removes any trapped air. Use a brake bleeder kit or have someone help. Always check the fluid level after bleeding. Make sure it’s at the right level.
Maintenance Tips
Check your brake pads often. Ensure they are clean and free from dirt. Dirt can make brakes work less well. Inspect the thickness of the pads. Thin pads might need changing soon. Listen for noises. Squeaking sounds can mean a problem. Feel for vibrations. They can show uneven wear. Always make sure everything is tight. Loose parts can be dangerous.
Look for grooves or cracks. These can be signs of wear. Watch for dust on the wheels. Too much dust can mean worn pads. Notice longer stopping times. This can mean the pads are thin. Feel the pedal. If it’s soft, check the brakes. A hard pedal can also show issues. Check for rust. Rust can damage brake parts.

Credit: www.youtube.com
Conclusion
Mastering the use of a brake pad spreader is essential. It keeps your vehicle safe and your brake pads in top condition. Practice these steps to become confident in using this tool. Remember, safety first. Protect your hands and eyes while working.
Always check your vehicle manual for specific instructions. A brake pad spreader can make brake maintenance easier. Save time and keep your car running smoothly. With patience, anyone can learn this skill. Regular brake checks ensure longer lifespan for your pads.
Enjoy safer drives with well-maintained brakes.