Imagine being able to perform routine maintenance on your car without the hassle of visiting a mechanic. With car ramps, this dream can become your reality.
Whether you’re an experienced DIY enthusiast or a curious beginner, learning how to use car ramps at home can save you time, money, and give you peace of mind knowing you can handle basic car upkeep yourself. Picture this: you, confidently sliding underneath your vehicle, armed with the knowledge to tackle oil changes or inspect what’s under the hood with ease.
This article will guide you through the essentials of using car ramps safely and efficiently, ensuring you can elevate your car care skills to new heights. Ready to transform your garage into your personal workshop? Let’s dive in and discover how car ramps can revolutionize your automotive maintenance experience.
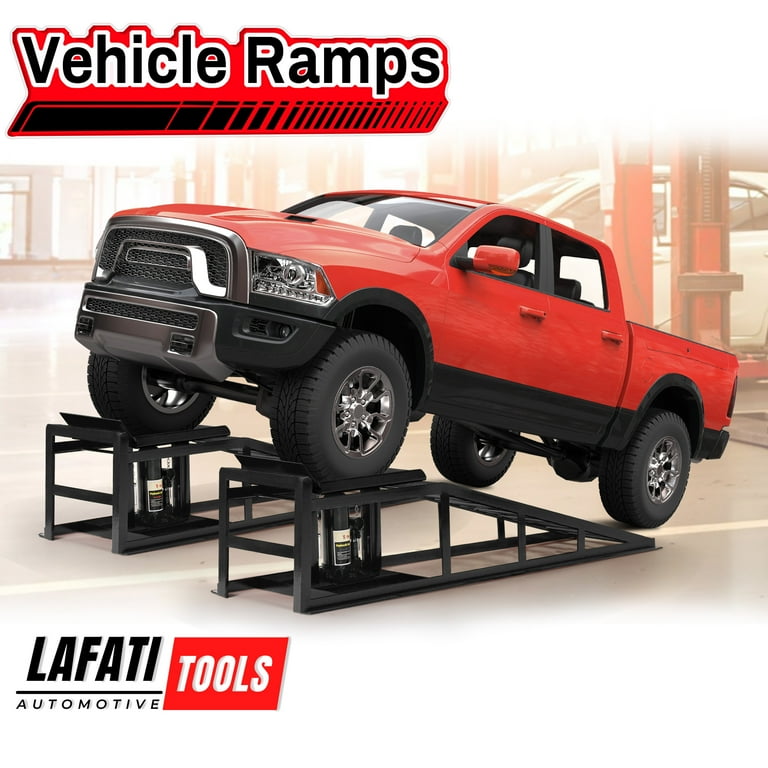
Choosing The Right Car Ramps
Choosing the right car ramps is crucial for safety and efficiency. With various options available, selecting the best ramps can feel overwhelming. Focus on key aspects to ensure you pick the perfect ramps for your needs.
Material And Durability
Consider the ramp’s material carefully. Steel ramps are tough and withstand heavy usage. Aluminum ramps are lighter but still strong. Plastic ramps are affordable and easy to move. Check if the material can endure regular use without damage.
Weight Capacity
Weight capacity is vital for safe ramp usage. Know your vehicle’s weight and choose ramps that support it. Overloading ramps can cause accidents and damage. Ensure the ramps have a capacity higher than your vehicle’s weight.
Ramp Angle And Height
Ramp angle affects ease of use. Steeper angles require more force to drive up. Gradual angles offer smoother access. Consider the ramp height for clearance needs. Low ramps suit cars with less ground clearance.
Preparing Your Work Area
Before using car ramps, make sure your work area is ready. A well-prepared area ensures safety and efficiency. It minimizes the risk of accidents while working on your car. Follow these steps to prepare your work space properly.
Ensuring A Flat Surface
Choose a flat surface to place your ramps. Uneven surfaces can make the car slip. Check the ground for bumps and holes. A smooth area provides better stability. Driveways or garage floors are usually flat. Avoid working on grassy or loose surfaces.
Clearing The Area
Remove obstacles that might get in your way. Clear away any tools or debris. This helps prevent tripping or slipping. A clean area allows easy movement around the car. Ensure no pets or children are nearby while working.
Gathering Necessary Tools
Collect all tools you need before starting. Keep them within arm’s reach. This saves time and keeps you focused. Common tools include wrenches, a jack, and wheel chocks. A flashlight can help in dark areas. Have a rag handy for any spills.
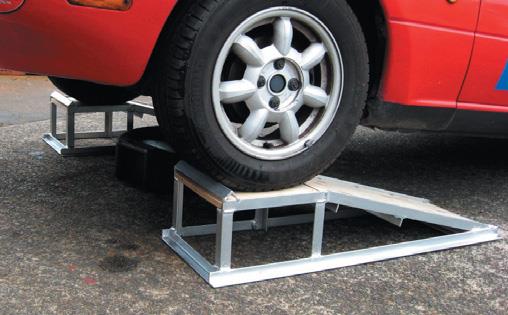
Positioning The Ramps
Positioning car ramps properly ensures a safe and effective vehicle lift at home. Align ramps with tires, keeping them parallel. Ensure they rest on a stable, flat surface to avoid slipping.
When you’re ready to do some work on your car at home, positioning the ramps correctly is crucial. It’s not just about getting the car up; it’s about doing it safely and securely. Proper positioning of ramps can make all the difference between a smooth operation and a potential disaster. Let’s break down the essential steps for positioning your car ramps safely and effectively.Aligning With Wheels
Aligning the ramps with your car’s wheels is the first step. Ensure the ramps are directly in front of the wheels you intend to elevate. A slight misalignment can cause the car to tilt or even slide off, which is dangerous. Imagine the headache of dealing with a slipped ramp because you didn’t take an extra moment to check alignment. Take your time and ask yourself: are both ramps pointing straight? It might help to have a friend guide you from the side.Checking Stability
Once aligned, check the stability of the ramps. Press down on the ramps to see if there’s any wobble or give. If they move, adjust them until they’re firm on the ground. It’s like setting a solid foundation for a house; everything depends on it. You wouldn’t want to start lifting the car only to find the ramp shifts under pressure.Using Safety Chocks
Safety chocks are your best friends when using car ramps. Place them behind the wheels that remain on the ground. This prevents the car from rolling backward, especially if you’re working on a slight incline. Think of chocks as your safety net—they catch any unexpected movement. You’d be surprised how much peace of mind a small wedge can provide. Have you ever considered what might happen without them? A little precaution goes a long way in ensuring your safety. By carefully aligning, checking, and using chocks, you can confidently elevate your car at home, making your DIY projects both safe and successful.Driving Onto The Ramps
Learn the safe use of car ramps at home. Position ramps on a flat surface and ensure alignment with your vehicle’s wheels. Slowly drive onto them, checking stability.
Driving onto the ramps at home is a crucial skill for any DIY car enthusiast. You want to ensure your vehicle is positioned correctly and safely on the ramps to avoid mishaps. Here’s how you can do it efficiently and with confidence.Slow And Steady Approach
Speeding up the ramps might seem tempting, but a slow and steady approach is safer. Driving too fast can cause your vehicle to overshoot the ramps, which can lead to accidents or damage. When I first used car ramps, I underestimated the importance of a controlled speed. Going slow helped me feel the vehicle’s response, giving me better control. How do you maintain a steady pace? Consider using the idle power of your engine. Letting your car’s natural momentum guide you up the ramps can be more effective than pressing the accelerator too hard.Monitoring Alignment
Alignment is key when driving onto ramps. Misalignment can cause your vehicle to slip off, which is both dangerous and frustrating. Regularly check that your wheels are aligned with the ramps. I found it helpful to look out my window and check the tire’s position relative to the ramp. Make slight steering adjustments if needed. This ensures a smooth ascent and keeps your vehicle secure. What signs indicate misalignment? If you feel the vehicle veering off or the ramp moving, stop immediately and realign. It’s better to spend an extra minute adjusting than dealing with potential damage.Using A Spotter
Having a spotter can be incredibly beneficial. A second pair of eyes can guide you and ensure your alignment is perfect. Ask a friend or family member to assist you. A spotter can give you real-time feedback, making the process easier and safer. When I first used a spotter, their guidance made the experience smoother and less stressful. What if you’re alone? You can set up mirrors or cameras to help monitor your progress. But whenever possible, using a spotter adds a layer of safety and reassurance. Driving onto ramps doesn’t have to be daunting. By maintaining a slow and steady approach, monitoring alignment, and using a spotter, you can ensure a safe and successful lift every time. Have you tried using ramps at home? What strategies worked best for you?Securing The Vehicle
Safely using car ramps at home is essential. Before driving up, securing the vehicle is crucial. This ensures safety while working underneath. Follow these simple steps to keep your car steady.
Engaging Parking Brake
First, engage the parking brake. This keeps the car from rolling. Always apply it before driving onto ramps. It acts as a primary safety measure. Double-check the brake is fully engaged.
Using Wheel Chocks
Wheel chocks add an extra layer of security. Place them behind the rear wheels. This prevents backward movement. Choose chocks that fit the wheel size. Always use them on a flat surface.
Double-checking Stability
After positioning the car, check stability. Push the vehicle gently to test. It should not wobble or move. Ensure ramps are aligned properly. Adjust if there’s any imbalance.
Credit: the-shed.nz
Performing Maintenance Safely
Using car ramps at home can be very convenient. It’s important to ensure safety when performing maintenance. Proper safety measures protect you from injuries. Always stay cautious and follow guidelines.
Wearing Protective Gear
Wearing protective gear is crucial during car maintenance. Gloves protect your hands from sharp objects. Safety goggles shield your eyes from debris. Wearing a helmet can prevent head injuries. Steel-toed boots protect your feet from heavy tools. Always wear appropriate clothing to avoid accidents.
Avoiding Under-car Hazards
Inspect the area beneath the car before starting any work. Ensure there are no loose objects that might fall. Check for fluid leaks that could cause slipping. Avoid working under a car that is not securely positioned. Use wheel chocks to prevent car movement. Always stay aware of your surroundings.
Keeping Tools Organized
Organizing tools helps in efficient maintenance. Use a toolbox to keep tools in one place. Label each section for easy access. Place frequently used tools at the top. Keep cleaning supplies handy for quick cleanups. Proper organization saves time and reduces stress.
Removing The Car Safely
Removing your car safely from ramps is a crucial step that requires your full attention and patience. It’s not just about getting your vehicle off the elevated surface but doing so without risking damage to either your car or yourself. Having used car ramps at home for years, I’ve learned the importance of each step in the process. You don’t want to rush it and risk an accident. Let’s dive into the essentials of safely removing your car from ramps.
Backing Down Slowly
Imagine you’re backing out of a tight parking spot. It’s all about control and caution. Engage your car in reverse and ease your foot off the brake slowly. Feeling the car roll back gently is key. You’ll want to keep your steering wheel straight to prevent any sudden shifts. The slower you go, the more control you maintain. Have you ever backed down too quickly and felt that uneasy jolt? That’s what you’re aiming to avoid.
Removing Wheel Chocks
After you’re off the ramps, don’t forget about those trusty wheel chocks. They’re your unsung heroes, keeping your car from rolling unexpectedly. Once the car is stable, remove them carefully. A friend of mine once left them in place, only to realize it when he heard an odd noise while driving. Avoid such surprises by ensuring they’re safely stored away after use. Remember, those little blocks are a small but mighty part of the process.
Inspecting For Damage
Once your car is off the ramps, take a moment to inspect for any damage. Look at the undercarriage, tires, and any exposed parts. Did you know a simple check can prevent future repair costs? It’s like checking your shoes for pebbles after a hike. You want to ensure everything is in order before hitting the road. Have you ever found a scratch that you didn’t expect? Early inspection can help you catch these issues before they become bigger problems.
Safely removing your car from ramps isn’t just about technique—it’s about understanding the process and staying alert. What’s the worst that can happen if you skip a step? By following these guidelines, you ensure a smooth and safe transition from ramps back to road-ready.
Storing The Ramps
Car ramps simplify home vehicle maintenance. Safely elevate your car for easy access underneath. Ensure secure placement and proper storage to extend their lifespan.
Storing car ramps properly is essential to prolonging their life and ensuring they remain safe for use. After all, you’ve invested in these tools to make your car maintenance easier and more efficient. But if you store them carelessly, they can quickly become damaged, rendering them useless. So, where should you keep them, and how can you prevent them from rusting or wearing out? Let’s dive into some practical tips for storing your car ramps at home.Choosing A Dry Location
You wouldn’t keep your clothes in a damp wardrobe, would you? The same goes for your car ramps. Choose a dry spot in your garage or shed to store them. Moisture can be a silent enemy, slowly eating away at the metal parts. Think about the last time you left a tool outside by mistake. It probably wasn’t in the best shape when you found it. Avoid repeating that mistake with your ramps. A dry location is your first line of defense against potential damage.Preventing Rust And Wear
Rust can sneak up on you, turning once reliable ramps into safety hazards. Use a rust-preventive spray to coat the metal parts of your ramps. This simple step can save you from future headaches. Consider wrapping the ramps in a tarp or cover when not in use. This added layer of protection keeps dust and moisture at bay. Have you ever noticed how much longer things last when you take just a little extra care?Regular Inspection
You wouldn’t drive your car without checking its oil from time to time. Similarly, inspect your ramps regularly for signs of wear or damage. Catching issues early can prevent accidents later on. Look for cracks, bends, or any unusual wear. It takes only a few minutes but can save you from costly repairs or replacements. When was the last time you gave your ramps a good once-over? By following these practical tips, you ensure that your car ramps remain a reliable tool in your DIY garage toolkit. After all, a little maintenance goes a long way in preserving both your tools and your peace of mind.Common Mistakes To Avoid
Using car ramps at home can be a convenient way to conduct maintenance or repairs, but it’s crucial to avoid common mistakes that can lead to accidents or damage. Understanding these pitfalls not only ensures your safety but also prolongs the life of your ramps and your vehicle. Let’s dive into some common errors and how you can steer clear of them.
Ignoring Weight Limits
Every car ramp comes with a weight limit, which is often overlooked. Exceeding this limit can lead to ramp failure, putting both you and your vehicle at risk. Always check the specifications of your ramps before use. Consider the combined weight of your car, any additional equipment, and ensure it falls within the ramp’s capacity. It’s a simple step that can save you from costly repairs or injuries.
Using On Uneven Surfaces
Stability is key when using ramps. Placing ramps on uneven surfaces is a recipe for disaster, as it can cause shifts or collapses. Ensure the ground is level and firm. Concrete driveways are ideal, but if you have to use them on grass, use a board underneath to provide extra support. You wouldn’t want your car rolling off unexpectedly, right?
Skipping Safety Checks
Before driving your car onto the ramps, perform a quick safety check. Inspect for cracks, bends, or any signs of wear and tear. Are the ramps positioned securely and aligned properly? Taking these precautions can prevent accidents. Imagine getting halfway up and realizing one ramp is misaligned—it’s a scenario best avoided with a simple check.
Engage with these insights and ask yourself: are your ramps ready for the task? Remember, small oversights can lead to big consequences. Your safety is paramount, and avoiding these common mistakes will ensure smooth and secure car maintenance at home.

Credit: www.amazon.com
Credit: www.walmart.com
Conclusion
Car ramps simplify vehicle maintenance at home. They elevate your car safely, providing easy access to the underside. Always check ramp compatibility with your vehicle. Ensure ramps are positioned on a flat, stable surface. Use wheel chocks for added safety.
Routine checks and careful use prolong ramp life. Practice caution during setup and takedown. Proper ramp usage boosts your DIY confidence. A safe and convenient tool for car enthusiasts. With practice, maintenance tasks become easier. Embrace the convenience of car ramps.
Enjoy hassle-free car care right in your driveway. Keep your vehicle running smoothly, saving time and effort.