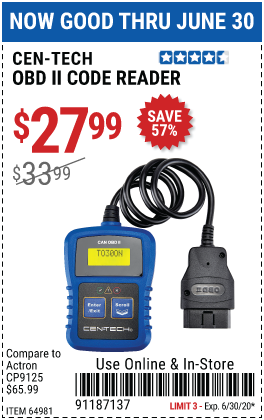
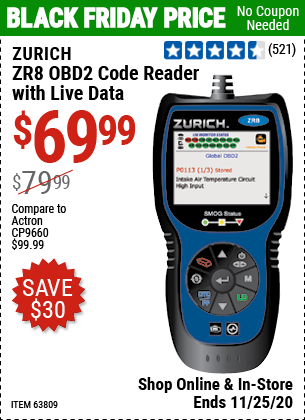
Do you ever wish you could solve your car troubles without a trip to the mechanic? With the Harbor Freight OBD2 scanner, you can take charge of your vehicle’s health right from your driveway.
Imagine knowing exactly what’s wrong with your car before anyone else does. This nifty device is your gateway to understanding your car’s diagnostics, saving you time and money. Don’t let those confusing engine lights stress you out anymore. By the end of this article, you’ll know exactly how to use the Harbor Freight OBD2 scanner like a pro.
Get ready to unlock the secrets under your car’s hood and gain peace of mind with every drive.
Choosing The Right Obd2 Scanner
Choosing the right OBD2 scanner from Harbor Freight can be crucial. It helps diagnose and fix vehicle issues efficiently. With various models available, making an informed decision is essential. Consider specific features, compatibility, and ease of use. These factors ensure you get the best scanner for your needs.
Features To Look For
Look for scanners with clear, user-friendly displays. They should provide real-time data. Check for scanners offering wide diagnostic capabilities. Features like code reading, clearing, and live data streaming are beneficial. Some models even offer advanced functions. This includes ABS and SRS diagnostics. A portable design is also helpful. Portability allows easy storage and use.
Compatibility With Your Vehicle
Ensure the scanner is compatible with your vehicle’s make and model. Not all scanners work with every vehicle. Most OBD2 scanners cover vehicles made after 1996. Double-check the specific requirements for your car. Some scanners support a broader range of vehicles. This is especially true for newer models. Confirm the scanner’s compatibility before purchasing. It saves time and avoids frustration later.

Credit: www.hotrod.com
Setting Up Your Harbor Freight Obd2 Scanner
Get started with your Harbor Freight OBD2 scanner by connecting it to your vehicle’s diagnostic port. Turn on the ignition to power the scanner and follow the on-screen instructions. You’ll be able to read error codes and diagnose issues quickly.
Setting up your Harbor Freight OBD2 scanner is a straightforward process that can empower you to diagnose vehicle issues with ease. Whether you’re a seasoned car enthusiast or a novice just starting to explore the world of automotive diagnostics, getting your scanner ready for action is the first step. Let’s dive into the setup process, ensuring that your journey into car diagnostics is smooth and rewarding.Unboxing And Initial Setup
When you first open your Harbor Freight OBD2 scanner, you’ll find the device itself, a user manual, and possibly a few cables. The excitement of holding a new gadget is palpable. Before you dive in, take a moment to read the user manual. It’s your guide to understanding the basic functions of the scanner. Set aside a clean, spacious area to unbox your device. This helps prevent losing any small parts. Once everything is laid out, inspect the scanner for any damage during transit. If everything looks good, you’re ready to power it on. Most scanners use batteries, so ensure they’re properly installed.Connecting To Your Vehicle
With your scanner ready, it’s time to connect it to your vehicle. Locate the OBD2 port, typically found under the dashboard on the driver’s side. It might require some bending and searching, but it’s usually within reach. Connect the scanner’s cable to this port. You’ll hear a click, indicating a secure connection. Once connected, turn on your car’s ignition but don’t start the engine. The scanner will power up, displaying a welcome screen. Navigate through the menu options using the buttons on the scanner. You’ll find sections for different diagnostic tests. Choose the test relevant to your needs. As the scanner communicates with your car’s computer, information will appear on the screen. This data can help you understand what’s happening under the hood. Have you ever felt the thrill of solving a mystery? That’s exactly what you’re doing as you interpret the scanner’s readings. You’re taking control, one code at a time. Are you ready to uncover the secrets your car holds?Navigating The Scanner Interface
Using a Harbor Freight OBD2 scanner requires understanding its interface. The scanner interface is designed to be user-friendly. It provides easy access to various diagnostic features. This guide will help you navigate the scanner interface effectively. Let’s dive into the essential components and how to use them.
Understanding The Menu Options
The Harbor Freight OBD2 scanner comes with a clear menu layout. Each menu option is labeled for easy identification. These options include diagnostics, settings, and data display. The diagnostic menu lets you check vehicle health. Settings allow customization based on your needs. Data display provides real-time information. Understanding these options helps in efficient scanner use.
Accessing Basic Functions
Accessing basic functions is straightforward. First, power on the scanner. Connect it to the vehicle’s diagnostic port. Select the diagnostics menu from the interface. You can then view trouble codes. These codes help identify vehicle issues. The scanner also lets you clear codes once issues are resolved. Accessing these basic functions saves time and effort.
Credit: go.harborfreight.com
Performing Diagnostic Tests
Harbor Freight’s Obd2 Scanner simplifies car diagnostics. Plug it into the vehicle’s port to read error codes. Follow the screen instructions to understand and fix issues quickly.
Performing diagnostic tests with a Harbor Freight OBD2 scanner can be straightforward. This tool helps identify problems in your car’s system. It reads error codes and gives you live data. You can quickly find issues affecting your vehicle’s performance. Using this scanner saves time and avoids unnecessary trips to the mechanic. Below, learn how to read and clear error codes and monitor live data.Reading And Clearing Error Codes
Error codes show specific problems in your car’s system. Connect the Harbor Freight OBD2 scanner to your vehicle’s port. Turn on the ignition without starting the engine. The scanner begins to read codes automatically. A list of codes appears on the screen. Each code corresponds to a specific issue. Use the scanner’s manual to understand what each code means. Once you identify the problem, you can clear the codes. This step helps reset the system after repairs. The scanner has a simple option to clear codes. Follow the on-screen instructions to complete this process.Monitoring Live Data
Live data gives real-time information about your car’s performance. The Harbor Freight OBD2 scanner displays various parameters. These include engine speed, temperature, and fuel consumption. Connect the scanner as before, and select the live data option. Watch how the values change as your car runs. This data helps you see how different parts are working. If a value seems off, it can indicate a potential problem. Monitoring live data aids in maintaining your vehicle’s health. Regular checks ensure your car runs smoothly and efficiently.Advanced Features And Functions
Harbor Freight OBD2 scanners aren’t just tools to read error codes; they offer a wealth of advanced features that can truly empower your car maintenance routine. With the right know-how, you can tap into features like freeze frame data and emission tests, which can save you time and money. Imagine knowing exactly what’s wrong with your car, before you even step into the mechanic’s shop. Wouldn’t that be incredible?
Using Freeze Frame Data
One standout feature of the Harbor Freight OBD2 scanner is its ability to access freeze frame data. This function captures a snapshot of your vehicle’s condition at the moment a trouble code is triggered. Picture it as a detective’s tool that lets you see engine temperature, speed, and other crucial data points at the time of the issue.
For example, if your car suddenly stalls, freeze frame data can help you pinpoint whether it was due to a temperature spike or fuel pressure drop. This can drastically cut down your troubleshooting time. Next time your car acts up, why not try checking the freeze frame data first?
Conducting Emission Tests
Another powerful function of the Harbor Freight OBD2 scanner is its ability to conduct emission tests. With this feature, you can assess whether your vehicle meets environmental standards without visiting a testing center. It’s almost like having a mini emissions lab right in your garage!
Are you worried about passing your upcoming emissions test? Use your scanner to check if your vehicle is likely to pass. If not, it provides the information you need to make necessary adjustments. It’s practical, straightforward, and saves you from the stress of last-minute surprises.
So, why not explore these advanced features today? They could be the key to transforming how you approach car maintenance and repair. What would you do with this newfound knowledge?
Tips For Accurate Diagnostics
Discover how to use the Harbor Freight Obd2 Scanner effectively for accurate diagnostics. Start by connecting the scanner to your vehicle’s OBD2 port. Follow the prompts on the device’s screen to identify and read error codes. This simple process helps pinpoint issues, ensuring timely and precise vehicle maintenance.
Using a Harbor Freight OBD2 scanner can be a game-changer for anyone keen on diagnosing their vehicle accurately. With the right approach, you can pinpoint issues and save time and money by addressing them promptly. But how can you ensure your diagnostics are spot on? Let’s explore some useful tips that can lead you toward precise results.Common Mistakes To Avoid
Avoid rushing through the setup process. Make sure your vehicle is off and the ignition is turned to the accessory position before connecting the scanner. This prevents errors and ensures reliable data. Another common pitfall is misinterpreting codes. Not all codes indicate a malfunction; some are mere alerts. Always cross-reference codes with the scanner’s manual or online resources. Don’t overlook the importance of updating your scanner’s software regularly. Updated software can offer more accurate diagnostics and cover newer vehicle models.Interpreting Results Correctly
When you receive a diagnostic code, it’s crucial to understand its meaning. A code might indicate a problem with a specific component, but it doesn’t always mean that part needs replacing. Analyze the code contextually and consider other symptoms your car might be exhibiting. Use the scanner’s database or online forums to gather more insights about the code. Have you ever replaced a sensor only to find the real issue was a loose wire? Ask yourself if there could be underlying issues linked to the current code. Your scanner can provide a snapshot, but it’s your detective work that solves the mystery.Practical Steps For Accurate Diagnosis
Start by ensuring all connections are secure. A loose connection can lead to misdiagnosis, which can be frustrating. If the scanner isn’t reading, double-check the OBD2 port and cables. Regularly clean your scanner’s connectors. Dust and debris can impede the signal, leading to inaccuracies. Use the scanner in conjunction with physical inspections. While the scanner provides digital data, a visual check can confirm or rule out physical damage. Are you ready to trust your scanner and your instincts to solve your car’s mysteries? With these tips, you can confidently embark on your diagnostic journey.Troubleshooting Common Issues
Using a Harbor Freight OBD2 scanner can simplify car diagnostics. Yet, users sometimes face common issues that can be easily resolved. Understanding these issues can enhance your scanning experience. This guide helps you troubleshoot common problems.
Connection Problems
Connection problems are common with OBD2 scanners. Ensure the scanner is firmly connected to the car’s OBD port. Check if the car’s ignition is on. A loose connection can prevent data transfer. Inspect the OBD port for damage or dirt. Clean the port if needed. If the scanner still doesn’t connect, try restarting the device.
Error Code Misinterpretations
Sometimes, error codes can confuse users. Always refer to the scanner’s manual for code meanings. Avoid making assumptions about error codes. Incorrect interpretations can lead to unnecessary repairs. Consider researching the error code online. Many forums discuss specific codes and their meanings. If unsure, consult a professional mechanic.
Credit: go.harborfreight.com
Maintaining Your Obd2 Scanner
Proper maintenance ensures your Harbor Freight OBD2 scanner works efficiently. Regular care prevents malfunctions and extends its lifespan. This section offers tips on keeping your scanner in top shape.
Regular Software Updates
Keeping your scanner’s software updated is crucial. Updates fix bugs and improve functionality. Check for updates monthly to ensure optimal performance. Follow the manufacturer’s instructions to install updates safely.
Proper Storage And Handling
Store your OBD2 scanner in a cool, dry place. Avoid exposure to extreme temperatures or moisture. Handle the device gently to prevent damage. Use the protective case if provided to keep it safe.
Clean the scanner with a soft cloth regularly. This removes dust and keeps it looking new. Avoid using harsh chemicals or water while cleaning. Proper storage and handling ensure your scanner lasts longer.
Conclusion
Using the Harbor Freight OBD2 scanner can save you time. It’s easy, even for beginners. This tool helps you understand your car’s issues quickly. You won’t need to visit a mechanic for simple problems. Follow the steps in the guide to get started.
Keep your scanner handy for regular checks. It’s a smart way to maintain your car. Stay informed about your vehicle’s health. With practice, you’ll feel more confident using the scanner. Happy scanning, and enjoy a smoother driving experience!