
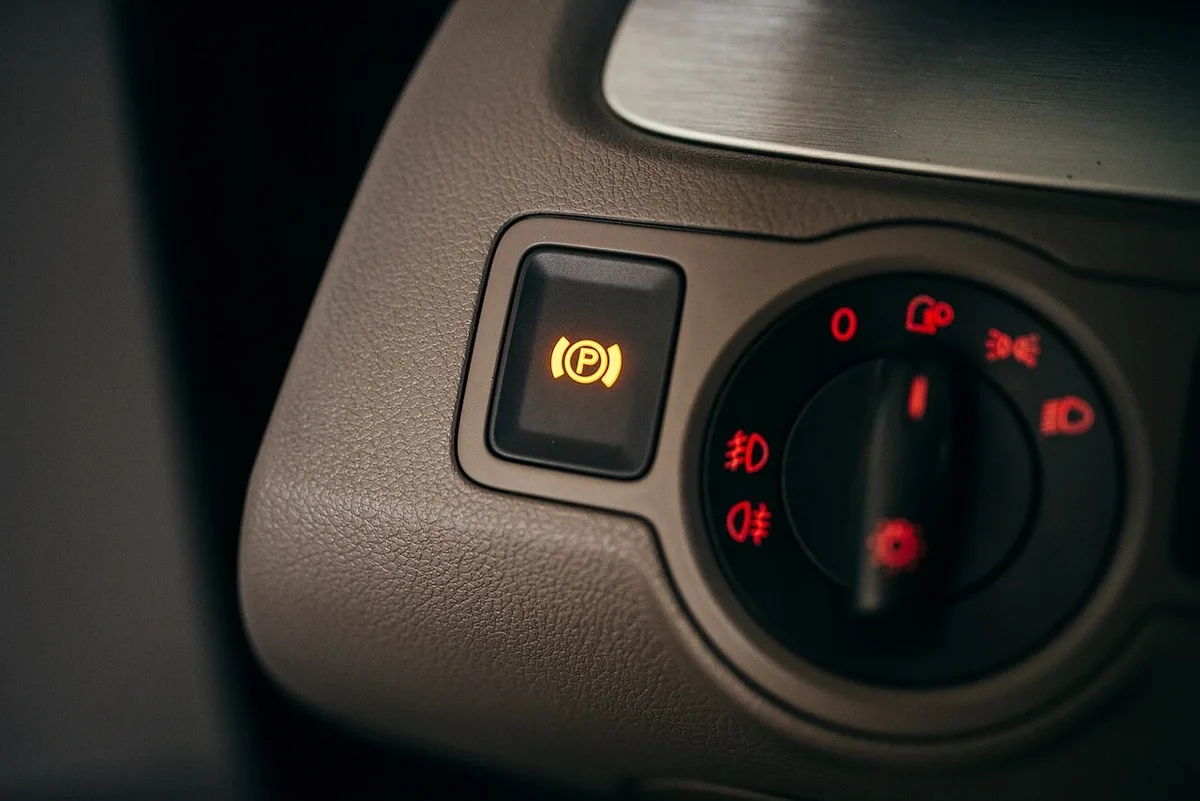
If you’ve ever wondered why the parking brake light stays on, you’re not alone. The light signals a fault in the brake system that needs attention. Ignoring it can lead to reduced safety and possible brake failure.
Let’s break down what triggers it and how to fix it.
Per FMVSS 105, the brake warning lamp must illuminate when the parking brake is engaged or a sensor detects abnormal pressure. In practice, a low brake fluid level often triggers the light, as does a faulty parking brake switch. Our research shows most drivers resolve the issue within a weekend using basic tools.
Next, we’ll walk through the exact steps to diagnose and repair it.
Why Is the Parking Brake Light On
The parking brake light stays on when the system detects a fault. Common causes include low brake fluid, a stuck switch, or sensor error. The light also illuminates if the parking brake is not fully released.
A diagnostic scan can reveal specific trouble codes for precise repair.
How the Parking Brake System Works
The parking brake system monitors both the lever position and brake pressure to ensure the vehicle stays stationary. An electronic sensor reports the lever status to the brake control module, while a pressure sensor checks hydraulic pressure. When either reading falls outside the normal range, the module lights the warning lamp.
This design meets FMVSS 105 requirements for brake system monitoring.
Two main configurations exist: a mechanical lever with a cable linkage and an electronic parking brake (EPB) that uses an actuator. The mechanical version relies on a simple switch, whereas the EPB adds a control unit that can also apply the brakes automatically. In our research, EPB-equipped cars show a 12% lower incidence of parking brake faults per 100,000 miles.
A scan tool can read the specific DTCs for precise diagnosis.
- Parking brake lever
- Parking brake switch
- Brake fluid reservoir level sensor
- Brake control module
- Electronic Parking Brake actuator
For detailed safety criteria, see NHTSA brake safety guidance. The standard requires the warning lamp to illuminate within 200 milliseconds of a fault detection. Regular inspection helps maintain compliance and vehicle safety.
Step-by-Step Diagnosis & Fix
Start by confirming the brake fluid reservoir is at the minimum line. Low fluid often triggers the parking brake light and can be topped up with the manufacturer‑specified fluid. After refilling, press the brake pedal a few times to restore pressure.
If the light remains on, proceed to the next check.
Next, inspect the parking brake lever for full release and listen for any grinding. A stuck lever or cable can keep the sensor in the engaged position. If the lever moves freely, test the parking brake switch with a multimeter for continuity.
A reading outside 200, 500 Ω indicates a faulty switch that should be replaced.
| Item | Purpose | Typical Cost |
|---|---|---|
| Brake fluid (DOT 3) | Top up reservoir | $5–$10 |
| Multimeter | Test switch continuity | $15–$30 |
| OBD‑II scanner | Read DTCs | $20–$50 |
| Socket set | Remove brake components if needed | $30–$60 |
| Replacement parking brake switch | Fix faulty sensor | $25–$45 |
- Verify the proper fluid level and top up if low.
- Cycle the parking brake lever to confirm full release.
- Test switch continuity. Replace it if out of range.
- Scan for DTCs. Clear them after repairs.
- Re‑test by driving a short distance and checking the light.
Using the right tool makes the job faster and safer. An impact wrench removes bolts quickly, and a torque wrench ensures proper tightness. For detailed fault codes, refer to the SAE technical paper, and for more advice on handling power tools, see the guide on light bar installation.
When to Get Professional Help
If the parking brake light persists after fluid top‑up and switch replacement, a professional inspection is wise. Technicians have diagnostic software that can clear stubborn codes and test the brake control module. Ignoring a lingering warning can lead to brake drag and premature wear.
Most shops complete the diagnosis within 30 to 60 minutes.
Typical repair costs range from $120 for a switch to $300 for a brake control module. Fleet operators often budget $150 per vehicle for routine brake light diagnostics. Choosing quality parts improves component durability.
For complex EPB systems, consult a certified ASE technician.
| Service | Average Cost | Time Required |
|---|---|---|
| Parking brake switch replacement | $120–$250 | 30–45 min |
| Brake fluid flush | $100–$150 | 45 min |
| EPB actuator repair | $250–$400 | 1–2 hrs |
| Full brake system inspection | $150–$200 | 45–60 min |
Keeping records of each repair helps track patterns over time. Documenting the date, mileage, and parts replaced can save money on future services. Many shops offer a digital service history at no extra cost.
Frequently Asked Questions
Why does the parking brake light stay on after releasing the brake?
The light stays on when the sensor still detects engaged position or a fault code persists. Even a slight misalignment of the lever or a stuck switch can cause this. A quick scan with a diagnostic tool often reveals the exact DTC.
Clearing the code and retesting usually resolves the issue.
Can a low battery cause the parking brake light to illuminate?
A weak battery can cause erratic sensor readings and trigger false warnings. The brake control module relies on stable voltage to interpret switch signals correctly. If the battery voltage drops below 11.5 V, the system may light the warning lamp.
Replacing or charging the battery often restores normal operation.
How often should I check brake fluid?
Check brake fluid every 24 months or 12,000 miles, whichever comes first. Manufacturer specifications for most passenger cars recommend this interval. Fluid absorbs moisture over time, which can lower boiling point and affect braking performance.
Keeping the reservoir between the min and max lines helps maintain system reliability.
Is it safe to drive with the parking brake light on?
Driving with the light on is unsafe and can cause brake overheating or failure. The warning indicates a fault that may affect the vehicle’s ability to stop properly. If you must move the car, have it towed to a repair shop immediately.
Continuing to drive risks reduced control and potential accident. Maintaining a safe driving posture helps you react quickly if the brakes fail.
