Welcome to the world of motorcycle maintenance, where the heartbeat of your Harley is regulated by its fuel injectors. Ensuring your Harley’s fuel injectors are clean and functioning optimally is crucial for a smooth and powerful ride.
In this guide, we’ll delve into the intricacies of how to remove and clean Harley fuel injectors, providing you with step-by-step instructions and valuable tips to keep your bike running at its best.
Whether you’re a seasoned rider or a DIY enthusiast looking to enhance your mechanical skills, join us on this journey to discover the ins and outs of maintaining your Harley Davidson’s fuel injection system.
Step by Step Guide about How to Remove And And Clean Harley Fuel Injectors?
Harley Davidson motorcycles are renowned for their power and performance, and a crucial component contributing to this is the fuel injector system. Over time, fuel injectors can become clogged or dirty, affecting the bike’s efficiency.
Here is the step-by-step process of removing and cleaning Harley fuel injectors, ensuring your ride continues to roar with optimal power.
Section 1: Understanding Harley Fuel Injectors
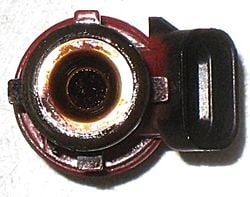
Begin by familiarizing yourself with the basics of Harley fuel injectors. These components are responsible for delivering a precise amount of fuel to the engine, ensuring efficient combustion. Over time, contaminants in the fuel can accumulate, leading to reduced performance and fuel efficiency.
Section 2: Signs that Your Fuel Injectors Need Cleaning
Before diving into the removal and cleaning process, it’s essential to recognize the signs of clogged or dirty fuel injectors. Common symptoms include reduced fuel efficiency, rough idling, and a noticeable decrease in overall performance. If you experience these issues, it’s time to inspect and clean your Harley’s fuel injectors.
Section 3: Tools and Materials Required
Gather the necessary tools and materials before starting the removal process. This typically includes a set of wrenches, a fuel injector cleaning kit, a fuel pressure gauge, and a suitable cleaning solution. Ensure you have a well-ventilated workspace and follow all safety precautions.
Section 4: Step-by-Step Guide to Removing Harley Fuel Injectors
-
Disconnect the Battery: Start by disconnecting the motorcycle’s battery to ensure safety during the procedure.
-
Relieve Fuel Pressure: Use a fuel pressure gauge to relieve the system’s pressure. This prevents fuel from spraying when you disconnect the fuel lines.
-
Remove the Fuel Tank: Detach the fuel tank to access the fuel injector rail. This step varies between Harley models, so consult your bike’s manual for specific instructions.
-
Disconnect Fuel Lines and Wiring: Carefully disconnect the fuel lines and wiring connected to the fuel injector rail.
-
Remove Fuel Injector Rail: Loosen the bolts securing the fuel injector rail and carefully remove it from the engine.
-
Detach Fuel Injectors: Gently detach the fuel injectors from the rail, taking note of their position for reassembly.
Section 5: Cleaning Harley Fuel Injectors
-
Inspect for Debris: Examine the fuel injectors for any visible debris or dirt. Use a soft brush to remove loose contaminants.
-
Utilize a Cleaning Kit: Follow the instructions provided with your fuel injector cleaning kit. Typically, this involves attaching the cleaning solution to the injector and allowing it to circulate to remove deposits.
-
Test Fuel Injectors: Before reassembly, conduct a fuel injector flow test to ensure they are functioning correctly.
Section 6: Reassembly and Testing
-
Reattach Fuel Injectors to Rail: Carefully reconnect the fuel injectors to the fuel injector rail, ensuring they are in the correct positions.
-
Reinstall Fuel Injector Rail: Secure the fuel injector rail back onto the engine and tighten the bolts.
-
Reconnect Fuel Lines and Wiring: Reattach the fuel lines and wiring to the fuel injector rail.
-
Reinstall Fuel Tank: Place the fuel tank back into position and secure it according to your motorcycle’s manual.
-
Reconnect the Battery: Finally, reconnect the motorcycle’s battery.
Section 7: Post-Cleaning Recommendations
After completing the process, start your Harley and allow it to run for a few minutes. This helps flush out any remaining cleaning solution. Take your motorcycle for a short ride to ensure the fuel injectors are operating optimally.
Credit: www.injectorrx.com
Conclusion
To effectively maintain the performance of your Harley, it is crucial to regularly remove and clean its fuel injectors. By following the step-by-step guide provided in this blog post, you can ensure the optimal functioning of your bike’s fuel system.
Proper maintenance of your Harley fuel injectors not only improves fuel efficiency but also extends the life of your engine.
So, don’t hesitate to invest your time in this simple yet essential task. Give your ride the care it deserves and enjoy the thrill of smooth and powerful performance on every ride.