Are you noticing a milky substance in your car’s engine oil or a sudden drop in coolant levels? If so, you might be dealing with a dreaded issue: engine oil mixing with coolant.
This isn’t just a minor inconvenience; it’s a serious problem that can lead to costly damage if not addressed promptly. But don’t worry—you’ve come to the right place. In this guide, you’ll discover exactly how to identify the cause of this issue and the steps you can take to fix it.
By understanding the process, you can save both time and money, and keep your vehicle running smoothly. Ready to take control and solve this problem before it worsens? Let’s dive in.
Credit: www.reddit.com
Causes Of Oil-coolant Mixing
Understanding the causes of oil mixing with coolant is crucial for engine health. This issue can lead to severe engine damage and costly repairs. Several factors can cause this problem. Knowing these can help in timely diagnosis and prevention. Let’s explore the primary causes of oil-coolant mixing.
Head Gasket Failure
The head gasket seals the engine’s cylinders. It ensures that coolant and oil flow separately. When the head gasket fails, these fluids can mix. This often results from overheating or poor maintenance. Signs include white exhaust smoke and milky oil. Prompt attention is necessary to avoid engine damage.
Cracked Engine Block
A cracked engine block can cause oil and coolant to mix. High engine temperatures or manufacturing defects may lead to cracks. These cracks allow fluids to escape their paths. The result is often visible in the coolant reservoir. Checking for external leaks can help identify this issue.
Faulty Oil Cooler
The oil cooler regulates engine oil temperature. A faulty cooler can lead to oil-coolant mixing. This happens when the cooler fails internally. Leaks can occur, causing fluid cross-contamination. Symptoms include oil in the coolant or vice versa. Regular checks of the oil cooler can prevent this problem.
Signs Of Contamination
Engine oil mixing with coolant can lead to severe engine issues. Spotting signs early prevents costly repairs. Knowing what to look for helps in addressing problems quickly.
Discolored Coolant
Check the coolant’s color in the reservoir. Normal coolant is usually green, yellow, or pink. If it appears milky or brown, contamination might be present. This discoloration often indicates oil mixing with the coolant.
Oil Level Changes
Regularly monitor the oil level using the dipstick. A sudden drop or increase in oil level can signal a leak. Oil leaking into the coolant system could cause unexpected changes in oil levels.
Engine Performance Issues
Watch for unusual engine behavior. Difficulty starting or rough idling can mean contamination. Loss of power, overheating, or white smoke from the exhaust might also indicate problems. These symptoms suggest the engine is not running smoothly.
Initial Diagnosis Steps
Suspect a head gasket failure as a common cause when engine oil mixes with coolant. Check for any leaks around the engine. Inspect the oil and coolant for unusual color or texture changes.
When you discover engine oil mixing with coolant, it’s crucial to act swiftly. Addressing this issue early can prevent significant damage to your vehicle’s engine. The initial diagnosis steps are essential in pinpointing the root cause and ensuring a successful repair. Let’s dive into these steps and explore practical ways to identify and resolve this problem.Visual Inspection
Start with a thorough visual inspection under the hood. Look for signs of oil in the coolant reservoir, which might appear as a milky or frothy substance. Check the engine oil dipstick as well; a creamy texture indicates coolant contamination. Don’t ignore other potential signs like oil leaks around the engine. Inspect hoses and seals for any visible damage or wear. These simple checks can offer valuable clues about the source of the problem.Pressure Testing
A pressure test can help identify leaks in the cooling system. This test involves using a pressure tester to simulate operating conditions. It can reveal weaknesses in the radiator, hoses, or engine gaskets. By maintaining the pressure for a few minutes, you can observe for any pressure drop. A decrease in pressure suggests a leak, indicating where the coolant might be escaping or oil entering. This step is vital in narrowing down the issue.Laboratory Analysis
Sometimes, the problem isn’t visible to the naked eye. That’s where laboratory analysis comes in. You can send a sample of the contaminated oil or coolant to a lab for testing. This analysis can identify specific contaminants, providing insights into the source of mixing. It’s a step that offers precision, especially when other methods yield inconclusive results. Consider this approach if you want to be absolutely certain about what’s causing the mixture. Taking these initial diagnosis steps seriously can save you time and money. Have you ever caught a small issue early on and avoided a bigger problem? Share your experiences or thoughts in the comments.Repairing Head Gasket
Fixing engine oil mixing with coolant often involves repairing the head gasket. Ensure the engine is cool before starting. Remove the cylinder head carefully to inspect and replace the damaged gasket. This prevents oil and coolant from mixing, safeguarding engine performance.
Repairing a head gasket can be a daunting task, especially when you’re trying to fix the problem of engine oil mixing with coolant. The head gasket is a crucial component that seals the engine cylinders and prevents oil and coolant from mixing. If you’re experiencing this issue, it’s likely due to a faulty head gasket. Let’s explore how you can tackle this repair effectively.Gasket Replacement
Replacing the head gasket is a meticulous job but essential to stop oil and coolant from mixing. Begin by draining the engine oil and coolant. This is crucial to avoid any spills or contamination during the repair. Once drained, remove the engine components that obstruct access to the head gasket. It’s important to keep track of all parts and bolts, perhaps by labeling them or taking photos. This will make reassembly much smoother. With the path cleared, carefully remove the old head gasket. Ensure the surface is clean and free of debris. Installing a new gasket on a dirty surface can lead to leaks, wasting all your hard work.Cylinder Head Inspection
Before installing the new gasket, inspect the cylinder head for any warping or cracks. A damaged cylinder head can render a new gasket useless. Use a straight edge to check for warping; even a small deviation can cause issues. If the cylinder head is damaged, consider consulting a professional. A machinist can often repair minor issues, but severe damage may require a replacement. Remember, installing a new gasket on a flawed surface won’t solve the problem.Reassembly Tips
Reassembling your engine requires patience and precision. Start by torquing the cylinder head bolts in the correct sequence and to the specified torque. This ensures even pressure on the gasket. Double-check all connections, ensuring hoses and wires are reconnected properly. It’s easy to overlook a small detail, but each component plays a role in the engine’s function. Finally, refill the engine with fresh oil and coolant. It’s also a good idea to run the engine briefly and inspect for any leaks. If all goes well, you’ve successfully fixed the issue! Have you ever tackled a repair like this? Share your experiences in the comments. Your insights could help others facing the same challenge.Addressing Engine Block Cracks
Engine block cracks can lead to serious problems. One of the most troubling is engine oil mixing with coolant. This issue can cause engine damage and decreased performance. Addressing the cracks in the engine block is crucial. Repairing these cracks can prevent further complications. Let’s explore some effective solutions.
Welding Techniques
Welding is a common method to fix engine block cracks. Skilled professionals use specialized welding equipment. This technique seals the cracks effectively. It restores the integrity of the engine block. Always consult an expert for welding repairs.
Block Replacement
Sometimes, welding is not enough. Severe damage may require block replacement. This involves removing the damaged engine block. Installing a new one ensures optimal engine performance. Block replacement is a more costly solution. It is essential for extensive damage.
Preventative Measures
Preventing engine block cracks is vital. Regular maintenance checks help identify early signs of wear. Ensure your engine does not overheat. Use quality engine oil and coolant. Maintain proper fluid levels. These steps can extend the engine’s lifespan.
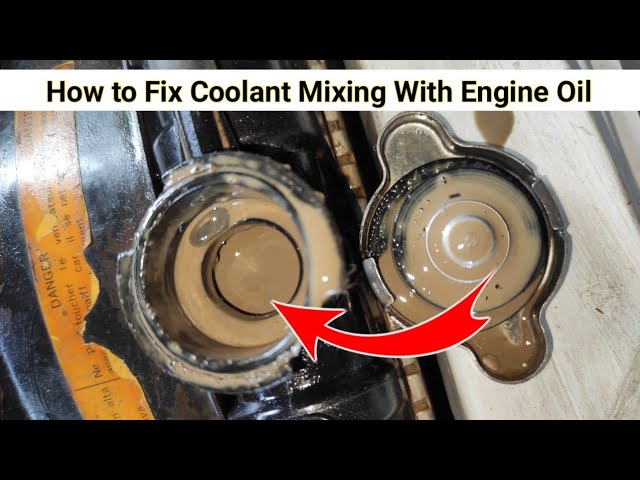
Credit: www.youtube.com
Oil Cooler Replacement
Dealing with engine oil mixing with coolant can feel like a daunting challenge, especially if you’re not a mechanic. However, understanding how to replace an oil cooler might just be the solution you’re looking for. An oil cooler plays a crucial role in keeping your engine’s temperature in check, and when it fails, it can lead to oil and coolant mingling. Let’s dive into how you can tackle this issue with confidence.
Selecting The Right Cooler
Before jumping into the replacement, choosing the right oil cooler is essential. The market offers various options, but you should aim for one that matches your vehicle’s specifications. Check your car’s manual or consult with a professional to make sure you’re getting a compatible model.
Consider the driving conditions you typically face. If you drive in extreme temperatures or frequently tow heavy loads, a high-performance cooler might be necessary. This decision can greatly impact your engine’s longevity, so it’s worth taking the time to research.
Installation Guide
With the right cooler in hand, it’s time to tackle the installation. Begin by safely draining your engine oil and coolant to prevent spills and further contamination. Safety should always be your top priority.
Next, carefully remove the old oil cooler. This step may require some elbow grease and patience. Keep your workspace organized by placing bolts and parts in labeled containers.
Install the new cooler by following the manufacturer’s instructions closely. Tighten all connections securely to ensure everything is in place. This is where attention to detail pays off.
Testing For Leaks
After installation, testing for leaks is crucial. Refill your engine oil and coolant, then start your engine and let it run for a few minutes. Observe closely for any signs of leaks around the cooler and the connections.
If you notice any leaks, tighten the connections or consider using a sealant recommended for your cooler. A small oversight here can lead to major problems later, so be thorough.
Finally, monitor your vehicle over the next few days. Does the temperature gauge stay stable? Are there any unusual sounds? These observations can provide early warning signs if something isn’t right.
Are you ready to tackle this challenge? Replacing an oil cooler might seem like a big task, but with the right approach and attention to detail, you can do it. Remember, taking care of your vehicle now can save you from costly repairs in the future.
Preventive Maintenance Tips
Engine oil mixing with coolant can cause engine damage. Regularly check for leaks in the head gasket. A mechanic can help repair or replace faulty parts. This prevents costly issues and keeps your engine running smoothly.
When dealing with engine oil mixing with coolant, prevention is always better than cure. Regular maintenance can save you both time and money. By taking preventive measures, you can avoid this frustrating issue altogether. Let’s dive into some practical tips to help you keep your engine running smoothly and avoid the headache of oil and coolant mixing.Regular Inspections
Routine check-ups are crucial for your car’s health. Get in the habit of inspecting your vehicle at least once a month. Look for any signs of leaks, unusual engine sounds, or changes in performance. Consider using a checklist to track what you inspect. This ensures you cover every vital component. You don’t want to miss something that could lead to engine troubles down the road.Coolant System Care
Taking care of your coolant system is key to preventing oil and coolant mixing. Make sure the coolant is at the right level and replace it as recommended by the manufacturer. Old or contaminated coolant can lead to leaks in the system. Check the radiator cap for any wear or damage. A faulty cap can cause pressure issues, leading to coolant leaks. Simple checks like these can save you from more complex problems later.Monitoring Oil Levels
Keeping an eye on your engine oil levels is a simple yet effective preventive measure. If the oil level drops suddenly, it could indicate a problem. Check the oil regularly and top it up if necessary. Use a high-quality oil that suits your engine’s needs. Cheap oil might save you money initially, but it can lead to costly repairs. Always follow the manufacturer’s guidelines for oil changes and ensure you use the right type. Do you have any stories of a small problem that led to a major repair? Share them in the comments. Remember, a little maintenance goes a long way in keeping your engine running smoothly.
Credit: www.dubizzle.com
Conclusion
Solving engine oil mixing with coolant is crucial for vehicle health. Regular checks can help prevent costly repairs. Early detection saves time and money. Follow proper steps to fix the issue. Consult a professional if unsure. Keeping your engine in top shape ensures smooth driving.
Remember, maintenance is key. A well-maintained car lasts longer and runs better. Stay proactive with vehicle care. Always prioritize safety first. Check fluid levels regularly. Don’t ignore any warning signs. A little attention can prevent big problems. Protect your engine for a better driving experience.