Windscreen wiper blades are an essential part of your vehicle’s safety system, helping to maintain clear vision in all weather conditions. However, over time, these blades can wear out and become less effective.
It is important to replace them when necessary to ensure optimal visibility while driving.
In this article, we will guide you step-by-step on how to remove windscreen wiper blades properly.
Tools You’ll Need
Before you start the process of removing your windscreen wiper blades, gather the necessary tools:
| Tools: |
| – Flathead screwdriver |
Credit: www.volvocars.com
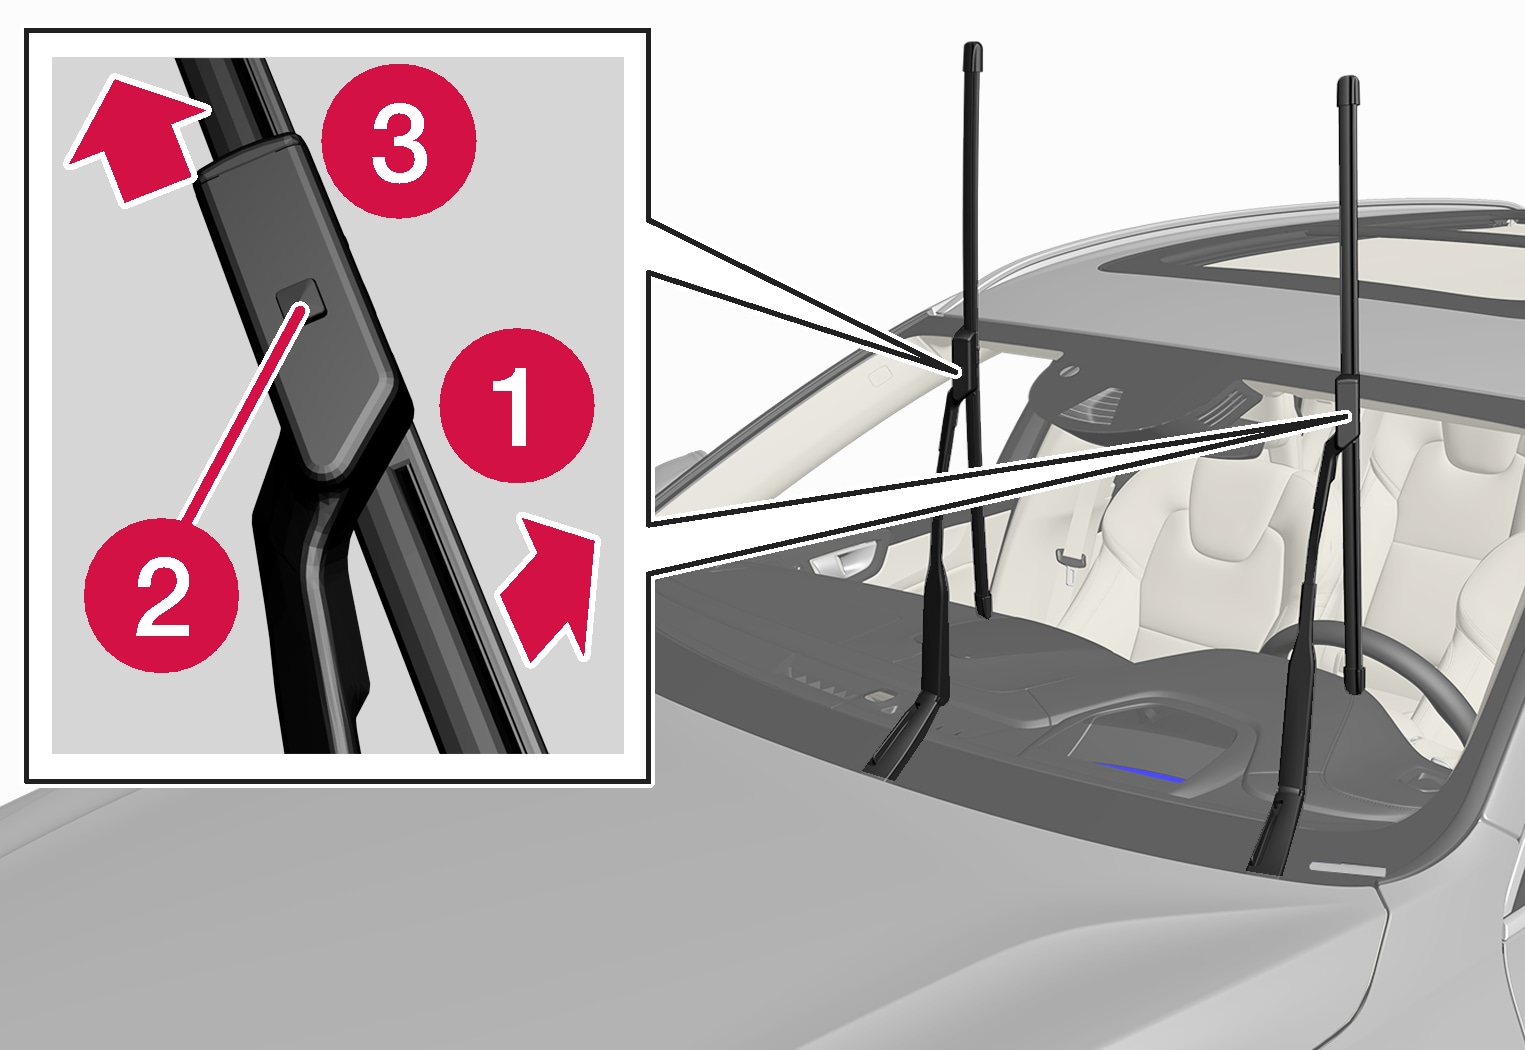
Step 1: Lift the Wiper Arm
Start by lifting the wiper arm away from the windscreen until it stays in an upright position. This will prevent any accidental damage to the windscreen or wiper blades during the removal process.
Step 2: Locate the Release Tab
Look for the small release tab on the underside of the wiper blade where it connects to the wiper arm.
Step 3: Press the Release Tab
Use the flathead screwdriver to press and hold the release tab. This will disengage the wiper blade from the wiper arm.
Step 4: Slide the Wiper Blade Off
While pressing the release tab, carefully slide the wiper blade off the wiper arm. Be cautious not to force it or bend the wiper arm during the process.
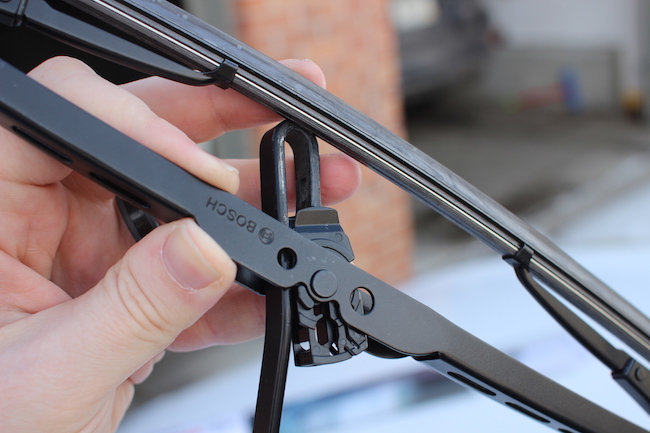
Credit: www.artofmanliness.com
Step 5: Repeat for the Other Wiper Blade
Follow the same steps to remove the wiper blade on the other side of the windscreen. It is important to replace both wiper blades to maintain consistent performance.
Step 6: Inspect the Wiper Arm
Take a moment to inspect the wiper arm for any signs of wear or damage. If the arm is damaged, it may need to be replaced along with the wiper blade.
Step 7: Replace the Wiper Blades
Now that you have successfully removed the old wiper blades, it’s time to install new ones. Make sure you choose the appropriate size and type of blades for your specific vehicle model.
Step 8: Position the New Wiper Blade
Align the new wiper blade with the wiper arm, ensuring that the hook on the blade fits into the groove on the arm.
Step 9: Secure the New Wiper Blade
Slide the new wiper blade onto the wiper arm until you hear a click sound, indicating it is securely in place. Give it a gentle tug to make sure it’s properly fastened.
Step 10: Lower the Wiper Arm
Carefully lower the wiper arm back onto the windscreen. Make sure the wiper blades are not in contact with the windscreen when at rest.
Step 11: Test the Wiper Blades
Finally, test the new wiper blades by activating them. Ensure they move smoothly across the windscreen without any skipping or streaking. If needed, adjust the positioning of the blades to achieve proper alignment.
Following these steps, you can easily remove and replace windscreen wiper blades, maintaining clear visibility and increasing overall driving safety. Remember to replace your wiper blades every six to twelve months or as soon as you notice a decline in performance. Safe driving!