If you’re experiencing issues with your windshield wiper blades or if they are leaving streaks on your windshield, it may be time to remove and replace them. Removing your windshield wiper blades is a simple process that you can easily do at home.
In this article, we will guide you through the step-by-step process of removing your windshield wiper blade.
Tools Needed:
- Flathead screwdriver
- Pliers
- Towel or cloth

Credit: www.tricoproducts.com
Step 1: Positioning the Wiper Blade
Start by lifting the wiper arm away from the windshield until it is in an upright position. Make sure to support the arm with one hand while doing this to prevent it from snapping back onto the windshield. You can also use a towel or cloth to prop the arm up.
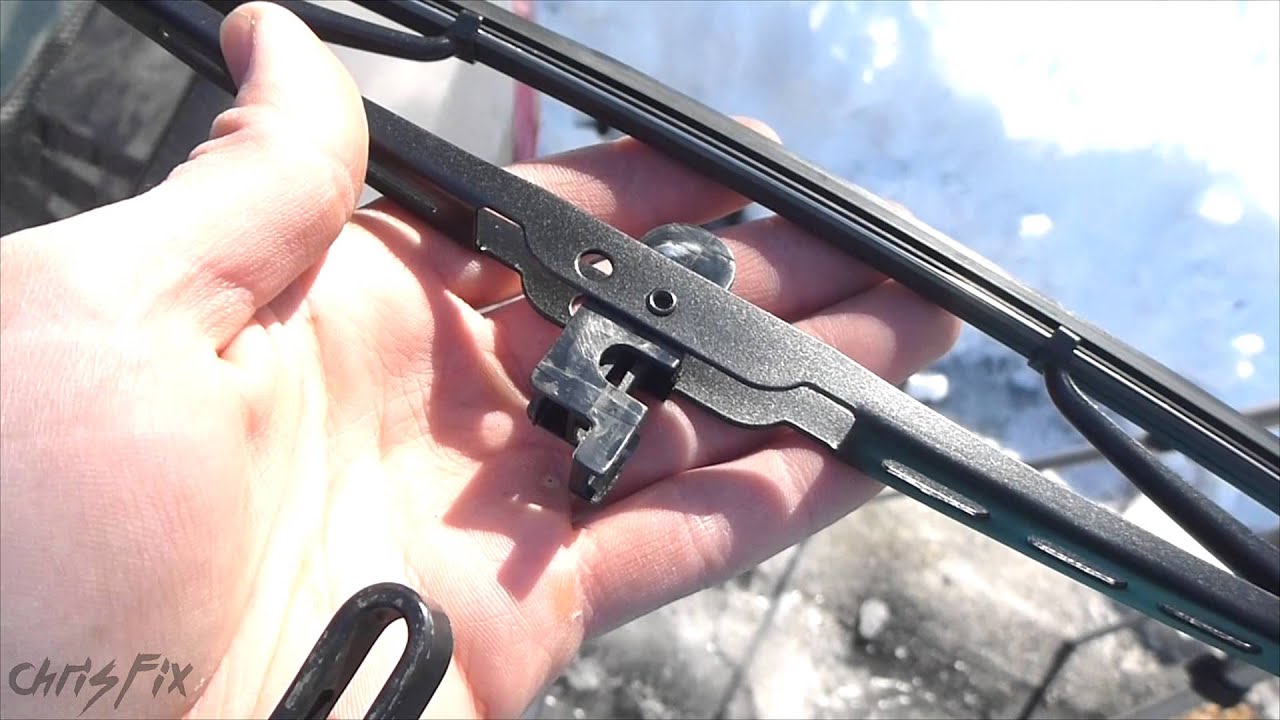
Step 2: Locate the Release Tab
Locate the release tab on the wiper blade. This tab is typically located in the middle or at one end of the blade, depending on the make and model of your vehicle. It is used to release the blade from the wiper arm.
Step 3: Press the Release Tab
Using a flathead screwdriver or your fingers, press down on the release tab. This will release the wiper blade from the wiper arm. If you’re having trouble locating the release tab, refer to your vehicle’s owner’s manual for guidance.
Step 4: Remove the Wiper Blade
Once the release tab is pressed, carefully slide the wiper blade out of the wiper arm. Be cautious not to let the wiper arm snap back onto the windshield as it may cause damage to the glass.
Step 5: Inspect and Clean
Before installing the new wiper blade, take a moment to inspect the wiper arm for any dirt, debris, or corrosion. Use a cloth or towel to clean the wiper arm if necessary. This will ensure a smooth and secure installation of the new wiper blade.
Step 6: Install a New Wiper Blade
Take your new wiper blade and align the adapter with the wiper arm. Slide the new blade onto the wiper arm until you hear a click or feel a secure fit. Make sure the new blade is properly aligned with the windshield and sits flat on the glass.
Step 7: Test the Wiper Blade
Once you have installed the new wiper blade, lower the wiper arm back onto the windshield. Turn on your wipers and test the new blade to ensure it is functioning properly and that there are no streaks or skipping motions.
Credit: m.youtube.com
Conclusion
Removing your windshield wiper blades is a straightforward process that you can do yourself. By following the steps outlined in this article, you can easily remove and replace your wiper blades at home.
It is recommended to regularly inspect and change your wiper blades to ensure optimal visibility and safe driving conditions.