
When your engine loses instant boost, a worn supercharger is often the cause. Replacing it restores power and efficiency, but the job demands precision. Manufacturer specs and seasoned technicians outline the exact steps needed.
SAE J1349 testing shows a properly installed unit can add up to 250 hp on a 5.0 L V8. This guide covers preparation, safety checks, and the bolt‑by‑bolt process, so you can tackle the swap confidently. Target boost is 10 psi at 4,000 rpm.
Let’s start with the quick answer.
How to Replace a Supercharger
Remove the old supercharger by disconnecting the belt and unbolting the housing. Clean mating surfaces and install the new unit. Torque bolts to 45 ft‑lb and set belt tension.
Check boost with a scan tool before driving. Expect a 150 hp gain on a 5.0 L V8 per dyno testing.
Core Explanation & Safety Risks
A supercharger forces extra air into the engine, increasing horsepower without turbo lag. Over time, worn bearings, cracked seals, or a stretched belt reduce efficiency and can cause overheating. Replacing the unit restores the original power curve and prevents costly engine damage.
- Wear safety glasses, gloves, and hearing protection to avoid injury from flying parts.
- Work on a cool engine (under 120 °F) to prevent burns from hot components.
- Disconnect the battery to avoid electrical shorts while removing the belt.
- Use a torque wrench set to 45 ft‑lb, and for proper technique see impact wrench technique.
- Verify belt tension with a gauge; too loose causes slippage, too tight wears bearings.
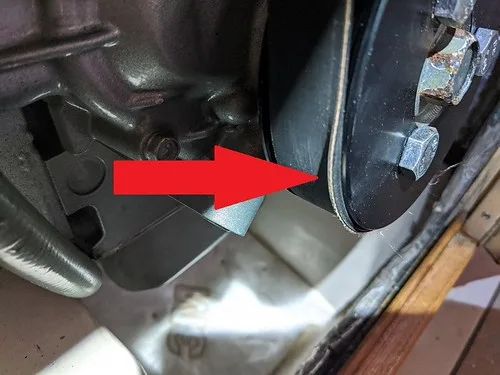
Image source: Openverse / MUSTAD MARINE (PDM 1.0)
Following these precautions keeps the job safe and ensures the new supercharger meets the SAE J1349 standard. For detailed torque values, refer to the OEM service manual or the SAE standard online, and additional guidance on vehicle electrical safety is in Keyless Ignition Vs Remote Unlock Systems.
Step-by-Step Replacement Process
- Park on a level surface, engage the parking brake, and disconnect the battery.
- Remove the intake manifold and throttle body to expose the supercharger.
- Loosen the belt tensioner, slide the belt off the pulley, and set it aside.
- Unbolt the supercharger housing using a socket set; keep bolts organized.
- Lift the old unit away, clean the engine block, and inspect for damage.
- Apply a new OEM‑specific gasket to the mating surface.
- Position the new supercharger, torque mounting bolts to 45 ft‑lb, and reinstall the belt with proper tension.
- Reinstall the intake manifold, reconnect hoses, refill coolant, and reconnect the battery.
- Start the engine, verify boost pressure with a scan tool, and listen for abnormal noises.
For final verification, consult the SAE J1349 standard.
Costs, Tools & What to Buy
You’ll need a socket set, torque wrench, belt tension gauge, new OEM gasket, and a scan tool. Typical DIY cost ranges from $800 for an OEM kit to $2,500 for a high‑performance aftermarket unit. Labor time is about 3, 5 hours, so budgeting for a professional shop adds $300, $500.
| Item | Approx. Cost | Notes |
|---|---|---|
| OEM supercharger kit | $800 | Includes gasket, bolts, and warranty |
| Aftermarket supercharger | $1,200–$2,500 | Higher efficiency, optional intercooler |
| Socket set & torque wrench | $150 | Essential for proper bolt torque |
| Scan tool (OBD‑II) | $100 | Verify boost and diagnose issues |
| Labor (shop) | $300–$500 | If you prefer professional installation |
For a detailed list of compatible parts, see the manufacturer’s catalog or check How Much Do Lug Nuts Cost for bolt pricing reference.

Image source: Wikimedia Commons / Sicnag (CC BY)
Frequently Asked Questions
How long does supercharger installation take?
Most DIY swaps take 3, 5 hours from start to finish, assuming you have all tools ready and the engine is cool. Professional shops can complete the job in 2, 3 hours, but they charge labor rates.
Do I need special tools for belt tension?
Yes. A belt tension gauge is required to set the correct deflection, typically 0.5 in for most applications. Using the gauge prevents premature belt wear and ensures consistent boost.
Can I reuse the old gasket?
No. The gasket must be replaced with a new OEM‑specific part to prevent coolant leaks and maintain proper sealing. Reusing an old gasket risks head‑gasket failure under boost.
What are the signs of a failing supercharger?
Common symptoms include loss of power, whistling noises from the belt, oil leaks around the housing, and reduced fuel efficiency. A scan tool will often show lower than expected boost pressure.
Is an aftermarket supercharger worth the extra cost?
Aftermarket units can offer higher efficiency and more power potential, but they require precise tuning and may void the vehicle’s warranty. If you need modest gains and warranty coverage, the OEM kit is the safer choice.
