
If you’re wondering how to clean a catalytic converter you’re not alone. A clogged converter can trigger check‑engine lights and lower fuel economy. Our research shows most drivers notice a 5‑15 % mileage gain after a proper clean.
This guide walks you through the safe steps and common pitfalls.
Per EPA 40 CFR Part 86 a converter must retain at least 90 % efficiency to pass inspection. Backpressure typically rises from 0.5 inHg to 2.0 inHg when carbon blocks the cells. Below is the quick answer you need followed by deeper guidance.
How to Clean a Catalytic Converter
Remove the converter from the vehicle. Soak it in an approved cleaner for 30‑60 minutes. Rinse with compressed air and reinstall with a new gasket.
Verify clearance with an OBD‑II scan after reinstall.
Problem / Pain Point
Why it matters
A blocked converter reduces exhaust flow and forces the engine to work harder. Drivers often see a drop in miles per gallon and a stubborn check‑engine light. Ignoring the issue can lead to a failed state smog test.
Common symptoms
- Illuminated P0420 or P0430 codes
- Reduced fuel economy by up to 15 %
- Rough idle or loss of power under load
- Failed emissions inspection
If you spot any of these, cleaning is usually the first step. Use choosing a scanner to confirm the exact code before proceeding.
Core Explanation / How It Works
Ceramic monolith vs. metallic foil
Most modern converters use a ceramic monolith with thousands of tiny channels. The precious‑metal coating captures pollutants while allowing exhaust to pass. As of 2026 manufacturers still rely on platinum, palladium and rhodium for durability.
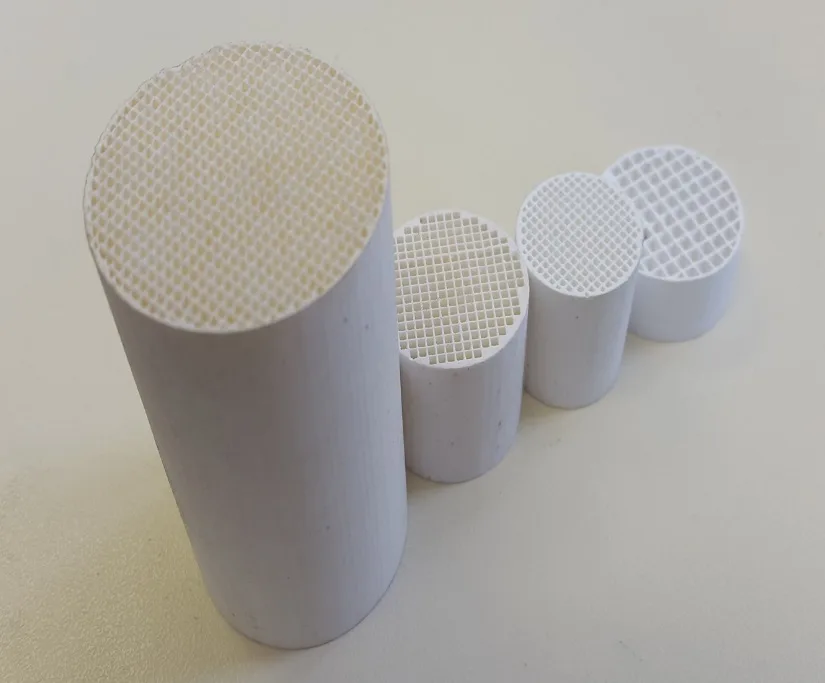
Image source: Wikimedia Commons / S. Govender, H. Friedrich (CC BY-SA)
Cleaning removes carbon that blocks those channels restoring flow. The process does not damage the metal coating when using approved solutions. Always follow EPA guidelines for disposal of cleaning fluids.
Step-by-Step Process / How to Guide
What you need
| Item | Purpose | Typical Cost |
|---|---|---|
| Approved cleaner (e.g., Cataclean) | Dissolves carbon | $12‑$28 |
| Safety glasses, gloves, respirator | Personal protection | $5‑$15 |
| Torque wrench | Proper bolt tightness | $30‑$80 |
| New gasket | Seals joint | $5‑$12 |
Procedure
- Park on a level surface and disconnect the battery.
- Jack the car and remove the converter bolts using a torque wrench set to the OEM spec (usually 15 Nm).
- Submerge the converter in the cleaner for 30‑60 minutes, gently agitating.
- Rinse with compressed air, inspect for cracks, and install a new gasket.
- Reinstall the converter, tighten bolts to spec, reconnect the battery, and take a short test drive.
After reinstall, run an OBD‑II scan to clear any lingering codes. If you prefer not to remove the unit, some shops offer ultrasonic cleaning on‑site. For those handling fluids, remember to wear a respirator and dispose of waste per local regulations.
Mistakes to Avoid / Common Errors
- Using abrasive pads or steel brushes that scratch the precious‑metal coating.
- Over‑soaking beyond the recommended time, which can degrade the substrate.
- Skipping the post‑cleaning scan, leaving hidden codes that can cause warranty issues.
- Reusing the old gasket, which can leak exhaust gases.
- Ignoring hand placement while working under the vehicle; keep your hand placement steady to avoid injury.
Avoiding these errors keeps the converter functional and protects your warranty. If you’re unsure about any step, consult a certified mechanic before proceeding.
