
How to clean a fuel tank comes down to one question first: what is actually sitting inside it? Varnish, rust scale, water, and diesel sludge each need completely different chemistry. Skip that step and you will spend a weekend scrubbing the wrong problem.
Worse, you might make a spark while doing it.
Gasoline has a flash point around 45°F below zero, and its vapor runs three to four times heavier than air, so it pools low in a garage or bilge. That is why a drained tank can still bite you. Industry practice, including NFPA 30, treats any opened tank as a flammable atmosphere until it has been purged.
We will walk the branches in the order that matters, from triage through drying, so you only do the work your tank actually needs.
How to Clean a Fuel Tank
Drain the old fuel into approved containers first. Identify the contamination before choosing a method. Varnish needs solvent, rust needs a chelator, and sludge needs physical removal.
Rinse, then dry the tank fully with alcohol and filtered air. Replace the pickup sock and filter before refilling.
Before You Pick a Method: Four Questions That Decide the Rest of the Job
Four answers shrink this job into something you can plan. Fuel type, tank material, tank location, and the symptom that sent you here together decide whether you are doing a two-hour flush or a five-day reline. Write them down before you spend a dollar on chemicals.
| Variable | What you are checking | How it changes the plan |
|---|---|---|
| Fuel type | Gasoline, E10, diesel, two-stroke premix, kerosene | Sets your solvent, your rinse, and your safety gear |
| Tank material | Bare steel, aluminized steel, aluminum, HDPE plastic | Sets which chemistry you are allowed to use |
| Tank location | Under-seat, under-body, below-deck, gravity-fed bulk | Decides in-place versus bench-out work |
| Symptom | No start, rough idle, fuel smell, wrong gauge reading | Tells you how far the contamination has already spread |
Get one of these wrong and the whole plan collapses. That is the part generic advice skips.
What's in the tank?
Start with the fuel itself, not the tank. Gasoline with ethanol behaves nothing like diesel, and neither behaves like two-stroke premix. Age matters as much as type.
Fuel that sat through a single winter is usually recoverable. Fuel that sat three years has often phase separated or turned to gum.
If the tank holds E10 that is more than six months old, treat it as contaminated by default. Ethanol-blended gasoline (E10 is gasoline with 10% ethanol) absorbs moisture from the air until it cannot hold any more. At that point the alcohol and water drop out of suspension together.
That process is called phase separation, and no additive reverses it.
If the fuel is diesel, ask a different question: was it stored in a vented tank, a boat, or a bulk farm tank? Those are the three places microbial contamination shows up most. Dyed off-road diesel is no safer than clear road diesel, it just carries a different tax stamp.
What the tank is made of?
Tank material decides which chemicals you can pour in. High-density polyethylene (HDPE) shrugs off most solvents but hates acetone and harsh aromatics. Aluminum corrodes fast in caustic cleaners.
Bare steel is the forgiving one, which is why acid derusting exists mostly for steel tanks.
You can usually identify the material without a parts diagram. A magnet sticks to steel and not to aluminum or plastic. Plastic tanks feel warm and dull when you tap them, and they flex at the seam.
Aluminum tanks on boats often carry a data plate or a stamped code near the sender.
If you are unsure, test on a hidden spot first. A rag with your chosen solvent, held against the tank shoulder for ten minutes, will tell you plenty. If the surface goes tacky or the rag picks up color, stop.
Where the tank lives?
Location sets the ceiling on how good this job can get. A mower tank under the seat comes off with two bolts and a fuel line. A car tank hangs on straps above the axle and needs the vehicle up in the air.
A below-deck marine tank may be glassed in with no realistic way out.
If the tank sits above the frame rails with reachable fittings, bench-out is a 30-minute job and always worth it. If it is an under-body tank with a skid plate, plan on a couple of hours and a helper. If it is glassed into a hull, in-place work is your only option, so the cleaning standard has to be higher.
Getting underneath safely is its own task. Sturdy wooden ramps or rated jack stands beat a scissor jack every time, and we would rather see you spend that hour than work under a car held up by hydraulics alone. There is a solid walkthrough on building a set of wooden ramps if you want something you can trust.
What the symptom is?
The symptom tells you how far the mess has traveled. A no-start after storage usually means the carburetor or the filter caught the debris, not the pump. A rough idle with a fuel smell points at a leaking injector seal or a saturated EVAP line.
A gauge that reads wrong after the job points at the sending unit.
Codes help here. Pull them before you touch anything. A cheap code reader will store the history for you, and a P0087 or P0088 tells you the rail is starving or over-pressuring.
That is a fuel delivery story, not an ignition story.
Pulling a plug is the other quick check. Wet, oil-fouled plugs after a long sit suggest fuel washing past rings or a rich condition. Dry plugs with a strong spark point you back toward fuel supply, which is where you started.
Resist the urge to chase a no-start with a squirt of starting fluid. It masks the real fault and it can damage a dry engine. There is a proper way to use that stuff and a lot of ways to get it wrong, which is worth reading before you reach for the can.
Reading the Contamination: Varnish, Rust Scale, Water, or Diesel Bug
Contamination type is the single biggest fork in this whole job. Solvent removes varnish but does nothing for rust. Acid eats rust but will not touch sludge.
Water needs to leave before anything else works. Read the tank before you choose a chemical.
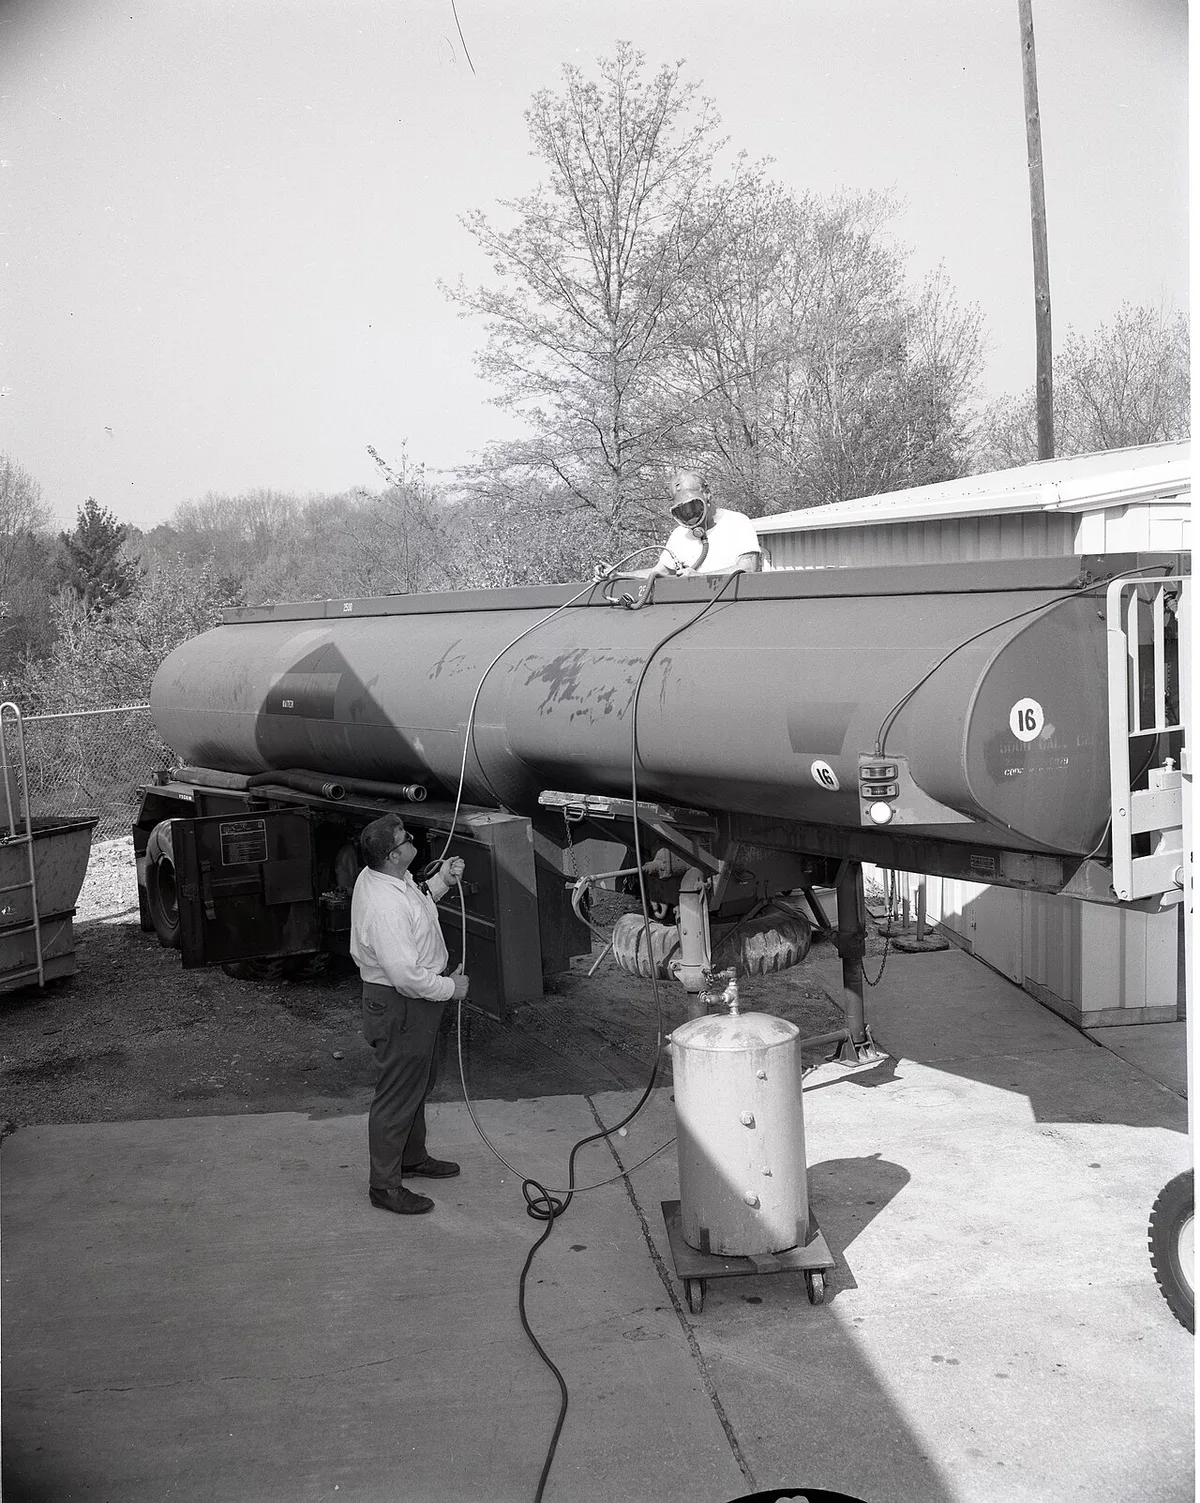
Image source: Wikimedia Commons / Martin Brown
The good news is that diagnosis is cheap. A clear jar, a strong flashlight, and a $30 USB borescope will tell you more than any forum thread. Give it twenty minutes before you commit.
| Contaminant | What you see | What it smells like | What removes it |
|---|---|---|---|
| Varnish and gum | Amber to brown film, sticky patches, dark varnish on the sock | Old paint, stale solvent | Aromatic solvent plus agitation |
| Rust scale | Orange flakes, gritty sediment, rough pitted walls | Damp iron | Chelator, phosphoric acid, or electrolysis |
| Free water | Distinct layer at the bottom of a settled sample | Nothing much | Drain and dry, then alcohol chase |
| Phase separation | Cloudy fuel that splits into a milky lower layer | Sharp alcohol bite | Full drain, no additive will fix it |
| Diesel bug | Black or brown biofilm, stringy sludge, dark streaks on walls | Rotten eggs or swamp | Biocide, then physical removal of the biomass |
The clear-jar settle test and what each layer tells you
The clear-jar test answers three questions at once. Pull a sample from the bottom of the tank, not the top, and let it sit in a glass jar for twenty minutes. Then look at it against a white background in good light.
A clean sample is one color and clear. A water layer shows as a sharp line near the bottom. Cloudiness that will not settle means emulsified water or ultra-fine sediment.
Dark flecks that float are usually rubber or sealer debris from a failed lining.
Label the jar with the date and keep it until the job is done. If the tank fails later, that sample is your evidence.
Varnish and gum: sticky, amber, smells like old paint
Varnish is oxidized gasoline, and it forms wherever fuel sits in contact with air and warmth. It coats the tank walls, the sock, the float, and the inside of the lines. Left long enough, it hardens into a shell that solvent alone will not lift.
The tell is texture. Fresh varnish wipes off with a rag and solvent. Old varnish feels like dried syrup and needs soaking plus mechanical agitation.
If the sock is brown and stiff, you have varnish and you have a filter problem too.
If the tank is steel with light varnish only, a solvent wash plus agitation media is the whole job. If varnish has reached the pump module and the lines, budget for new soft parts.
Rust scale and pitting: flaking, gritty, magnetic
Rust scale is flaky iron oxide sitting on top of good metal, or on top of thin metal. Those are very different problems. Scale that brushes away to shiny steel is a cleaning job.
Scale that comes off and leaves deep craters is a replacement conversation.
Test pitting depth before you spend money on chemicals. Wire-brush a small patch, then look at it under a bright light at an angle. If the pits are shallow and isolated, a chelator plus a sealer can save the tank.
If pits are clustered along a seam or the sump, water will find them again.
Magnetic sediment is another clue. Rust particles stick to a magnet, grit and sand do not. That distinction matters because grit often comes from a failed in-tank strainer or a rusting filler neck, both of which need fixing too.
Free water vs. phase separation in E10
Free water is water sitting as a separate layer. It is heavy, it pools in the sump, and it pulls straight into the pickup. Phase separation is different and nastier.
The ethanol binds with water until it can hold no more, then the whole blend splits.
E10 can hold roughly 0.5% water by volume before that happens, which is a little over half an ounce per gallon. Cool nights and warm days push moisture in through the vent. A half-empty tank in a humid climate is basically a condensation machine.
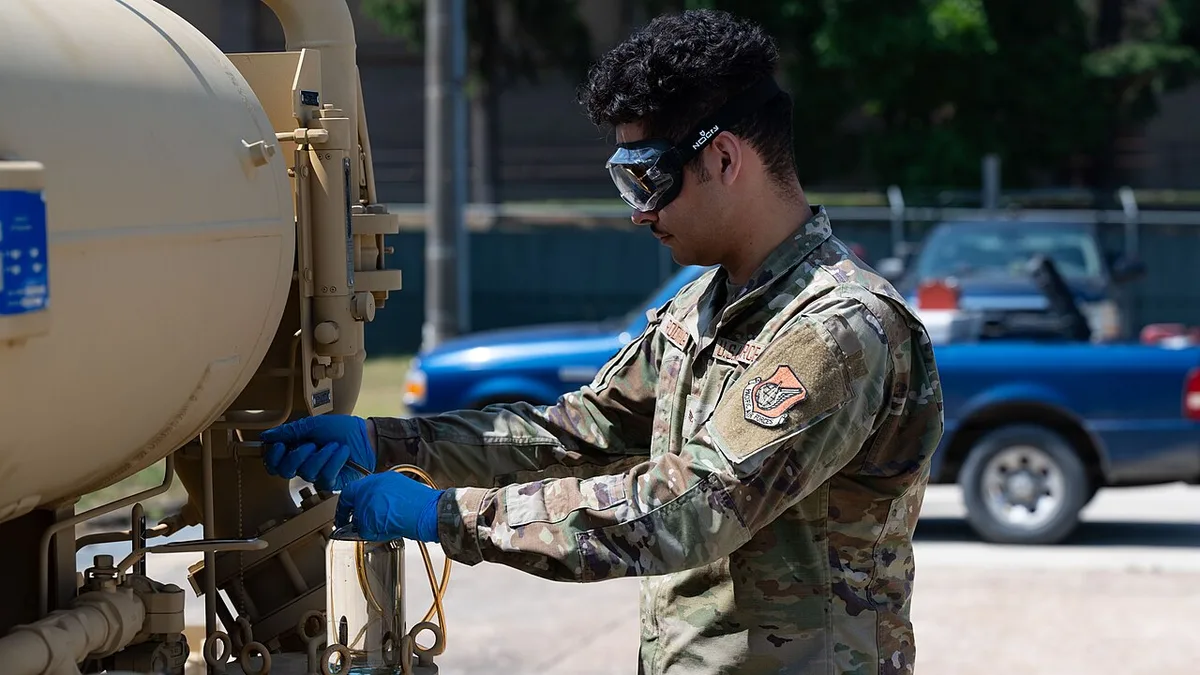
Image source: Wikimedia Commons / U.S. Air Force photo by Senior Airman Rome Bowermaster
If you see the split, drain everything. Adding fresh fuel or a dry-gas product does not recombine a separated blend in any reliable way. The lower layer is corrosive, and it will eat aluminum, zinc, and the inside of a fuel pump.
Diesel bug: biofilm, sludge, and the rotten-egg smell
Diesel bug is a catch-all term for microbial contamination, and it is a living problem. Bacteria and yeast grow at the fuel and water boundary, feeding on the water and the fuel. They leave behind a biofilm that plugs filters and a sludge that settles in the tank.
ASTM D6469 is the reference standard for diagnosing and treating microbial contamination in fuels. The practical version is simpler. Black stringy material, a rotten smell, and a filter that clogs within days of changing it all point the same way.
Biocide kills the organisms, but it does not remove the bodies. You still have to get the biomass out of the tank physically, or it will migrate forward and wreck the high-pressure side. On a modern common rail diesel, the pump and injectors downstream are built to micron tolerances, and contaminated fuel is a fast route to a four-figure repair.
It is the same reason a set of replacement injectors is treated as a wear item on older trucks with a history of bad fuel.
When a borescope pays for itself
A borescope pays for itself the first time it saves you from a job you did not need. A basic USB or Wi-Fi camera with a 5mm head costs less than a tank of fuel. Feed it through the filler neck or the sender opening and shoot video of the seams, sump, and baffle pockets.
Look for four things: coating on the walls, standing liquid at the lowest point, flaking material, and the condition of the pickup sock. Most tanks have a low spot you cannot reach with a rag. That is where the real story is.
Fuel Type and Tank Material: The Two Variables That Set the Chemistry
Fuel and material together rule out half the methods people recommend online. Acetone in a plastic mower tank is a destroyed tank. Caustic soda in an aluminum boat tank is a destroyed tank.
Get the pairing right and the rest of the job behaves.
Pump gasoline in the US and UK is mostly E10 as of 2026, with E5 still sold in premium grades in the UK and ethanol-free "rec fuel" available at marinas and select stations. E15 is common at US pumps for 2001-and-newer vehicles. E85 is a different animal entirely and needs its own approach.
| Fuel | What it does to a sitting tank | Extra step it forces |
|---|---|---|
| E10 gasoline | Absorbs water, then phase separates | Full drain and a sealer compatibility check |
| E5 or ethanol-free | Varnishes faster, but holds far less water | Solvent wash, no phase separation worries |
| E85 | Aggressive on older rubber and sealers | Verify every seal and line is ethanol rated |
| Diesel and B20 | Water pools, microbes grow at the boundary | Water separation plus biocide if contaminated |
| Two-stroke premix | Leaves sticky oil residue that traps grit | Degrease before any derusting step |
| Kerosene | Slow varnish, minimal corrosion | Simple flush, but it still fumes |
What attacks plastic, what attacks aluminum, what steel can take
Plastic is the one people ruin. HDPE handles mineral spirits and mild degreasers fine. It does not handle acetone, MEK, or long soaks in hot aromatic solvents.
Those soften the surface and can leave a sticky residue that never fully cures.
Aluminum is the opposite problem. It is chemically reactive and hates caustic. Sodium hydroxide based degreasers will pit it and can eat through thin sections.
Mild detergent, citric acid, and chelating rust removers are the safe lane.
Steel is the tolerant one. It can take phosphoric acid, chelators, electrolysis, and caustic hot tanks. The limit is wall thickness, not chemistry.
| Tank material | Safe to use | Keep away from |
|---|---|---|
| Bare or aluminized steel | Mineral spirits, phosphoric acid, chelators, electrolysis | Long caustic soaks on thin seamed tanks |
| Aluminum | Mild detergent, citric acid, chelators | Caustic soda, strong acids, long water soaks |
| HDPE plastic | Warm soapy water, mineral spirits, citrus degreasers | Acetone, MEK, hot aromatic solvents |
| Fiberglass and older composites | Mild detergent, kerosene | Alcohol soaks, acetone, anything that softens resin |
Seal, gasket, and line compatibility in the ethanol era
Every soft part in the system has to survive the fuel you are putting back in. That means the pickup sock, the pump module O-ring, the lock ring gasket, the filler hose, the vent line, and any rubber fuel line in the run.
Older nitrile rubber and natural rubber lines degrade in ethanol. Modern fluoroelastomer and Viton parts do not. If the tank is going back into a pre-1990s vehicle or a piece of equipment that has never seen E10, plan on replacing every soft part you touch.
The same logic applies to tank sealer. A sealer that is not rated for ethanol will soften, lift, and flake, and those flakes head straight for the filter. Check the manufacturer's technical data sheet for ethanol compatibility before you buy a kit.
Choosing Your Route: On-Vehicle Flush, Bench-Out Clean, Replace, or Shop
There are four honest routes, and picking the wrong one is the most expensive mistake in this whole job. The right route depends on contamination severity, tank access, and how much of the tank you can actually reach.
| Route | Best for | Active time | Rough cost |
|---|---|---|---|
| On-vehicle flush | Light varnish, no rust, easy access to fittings | 2 to 4 hours | $30 to $80 in solvent and filters |
| Bench-out clean | Rust, sludge, baffled tanks, any serious contamination | A weekend | $50 to $150 plus consumables |
| Clean then seal | Pitted steel worth saving, classic or discontinued tanks | 5 days or more with cure | $50 to $120 for a sealer kit |
| Shop hot-tank or reline | Heavy scale, marine tanks, no workspace, no time | 3 to 10 days | $150 to $600 |
| Replacement | Pinholes, thin walls, split plastic, cracked seams | 2 to 6 hours | $200 to $900 and up |
When an in-place drain-and-flush is genuinely enough
In-place work is genuinely enough in a narrow set of cases. The tank has light varnish and no rust. You can reach the sender opening.
The fuel is not separated. And the tank is simple, with no deep baffles trapping debris.
If all four are true, drain, flush with solvent, chase with alcohol, and change the filter. That is a real repair for a mower, a generator, or a bike that sat one season.
If any one of them is false, you are guessing. In-place flushing cannot agitate the corners, cannot inspect the sump, and cannot dry a baffled tank properly. Half a job on a fuel system usually means a second breakdown within a few months.
When the tank has to come out
The tank has to come out when you cannot see or reach the contamination. Baffles create dead zones that hold debris no matter how long you slosh solvent around. A sump with a layer of sludge needs to be wiped, not rinsed.
Rust is the other trigger. You cannot derust a tank you cannot rotate. Chelators need full contact and time, and electrolysis needs line of sight to the anode.
Sending unit and pump access is the third. If the lock ring is seized or the pump module has to come out for cleaning, the tank is coming down anyway.
The pitting and pinhole test that ends the conversation
Pinholes end the discussion. There is no sealer worth trusting over a rust hole in a structural wall, no matter what the label claims. Test before you invest.
Three tests you can do at home. Wire-brush a suspect area and inspect it under strong angled light. Fill the tank with water and watch the outside for weeping over an hour.
Or cap the openings and pressure test at 2 to 3 psi with soapy water, never more.
If you find a weeping seam, a cluster of pits, or a soft spot that flexes under thumb pressure, replace the tank. A new aftermarket tank is usually cheaper than a proper reline plus the risk of a leak over a hot exhaust.
Signs you should hand it to a hot-tank or relining shop
Some tanks should go straight to a shop. Below-deck marine tanks, tanks with internal baffles welded in place, and anything holding 50 gallons or more all qualify. So does any tank you cannot safely move or ventilate.
A hot-tank dip strips varnish and scale in a way no driveway method matches. A professional reline includes proper etching, a proven ethanol-rated coating, and a cure cycle in controlled temperature. That matters more than most people realize.
The other signal is time. If the equipment is a work truck, a boat you use weekly, or a standby generator, paying $300 to $600 to have it done right this week beats a DIY job you finish in three weekends.
The Safety Setup: Vapor, Static, and the Tools That Get People Hurt
Fuel tank work hurts people through vapor, not liquid. The liquid burns. The vapor explodes, and it does so at concentrations you cannot see or smell reliably.
Set the workspace up before you open anything.
Why a shop vac, a drill, or a drop light near an "empty" tank is the real danger
An empty tank is more dangerous than a full one. What is left inside is vapor, mixed with air, sitting right in the flammable range. Gasoline's flammable range runs from about 1.4% to 7.6% by volume in air, and a half-empty tank sits comfortably inside it.
Shop vacuums are the classic mistake. Their motors use brushes that spark, and the airflow pushes vapor through the housing. People have destroyed garages this way.
The same applies to drills, grinders, cut-off wheels, and incandescent drop lights. Any of them can ignite a tank that has been "empty" for a week. If a tank needs cutting or welding, it needs professional purging, not a garden hose rinse.
OSHA's flammable liquids standard is written for workplaces, and its core logic applies in your garage too: control ignition sources, control vapor, and control the quantity of liquid present.
Bonding and grounding during every transfer
Static is the quiet killer. Fuel moving through a hose generates charge, and an ungrounded container can hold it until something makes a circuit. That spark happens at the filler neck, right where the vapor is.
Bond before you open anything. Connect the receiving container to the tank or the vehicle chassis with a bonding strap, then ground the whole assembly. Keep the connection in place until everything is closed up again.
Never fill a loose container sitting in a truck bed or on a plastic liner. Set it on the ground, away from the vehicle, and keep the nozzle in contact with the container rim. That single habit prevents most static incidents.
Use an approved transfer pump or a fuel-rated caddy. A length of garden hose and a mouthful of gasoline is how people end up in an emergency room.
Ventilation, respirator cartridges, gloves, and eye protection
Work outside or with forced cross-ventilation. A closed garage holds vapor at exactly the concentration you do not want, and it pools at floor level where you are kneeling.
Wear nitrile gloves, not latex. Gasoline passes through latex in seconds. Add chemical splash goggles and an apron, because fuel finds the one gap in your setup every time.
For solvent work, use an organic vapor cartridge respirator. A dust mask does nothing for aromatic vapor. If you can smell the solvent through the mask, the seal is broken or the cartridge is spent.
Diesel isn't safe just because it's harder to light
Diesel has a flash point around 125°F to 180°F, well above ambient, which makes people careless. It still burns, and it burns badly once it is soaked into something.
A diesel-soaked rag in a warm shop is a real fire risk. So is diesel mist from a leaking injector line or a pressurized transfer. Vapor from a spill in a hot enclosed space is worse than most people expect.
Treat diesel with the same ignition discipline as gasoline and add one extra habit: bag and remove soaked rags immediately. Do not leave them in a bucket overnight.
Solvent, sludge, and drained fuel are all hazardous waste, and every bit of it has to leave your property legally. Pouring it down a drain or onto gravel contaminates groundwater, and it is illegal nearly everywhere. Start with the EPA's guidance on household hazardous waste before you decide what to do with the drums.
Next in line is the actual drain, the fuel transfer, and the disposal run, where the details start to matter more than the theory.
Draining, Pumping Out, and Getting Rid of the Old Fuel
Draining sounds like the easy part. It is where most of the real damage happens, either to your back, your driveway, or the paint on the vehicle. Slow down here.
Your two goals are simple. Get the fuel out without spilling it. Learn what the tank is hiding while you do it.
Relieving fuel pressure and disabling the pump before you open anything
Fuel injection systems hold pressure after the engine stops. A modern port-injected engine can hold 40 to 60 psi in the line, and direct injection runs far higher. Open a fitting without relieving that and you get a face full of fuel.
Find the fuel pump fuse or relay and pull it. Crank the engine for a few seconds until it stumbles and stalls. Then disconnect the negative battery terminal and release any remaining pressure at the test port on the rail, wrapping a rag around it to catch the spurt.
On a small engine, this is just a fuel shutoff valve or a clamped line. On a diesel, expect a low-pressure lift pump and a separate water separator drain. Never open a high-pressure common rail line with the engine running or recently run.
Label the fuse you pulled. A surprising number of these jobs end with a no-start that turns out to be a fuse still sitting in a sandwich bag on the bench.
Siphon, transfer pump, or fuel caddy?
Four draining methods cover almost every tank you will meet. Which one fits depends on tank size, access, and whether the tank has a drain plug.
| Method | Best for | Speed | Watch out for |
|---|---|---|---|
| Primer bulb siphon | Small tanks under 5 gallons | 10 to 20 minutes | Bulb and hose must be fuel rated, not aquarium hose |
| Electric transfer pump | Vehicles, boats, bulk tanks | 5 to 15 minutes | Needs bonding and a grounded container |
| Fuel caddy with built-in pump | 10 to 30 gallon jobs, clean transfers | 10 minutes | Heavy when full, needs a smooth path |
| OEM tank drain plug | Tanks that have one, usually diesel trucks | Fastest | Torque the plug on refit and fit a new washer |
A manual siphon with a primer bulb is the safest choice for a one-off small tank. There is no motor, no spark, and no cord. It is slow, but slow is fine when you are kneeling next to 3 gallons of gasoline.
If the tank has no drain plug and the pump module is coming out anyway, you can often jumper the pump to push fuel out through the feed line. That works well on a vehicle. It is a terrible idea on a bench-mounted tank with open vapor.
One habit matters more than the method. Set the receiving container on the ground, bond it to the tank or chassis, and keep metal contact between the hose and the container mouth.
Measuring what came out, and why the number matters
Measure what you pull out. If a 16-gallon tank gives up 11 gallons, there are 5 gallons of something still in there, and that leftover is where the water and sludge live.
Do the math before you clean. A tank drained from full carries far less settled debris than one drained from a quarter tank that sat two years. That difference decides whether a solvent wash is enough or whether you need a full bench-out scrub.
Keep a small sample in a labelled jar. Note the date, the equipment, and the fuel type. If the same machine comes back with a clogged filter in six weeks, that jar tells you whether you fixed the cause or just the symptom.
Getting the last gallon out of a baffled tank
Baffles are walls inside the tank that stop fuel sloshing. They also create pockets a siphon tube cannot reach. Every baffled tank has a low corner that holds a pint or two of the worst stuff in the system.
Rock the tank gently, then tip it toward the sender opening. A cheap fluid extractor with a thin pickup tube reaches into corners a siphon will not. On a shaped plastic tank, tilting to the filler neck side and letting it sit overnight gets more out than any hurried attempt.
Do not reach for a wet/dry vacuum for this step. Even a shop vac rated for liquids has a universal motor with brushes that spark. That is the exact ignition source this job exists to avoid.
Legal disposal: household hazardous waste, never a drain or the ground
Old fuel is regulated waste. It cannot go down a storm drain, into soil, into the trash, or into a sewer. One gallon of gasoline can foul a very large volume of groundwater, and most municipal systems are not built to handle it.
The practical route in the US is a household hazardous waste collection site or a municipal HHW event. Many counties run one-day collections in spring and fall, and some fire departments accept small quantities. The EPA lays out the household hazardous waste framework that local programs follow.
In the UK, most local authority recycling centres take small quantities of fuel and solvents, and some garages accept drained fuel for a fee. Call first. Turning up with 15 gallons in unlabelled containers usually ends with a refusal.
A few rules that keep you legal and safe:
- Keep fuel in approved, sealed, labelled containers, never in milk jugs or water bottles.
- Do not mix fuel with used oil unless your collection site specifically accepts the mix.
- Store filled containers away from the house, out of sun, and off concrete that can wick spills indoors.
- Keep a spill kit and absorbent pads on hand while transferring, not after.
- Ask about solvent and sludge separately, since some sites take fuel but not spent solvent.
If a bed-mounted tank or a truck bed full of containers is part of your setup, remember that a closed cover traps vapor where you least want it. A sealed bed cover over a leaking container is a bomb with a lid. Ventilate before you open anything.
Step-by-Step: Degreasing and Stripping Varnish
Varnish is oxidized fuel, and it behaves like dried cooking oil. Fresh varnish wipes off. Old varnish needs heat, time, and mechanical help.
Plan the sequence before you pour anything.
The order is degrease, then derust, then rinse, then dry, then seal. Skipping the degrease step is the most common reason a rust remover underperforms. Chelators and acids cannot work through an oil film.
| Item | What to get | Notes |
|---|---|---|
| Solvent | Mineral spirits or a dedicated fuel tank solvent | Check plastic compatibility first |
| Degreaser | Water-based, aluminum safe | Dilute per label, rinse fully |
| Agitation media | 2 to 3 feet of light chain, or a handful of nuts | Count them in and count them out |
| Brushes | Long-handle bottle brush, nylon and brass | Brass for steel only |
| PPE | Nitrile gloves, splash goggles, organic vapor respirator | Latex is useless here |
| Containers | Metal pail for used solvent, funnel with filter | Label everything |
Solvent selection by tank material
Pick the mildest solvent that will lift the film, then escalate only if it fails. That approach protects the tank and your lungs.
For steel, mineral spirits, naphtha, or a purpose-made tank solvent all work. For aluminum, stay with mineral spirits or a mild citrus degreaser and avoid anything caustic. For HDPE plastic, warm water and a strong detergent often do more than solvent, and they carry far less risk of softening the surface.
Acetone and MEK are the two that ruin plastic tanks. They are also overkill for varnish. There is no varnish so stubborn that a plastic tank needs acetone.
Agitation media and how long to shake
Agitation is what separates a real clean from a rinse. Solvent dissolves the film. Media scrubs the walls where the film has hardened.
Drop a length of light chain through the sender opening, or a handful of steel nuts for a small tank. Seal every opening with the original sender, a cap, or a rubber plug and tape. Wrap the tank in a blanket or old towel so the outside does not get beaten up.
Then shake. Two to three minutes of hard shaking, then rest for fifteen. Rotate the tank to a new face and repeat.
For light varnish, 30 to 45 minutes of this cycle is enough. For heavy gum, plan on two to three hours across an afternoon, changing the solvent once when it goes dark.
Count your media before it goes in and count it again when it comes out. A stray nut left rolling around inside a tank will rattle, and eventually it will find the pickup.
Getting corners, seams, and baffle pockets clean
Corners and seams hold the film that causes repeat failures. A chain reaches most of the interior. It does not reach a baffle pocket or the sump well.
Use a long-handle bottle brush through the sender opening for the sump. For a baffled tank, pour a small amount of solvent into each pocket, seal, and rock the tank specifically to flood that pocket.
Look at the seam weld line. If it still shows a dark line of varnish after two cycles, the job is not done. That residue softens in fresh fuel and heads straight for the filter.
The soak and scrub cycle for heavy varnish
Heavy gum needs dwell time. Fill the tank a third full with solvent, seal it, and let it sit for an hour. Then agitate, drain, and inspect with a light.
Repeat until the walls feel smooth and the solvent comes out close to its original color. A dark amber pour means the solvent is saturated and needs replacing, not reusing.
Do not leave solvent sitting in a plastic tank for days. Minutes to hours is the working window. Long soaks are for steel only.
Neutralizing and the first rinse
Neutralizing matters more after acid than after solvent, but rinse discipline applies to both. Water-based degreasers must be rinsed completely, because residue interferes with sealers and can hold moisture against steel.
Rinse with clean water, then neutralize any acid with a baking soda solution until it stops fizzing. Follow with two fresh water rinses. Then move straight to drying, because bare steel starts to flash rust within minutes to hours.
Solvent does not need neutralizing, but it does need removing. Wipe out what you can, then let the rest evaporate with the tank open and ventilated. Never trap solvent vapor in a sealed tank.
What to do with the solvent afterward
Spent solvent is hazardous waste, same as the fuel. It usually goes to the same collection site, in a labelled metal container with a tight lid.
Let sludge settle, then decant the clearer solvent for a second use on a dirty job. That is a legitimate way to stretch a gallon. Filtering and reusing solvent for a final rinse is standard practice in shops.
Never pour solvent onto gravel, into a drain, or into a burn barrel. If the container is a plastic bucket, check that the solvent will not soften it before you leave it sitting in a garage for a month.
Killing Rust: Chelation, Acid, and Electrolysis Compared
Rust removal is chemistry, and the right chemistry depends on how much metal you have left. The goal is to remove oxide without removing good steel. That is a narrower target than most people assume.
Image source: Wikimedia Commons / NASA Marshall Space Flight Center / Michael DeMocker
There are four methods worth knowing. Each has a case where it wins, and each has a failure mode that ruins a tank.
| Method | Speed | Cost | Best case | Main risk |
|---|---|---|---|---|
| Chelating remover | 4 to 24 hours | $25 to $40 per gallon | Light to moderate scale, low fuss | Slow on heavy flaking rust |
| Phosphoric acid | 30 minutes to 2 hours | $15 to $30 | Fast surface conversion on steel | Etches aluminum, needs full neutralization |
| Electrolysis | 4 to 24 hours | $20 to $40 plus a charger | Heavy scale on accessible steel | Line of sight limits, hydrogen gas |
| Vinegar or citric acid | 12 to 72 hours | Under $10 | Light flash rust on small tanks | Flash rusts within hours of rinsing |
Evapo-Rust-type chelators: slow, safe, forgiving
Chelating removers bind iron ions and lift them into solution. They are the friendliest option on this list. They will not eat good steel, they will not etch aluminum, and a forgotten tank left overnight is not a disaster.
The catch is time and volume. You need enough liquid to cover the rusted area, and the process slows as the solution loads up with iron. Four hours handles light scale.
Twenty-four hours handles moderate scale.
Chelators work best on a tank that has already been degreased. Oil film blocks contact and the rust stays put. If you only do one prep step before a chelator, make it the degrease.
Phosphoric acid: fast, but it demands full neutralization
Phosphoric acid converts iron oxide into iron phosphate, which is a dark grey coating that paint and sealer will bond to. It is fast, effective, and the right tool for a steel tank you plan to seal.
It is also unforgiving. Leave it in a seam and it keeps working, eating metal and ruining the new pump months later. Rinse thoroughly, neutralize with baking soda, then rinse twice more.
Keep phosphoric acid away from aluminum, and never use it in a galvanized tank. It will attack the zinc coating and leave you with bare steel that rusts immediately.
Electrolysis setup and its limits
Electrolysis uses a low-voltage DC current to move rust off the steel and onto a sacrificial anode. A battery charger, a plastic tub, washing soda, and a piece of scrap steel are the whole kit.
It works beautifully inside a tank when the anode can see the rust. It does not work around corners, behind baffles, or in a tank too small to fit an anode. It also produces hydrogen, so ventilation is not optional.
Watch the polarity. Reversing it will erode the tank instead of the rust. And keep the charger off the battery setting and on manual, because a smart charger will shut down when it sees the load it does not expect.
Vinegar, molasses, and the folk remedies that actually work
Some home remedies are real chemistry and some are internet folklore. Vinegar, which is dilute acetic acid, does remove light rust. It also etches steel and causes flash rust almost immediately after rinsing, so it needs an alcohol chase and a coat of oil or sealer right away.
Citric acid is the gentler cousin and works well on small parts and motorcycle tanks. Molasses and water works through chelation, and it works, but it takes weeks and smells like a farmyard. A tank that needs molasses in July is a tank that probably should have been sealed in May.
None of these fix pitting. They remove oxide. They do not add metal back.
Judging pitting depth before you commit
Pitting is where rust removal stops being a cleaning job. Shallow pits across a flat panel are usually savable. Deep pits at a seam, under a strap, or around the sump are usually not.
Wire-brush a suspect patch and look at it under angled light. If the pits look like pinpricks and the surrounding metal is solid, clean and seal. If the metal flexes under thumb pressure or the pits cluster along a weld, replace.
The economics are simple. A chelator, a sealer kit, and a weekend is real money. A new aftermarket tank for a mower or an older car is often in the same range.
On a diesel that has been running contaminated fuel, the injectors are often the bigger bill anyway, and a set of replacement injectors for an older Duramax will cost more than the tank ever did.
Drying and the Flash-Rust Window
Drying is the step people rush, and it is the step that decides whether everything before it holds. Moisture left in a seam ruins sealer. Moisture left anywhere starts rust on bare steel within minutes.
Think of it as a countdown. The moment bare steel is exposed to air after a water rinse, the clock is running.
Chasing water out with isopropyl or denatured alcohol
Alcohol is the workhorse here because it mixes with water and evaporates fast. Use 90% or higher isopropyl, or denatured alcohol. The 70% drugstore version leaves too much water behind.
Pour in a cup or two, seal, and slosh it across every surface, especially seams and the sump. Then drain it out. The alcohol picks up residual water as it goes.
Two alcohol passes are better than one long soak. Change the alcohol between passes, since the first one comes out carrying the water you are trying to remove.
Filtered compressed air, low heat, and a water trap
Compressed air is useful, but only if it is dry. A compressor without a water trap blows moisture straight into your clean tank, which is the opposite of the goal.
Fit an inline water trap and drain the compressor tank first. Then blow air through the sender opening and out the filler neck, working each corner in turn. Watch the exit for mist.
Low heat finishes the job. A heat gun on its lowest setting, held well back, or a warm dry room at 80°F to 90°F overnight works. Never use a heat source with a flame, and never seal the tank while it is still warm and humid inside.
Verifying dryness with a mirror or camera, not by feel
Your hand is a bad moisture detector. A tank that feels dry can hold water in a seam that you cannot reach.
Use a mirror on a stick with a flashlight, or the borescope again. Look at the sump, the seam line, and the area under the baffles. Any beaded moisture means another alcohol pass and more air.
The plastic bag test is a decent confirmation. Seal the tank openings with a piece of clear plastic taped over them and leave it in the sun for an hour. Condensation on the underside of the plastic means moisture is still coming off the metal.
Why a wet seam ruins the next three steps
A damp seam fails in three ways. It lifts sealer, causing flakes that clog the filter weeks later. It holds acid residue that eats the new pump.
And it starts rust under the coating, which is invisible until the tank leaks.
That is why shops are fussy about cure temperatures and dry time. It is not padding the bill. It is the difference between a five-year repair and a five-week one.
If you cannot get the tank genuinely dry, do not seal it. Leave it bare, keep fuel fresh, and revisit the job when you have time and a warm space. A bare clean tank with stabilizer in it beats a badly sealed one every time.
Sealing a Tank: When a Liner Saves It and When It Ruins It
A tank liner is a coating bonded to the inside of the tank. Done right, it turns a pitted steel tank into a serviceable one for years. Done wrong, it becomes the source of the debris that kills your fuel system.
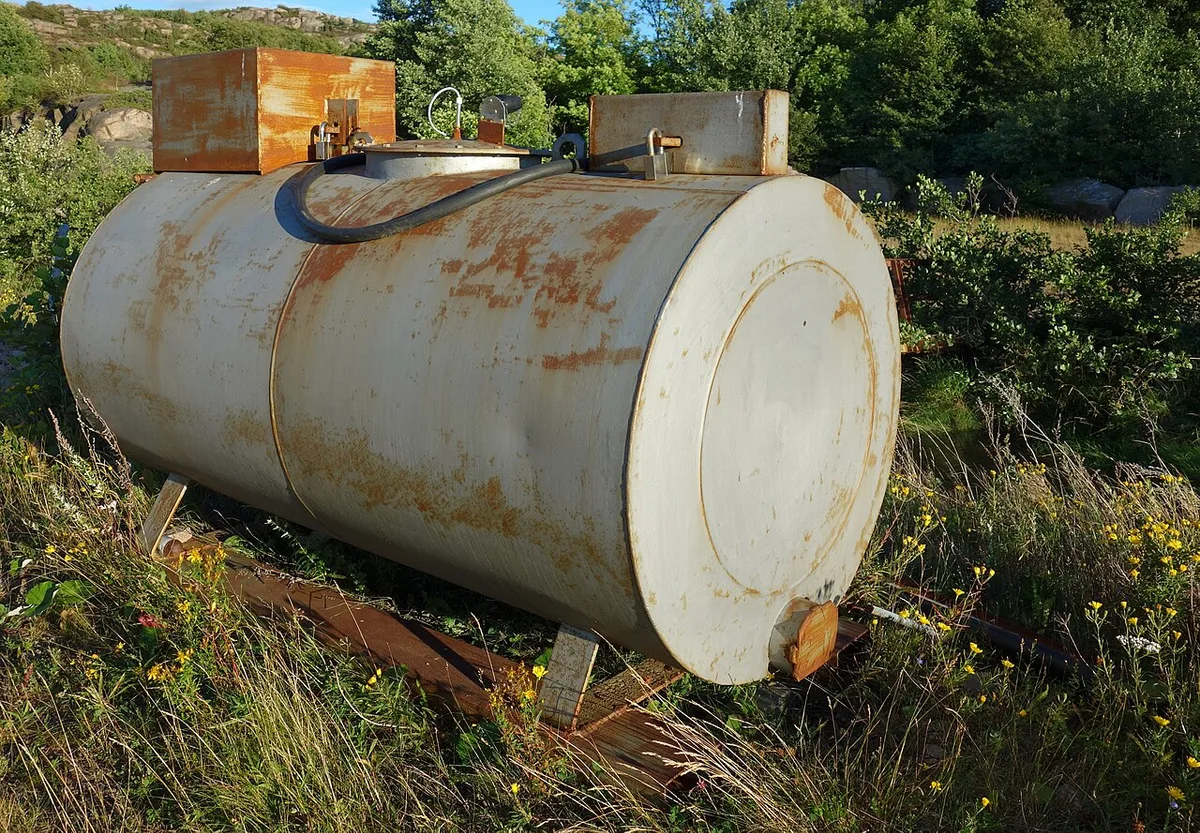
Image source: Wikimedia Commons / W.carter (CC BY-SA)
The difference between those outcomes is almost entirely prep. The epoxy is the easy part.
When a liner makes sense, and when it doesn't
Sealing is right for a specific set of tanks. It is wrong for a lot of others, and knowing which is which saves you a lot of money and swearing.
| Situation | Seal it? | Why |
|---|---|---|
| Steel tank, shallow pitting, solid walls | Yes | Coating seals the pits and stops rust returning |
| Rare or discontinued tank worth saving | Yes | A quality liner is cheaper than fabrication |
| Plastic or HDPE tank | No | Sealers do not bond reliably to plastic |
| Aluminum tank with corrosion | Usually no | Adhesion is inconsistent, welding or replacement is better |
| Active pinholes or weeping seams | No | A coating is not structural |
| Tank with an unknown previous liner | No, strip first | New sealer will not bond to a failing old liner |
Etching and phosphate prep before any epoxy goes in
Prep is the whole job. A sealer needs a rough, clean, chemically active surface to grab. Smooth steel and oil film both cause peeling.
Most kits specify a two-stage prep. First a detergent or solvent wash to remove every trace of oil. Then an acid etch, often phosphoric or a purpose-made metal prep, to leave a grey phosphate surface.
Follow the kit's dilution and dwell times exactly. Mixing your own stronger acid is how tanks get etched too far and seams get compromised. If the data sheet says five minutes, five minutes it is.
Two-part epoxy, phenol-novolac, and rotation coating
Two-part epoxy is the common liner for gasoline tanks. Phenol-novolac coatings are the heavier-duty option for tanks seeing harsh fuel or long service. Both work on the same principle: coat every surface, drain the excess, and let it cure.
Rotation is the technique. Pour the mixed sealer in, seal the openings, and turn the tank slowly through every orientation. Every face gets a pass.
Then drain the excess out through the sender opening and keep rotating until it stops running.
A tank with baffles needs extra patience. Each pocket has to be coated, and each pocket has to drain. Pockets that pool sealer end up with a thick blob that can crack and flake later.
Cure time and temperature floors
Cure time is where impatience wrecks a good job. Most two-part tank sealers want around 96 hours at 70°F or above, and some want longer in cool conditions.
Cold slows the reaction. A tank cured at 55°F may never fully harden, and a soft liner fails the first time fuel sloshes against it. Read the temperature floor on the data sheet and meet it.
Do not shortcut with heat. A heat gun on uncured epoxy skins the surface and traps solvent underneath, which is a guaranteed peel later. Warm room, no drafts, and leave it alone.
Thin spots, puddles, and blocked pickup passages
Inspect the cured liner with a light and a mirror. What you want is an even, glossy coat with no visible steel. Thin spots show as dull patches or grey areas where the metal still shows through.
Puddles are the other defect. A thick pool at the sump can block the pickup screen or crack as it cures. If the pickup passage is partially blocked, clear it before reassembly, not after.
Reject the job if the liner is soft, tacky, or lifting at the seam. Scraping out a bad liner is a miserable afternoon. A second attempt on the same tank needs a full strip, not another coat on top.
Ethanol-compatible sealer or nothing at all
Ethanol is the reason older liners fail. E10 softens coatings that were formulated before ethanol became standard, and the coating lifts in sheets that head straight into the filter and the pump.
Check the product data sheet for ethanol resistance before you buy. Most reputable kits now state E10 and E15 compatibility explicitly. If a label is vague or silent on ethanol, treat that as a no.
The same logic applies to every soft part in the system. A liner rated for ethanol mated to a non-rated filler hose is still a leak waiting to happen. Which is why the next stage, the reassembly, is where you finish the job or undo it.
Reassembly: Socks, Filters, Lines, and the Parts You Never Reuse
A clean tank bolted back to a contaminated system is a second breakdown with a delay timer. Everything downstream of the tank has been sitting in the same dirty fuel. Reassembly is where you decide whether this repair lasts or repeats.
Buy the soft parts before you start. They are cheap, and most of them are one-time-use by design.
| Part | Replace every time? | Typical cost | Why it fails |
|---|---|---|---|
| Pickup sock or in-tank strainer | Yes | $8 to $25 | Clogs with varnish and gets brittle with age |
| Inline fuel filter | Yes | $10 to $40 | Already loaded with debris from the tank |
| Lock ring O-ring or gasket | Yes | $5 to $20 | Crushes once, seals once |
| Fuel line quick-connect clips | Yes | $3 to $10 | Plastic tabs snap on removal |
| Filler neck hose and clamps | Inspect, replace if cracked | $15 to $45 | Ethanol degrades older rubber |
| Tank strap bolts | Usually reuse | n/a | Replace if corroded or stretched |
New pickup sock, new inline filter, new lock ring O-ring
The pickup sock is the part that decides how long the repair lasts. It sits at the lowest point of the tank and catches everything the fuel carries. A brown, stiff sock is a spent sock, and soaking it in solvent does not restore it.
Fit a new sock before the pump module goes back in. Push it fully onto the pickup tube until it seats. A sock that sits half-on will fall off inside the tank and leave the pump pulling unfiltered fuel.
The lock ring O-ring seals the module to the tank. Reuse one and you get a slow weep that shows up as a fuel smell in the cabin or a wet patch on the tank top. Lube the new O-ring with a little fuel, not grease, and seat it square before you tighten the ring.
Fuel line and quick-connect condition
Fuel lines rust from the inside out on steel, and crack from the outside in on rubber. Both problems dump debris and air into a system you just cleaned.
Run a finger along the steel line and look for damp spots, scaling, and dark staining at the fittings. On rubber sections, bend them gently and look for surface cracks. Any line that is stiff, cracked, or weeping gets replaced.
Quick-connect fittings deserve their own check. The plastic retaining clips go brittle with heat and age, and they often break on removal without obvious drama. Fit new clips, listen for the click, then tug the line to confirm it locked.
Nylon lines on newer vehicles are durable but unforgiving. They crack if you bend them sharply, and they do not tolerate being forced onto a misaligned fitting.
Sending unit resistance and getting the gauge right
A gauge that reads wrong after the job is almost always a sending unit problem. The float arm bends easily, and a bent arm reads empty when the tank is half full.
Check the sweep before you install. With the module out and the connector plugged in, move the float through its full travel and watch the gauge. It should rise and fall smoothly, with no dead spots.
If you fitted an aftermarket pump module, confirm the resistance range matches the original. Common ranges are roughly 0 to 90 ohms and 240 to 33 ohms, and they are not interchangeable. A mismatch gives you a gauge that reads backwards.
Bend the float arm only if the tank shape demands it, and then in small increments. Each adjustment costs you a full drain and refill to verify.
EVAP and vent routing, torque specs, and the leak test
The evaporative emissions system is the part people rush. Vent lines and rollover valves have a specific routing for a reason, and a swapped or kinked line causes fuel smells and check engine lights.
Route the vent line the way it came off, and use the clip locations on the frame or body. A vent line that hangs low can fill with liquid fuel and block vapor flow. A pinched line does the same thing.
Torque the lock ring and strap fasteners to spec. Lock rings are usually tightened with a spanner or a brass drift, never a screwdriver and hammer. Straps want even tension on both sides, since an uneven pull distorts a plastic tank.
Then leak test before you put fuel in. Cap the openings and apply 2 to 3 psi with a hand pump, or use a smoke machine if you have access to one. Soapy water on every fitting shows you the truth in seconds.
First start, prime, pressure check, and the follow-up filter change
Prime the system before you crank. Cycle the key to run several times without starting, letting the pump build pressure each cycle. On a diesel, use the hand primer or the lift pump cycle until it goes firm.
Then start it and let it idle. Listen for a whine from the pump, watch for leaks at every joint, and check that the gauge reads sensibly. A pump that sounds loud and strained is pulling air or fighting a restriction.
Take it for a short drive and recheck. Heat and vibration reveal leaks that a cold idle hides. Then recheck the fuel trims if you have a scanner, since a big positive trim tells you something is still restricted.
Plan a second filter change after 500 to 1,000 miles. Any debris that survived the clean will collect there, and a $15 filter now saves a pump later. Log the date and mileage so the next owner, or the next you, knows what was done.
If the check engine light comes back with an EVAP code, do not guess. A tool that shows live data and pending codes will tell you whether it is a purge valve, a vent valve, or a real leak, which is a much faster path than replacing parts one at a time.
What It Actually Costs: DIY, Shop Cleaning, Sealing, Replacement
Cost is where the decision usually gets made. A DIY clean looks cheap until you add solvent, filters, sealer, and three trips to the parts store. A shop looks expensive until you price a fuel pump.
Here is the honest range, based on parts pricing and typical shop labor rates as of 2026.
| Route | Parts and materials | Labor | Total |
|---|---|---|---|
| Small-engine tank, DIY flush | $20 to $50 | 1 to 2 hours | $20 to $50 |
| Vehicle tank, DIY bench-out clean | $60 to $150 | 4 to 8 hours | $60 to $150 |
| DIY clean plus sealer kit | $110 to $270 | 4 to 8 hours plus cure | $110 to $270 |
| Shop cleaning, tank dropped off | n/a | 2 to 4 hours shop time | $150 to $400 |
| Shop removal, clean, refit | n/a | 4 to 8 hours shop time | $400 to $900 |
| Professional reline | n/a | 3 to 10 days turnaround | $300 to $600 |
| New OEM tank | $200 to $900 and up | 2 to 6 hours | $200 to $900 plus labor |
| Aftermarket replacement tank | $120 to $400 | 2 to 6 hours | $120 to $400 plus labor |
| Fuel polishing service | n/a | On-site, 1 to 3 hours | $200 to $800 |
Consumables and solvent spend vs. shop labor
The DIY number people forget is consumables. Solvent, degreaser, alcohol, gloves, respirator cartridges, absorbent pads, and a funnel with a filter add up fast. A serious bench-out clean on a 20-gallon tank can burn $80 in chemicals before you buy a single part.
Shop labor is the other side. Most independent shops bill $100 to $180 an hour, and dropping a tank on a modern vehicle is a book-time job that can run four hours on its own. Dealership rates push higher.
Do the comparison on total cost, not on the sticker. If a shop charges $350 to clean a tank you would spend $150 and two weekends on, that $200 buys you a working vehicle this week. For a mower, it does not.
Sealer kit vs. new OEM tank vs. aftermarket replacement
The sealer question is really a value question. A $70 sealer kit plus prep materials makes sense when the tank is rare, expensive, or numbers-matching. It makes no sense on a $150 aftermarket tank for a 15-year-old commuter car.
Use this as a rough rule. If the tank is under $250 new and readily available, replace it. If it is discontinued, marine, or original to a restored vehicle, clean and seal it.
Aftermarket tanks vary enormously in quality. Thicker steel, proper baffling, and a correct filler neck location are what separate a good one from a headache. The same judgment you would apply to whether pricier chassis parts earn their keep applies here: sometimes the cheap part is fine, and sometimes it costs you the job twice.
If you go aftermarket, compare the tank to the original before installation. Check the filler neck angle, sender opening size, strap channel depth, and the presence of internal baffles. A tank that fits but lacks baffles will starve the pump on hard corners.
Fuel polishing for large diesel tanks
Fuel polishing is on-site filtration of stored fuel, and it solves a different problem than tank cleaning. It removes suspended water and particulate from the fuel itself, without opening the tank.
Polishing is the right call for a 500-gallon farm tank, a boat with 300 gallons aboard, or a generator with a full belly of questionable diesel. A polishing rig circulates the fuel through filters and a water separator, often several passes, until the sample runs clear.
What polishing cannot do is remove sludge or biofilm stuck to the tank walls. If the tank has a visible layer of biomass, polishing cleans the fuel and leaves the colony behind. You need physical removal first, then polishing to protect the new fuel.
Ask for a before-and-after sample in a clear jar. That is the only proof that means anything, and a reputable outfit will hand it over without being asked.
The downstream bill if contamination reaches the pump and injectors
The expensive part of contaminated fuel is not the tank. It is everything the fuel touches on the way to the cylinder.
A modern common rail diesel filters at 2 to 5 microns and runs fuel through a high-pressure pump with clearances measured in microns. Contaminated fuel scores those surfaces, and the metal it sheds goes straight to the injectors. A pump and injector set on a modern diesel commonly lands between $3,000 and $8,000 or more.
Gasoline direct injection has the same problem at a smaller scale. A clogged or scored high-pressure pump and a set of fouled injectors is a four-figure repair on many engines. A $30 filter and a $150 cleaning job are cheap insurance against that.
Then there is the labor. A tank clean is a weekend. An injector replacement on a diesel can mean cab-off service on some trucks, which is where the bill really climbs.
Mistakes That Send You Back In Twice
Most failed tank jobs fail for the same handful of reasons. None of them are exotic. All of them are avoidable if you slow down at the right moment.
Cleaning the tank but not the lines, filter, or EVAP circuit
The tank is the source, not the whole system. Fuel lines, the inline filter, the EVAP canister, and the filler neck all hold contamination.
If you clean the tank and refit it with the old filter, the filter loads up in the first fifty miles. Then you blame the cleaning. Then you do the job again.
Flush the lines with clean solvent or low-pressure air, replace the filter, and inspect the filler neck for rust and scale. The filler neck on older vehicles is a genuine culprit, since it rusts from the inside and drops flakes directly into the tank.
Leaving acid or caustic in seams to eat the new pump
Residue is patient. Acid left in a seam keeps reacting long after the tank looks dry, and the byproducts go straight into the fuel.
The symptoms show up weeks later. A new pump fails, or a filter clogs repeatedly, and nobody suspects the rinse they skipped. By then you have bought the pump twice.
Neutralize with baking soda solution until the fizzing stops. Then rinse twice with clean water. Then do the alcohol chase.
If a seam still smells sharp or the rinse water stays acidic on a test strip, keep going.
Rinsing gasoline out with water and calling it dry
Water rinse on a gasoline tank is a legitimate step in some workflows, and a disaster when it is done casually. Water gets into baffle pockets, seams, and the sump. Then it sits there.
The tank feels dry, the outside looks dry, and three weeks later the pump is rusty and the fuel is cloudy. Steel starts to flash rust within minutes of exposure to humid air, and trapped water keeps the process going for days.
If you rinse with water, dry like you mean it. Alcohol chase, filtered air, low heat, and a visual check with a mirror or camera. If you cannot verify dryness, do not seal and do not refill.
Sealing over a damp, oily, or poorly etched surface
Sealer adhesion is binary. Either it bonds or it peels, and there is no middle ground that lasts.
Oil film is the most common cause of peeling. A fingerprint of oil on bare steel is enough to create a blister that grows. The second most common is skipped etching, which leaves a smooth surface with nothing for the epoxy to grip.
The third is temperature. Sealer applied below the data sheet floor may never fully cure, and a soft liner fails fast. Read the sheet, meet the temperature, and give it the full cure window.
Reusing gaskets, crush rings, and original clamps
Reused sealing parts leak. A crush washer is crushed once, an O-ring takes a set, and a spring clamp loses tension after a few heat cycles.
This is the cheapest mistake to avoid and the most annoying to fix. A $6 O-ring that weeps means dropping the tank again.
Replace every seal you disturb. That includes the filler neck gasket, the sender O-ring, the lock ring seal, the fuel line O-rings, and the water separator seals on a diesel. Use fuel-rated clamps, not hardware store hose clamps with sharp edges that cut into rubber.
Skipping the leak test because it looked fine
A leak test takes ten minutes and catches the failures that would otherwise show up as a fuel smell a week later. "It looked fine" is how people end up with a fuel puddle under a hot exhaust.
Pressure test at low pressure, 2 to 3 psi, with soapy water on every joint. Never pressurize a tank to its full working pressure, and never use compressed air at line pressure on an empty tank.
Then do the heat cycle check. Drive it, let it cool, and look again. Thermal expansion opens joints that were tight when cold.
Using a shop vac, a drill, or a heat gun carelessly
This one belongs on the list because it keeps happening. An empty tank is a vapor vessel, and vapor is the part that explodes.
Shop vacs, drills, cut-off wheels, incandescent drop lights, and any open flame are all out. So is a heat gun shoved into a filler neck on a tank that still smells of fuel.
OSHA's flammable liquids standard exists for workplaces, but the logic applies in a driveway: control the ignition source, control the vapor, and control how much liquid is present at any moment. If you need to cut or weld a tank, have it professionally purged first.
Trusting a fuel additive to fix a mechanical problem
Additives maintain clean systems. They do not remove rust scale, they do not dissolve sludge, and they do not repair a clogged sock.
Pouring in a cleaner and hoping is the most common version of this mistake. It feels like progress, and it costs $15, and it does nothing for a tank with a quarter inch of sediment in the sump.
Use additives for storage and for keeping a clean tank clean. Use chemistry and agitation for a dirty one.
Keeping It Clean: Storage, Ethanol, and Seasonal Habits
A clean tank stays clean with a few habits. None of them are difficult, and all of them cost less than the repair they prevent.
The core problem is moisture. Every time a tank breathes through its vent, it takes in air with humidity in it. When the tank cools, that moisture condenses on the walls and runs down into the fuel.
Full vs. empty for winter: the condensation argument
Leave the tank full. A full tank has almost no air space, and almost no air space means almost no condensation.
A half-empty tank is a breathing chamber. Day and night temperature swings pull moist air in and push it out, and each cycle leaves a little water behind. Over a winter, that adds up to a measurable water layer in a sump.
Fill it before storage, add stabilizer to that fresh fuel, and run the engine long enough to get treated fuel through the whole system. Ten minutes of idling is not enough. A short drive or a loaded run is better.
For equipment that must be stored empty, drain it completely and fog the internals if the manufacturer recommends it. A truly dry tank beats a half-full one, but a full treated tank beats both.
Stabilizer timing: before storage, not after
Stabilizer works by slowing oxidation in fuel that is still good. It does not restore fuel that has already degraded.
Add it at the pump or right after you fill, then run the engine so treated fuel reaches the injectors and the rail. Adding it in spring to fuel that sat all winter is a waste of money.
Most stabilizers claim 12 to 24 months of protection in a sealed container. Real-world results in a vented tank are shorter, especially in humid climates. Twelve months is a safer planning number.
For ethanol blends, choose a stabilizer that explicitly addresses ethanol and corrosion. Enzyme treatments for diesel are a separate product category and are not interchangeable.
Draining carburetor bowls on small engines
The carburetor bowl is where stale fuel does its damage on mowers, trimmers, and generators. It holds a small volume of fuel that turns to varnish and blocks the main jet.
Drain it before storage. Most small engines have a bowl drain screw, and some have a fuel shutoff valve you can close and then run the engine until it dies. That second method is the cleanest.
If the engine has no drain, plan on a carburetor clean in spring. It is a fifteen-minute job on most small engines, and it is far cheaper than a new carburetor.
Fresh fuel every season matters as much as draining. A can of gasoline that has been sitting in a shed since last summer is not a good starting point for a small engine.
Annual water-separator service and sampling on diesel
Diesel water separators need attention on a schedule, not when the light comes on. Drain the separator monthly on equipment that sits, and annually at minimum on anything used regularly.
Sample the tank from the bottom, not the top. A clear jar left to settle tells you whether water and biomass are building up. Do this before the season starts and again mid-season on a boat or a bulk tank.
Biocide treatment is preventive, not curative. If you already have a biofilm, treat it and then physically remove the biomass. Dosing a contaminated tank and calling it done just moves the problem downstream.
Keep the fuel cap seal intact and the filler area clean. A missing or hardened cap gasket lets rainwater straight into a tank that sits outside.
How long untreated E10 actually lasts
Untreated E10 has a practical shelf life of about three to six months. After that, oxidation and moisture start changing the fuel in ways you can smell.
At six months, you get hard starting and a rougher idle. At twelve months, varnish starts forming on the sock and in the lines. At two years, the fuel may have phase separated, and at that point it is not fuel anymore.
Ethanol-free gasoline lasts longer, often twelve months or more untreated. Diesel is more variable, since microbial growth depends on water and temperature, but six to twelve months is a reasonable untreated window.
The habit that solves most of this: buy fuel you will burn in a season, treat what you store, and rotate your stock. Old fuel in a clean tank is still old fuel.
Frequently Asked Questions
Can I clean a fuel tank without removing it?
Yes, if the contamination is light varnish and you can reach the sender opening. Drain, flush with solvent, chase with alcohol, and replace the filter. If there is rust, sludge, or heavy gum, the tank needs to come out.
In-place work cannot agitate corners or dry a baffled tank properly.
Is vinegar safe for a motorcycle tank?
Vinegar removes light rust from a steel motorcycle tank, and it is cheap. It also etches steel and flash rusts within hours of rinsing. Follow with an alcohol chase, dry it fully, and coat or refill immediately.
Never use vinegar in an aluminum tank.
How do I clean algae out of a diesel tank?
Treat the fuel with a biocide to kill the organisms, then remove the biomass physically. Draining and wiping the tank walls is the only reliable method. Polishing the fuel afterward protects the new filters.
Replace the water separator and filters once the tank is clean.
Will a plastic mower tank survive solvent?
Most HDPE mower tanks handle mineral spirits and mild degreasers fine. They do not handle acetone, MEK, or hot aromatic solvents, which soften the surface. Warm soapy water plus agitation often does the job with no chemical risk at all.
How long does tank sealer need to cure?
Most two-part tank sealers want about 96 hours at 70°F or above. Some need longer in cooler conditions. Cold stalls the reaction, and a soft liner fails once fuel hits it.
Follow the data sheet temperature floor exactly.
What do I do with 15 gallons of stale gas?
Take it to a household hazardous waste collection site or a municipal collection event. Never pour it down a drain, into soil, or into the trash. Store it in approved sealed containers until you can drop it off, and call ahead to confirm they accept fuel.
