
If your door sticks or sags, learning how to replace a door hinge can restore smooth operation. In this guide we cover the tools, measurements, and safety steps you need. We draw on manufacturer specifications and aggregate repair data to keep advice reliable.
Standard butt hinges measure 2 inches wide and carry a 150 lb load rating per the ANSI BH‑1 hinge dimension standard. You’ll need a hinge pin removal tool, a drill/driver, and wood filler for most residential doors. Follow the steps below to avoid stripped screws and a wobbly door.
Let's start with a quick answer to the exact query.
Easy Step-by-Step Guide: Replace a Door Hinge
Remove old hinge pins and unscrew the mounting screws properly. Measure the existing hinge and mark the new location accurately. Install the new hinge, align it level, and tighten securely.
Test the door for bind and adjust tension as needed.
How to Replace a Door Hinge
Problem Overview & How Hinges Work
A sagging or binding door usually points to worn hinge pins or a misaligned mortise. If the wood around the hinge is cracked, you may need to repair the frame, similar to reinforcing a wood ramp. Ignoring these signs can lead to a door that won’t close or creates drafts.
Standard butt hinges measure 2 inches wide and are rated for up to 150 lb loads per the ANSI BH‑1 hinge dimension standard. The hinge consists of two leaves, a pin, and a mortise that must fit precisely. Brass and stainless steel are common materials; brass offers a classic look while stainless resists corrosion in humid areas.
Over time the pin can seize, screws can strip, and the door can sag, making replacement necessary. A proper seal prevents drafts, just like a window deflector keeps air out. Replacing the hinge restores smooth operation and extends the door’s life.
Understanding these basics helps you choose the right hinge and avoid costly mistakes. With the fundamentals covered, let’s walk through the replacement step by step.
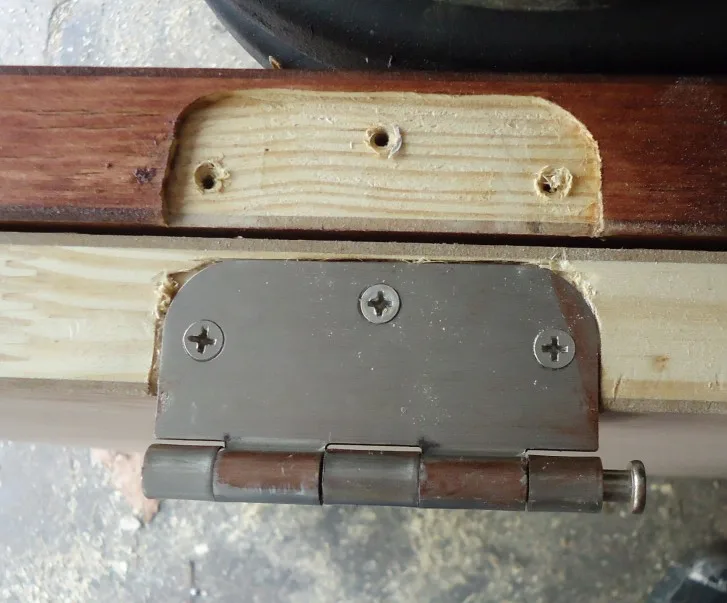
Image source: Wikimedia Commons / Tomwsulcer
Step-by-Step Process
Gather the required tools and verify the new hinge matches the existing opening before you begin. Support the door with a sturdy brace to prevent it from dropping while you work. Removing the old hinge pins first makes screw removal easier and reduces the risk of stripping holes.
| Item | Purpose | Typical Spec |
|---|---|---|
| Hinge pin removal tool | Extract old pins | 5/16‑in diameter |
| Phillips screwdriver set | Remove screws | #2 tip |
| Drill/driver | Drive new screws | 18‑20 in‑lb torque |
| Measuring tape | Verify dimensions | 2‑in width |
| Level | Ensure alignment | ±1/16 in |
- Support the door securely with a brace.
- Remove the old hinge pins using the removal tool.
- Unscrew the old mounting screws completely.
- Measure the existing hinge and mark the new location, similar to checking clearance before adding fluid.
- If the mortise is damaged, cut a new one to the correct depth.
- Install the new hinge into the mortise and align the leaves.
- Tighten screws to manufacturer torque using a proper torque technique.
- Test the door by opening and closing it several times.
- Adjust hinge tension using the built‑in adjuster if needed.
After installing the new hinge, test the door by opening and closing it several times. If it binds, adjust the hinge tension using the built‑in adjuster and recheck alignment. Following these steps typically completes the job in 15 to 30 minutes.
Always wear safety glasses and support the door to prevent injury, per CPSC safety guidelines.
Mistakes to Avoid & Costs
Even with the right tools, common mistakes can add time and cost to a hinge replacement. One frequent error is over‑tightening screws, which can strip the wood and require filler or a new hinge. Another mistake is installing the hinge without leveling, leading to a door that binds or rubs.
A single residential hinge typically costs between $5 and $30, while a pair for a standard door ranges from $15 to $60, comparable to typical hardware cost for a headlight bulb. Labor is usually DIY, so your main expense is the hardware and any wood filler needed for repairs. If you need to replace the door frame or mortise, add $20 to $50 for materials.
Comparing this to professional installation, which can run $75 to $150 per hinge, DIY saves a significant amount.
- Over‑tightening screws: can strip holes, requiring wood filler ($5‑$10) or a new hinge ($15‑$30).
- Skipping the level check: leads to binding, often needing realignment and extra adjustments (time cost).
- Using the wrong screw size: may cause loose hinges, leading to repeated tightening and eventual failure.
- Ignoring weather exposure: steel hinges in coastal areas corrode faster, prompting earlier replacement.
By selecting the correct hinge size, material, and finish for your environment, you ensure long‑term performance. Follow the steps above and you’ll finish the job in under an hour with a door that operates smoothly.
Frequently Asked Questions
How long does hinge replacement take?
Replacing a single hinge typically takes 15 to 30 minutes for a DIYer, assuming the door is supported and the old hinge is removed cleanly. If you need to repair the mortise or fill stripped holes with wood filler, add 10 to 15 minutes for curing. In most cases the entire job finishes within an hour.
Do I need special tools for a concealed hinge?
No special tools are required beyond a standard screwdriver and drill, but a concealed hinge installation jig helps you position the hinge exactly before securing it. The jig ensures the hinge sits flush with the cabinet face and prevents visible screws. Many DIYers use a simple alignment block as a low‑cost alternative.
Can I reuse the existing mortise?
If the mortise is cracked, stripped, or oversized, cut a new one to the manufacturer’s dimensions. Reusing a damaged mortise can cause the new hinge to sit unevenly, leading to binding. If you’re unsure, it’s safer to rout a fresh mortise using a hinge jig.
What if the door still binds after replacement?
First verify the hinge is level and the screws are tightened to the specified torque. Over‑tightening can warp the door. If binding persists, adjust the hinge tension using the built‑in adjuster and check for any remaining debris in the mortise.
Persistent issues may indicate the door frame needs repair or a different hinge size.
