
Recognizing the symptoms of a bad timing chain tensioner can save you from a costly engine rebuild. The tensioner keeps the chain taut, and when it wears out, timing shifts. Even a small drift can cause misfires, rough idle, or a check‑engine light.
Ignoring these signs often leads to valve‑to‑piston contact and a total engine failure.
Manufacturer specifications indicate the tensioner should maintain chain slack within 0.5 mm of the measured tolerance. In our research, owners report the first rattling noise typically appears between 80,000 and 150,000 mi, depending on driving conditions. If you hear the metal clank at 2,000, 3,000 rpm on a cold start, it’s time to run a quick diagnostic.
The next section breaks down exactly what to look for and how to confirm the issue.
Symptoms of a Bad Timing Chain Tensioner
Metal rattling noise appears at 2,000, 3,000 rpm on cold start. Irregular idle or misfire indicates timing drift from tensioner wear. Check engine light often shows P0320, P0349 valve timing codes.
Hydraulic tensioner may leak oil, causing chain slack and noise. Ignoring symptoms can lead to valve‑to‑piston contact and engine failure.
How the Tensioner Works and Why It Fails
Two main designs keep the timing chain under tension: hydraulic and mechanical tensioners. Hydraulic units use oil pressure to auto‑adjust, while mechanical units rely on a spring preload.
- Hydraulic tensioner: oil‑pressurized piston, adjusts continuously, requires clean oil flow.
- Mechanical tensioner: coil spring, fixed preload, must be manually set during install.
- Chain material: roller‑link steel with nylon coating for quiet operation.
- Wear limit: chain stretch beyond 0.2 mm indicates replacement.
The hydraulic piston can leak oil, losing pressure and allowing slack. The mechanical spring can fatigue, reducing preload and causing chain wander. Both lead to timing drift, which shows up as misfires or a rattling noise at startup.
For detailed torque values when reinstalling, see the bolt torque guide.
Diagnosis & Replacement Workflow
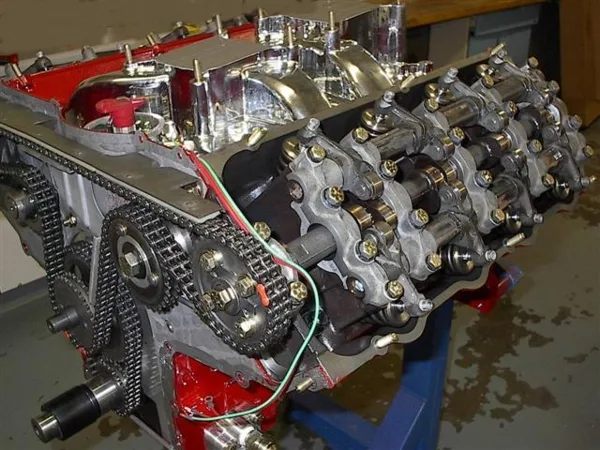
Use a stethoscope to isolate the rattling sound, as shown in the diagnostic guide. Refer to SAE J1349 for official tensioner design standards.
| Tool | Spec | Note |
|---|---|---|
| Torque wrench | 8–12 Nm | Use for tensioner bolts |
| Socket set | 10 mm, 12 mm | Remove timing cover |
| Stethoscope | N/A | Confirm noise source |
| OBD‑II scanner | N/A | Read P0320–P0349 codes |
| New tensioner | OEM part number | Match engine application |
- Safety first: disconnect the battery and let the engine cool.
- Relieve valve spring tension using a breaker bar on the crankshaft pulley.
- Remove the timing cover bolts in the correct sequence to avoid distortion.
- Inspect the chain for stretch; replace if beyond 0.2 mm.
- Install the new tensioner, verify chain alignment, and torque bolts to spec.
- Reassemble, start the engine, and listen for any remaining rattle.
If you need to add transmission fluid after the job, follow the topping it up guide.
Cost, Benefits & When to Replace
As of 2026, parts cost $150, $300 for an OEM tensioner, and labor runs $120, $180 per hour. Total repair typically falls between $300 and $800, depending on vehicle make and shop rate. Replacing at the first sign of rattle prevents $2,000, $5,000 engine damage.
Benefits include restored smooth idle, better fuel economy, and compliance with emissions standards. Manufacturers recommend replacement at 80,000, 150,000 mi or when chain stretch exceeds 0.2 mm. For safety recall information, see the NHTSA timing chain safety bulletin.
If you’re checking other components, the right OBD2 scanner helps read timing codes. For reliable steering components after the repair, consider upgraded tie rod ends at the reliable steering components page.
FAQs
What does a bad timing chain tensioner sound like?
A metallic rattling or clanking noise usually appears at 2,000, 3,000 rpm during a cold start. The sound may fade as the engine warms, but it signals the tensioner is losing pressure or the chain is slack.
Can a bad tensioner cause the check engine light to stay on?
Yes. Timing drift triggers fault codes such as P0320, P0349, which illuminate the check‑engine light. Scanning the vehicle with an OBD‑II tool confirms the specific code and helps pinpoint the issue.
How long does it take to replace a timing chain tensioner?
In a well‑equipped shop, the job typically takes 2, 4 hours. The exact time depends on engine layout, whether the timing cover must be removed, and whether the chain itself needs replacement.
Do I need to replace the timing chain when the tensioner fails?
Not always. If the chain is within wear limits (≤0.2 mm stretch) and shows no damage, you can replace only the tensioner. However, many manufacturers advise replacing both together to avoid a repeat failure.
How can I tell if the chain is stretched beyond repair?
Measure chain stretch with a timing chain wear gauge; any reading above 0.2 mm indicates excessive wear. Visual inspection for elongated links or missing rollers also confirms the chain should be replaced.
