
Ask how long does it take to charge an ev and the honest answer is another question: what are you plugging into? A 120V household outlet adds roughly 4 miles of range every hour. A 350 kW roadside charger can add 200 miles while you stretch your legs and buy a coffee.
Same car, same battery, a completely different clock.
Energy Department figures put Level 1 charging at 3 to 5 miles per hour and Level 2 at 10 to 20 miles per hour, so there's a big gap before you even reach a fast charger. Manufacturer spec sheets show the same spread on the DC side, from 50 kW up to 350 kW. The useful answer isn't a single number, it's a map.
Here's how to find your spot on it.
How Long Does It Take to Charge an Ev
How long does it take to charge an ev? Anywhere from 30 minutes to 40 hours. It depends on the charger, the car, and the battery level.
A 120V outlet adds about 4 miles an hour. A DC fast charger adds 150 to 200 miles in roughly 20 minutes. Most owners charge overnight and never watch the clock.
Why "How Long Does It Take to Charge an EV" Has No Single Answer
Four variables decide the clock. Charger power, your car's onboard limit, how empty the pack is, and how cold the pack is. Change any one of them and the answer moves by hours, not minutes.
| Variable | What it does to your charge time |
|---|---|
| Charger power | The biggest lever. 1.4 kW versus 11 kW is roughly a 50-hour fill versus a 6-hour fill. |
| Onboard charger limit | Caps AC charging no matter how much the wall unit can deliver. |
| Battery size | A bigger pack takes longer at the same power, but each hour of charging buys more miles. |
| State of charge | The top 20% is always the slowest part of the session. |
| Temperature | A cold-soaked pack can accept half the power or less until it warms up. |
Here's the if/then version. If you're on a 120V outlet and the pack sits at 50%, you're looking at roughly a full day to reach 100%. If you're on an 11 kW home charger at the same 50%, you're looking at three to four hours.
Same car, same battery level, a 10x swing from the plug alone.
The second trap is the advertised number. A car marketed as "18 minutes from 10% to 80%" hits that figure at one specific charger, in mild weather, starting from a warm pack. Our research across manufacturer footnotes and owner reports keeps turning up the same pattern.
Those headline times assume ideal conditions and a charger that can actually deliver its rated output.
The third trap is unit confusion between kW and kWh. One is a rate, the other is a quantity. A 50 kWh top-up on a 50 kW charger sounds like an hour of work.
Then taper and conversion losses push it past an hour and a half.
Convenience tech has moved fast too, from phone-based entry setups to over-the-air updates. None of it moves electrons any quicker. Charging speed is a hardware story, not a software one.
So the useful question isn't "how long does charging take." It's "how long does it take in my situation." That comes down to a short list of branches:
- What am I plugged into, and what can it actually deliver?
- What does my car's onboard charger accept?
- How empty am I, and how full do I need to be?
- What's the temperature, and is the pack preconditioned?
- Am I charging overnight at home or standing at a public stall?
Answer those five and the number stops being a range. It becomes a window you can plan around.
The Three Charging Levels and What Each One Actually Delivers
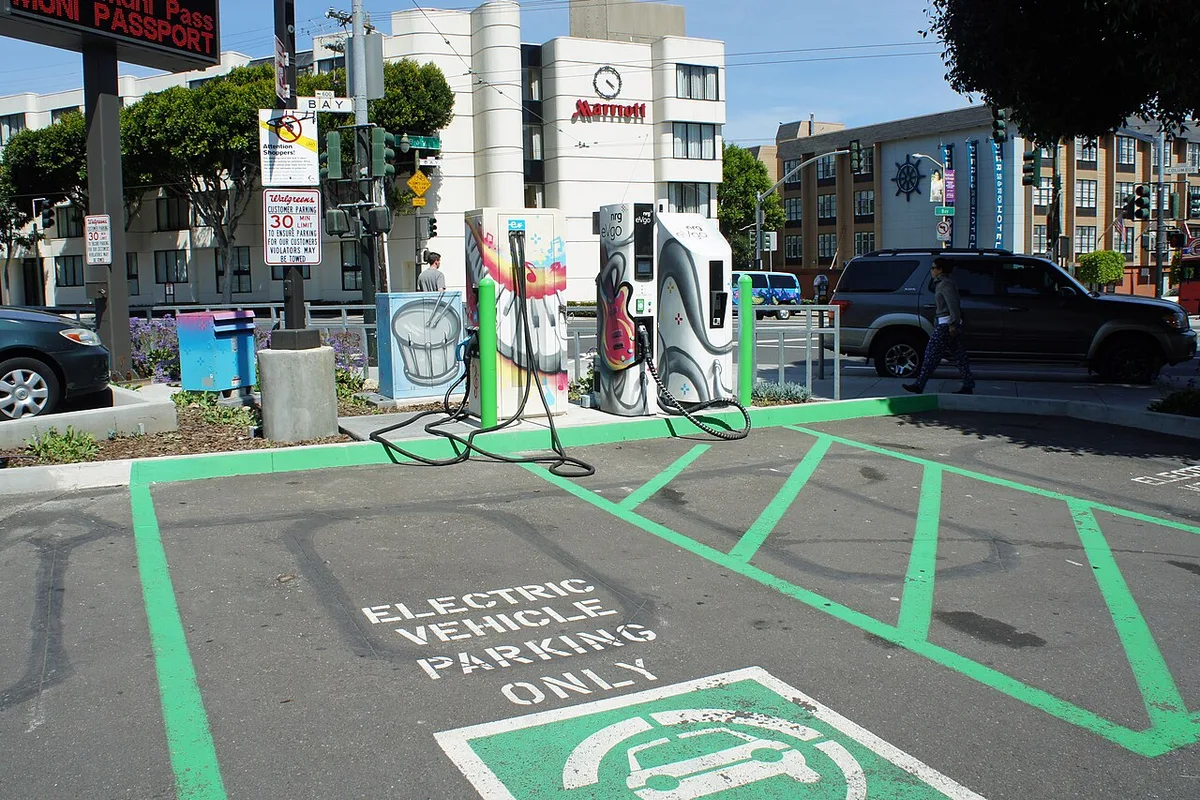
Image source: Wikimedia Commons / Mariordo (Mario Roberto Durán Ortiz) (CC BY-SA)
The industry sorts charging into three levels, and the gap between them is enormous. Level 1 is the cord that came in the trunk. Level 2 is the box most homeowners install.
DC fast charging is the roadside infrastructure that makes long trips work.
Here's the whole picture in one table. Figures assume a mid-size EV with a 75 kWh pack and typical efficiency of 3.5 miles per kWh. Your car will land somewhere near these numbers, not exactly on them.
| Level | Typical power | Miles added per hour | 0 to 100% on a 75 kWh pack |
|---|---|---|---|
| Level 1 (120V) | 1.2 to 1.8 kW | 3 to 5 | 50 to 65 hours |
| Level 2 (240V, 32A) | 7.7 kW | 20 to 25 | 9 to 11 hours |
| Level 2 (240V, 48A) | 11.5 kW | 30 to 40 | 6 to 8 hours |
| DC fast, 50 kW | 50 kW | 130 to 150 | 60 to 90 minutes (tapered) |
| DC fast, 150 kW | 150 kW | 400 plus | 30 to 45 minutes to 80% |
| DC fast, 350 kW | 350 kW | 800 plus | 15 to 25 minutes to 80% |
The Alternative Fuels Data Center at the U.S. Department of Energy maintains the reference definitions for all three levels, and the mileage ranges above track their published figures closely.
Level 1: the wall outlet you already have
Level 1 charging uses a standard 120V household outlet. The cord that ships with most EVs draws about 12 amps continuous, which works out to roughly 1.4 kW.
On a 15A circuit, 12 amps is the ceiling. Electrical code treats EV charging as a continuous load, so you stay at 80% of the breaker rating. That's why the portable cord can't simply pull more.
What does that feel like in practice? About 4 miles of range per hour. A 40-mile daily commute needs 10 hours plugged in.
That's fine if the car sits overnight and you're home by 7pm.
If you drive 60 miles a day in a cold climate, Level 1 quietly stops working for you. You'll wake up short, and the shortfall compounds through the week. In our research, this is the single most common reason new owners upgrade within the first month.
Level 1 works well for:
- Low-mileage drivers under about 30 miles a day
- Renters with a garage outlet and a cooperative landlord
- Plug-in hybrids with small packs that fill in a few hours
- Second cars used for errands and school runs
Level 2: the 240V workhorse
Level 2 runs on 240V, the same supply as an electric dryer or range. Power ranges from about 3.8 kW on a 16A circuit up to 11.5 kW on a 48A circuit, and occasionally 19.2 kW on an 80A setup.
This is where home charging becomes genuinely convenient. At 7.7 kW you add around 25 miles an hour. At 11.5 kW you add 35 to 40.
A car parked from 10pm to 6am recovers 200 to 300 miles of range without anyone thinking about it.
Hardware comes in two flavors. Portable Level 2 units plug into a NEMA 14-50 outlet. Wallboxes are usually hardwired and can run 48 amps instead of the 40 amps a plug-in unit is limited to.
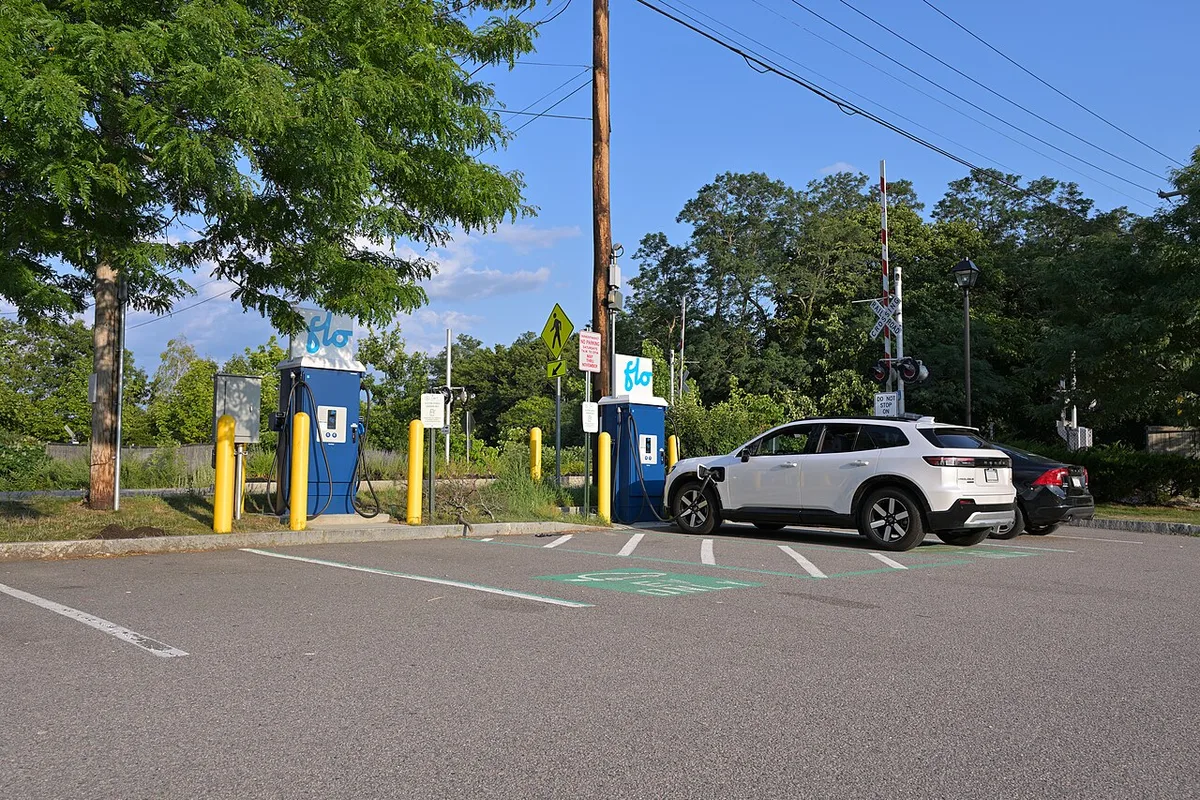
Image source: Wikimedia Commons / 4300streetcar (CC BY)
One wiring detail catches people out. A 40-amp charger needs a 50-amp circuit, and a 48-amp charger needs a 60-amp circuit, because of the 80% continuous-load rule. If your panel is tight, load management hardware can throttle the charger when the house is drawing heavy.
Level 2 is the right answer for most people. If you can park in a driveway, charge overnight, and drive under 200 miles a day, you may never need public charging at all.
DC fast charging: the road-trip tool
DC fast charging skips the onboard converter and feeds the battery directly. Power starts at 50 kW on older equipment and climbs to 350 kW and beyond on newer 800V sites.
A 50 kW unit is the slow end. Expect 60 to 90 minutes for a 10% to 80% session. A 150 kW unit cuts that to 30 to 45 minutes.
A 350 kW unit paired with an 800V car can do it in under 20.
Here's the distinction that matters more than the spec sheet. Session time is not stop time. Add the detour off the highway, the queue, the app handshake, the walk to the bathroom, and a 20-minute charge becomes a 35-minute stop.
Our research suggests planning on the stop time, not the session time.
Reliability is the other wild card. A stall rated at 350 kW can deliver 40 kW if a cable is derated, a cabinet is sharing power, or the site is faulting. When a session dies at the handshake, the car usually logs a code, and choosing a code reader is cheaper than guessing at the problem.
As of 2026, 150 kW sites are common along interstate corridors and 350 kW sites are routine on the busiest routes. The experience still varies a lot by region.
The Only Math You Need: Kilowatts, Kilowatt-Hours, and Miles Per Hour
Almost every charging question reduces to one division. Hours equals kilowatt-hours needed, divided by kilowatts delivered. Everything else is detail layered on top.
Here's the formula with a realistic loss factor baked in:
Hours = kWh needed ÷ (kW delivered × 0.9)
That 0.9 accounts for the roughly 10% lost in AC-to-DC conversion and heat on an AC charge. DC charging is a little more efficient, closer to 0.95.
Why kW and kWh get mixed up constantly
A kilowatt is a flow rate. A kilowatt-hour is a quantity. Think liters per minute versus liters in the tank.
Your battery holds kWh. Your charger delivers kW. Divide one by the other and you get hours.
That's it. The confusion comes from marketing, where both units get thrown around loosely, and from the fact that "kW" and "kWh" look nearly identical at a glance.
A quick gut check: a 100 kWh pack on a 10 kW charger takes about 10 hours in a perfect world. Add losses and taper and you're closer to 11 or 12.
Turning charge power into miles of range
Most drivers think in miles, not kilowatt-hours. The conversion is simple once you know your car's efficiency.
Miles per hour of charging = kW × miles per kWh
A car that does 3.5 miles per kWh gains about 4.9 miles an hour on Level 1 and about 40 miles an hour on an 11.5 kW wallbox. A heavy electric truck at 2.0 miles per kWh gains closer to 2.8 and 23.
Here's what that looks like across a few common scenarios:
| Energy needed | At 1.4 kW | At 7.7 kW | At 11.5 kW |
|---|---|---|---|
| 25 kWh (about 85 miles) | 20 hours | 3.6 hours | 2.4 hours |
| 50 kWh (about 175 miles) | 40 hours | 7.2 hours | 4.8 hours |
| 75 kWh (about 260 miles) | 60 hours | 10.8 hours | 7.2 hours |
Efficiency itself is not fixed. Highway speed, temperature, tires, and payload all move it. In pickups, something as basic as a hard bed cover can shift highway efficiency by a few percent, which changes how many miles each hour of charging actually buys.
So when someone tells you their car charges "at 30 miles an hour," they're quoting a combined figure. It's kW times efficiency, and both halves of that product can change.
Your Car's Onboard Charger Sets the Ceiling: Check It Before You Buy Hardware
AC power from the wall can't go straight into a battery. It has to be converted to DC first, and that converter lives inside the car. It's called the onboard charger, and it's the hard ceiling on your Level 2 speed.
This is the single biggest purchasing mistake we see. People buy a 48-amp wallbox, then discover their car accepts 7.2 kW and never uses more than 32 amps.
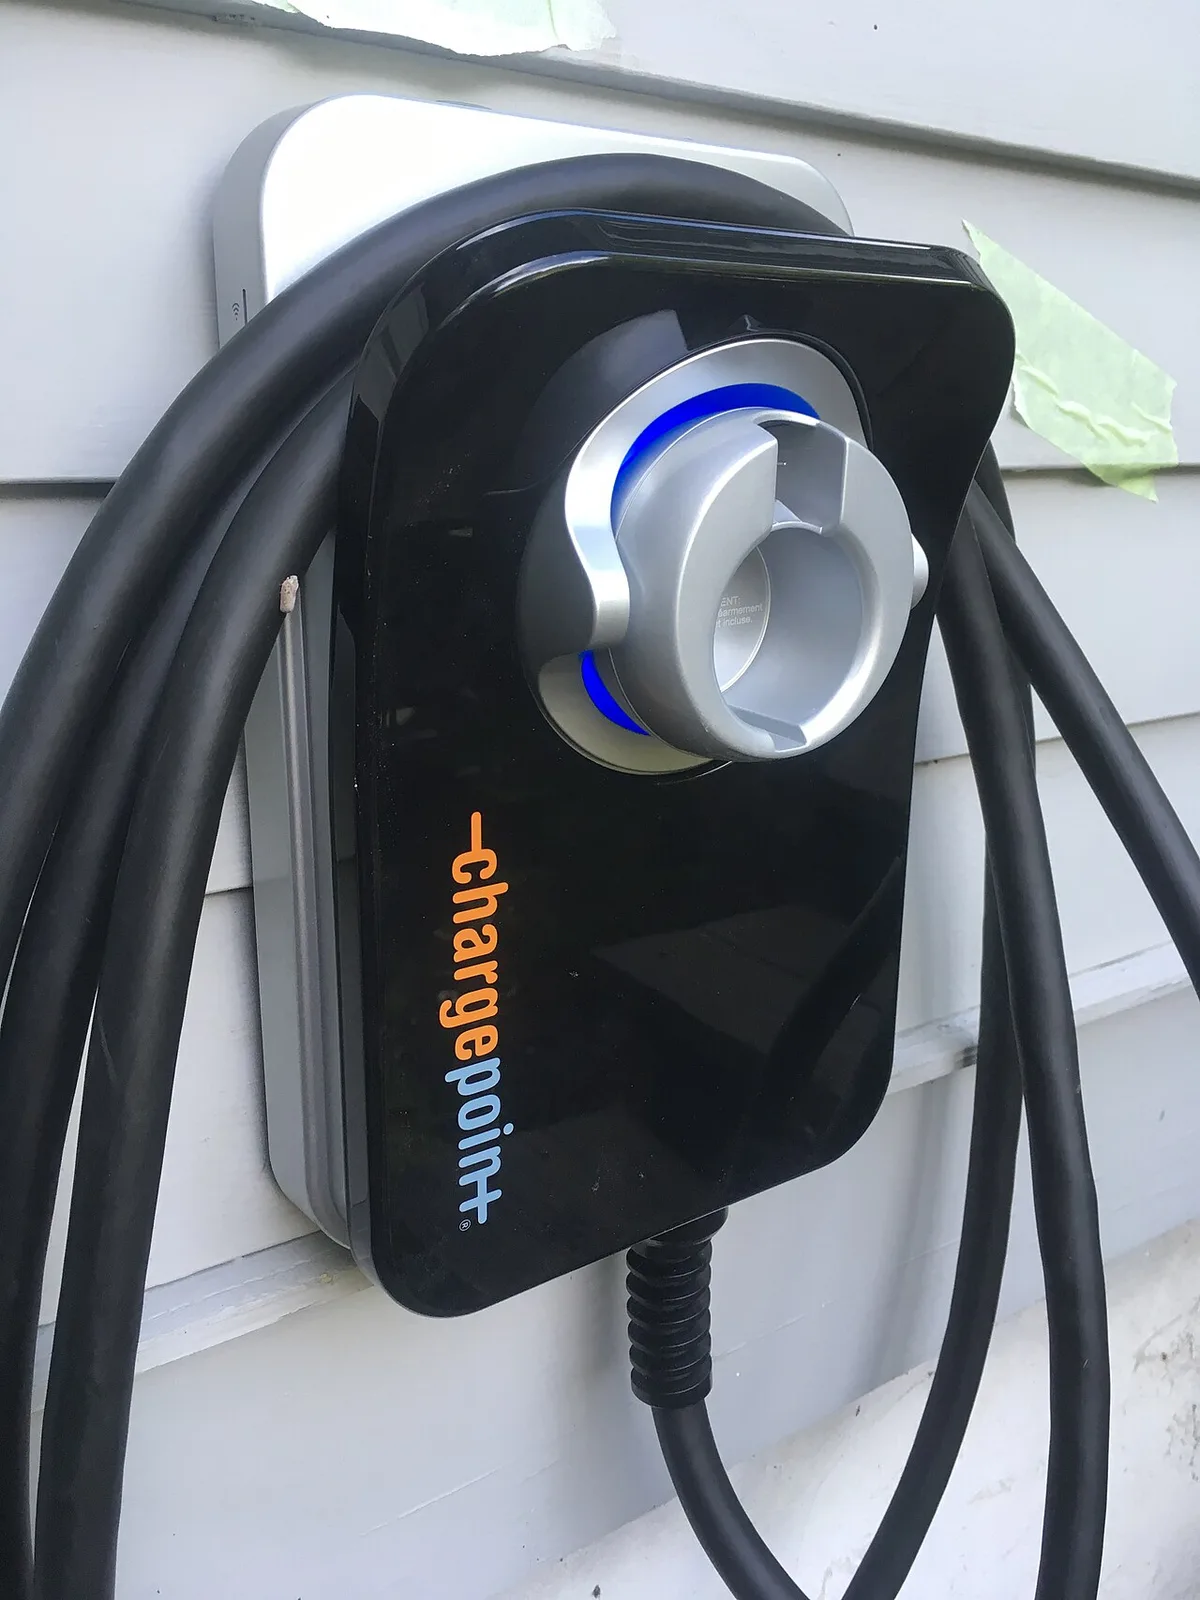
Image source: Wikimedia Commons / Ken Fields (CC BY-SA)
Common onboard charger ratings and what they mean in practice:
| Onboard charger | Amps at 240V | Time to add 50 kWh | Typical vehicles |
|---|---|---|---|
| 3.3 kW | 16A | 16.8 hours | Older and entry-level EVs |
| 6.6 kW | 27.5A | 8.4 hours | Older mid-range models |
| 7.2 kW | 30A | 7.7 hours | Many base-trim EVs |
| 9.6 kW | 40A | 5.8 hours | Common on US-market crossovers |
| 11.5 kW | 48A | 4.8 hours | Current mid-to-upper trims |
| 19.2 kW | 80A | 2.9 hours | Select trucks and older performance models |
The only reliable place to find your car's figure is the manufacturer's own spec sheet or owner's manual. Dealership staff get this wrong regularly.
Why a 48A wallbox can be wasted on an 11 kW car
A 48-amp wallbox delivers 11.5 kW. A car rated at 11 kW will pull 11 kW and stop there, leaving a small slice of capacity unused. A car rated at 9.6 or 7.2 kW wastes far more.
In Europe the mismatch is even starker. Many cars there cap at 11 kW three-phase, and plenty of homes only have single-phase power, so the practical limit drops to 7.4 kW.
That doesn't automatically make a bigger wallbox a bad buy. If you plan to keep the unit for a decade, or you're wiring a two-car garage, headroom has value. Just don't pay for capacity your current car can't touch.
The same logic shows up everywhere in cars. Spending more only helps when the spec genuinely differs, which is true of premium suspension parts as much as charging hardware. Match the part to the job.
While you're planning the install, keep accessory work separate. Adding an auxiliary light bar is 12V work and should never touch the orange high-voltage cables. The 80% continuous-load rule in the National Electrical Code is what sets your breaker size, not the charger's marketing copy.
400V vs. 800V packs and what that means for 350 kW chargers
Pack voltage decides whether a 350 kW charger is real or theoretical for your car.
Most EVs built before 2021 use a 400V architecture. Charging amperage tops out around 500A on current hardware. Multiply the two and you land near 200 kW, well short of 350.
Newer 800V cars, including the Hyundai Ioniq 5, Kia EV6, Porsche Taycan, and Lucid Air, can pull far more. At 500A and 800V, the ceiling sits around 400 kW.
Here's the if/then version. If your car is 400V, a 350 kW stall will usually deliver 150 to 200 kW at peak, and that's normal. If your car is 800V, you'll see the difference on the right equipment, in the right temperature, at a low state of charge.
None of this affects home charging. Level 2 is limited by the onboard charger, not the pack architecture.
The Charging Curve: Why the Last 20% Takes as Long as the First 70%
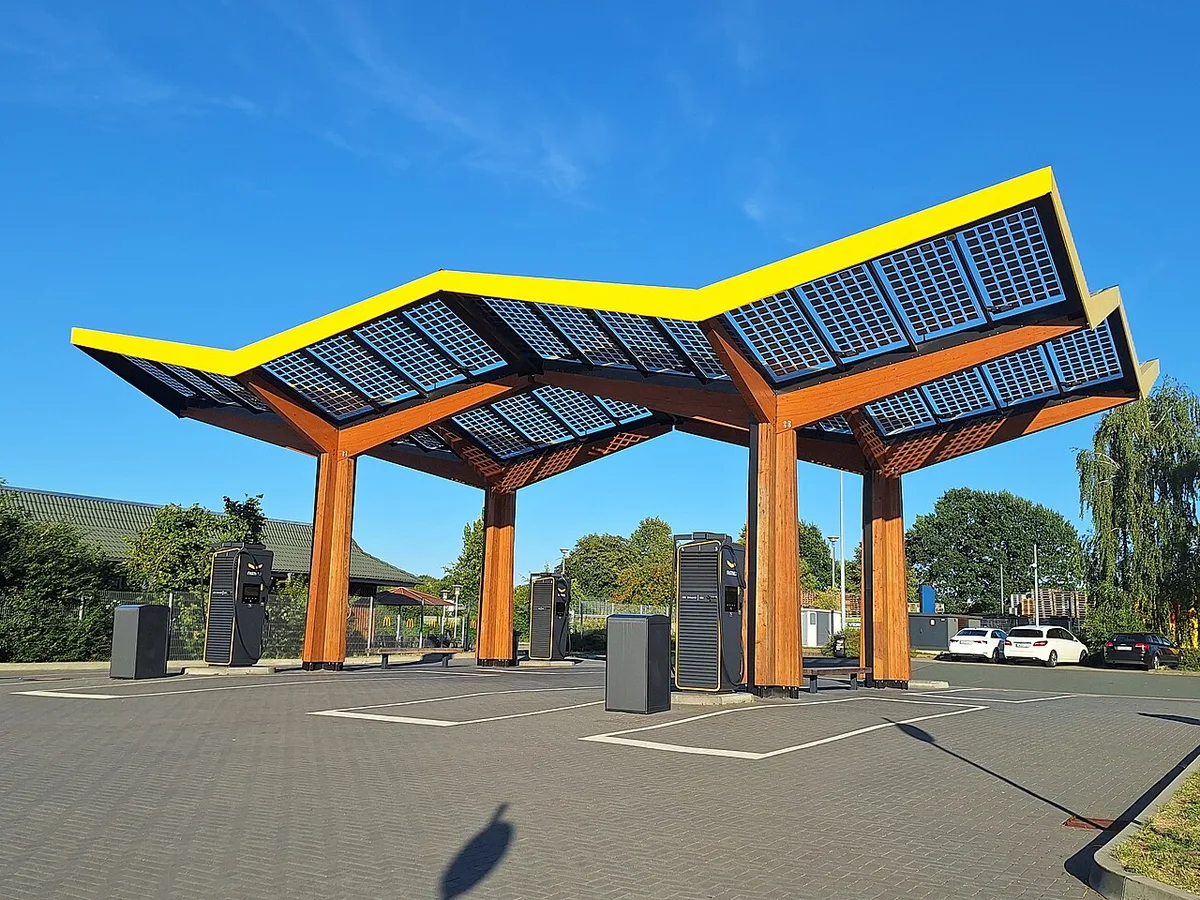
Image source: Wikimedia Commons / Steffen Mokosch (CC BY-SA)
A charger's rating is a peak, not a promise. The number on the cabinet is the most the stall can deliver, not what your car will take for the whole session.
Lithium-ion packs accept power on a curve. Below roughly 50% state of charge, the battery can absorb a lot. Above that, the battery management system pulls back to protect the cells from heat and lithium plating.
If you plotted power against state of charge, you'd see a shape technicians call the charging curve. It climbs fast from a low state of charge, plateaus for a stretch, then slides downhill. That curve, not the stall's rating, is what sets your stopwatch.
Here's what a typical 150 kW-capable car does on a good 150 kW stall in mild weather, starting from 5%:
| State of charge | Typical power | Time spent in that band |
|---|---|---|
| 5% to 20% | 140 to 170 kW | 5 to 7 minutes |
| 20% to 50% | 120 to 150 kW | 9 to 12 minutes |
| 50% to 70% | 80 to 110 kW | 8 to 11 minutes |
| 70% to 80% | 45 to 70 kW | 7 to 10 minutes |
| 80% to 90% | 25 to 40 kW | 10 to 14 minutes |
| 90% to 100% | 8 to 20 kW | 15 to 25 minutes |
Add those up and the pattern jumps out. The first 75 percentage points take around 30 minutes. The last 20 take nearly as long as everything before them.
Peak versus average power in a real session
Manufacturers quote peak. Your session runs on average. Those are different numbers, and the gap is usually a third or more.
A car that peaks at 170 kW for two minutes and spends the rest of the session between 40 and 90 kW averages maybe 90 kW. If you plan a stop using the peak figure, you'll be standing there longer than you budgeted.
The useful planning move is to ignore peak entirely. Use a published 10% to 80% time for your model, then add 10 or 15 minutes for the unknowns. Aggregate owner reports on owner forums track those published figures fairly well in mild weather.
They drift badly in the cold.
The 10 to 80 percent window and when to actually unplug
The 10% to 80% habit isn't a rule of physics. It's time management.
Here's the if/then logic. If you're on a road trip and the next charger is 120 miles away, leave at 60% and keep moving. If you're stopping for a sit-down meal anyway, let it run to 90% because the car is parked regardless.
If you're charging at home on AC, none of this matters much. Level 2 taper is gentle, and a car that sits all night finishes either way. The curve only bites when you're paying by the minute and watching the clock.
One more thing worth knowing. Cars with lithium iron phosphate (LFP) packs have a flatter curve and a different owner routine. They're happiest charging to 100% regularly so the BMS can balance the cells.
With an NMC pack, routine 100% top-ups on DC are wasted time and mild extra wear.
Cold Batteries, Hot Packs, and What Preconditioning Buys You
Temperature is the variable owners underestimate most. A cold pack doesn't just hold less energy. It accepts energy more slowly, and the BMS clamps the rate hard.
The physics is straightforward. Charging is a chemical reaction, and reactions slow down in the cold. Push current into a cold cell and you risk lithium plating, which permanently costs capacity.
Below freezing, DC fast charging may be blocked outright on some models or limited to a trickle until the pack warms. In our research across owner reports from Minnesota, Norway, and eastern Canada, a 15% to 30% longer session is the normal winter penalty. A cold-soaked pack with no preconditioning can be far worse than that.
| Conditions | Effect on a fast-charge session |
|---|---|
| 20°C to 25°C pack, preconditioned | Baseline. Full curve available. |
| 5°C pack, driven 10 minutes | 10% to 25% longer |
| 0°C pack, cold-soaked overnight | 30% to 60% longer, rate capped early |
| Below -10°C, no preconditioning | Charging may be blocked or crawl for the first 10 minutes |
| Pack above 40°C after repeated DC stops | Rate pulled back for the second and third session |
The winter penalty on a cold-soaked pack
A cold-soaked battery is one that's been sitting in low temperatures long enough to equalize with the outside air. Park overnight at 10°F and your pack is at 10°F by morning.
Preconditioning fixes this, and it does it two different ways. Route-based preconditioning warms the pack automatically when you navigate to a fast charger, usually starting 20 to 40 minutes out. Plugged-in preconditioning uses grid power to heat the pack and cabin before you leave.
That second one is free range. Cabin heat drawn from the battery on a cold morning can cost 20% to 30% of your range in the first half hour. Preheating while still plugged in moves that load to the wall.
Practical winter habits that actually move the needle:
- Set a departure time in the car or charger app so preconditioning runs on grid power
- Navigate to the charger, don't just drive toward it, so the pack warms on route
- Park in a garage when you can, even an unheated one
- Charge on arrival home while the pack is still warm, not the next morning
- Fit wind deflectors on the side glass if you crack windows while parked, since less heat soak means less cooling load on the drive
Thermal derating on the second and third stop of the day
Heat is the other end of the same problem. Fast charging generates heat, and a pack that's already hot can't shed it fast enough.
You'll notice this on a long trip. The first stop hits full power. The second stop peaks lower.
By the third, you may be capped well under what the car is rated for.
Air-cooled packs feel this hardest. The Nissan Leaf's passive cooling is the classic case, and it's why older Leafs throttle sharply after a couple of quick charges. Liquid-cooled packs handle repeated sessions far better, though none are immune.
If you're planning a multi-stop day, give the car 20 to 30 minutes of highway airflow between fast charges. That does more for pack temperature than any setting in the menu.
Branch 1: Overnight Charging on a Standard 120V Outlet
Level 1 charging is what you get from the cord in the trunk and the outlet on your garage wall. It's the slowest option and the cheapest to start with, because the hardware is already in the bag.
The math is fixed by code. A portable EV cord draws about 12 amps, and 120 volts times 12 amps is roughly 1.44 kW. At 3.5 miles per kWh, that's about 5 miles an hour in ideal conditions and closer to 3 to 4 in practice.
An eight-hour overnight session returns 24 to 40 miles. A twelve-hour session returns 36 to 60.
Who this genuinely works for
If you drive under 30 miles a day and the car sits for ten hours or more, Level 1 covers you indefinitely. That's a real group, not a theoretical one.
- Commuters with short, predictable runs
- Retirees and second cars used for errands
- Renters with a garage outlet and a landlord who says yes
- Plug-in hybrids, whose 10 to 20 kWh packs fill in 7 to 14 hours
- Anyone waiting on a panel upgrade or an electrician's slot
The test is simple. Track your daily miles for two weeks. If the average sits comfortably under 30 and you rarely stack back-to-back long days, Level 1 works.
When it quietly stops being enough
Level 1 fails gradually, which is why people miss it. You don't wake up with an empty battery. You wake up short by 10 miles, then 20, and by Thursday you're making an unplanned detour.
Here are the signals that you've outgrown it:
- You finish the week lower than you started it
- Winter cuts your miles per hour of charging by a third or more
- Your utility's off-peak window is shorter than your charge time
- Two drivers share the car and one of them does 50 miles a day
There's a safety side too. Level 1 charging is a continuous load, and continuous loads heat things up. Old outlets with loose contacts, worn receptacles, or undersized wiring get warm in ways you can feel.
If the plug face is hot after an hour, stop and get an electrician to look at the circuit.
Extension cords are the other common mistake. A 12-gauge cord rated for 15 amps on a 50-foot run will still heat up under hours of continuous draw. Most EV manufacturers explicitly prohibit extension cord use, and the fire reports back them up.
The National Electrical Code treats EV supply equipment as continuous duty for exactly this reason.
Branch 2: Level 2 at Home, Wallboxes, and Breaker Reality
Level 2 is the sweet spot for most households. It runs on 240V, adds 20 to 40 miles an hour, and turns charging into something you never think about.
The equipment falls into two families. Portable units plug into a NEMA 14-50 outlet and cap at 40 amps. Wallboxes are usually hardwired and can run 48 amps, occasionally 80.
So how long does a Level 2 charge actually take? Divide your usable pack by the delivered power, then add roughly 10% for conversion losses:
| Your setup | Power delivered | 40 kWh top-up | 75 kWh full charge |
|---|---|---|---|
| 16A on a 20A circuit | 3.8 kW | 11.6 hours | 21.9 hours |
| 32A on a 40A circuit | 7.7 kW | 5.7 hours | 10.8 hours |
| 40A on a 50A circuit | 9.6 kW | 4.6 hours | 8.7 hours |
| 48A on a 60A circuit | 11.5 kW | 3.9 hours | 7.2 hours |
Plug-in versus hardwired, and the amperage you can actually support
A 32-amp charger needs a 40-amp breaker. A 40-amp charger needs 50. A 48-amp charger needs 60.
That 80% headroom isn't a recommendation, it's the continuous-load rule, and an electrician will apply it whether you ask or not.
Plug-in wins on flexibility. You can unplug the unit and take it with you when you move, and there's no permit issue on the outlet side if one already exists. The tradeoff is a 40-amp ceiling because the 14-50 outlet itself is rated for 50 amps.
Hardwired wins on speed and durability. You get the full 48 amps, fewer connection points to corrode, and GFCI protection built into the unit rather than the breaker.
Before you buy anything, do three things:
- Read your car's onboard charger rating in the owner's manual
- Photograph your electrical panel with the cover off, or have an electrician do a load calculation
- Measure the run from panel to parking spot, including any crawlspace or trench work
That third one surprises people. A 60-foot run through a finished basement costs far more than a 15-foot run in an unfinished garage. Detached garages usually need a subpanel or a trench, and both add real money.
Load management when your panel is already full
A 200-amp service usually has room for a 60-amp EV circuit. A 100-amp service often doesn't, especially with electric heat, a heat pump, and an electric range already on it.
The traditional answer is a service upgrade, and that runs into the thousands. The modern answer is load management hardware.
These devices sit between the panel and the charger and watch total household draw. When the dryer and oven are both on, they throttle the car. When the house quiets down, the car ramps back up.
You keep a 48-amp charger on a 100-amp service without tripping the main.
Another option is an EV-specific energy management system that shares an existing circuit, like a dryer outlet, and locks out the appliance while charging. Useful for renters and anyone who can't touch the panel.
Once it's installed, set a schedule. Time-of-use rates in many regions make overnight power significantly cheaper, and most cars let you set a departure time instead of a start time. That way the pack finishes warm and ready, not cold and finished at 2am.
Connector standards matter here too. In North America, most existing home units use the J1772 connector, while newer vehicles use the NACS (SAE J3400) standard. Adapters are cheap and certified ones are safe, but check before you buy hardware you plan to keep for a decade.
Branch 3: DC Fast Charging on a Road Trip
DC fast charging bypasses the onboard charger and feeds the pack directly. It's the only way to cover 500 miles in a day without an overnight stop.
Session length spans a wide range. On a 50 kW stall, plan 60 to 90 minutes for 10% to 80%. On a 150 kW stall, 30 to 45 minutes.
On a 350 kW stall with an 800V car, 15 to 25 minutes.
Session time versus total stop time
The session is the part the car controls. The stop is the part the world controls, and it's usually longer.
| Piece of a real charging stop | Typical time |
|---|---|
| Exit highway and reach the site | 3 to 8 minutes |
| Queue for a free stall at a busy site | 0 to 20 minutes |
| Plug in, authenticate, handshake | 1 to 3 minutes |
| Charging, 10% to 80% | 18 to 45 minutes |
| Unplug, pay, move the car | 1 to 2 minutes |
| Get back to the highway | 3 to 8 minutes |
Plan on 45 to 60 minutes per stop and you'll rarely be wrong. Plan on 20 and you'll be late.
Site choice matters more than raw power here. A 150 kW site with six working stalls beats a 350 kW site with two, one of which is down. Our research across public reliability data keeps landing on the same point: stall count and uptime beat peak kilowatts.
Why advertised 350 kW rarely shows up on your screen
Three things stop a 350 kW stall from delivering 350 kW.
The first is your car. A 400V architecture tops out near 200 kW because current is limited to about 500 amps. That's not a fault, it's the design.
The second is the site. Many cabinets split power between two stalls. When both are occupied, each car gets a share.
You'll see 175 kW instead of 350 and assume something broke.
The third is conditions. A cold pack in January, a pack above 40°C in August, or a car at 70% state of charge will all pull far less than the rating.
Here's the if/then version. If the screen shows 90 kW on a 350 kW stall in winter, that's normal. If it shows 20 kW in mild weather at 15% state of charge, unplug and try the next stall.
A failed handshake or a derated cable is the usual culprit, and moving one bay over often fixes it.
A few road-trip habits that save real time:
- Arrive low, ideally under 20%, where the curve is steepest
- Navigate to the charger so preconditioning triggers on route
- Charge to what you need for the next leg, not to 100%
- Check live stall status in the network app before committing to an exit
- Move the car promptly, since idle fees start within minutes on most networks
- Keep a CCS or NACS adapter in the trunk depending on your car and region
Billing structures add another wrinkle. Some states allow per-kWh pricing, others require per-minute. Per-minute billing makes a slow session expensive, which is why some networks tier their rates by charging speed.
As of 2026, pricing swings from roughly $0.30 to $0.60 per kWh depending on region and network.
Finally, treat the last stop of the day differently from the rest. If you're arriving home or at a hotel with an outlet, take only what you need to get there. The final 20% is the most expensive part of the session in both time and money.
Branch 4: No Garage, No Driveway, Apartments, Renters, and Street Parking
If you can't park next to an outlet, the home charging arithmetic simply doesn't apply. Roughly a third of US households rent, and plenty of those have no assigned space at all. Charging without a driveway is still workable.
It just costs more planning and less convenience.
Here's the menu, with realistic numbers rather than brochure numbers.
| Option | Typical power | Miles added per hour | Works when |
|---|---|---|---|
| Shared garage outlet (120V) | 1.4 kW | 3 to 5 | You park in the same spot daily and drive under 30 miles |
| Landlord-installed Level 2 | 7.7 kW | 20 to 25 | Your lease is long and the panel has room |
| Workplace charging | 6.6 to 7.7 kW | 18 to 25 | Your employer has stalls and you work full days |
| Curbside or lamppost charging | 5 to 8 kW | 15 to 25 | Your city has a program and you can move the car |
| Public DC fast charging only | 50 to 350 kW | 130 and up | You can absorb 30 to 45 minute stops two or three times a week |
What are your actual options without a driveway?
Workplace charging is the best of them, and it's underrated. A full eight-hour workday on a 7.7 kW stall delivers about 60 kWh, which is more than most people use in three days.
Ask your employer three questions. Are the stalls Level 2 or DC? Are they shared or assignable?
Is there a fee or a time limit? A single shared Level 2 stall among forty employees is nearly useless. Four stalls with a booking app is genuinely useful.
Curbside charging is spreading fast in the UK and parts of Europe, where lamppost units running 5 to 8 kW are common. US cities have pilots too, mostly in dense metros. The catch is turnover rules.
Many curbside spots limit you to a few hours, which suits a top-up more than a full overnight fill.
The rideshare and delivery case is different. Drivers doing 200 miles a day lean on DC fast charging by default, usually two or three sessions a week at 30 to 45 minutes each. That's a real time cost, and it's the strongest argument for paying a bit more for an 800V car if you drive for a living.
Talking to a landlord about a dedicated circuit
Bring a proposal, not a request. Landlords approve things that look simple, safe, and reversible.
Here's the sequence that works:
- Get a written quote from a licensed electrician, including the permit
- Offer to cover the install cost yourself
- Agree in writing who owns the hardware and whether it stays when you leave
- Confirm the unit is UL listed and the work gets inspected
- Suggest a metered or app-based unit so your electricity use is billed separately
That last point solves the most common objection. A wallbox with per-user billing, or a split-billing feature on a networked unit, means the landlord isn't paying for your miles. Some utilities also offer multi-unit rebates that reduce the landlord's share to near zero.
Right-to-charge laws help here. California, Colorado, Florida, Hawaii, New York, and Oregon are among the states that limit how a landlord can refuse a reasonable request. The rules usually require you to pay for the work and to restore the property at move-out.
If your building can't support a circuit at all, don't force it. A 100-amp service shared across twelve units isn't going to carry new EV loads. In that case, workplace charging plus a weekly DC session is a saner plan than an expensive fight.
Real Charging Times Side by Side for Popular EVs
Spec sheets are useful, but they don't tell you what a session feels like. This table does. All times assume mild weather, a preconditioned pack, and a charger that can actually deliver the car's peak.
| Model | Usable pack / peak DC | 10% to 80% on DC | Full charge on 11.5 kW AC |
|---|---|---|---|
| Tesla Model 3 Long Range | 75 kWh / 250 kW | 25 to 28 min | 7 to 7.5 hours |
| Tesla Model Y Long Range | 75 kWh / 250 kW | 26 to 30 min | 7 to 7.5 hours |
| Hyundai Ioniq 5 (84 kWh) | 84 kWh / 260 kW | 16 to 20 min | 8 to 8.5 hours |
| Kia EV6 Long Range | 84 kWh / 258 kW | 16 to 20 min | 8 to 8.5 hours |
| Porsche Taycan (Performance Battery Plus) | 105 kWh / 320 kW | 17 to 20 min | 10 to 11 hours |
| BMW i4 eDrive40 | 81 kWh / 205 kW | 29 to 32 min | 8 to 8.5 hours |
| VW ID.4 Pro S | 82 kWh / 175 kW | 26 to 30 min | 8 to 9 hours |
| Ford Mustang Mach-E Extended Range | 91 kWh / 150 kW | 34 to 38 min | 9 to 9.5 hours |
| Ford F-150 Lightning Extended Range | 131 kWh / 150 kW | 38 to 44 min | 12 to 13 hours |
| Rivian R1T Large Pack | 131 kWh / 220 kW | 38 to 44 min | 12 to 13 hours |
| Chevrolet Bolt EUV | 65 kWh / 55 kW | 50 to 60 min | 6.5 to 7 hours |
| Nissan Leaf SV Plus | 60 kWh / 100 kW | 35 to 45 min | 6 to 6.5 hours |
Two rows deserve a closer look.
The Bolt EUV is the clearest example of a car that charges slowly by design. Its 55 kW DC ceiling means a road trip involves real waiting, and most owners plan around it rather than fight it. The Leaf's 100 kW rating looks better on paper.
Its air-cooled pack throttles hard on the second session of the day, so that 35 to 45 minute figure drifts toward an hour once the battery is hot.
The Ioniq 5 and EV6 numbers are the other extreme. Both sit on an 800V architecture, and both hit their best times at a 350 kW stall. On a 150 kW stall they still beat most 400V cars, but the gap narrows.
A note on why identical specs perform differently. Two cars with the same pack size and the same peak rating can differ by ten minutes on the same charger. Charging curve shape, thermal headroom, and how aggressively the battery management system protects the cells all matter more than the headline number.
Manufacturer documentation is the only honest source for a specific model's curve, and even that assumes ideal conditions.
Installation Costs, Panel Capacity, and the Electrical Rules People Skip
Hardware is the cheap part. The wiring is where the bill lives.
| Line item | Typical US cost range |
|---|---|
| Level 2 wallbox, 32 to 48 amp | $400 to $900 |
| Basic install, panel close, short run | $500 to $1,200 |
| Long run, conduit, or finished-wall work | $1,200 to $3,000 |
| Detached garage with trench or subpanel | $2,000 to $5,000 |
| Panel upgrade to 200 amp | $1,500 to $4,000 |
| Permit and inspection | $50 to $300 |
| NEMA 14-50 outlet only, no unit | $300 to $800 |
A typical straightforward job lands between $1,000 and $2,500 all in. A complicated one clears $6,000. The spread comes almost entirely from distance and panel capacity, not from the charger you pick.
Permits, inspection, and why the extension cord is a bad idea
A new 240V circuit needs a permit in most jurisdictions, and the work needs inspecting. Skipping that step can void your homeowner's insurance if something goes wrong later. It also creates a headache at resale, since an unpermitted circuit shows up in a buyer's inspection.
The 80% continuous-load rule drives the breaker sizing. EV charging counts as a continuous load under Article 625 of the National Electrical Code, which means the circuit has to be rated at 125% of the charger's draw. A 40-amp charger on a 50-amp breaker.
A 48-amp charger on a 60-amp breaker. No exceptions, no workarounds.
Extension cords are the mistake we see most often, and it's the dangerous one. A cord rated for 15 amps may be fine for a table saw for thirty seconds. Under eight hours of continuous EV draw, the same cord heats at the plugs and along the run.
Most manufacturers explicitly prohibit extension cord use for exactly this reason.
A few other rules people skip:
- Garage receptacles need GFCI protection in most current code cycles
- Hardwired units usually have GFCI built in, so you don't need it at the breaker
- The charger must be UL 2594 listed, and the connector UL 2251 listed
- Never run EV charging cable through a doorway or under a garage door
- Keep the connector off the floor and out of standing water
Rebates, tax credits, and time-of-use rates
Stack these before you buy anything. Utility rebates for Level 2 hardware are common and often run $250 to $500. Some utilities offer a separate incentive for charging off-peak, either a bill credit or a discounted rate window.
The federal picture has been moving. The 30C credit for home refueling property is scheduled to end for equipment placed in service after June 30, 2026 under current law, so confirm the status with the IRS before you count on it. State programs vary widely and some are far more generous than the federal one ever was.
Time-of-use rates change the economics more than any rebate. If your utility charges a third as much overnight, a 75 kWh fill costs a few dollars instead of fifteen. That's the real reason to schedule charging rather than plug in at 6pm.
One caution: a rate switch isn't automatically a win. Some time-of-use plans raise the daytime price sharply, and households with heavy afternoon air conditioning can end up worse off. Run your last three months of usage through the utility's comparison tool before you switch.
Mistakes That Make Charging Take Longer Than It Should
Most slow charging isn't a hardware failure. It's a habit, a setting, or a wrong assumption.
Here's the diagnostic version first.
| Symptom | Likely cause | Fix |
|---|---|---|
| DC session stuck at 20 to 40 kW in mild weather | Cold pack, high state of charge, or a derated cabinet | Precondition, arrive under 20%, try another stall |
| Wallbox delivering half its rating | Car's onboard charger is lower, or a DIP switch limits amps | Check the owner's manual spec, check unit settings |
| Session dies at authentication | App, RFID, or payment handshake failure | Use Plug and Charge if supported, keep a card as backup |
| Second DC stop much slower than the first | Thermal derating from a hot pack | Add 20 to 30 minutes of highway driving between stops |
| Charge time longer every winter | Cold-soaked pack with no preconditioning | Set a departure time, navigate to chargers |
| Level 1 never keeps up | Daily miles exceed what the outlet returns | Move to Level 2 or supplement with public charging |
Charging to 100 percent every night on an NMC pack
This one costs you time and buys you nothing. An NMC pack held at 100% ages faster than one kept in the 20% to 80% band, and the last hour of that charge is the slowest hour of the session.
Set a charge limit of 80% or 90% for daily use. Raise it before a long trip. If your car has an LFP pack, ignore this advice entirely, since those packs want a regular 100% charge so the management system can balance the cells.
Blaming the charger when the car is the bottleneck
We've seen this play out repeatedly in owner reports. Someone buys a 48-amp wallbox, plugs in a car with a 7.2 kW onboard charger, and concludes the unit is defective. It isn't.
The car accepted everything it could take.
Check the onboard charger rating first. Every other decision follows from it.
Choosing the wrong stall at a busy site
Two habits make a measurable difference. First, prefer a site with more stalls over one with a higher peak rating. Six 150 kW stalls beat two 350 kW stalls, both in uptime and in queue time.
Second, don't take the last stall next to an occupied one on a shared-power cabinet. Many sites split a cabinet between two cables. Plug in beside someone already pulling 150 kW and you'll both sit around 90.
Letting the car sit low and cold
A pack left at 10% in freezing weather is the slowest possible starting point. It has to warm before it can accept meaningful current, and the BMS won't let you rush it.
If you can't charge overnight, plug in when you get home even on Level 1. A few hours on a warm pack after a drive moves more energy than a full night on a cold one.
Buying hardware before checking the panel
A 60-amp breaker needs two free slots and spare service capacity. Plenty of older homes have neither. Have an electrician do a load calculation before you order anything.
Discovering the panel is full after the charger arrives is an avoidable delay of weeks.
The Decision Guide: Match Your Setup to How You Actually Drive
Start with daily miles and parking, not with charger specs. Those two facts eliminate most of the options for you.
| Your situation | Recommended setup | Realistic charge time |
|---|---|---|
| Under 30 miles a day, driveway, overnight parking | Level 1 on an existing outlet | 8 to 12 hours for a full day's use |
| 30 to 80 miles a day, driveway | Level 2 at 32 to 40 amps | 2 to 5 hours nightly |
| 80 to 150 miles a day, driveway | Level 2 at 48 amps hardwired | 5 to 8 hours nightly |
| Two EVs sharing one charger | 48 amp hardwired with load management | Staggered overnight sessions |
| No driveway, fixed workplace | Workplace Level 2 plus occasional DC | Full recovery across a workday |
| No driveway, no workplace charging | Weekly DC sessions plus opportunistic Level 2 | 30 to 45 minutes, 2 to 3 times a week |
| Rideshare or delivery driver | Home Level 2 plus a DC membership | 45 minutes daily or every other day |
| Long-distance commuter, 150 miles plus | Level 2 at 48 amps plus route DC stops | Overnight full, plus one midweek top-up |
Now the branches in plain language.
If you park in a driveway or garage and drive under 150 miles a day, install Level 2 and stop thinking about charging. It's the boring answer and it's the right one for most households. Size the circuit to your car's onboard charger, not to the biggest unit on the shelf.
If you park on the street and can't get a circuit, build your week around two or three DC stops. Aim for a site with at least four stalls, arrive under 20%, and leave at 80%. Budget 45 minutes door to door, not 20.
If your daily miles are unpredictable, go bigger on home power. A 48-amp hardwired setup costs a few hundred dollars more than a 32-amp plug-in and removes the whole category of "will I have enough" anxiety.
If you're in a cold climate, add one thing to any plan: departure-time scheduling. Preconditioning on grid power is the cheapest range you'll ever buy, and it cuts winter charge times noticeably.
If you're still deciding whether an EV fits at all, work backwards from your worst week rather than your average one. The vehicle that handles your two road trips a year and your 40-mile commute is usually the same one.
And if the numbers you're seeing don't match the specs, check the small stuff before you call a technician. Cold pack, high state of charge, a shared cabinet, a limiter set in the app. In our research, those four causes explain the overwhelming majority of "my car is charging slowly" complaints.
