
Changing a tire at home saves money and teaches you what your bike is actually doing underneath you. Learning how to change a motorcycle tire is mostly about avoiding four or five specific mistakes, not about brute strength. The job takes 45 to 90 minutes the first time.
Most of that is setup and checking your own work.
Manufacturer service manuals list axle nut torque anywhere from about 40 Nm to 110 Nm depending on the model, with pinch bolts sitting far below that. Those numbers matter more than any technique video you'll watch. Get them wrong and you're gambling with wheel bearings or a loose front end.
Everything below starts with the boring part, which is knowing exactly what you're working on.
How to Change a Motorcycle Tire
To change a motorcycle tire, loosen the axle nut before you lift the bike. Support the frame or swingarm so the wheel hangs free. Deflate the tire, break both beads, then lever the tire off the rim.
Fit the new tire, seat the bead, and balance the wheel. Torque the axle to spec and pump the brake lever before you ride.
Why a Tire Change Is a Safety Job, Not a Chore
A wheel carries every force your bike makes. Braking load, drive torque, and cornering grip all pass through the axle, the spacers, and two thin bearing races. When one of those links is wrong, nothing feels wrong in the garage.
It shows up at 60 mph.
NHTSA's tire safety guidance treats underinflation and tread wear as leading contributors to blowouts and loss of control. That's the same system you're about to take apart on your driveway. The Motorcycle Safety Foundation (MSF) builds tire condition into its T-CLOCS pre-ride inspection for exactly this reason.
Here's the part most guides skip. The dangerous mistakes are almost always assembly errors, not technique errors. A tire that's mounted neatly but pinched will still fail.
| Small mistake | What it becomes on the road |
|---|---|
| Tube pinched between lever and rim | Instant flat, often at speed |
| Bead not fully seated | Steady thump, then a blow-off |
| Axle nut over-torqued | Crushed bearings and a dragging wheel |
| Brake lever never pumped | No front brake at the first stop |
| Chain misaligned after refit | Uneven wear and vague handling |
| Spacer fitted backwards | Seized wheel or a cracked hub |
Read that table again. None of those problems announce themselves while the bike is on the stand.
If you've ever watched someone rattle a nut on with power tools on wheel fasteners, you already know how a two-second shortcut becomes a snapped stud. Motorcycle axles are softer and thinner than car studs, so the margin is tighter.
So treat this as inspection work with a tire change in the middle. Slow hands, a torque wrench, and one final walk-around beat speed every time.
Identify Your Wheel First: Tubed Spokes, Cast Tubeless, and Sealed Laced Rims
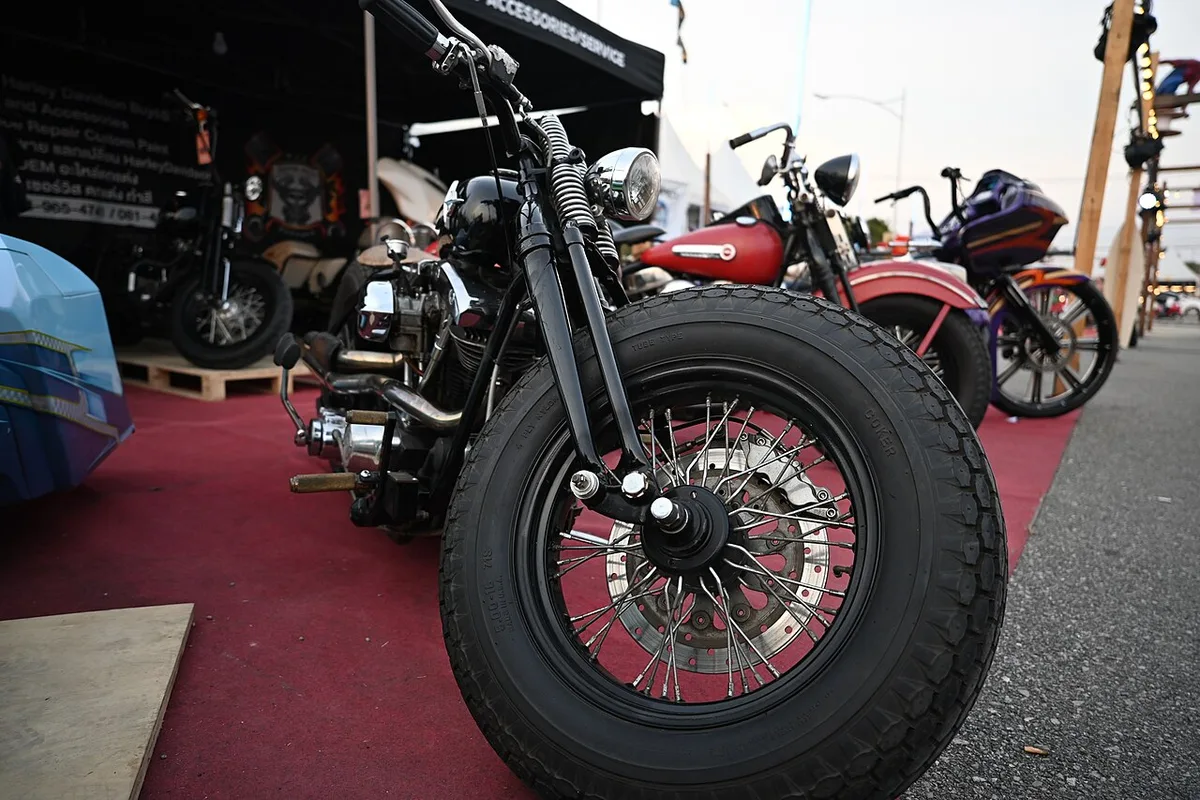
Image source: Wikimedia Commons / PattayaPatrol (CC BY-SA)
Before you buy tools or a tire, look at the rim. The wheel type decides your whole method, and getting it wrong wastes an afternoon or ruins a tube.
Here's the quick test. If the spoke nipples poke through the rim bed, you have a tubed wheel. If the rim bed is smooth alloy with no holes, it's tubeless.
The rim bed itself is called the drop center, a recessed channel in the middle of the rim. Almost every mounting trick in this guide depends on you pushing the tire bead into that channel. Ignore it and the tire simply won't go on, no matter how hard you lever.
The bead is the thick wire bundle that snaps over the rim flange and holds the tire onto the wheel. A safety bead hump sits just inside the flange to keep a deflated tire from walking off the rim.
| Wheel type | How to spot it | What you need |
|---|---|---|
| Spoked, tubed | Nipples visible in rim bed, rubber valve stem | Inner tube, rim strip, rim protectors |
| Cast alloy tubeless | Smooth one-piece rim, metal clamp-in valve | Tubeless tire, bead lubricant, air volume |
| Sealed laced tubeless | Spokes plus a sealed rim bed, often metal valve | Tubeless tire, careful bead seating, seal check |
| Dirt or dual-sport with rim lock | Small clamp bolt through the rim | Rim lock, tube, heavier levers |
If the wheel has spokes, plan for a tube
Spoked wheels leak air through the nipple holes, so they need an inner tube. That tube is the single biggest source of DIY failure. It pinches, it folds, and it chafes if you install it flat.
Check the rim strip before anything else. That rubber band covers the nipple heads, and a missing or shifted strip means a spoke end will rub through the tube within a few hundred miles. If it's cracked or curled at the edges, replace it.
They cost less than a coffee.
Rim locks show up on dirt bikes and dual-sports. They clamp the tire to the rim so it can't spin under low pressure. If your wheel has one, loosen it before dismounting and remember to refit it.
If the rim is smooth alloy, you're tubeless
Cast tubeless wheels are easier to work with, but the bead is fussier to seat. Tubeless tires have a stiffer bead bundle designed to lock onto the flange. That stiffness is great on the road and annoying on the stand.
Sealed laced rims sit in between. Manufacturers like BMW Motorrad and KTM seal the rim bed so a spoked wheel can run tubeless. Treat them as tubeless, but check the spoke seal area for corrosion while the tire is off.
Never fit a tube-type tire to a tubeless rim without a tube, and never run a tubeless tire on a spoked rim without sealing it properly. Those aren't style choices. They're the difference between holding air and losing it in a corner.
Wheels with TPMS sensors need extra care. A tire pressure monitoring sensor sits inside the rim, usually clamped at the valve. Warn the tire machine operator, or if you're doing it by hand, keep your levers well away from it.
Single-sided swingarm bikes, including several Honda VFR, Ducati, and BMW models, use a center-lock nut instead of a conventional axle. Those need a specific socket and often a much higher torque value. Confirm the figure in your manual before you touch it.
The Tools That Actually Work, and the Ones That Cost You a Rim
You can change a tire with three good levers and a bead breaker. You cannot do it well with a screwdriver and hope.
Tire irons, bead breakers, rim protectors, and bead clamps
Buy curved motorcycle tire irons, not flat pry bars. The curve follows the rim and gives you a place to hook the lever so it doesn't slide. Two irons is a minimum.
Three makes tubed tires much less frustrating.
Use rim protectors. These are small plastic or rubber clips that sit between the lever and the rim edge. Without them, a hardened steel lever will gouge a cast wheel in one slip.
A bead breaker does one job: push the tire sidewall down and off the flange. Manual bar-style breakers work fine for occasional use. A bead clamp or Bead Buddy holds the bead you've already seated down in the drop center while you work the rest of the tire on.
That single tool turns a two-person job into a one-person job.
Here's what our research and shop write-ups keep repeating. The tools that damage wheels are always the improvisations. Screwdrivers, flat pry bars, and vice grips top that list.
| Tool | Job it does | Cheap version's failure |
|---|---|---|
| Curved tire irons (2 or 3) | Lever the bead over the flange | Bends, gouges rim, tears tube |
| Bead breaker | Separate bead from flange | Dents rim, slips, needs three hands |
| Rim protectors | Shield the rim edge | Skipped, then the rim is scratched |
| Bead clamp or Bead Buddy | Holds bead in the drop center | Tire keeps popping back off |
| Valve core tool | Removes core for fast deflation | Pliers chew the valve threads |
| Bead lubricant or soapy water | Lets the bead slide and seat | Dry bead refuses to pop |
| Torque wrench, 5 to 100 Nm range | Correct fastener load | Guesswork and stretched threads |
| Static balancer and weights | Removes vibration | Ignored, then you feel it at 70 mph |
Also get a clip-on air chuck. Holding a chuck against a valve while a bead seats at 40 psi puts your hands directly in the blast path if something lets go.
Air volume vs air pressure: what bead seating really needs
This is the concept that trips up most first-timers. Seating a bead needs a large rush of air, not high pressure. A track pump can hit 100 psi and still fail.
A compressor with a tank dumps 30 psi in half a second and the bead pops on.
If your tire won't seat with a hand pump, stop pumping harder. You need volume, a lubed bead, and the bead pushed down into the drop center.
Two more habits worth building. Remove the valve core when you're seating a tubeless bead so air flows freely, then refit it. And stand to the side, never over the tire, while it inflates.
For tubed tires, put just enough air in the tube to give it shape before it goes in. A tube with a slight roundness seats inside the tire instead of folding into a crease. A flat tube is the number one cause of pinched installations.
The Numbers You Need Before You Start: Torque Specs, Pressures, and Chain Slack
Guessing is the most common expert-versus-amateur line in this whole job. Every number you need is already published for your model. Find the torque table in your owner's manual or service manual before the wheel comes off.
| Item | Typical range | Where to confirm |
|---|---|---|
| Front axle nut | 40 to 80 Nm | Model service manual |
| Rear axle nut | 60 to 110 Nm | Model service manual |
| Fork pinch bolts | 15 to 25 Nm | Model service manual |
| Brake caliper bolts | 20 to 40 Nm | Model service manual |
| Chain slack | 25 to 35 mm | Swingarm or manual sticker |
| Cold street tire pressure | 28 to 36 psi | Manual or tire placard |
| Balance weight increments | 5 g and 10 g | Balancer instructions |
Two conversions save a lot of confusion. One Nm equals about 0.74 lb-ft, and torque wrenches are only accurate in the middle of their range. A 5 to 100 Nm wrench used at 20 Nm is far more trustworthy than a big 40 to 200 Nm unit at the same setting.
Chain slack is measured at the tightest point, usually midway between the front and rear sprockets. Push up, push down, measure the total movement. Do it with the bike on the ground and the suspension loaded, not on a stand, unless your manual says otherwise.
Tire pressure is a cold measurement. Check it before you ride, not after, because heat adds several psi and will lead you to underinflate.
Tire age is the number nobody checks. Every DOT code stamped on the sidewall carries four digits: the week and year of manufacture. Many manufacturers advise replacing a tire around five to six years old regardless of tread depth, because rubber hardens and grip drops.
As of 2026, plenty of used bikes are rolling on tires from 2018.
In the UK, the MOT test fails a motorcycle tire below 1 mm of tread across three quarters of the width. Most riders should replace far earlier than that. Legal minimum is not a target.
If you're replacing hardware at the same time, it's worth knowing what replacement fasteners cost before you assume the dealer is overcharging. Quality axle nuts and caliper bolts aren't cheap, and reused stretched fasteners are a false economy.
Getting the Bike Up Safely: Stands, Straps, and Keeping the Caliper Off the Brake Line
A bike that falls off a stand while you're leaning on a tire lever will cost more than the whole tool kit. Get this part right first.
If your bike has a center stand, use it. It's the most stable option for a rear wheel, and the front can be lifted afterward with a headstock stand under the lower triple clamp. If you don't have a center stand, a paddock stand lifting the swingarm spools is the next best choice.
Front wheels need a different approach. A fork-lift stand under the axle works for many bikes, but a headstock stand is far more secure because it lifts from the frame. On a faired bike, check clearance before you commit.
If you work on the ground, a wheel chock plus two ratchet straps to solid anchors keeps things predictable. Strap to something genuinely structural, ideally a properly rated recovery point or a garage floor anchor, not a shelf bracket. Pull the straps down and slightly forward so the bike can't roll.
Riders who prefer ramps can do well with building your own wooden ramps, provided they're wide enough and have a stop at the end. A motorcycle climbing a narrow car ramp is a bad afternoon.
Handling the caliper without wrecking the hose
Never let a caliper hang from its brake line. The hose is a reinforced rubber tube, not a load-bearing strap. Hanging the weight of a caliper stretches the fitting and can crack it at the banjo bolt.
Tie it up with a bungee or a zip tie to the frame or fork leg. Keep it above the axle line and out of the way of the wheel as it drops.
One more rule. Don't squeeze the brake lever while the wheel and rotor are out. That pushes the pistons out of the caliper, and getting them back in usually means a bleed you didn't plan on.
Wheel Removal Without Collateral Damage: Spacers, ABS Rings, and Speed Sensors
Start on the ground. Break the axle nut loose while the bike is still sitting on its wheels, because the brakes and the tire give you something to push against. Do the same for caliper bolts.
Then lift the bike and take the weight off the wheel. From here it's a sequence, not a fight.
- Photograph the axle, spacers, and caliper position before you loosen anything.
- Remove the caliper and tie it up out of the way.
- Pull the axle and catch every spacer as it comes free.
- Note the order and orientation of the spacers. Most are handed and won't work swapped.
- Lower the wheel, then check the ABS tone ring and sensor for damage.
Spacers cause more reassembly failures than any other single part. There's a left and a right, and sometimes a shouldered end that faces inboard. If the wheel doesn't spin freely after refitting, stop and check the spacer stack before you torque anything.
ABS tone rings and speed sensors sit close to the hub with a small air gap. A lever slipped in the wrong place will bend a tone ring or knock a sensor out of alignment. On some bikes that means a dead speedometer and a permanent warning light.
Reading the stored fault codes, which is why it pays to know what to look for in a code reader, at least tells you whether the sensor or the ring is the problem.
While the wheel is off, do the free inspections. Spin it and feel for bearing roughness. Check spoke tension by plucking them.
Look for cracks around the hub and corrosion along the bead seat. If a bearing feels notchy, replace it now rather than in six months.
Keep the chain adjuster blocks and alignment marks visible when you take the rear out. Count the number of turns you back the adjusters off, or note the mark positions, so you can get close on refit. Final alignment gets checked properly after the wheel is torqued.
Wheel bearings and spacers are exactly the kind of part where when pricier parts earn their keep applies: cheap bearings fail early, and the labor to get back in there is the expensive bit.
Breaking the Bead and Dismounting the Tire
That bead has been pressed hard against the rim flange since the tire was fitted. On an older wheel it can feel welded on. The answer is patience and the right angle, not brute force.
Start by pulling the valve core and letting every bit of air out. A tire with leftover pressure will fight the levers and slide out from under them. Press the core tool in and wait for the last hiss.
Where the bead breaker actually goes
Set the breaker's shoe just inside the rim flange, on the rubber. Not on the rim lip, and not on the sidewall halfway up.
Clamp down until the bead drops. Then move around the circumference and repeat. Four or five bites around the wheel beats one giant shove every time.
Flip the wheel and do the other side. A tubed tire needs both beads broken before you can get levers in.
If you're using a manual bar-style breaker, sit the wheel on a padded surface and use your body weight. The bar wants to slide toward the rim. Watch it.
What if the bead won't break?
Some tires refuse, especially hardened touring rubber or a tubeless bead that's sat on the flange for six years. Work through this list in order.
- Soak the bead line with soapy water and give it a few minutes to creep in.
- Warm the sidewall with a heat gun on low, moving constantly. Never park heat in one spot.
- Clamp the tire by the tread and put both hands into the breaker.
- If the tire is already scrap, cut it off. A reciprocating saw with a fine blade saves an hour of swearing.
Never hammer a screwdriver between the bead and the rim. That's how rims bend and knuckles open up.
Working the tire off the rim
Now the levers. Push the bead on the far side of the wheel deep into the drop center first. That's what gives the bead you're lifting enough slack to climb over the flange.
Slide the first lever under the bead and hook it against a spoke. Step the second lever in about four inches along and lock it too. A third lever at the last bite is what saves your hands.
Keep bites small, roughly four to six inches of bead per lever. Big bites tear tubes and scratch rims.
On a tubed wheel, once the top bead clears, reach in and pull the tube out. Push the valve stem through its hole last so you don't rip it on the rim edge.
On a tubeless wheel, both beads come off the same way, then the tire lifts free. Watch the TPMS sensor at the valve. Get a lever near it and you're buying a replacement.
The free inspection while the tire is off
Before anything goes back on, look inside the old tire. Find the object that caused the puncture, otherwise the new tube dies the same way within a week.
Check the rim strip for cracks, curled edges, or bare nipple heads. Run a thumb around the inside of the rim for corrosion or a burr. Spin the bare wheel and feel for bearing roughness.
Pluck the spokes and listen for a dead one.
| What you find | What it means |
|---|---|
| Spear of wire or glass in the carcass | Remove it, or the new tube fails |
| Rim strip cracked or shifted | Replace before refitting anything |
| Rough or corroded bead seat | Clean it, tubeless won't seal otherwise |
| Notchy bearing when spun | Replace now, not next season |
| Loose spoke | True the wheel before the new tire goes on |
The bead seat matters more than most riders realise. Tubeless tires seal against that surface, so a patch of corrosion or dried rubber cement will leak no matter how well the bead pops.
Mounting a Tubed Tire: The Drop Center Trick, Rim Strips, and Tube Handling
Fitting a tube is the part that decides whether this job goes well. Do it right and the tire lasts. Rush it and you'll be back in the garage within 200 miles.
Fit the rim strip before anything else
A rim strip costs almost nothing and covers the spoke nipples. Fit it so every nipple head is hidden and the strip sits centred. If the valve hole has a sharp edge, that's another tube failure waiting to happen.
While you're there, dust the inside of the tire and the tube with talcum powder. It sounds fussy. It lets the tube slide into place instead of gripping and creasing.
Get the tube shaped before it goes in
Put a couple of psi into the tube so it holds a round shape. A tube with a bit of air seats inside the tire. A flat tube folds into a crease, and that crease chafes until it splits.
Then deflate it just enough to work with. You want shape, not pressure.
Line up the arrow and the balance dot
Every motorcycle tire has a rotation arrow on the sidewall. It must point the way the wheel turns when the bike moves forward. Get this wrong and you'll be taking the tire off again.
Most tires also carry a coloured balance dot, usually a light spot in the carcass. Line it up with the valve stem. That single step reduces the balancing weight you'll need later.
First bead by hand, second bead with levers
Push the first bead over the flange with your hands, working around the rim. It usually goes most of the way by hand if you keep the bead in the drop center.
Feed the valve stem through its hole, then work the second bead on with levers, again in small bites. Keep the bead opposite your levers pressed into the drop center at all times. A bead clamp or Bead Buddy holds it there for you.
On the last few inches, use short strokes close together rather than one long heave. That final section is where tubes get pinched.
Once both nuts are on the valve stem, run one down to the rim finger tight. Don't crank it. Some riders leave the outer nut off entirely so the valve can pull through instead of tearing if the tire ever goes flat.
How do you know the tube isn't pinched?
Look between the tire bead and the rim flange before you inflate. You should see rubber bead, never a sliver of pink or black tube.
If you spot tube, deflate, push that section of bead back off, and reset it. A pinched tube typically fails within the first few miles, usually at the worst possible moment.
Inflate slowly, deflate, then reinflate
Bring the tire up to a few psi and check the bead line on both sides. That thin moulded rib just above the rim should sit an even distance from the flange all the way around.
Then deflate fully and inflate again. That second cycle lets the tube settle and shake out any fold. Set your cold pressure last.
Refit the rim lock if the wheel has one, and tighten it down. A rim lock left loose lets the tire spin on the rim and tear the valve out.
Seating a Tubeless Bead Without Blowing It
Tubeless beads need a rush of air, not a slow build. That's why a 100 psi track pump can fail where a small compressor succeeds.
The sequence that works
- Remove the valve core so air can flow in fast.
- Lube both bead faces with soapy water or proper bead lubricant.
- Check the tire is sitting evenly on the rim before you pressurise.
- Use a clip-on chuck and stand to the side, never over the tire.
- Stop as soon as both beads pop and the rib sits even.
Standing clear isn't paranoia. If a bead lets go at pressure, the blast can take a finger.
What if the bead won't pop?
Most stubborn beads come down to lubrication or shape. Run through these fixes before reaching for more pressure.
| Symptom | Likely cause | Fix |
|---|---|---|
| Air escapes around the bead | Dry bead, poor seal | Relube generously, retry |
| Bead sits down in the drop center | Tire too stiff or cold | Warm it, push beads outward by hand |
| One side pops, the other won't | Uneven seating | Deflate, relube, strap the tread |
| Nothing happens at any pressure | Too little air volume | Use a tank compressor, not a pump |
A ratchet strap around the circumference squeezes the tread and pushes both beads toward the flanges. It works surprisingly often on stiff touring tires.
Never use starting fluid or any flame method to seat a bead. It's a technique that shows up in videos and in injury reports. The tire can leave the rim, and people have been killed doing it.
Also watch the pressure. Stiff sport-touring beads sometimes need real force, but never exceed the maximum printed on the sidewall. If the bead hasn't popped by then, something else is wrong.
Per the fitment standards published by bodies like ETRTO, a tire and rim pair that's mismatched by width will never seat properly no matter what you do. Check the size on the sidewall against the rim width stamped on the wheel.
Confirm the seat before you ride
Once the bead pops, run a soapy water test around both flanges and the valve. Bubbles mean a leak at the bead or the valve seat.
Refit the valve core, set the pressure, and let the wheel sit for a while. A slow leak that shows up overnight is a bead that isn't fully home, or a valve that needs reseating.
Balancing the Wheel: Static Balancers, Weights, and What Vibration Is Telling You
An unbalanced wheel shows up as a shake through the bars or the pegs, usually in a narrow speed band. It wears tires unevenly and it makes the front end feel vague in fast sweepers.
Static balancing in plain steps
- Mount the wheel on the balancer axle with the cones snug in the bearings.
- Let it settle. The heavy spot rotates to the bottom.
- Mark the bottom. That's where weight goes on the opposite side, at the top.
- Add weight in 5 g or 10 g increments until the wheel stops on a random spot each time.
- Spin it twice more to confirm it settles inconsistently.
On wider rear rims, split the weight across both sides of the rim rather than stacking it all on one edge. It sits flatter and stays put.
Use adhesive weights on cast wheels and clip-ons where the rim profile allows it. Clean the rim with alcohol first. A weight that peels off at speed becomes a projectile.
Balance beads, spin balancers, and when to pay someone
| Method | Accuracy | Best for |
|---|---|---|
| Static balancer and weights | Good enough for most street riding | Home mechanics, occasional changes |
| Dynamic spin balancing | Best, catches side-to-side imbalance | Wide rear tires, sport and touring |
| Balance beads or fluid | Convenient, less precise | Dual-sport and trailside changes |
Static balancing handles the up-and-down imbalance, which is the one you feel. Dynamic balancing also corrects the side-to-side imbalance, which matters more on wide rear tires at high speed. If your shop charges a small fee to spin the wheel, take it.
What vibration is telling you
A shake that appears at 40 mph and fades by 60 usually points to balance. A thump that scales with speed points to a bead that isn't seated. A vibration you feel through the pegs only, after a rear tire change, often means the chain alignment is off.
Check runout while the wheel is on the balancer. Spin it and watch the rim edge against a fixed point. A visible wobble means a bent rim or a bad bearing, and no amount of weight will fix it.
Refitting the Wheel: Axle Torque, Pinch Bolt Sequence, and Chain Alignment
Getting the wheel back in is quicker than taking it out, but this is where the dangerous shortcuts happen.
Spacers, grease, and the slide
Wipe the axle clean and put a thin film of grease on it. Not a blob. A film stops corrosion and makes the next removal easier.
Fit the spacers in the order you photographed earlier. Most are handed, and a reversed spacer will either bind the wheel or leave it loose on the axle. If the wheel doesn't spin freely once it's in, stop and check the stack before you torque anything.
Slide the axle through by hand. If it needs a hammer, something is misaligned. A rubber mallet tap is fine.
A steel hammer is not.
Torque the axle first, then the pinch bolts
Hold the opposite end of the axle with the correct tool and torque the axle nut to the figure in your manual. Then bounce the forks a few times with the front brake held, so the sliders settle onto the axle.
Only after that do you torque the pinch bolts. Snug them in a cross pattern, then bring them to spec. Over-tightening pinch bolts is common and it binds the fork leg.
If you've ever watched someone over-torque a fastener with an impact gun, you know how fast threads stretch. The same discipline applies here, and it applies to the right way to drive fasteners on wheels as much as to axle nuts.
Caliper, brake lever, and the first squeeze
Refit the caliper with a dab of threadlocker on the bolts and torque to spec. Make sure the pads sit either side of the rotor and the ABS sensor lines up with its tone ring.
Then pump the brake lever. Pump it until it feels firm, which might take five or six strokes. Until you do, there's no front brake at all.
Do this before the bike comes off the stand, and again after you've rolled it a few feet.
Chain slack and alignment on the rear
Set slack at the tightest point of the chain, usually midway between the sprockets. Measure total up-and-down movement with the bike on the ground and the suspension loaded.
Alignment marks on the swingarm are a starting point, not a guarantee. They're stamped into castings and they drift. A chain alignment tool or a straight edge along the sprocket faces gives you a truer answer.
Spin the wheel and watch the chain run. It should track straight and centre on the sprocket teeth. A chain running off-centre eats sprockets and adds a vibration you'll feel through the pegs.
The final walk-around
Spin the wheel and listen. Drag or a scraping sound means a brake or spacer problem. Grab the wheel at the top and bottom and rock it.
Any movement means a bearing or a spacer issue.
Check that the ABS light clears when you roll away. Look over every fastener you touched. Then ride slowly for the first few hundred metres, testing brakes at low speed before you trust them.
Re-check axle torque and chain slack after the first proper ride. Fasteners settle, and the second check is the one that catches it.
The Failure Modes That Cause Crashes: Pinched Tubes, Unseated Beads, and Dry Brake Levers
None of the mistakes in this section announce themselves in the garage. They wait. That's exactly what makes them worth memorising before you pick up a lever.
Our review of rider reports and shop write-ups keeps landing on the same handful of assembly errors. Each one has a signature symptom. Learn the symptom and you can catch the fault before it catches you.
The pinched tube
A pinched tube is the most common DIY failure on spoked wheels. It happens when a lever traps a fold of rubber between the tire bead and the rim flange.
The symptom is a flat within the first few miles. Often it's two small slits sitting side by side, which is why riders call it a snakebite. Patch that tube and it will fail again in the same spot, so bin it.
Prevention is boring and it works. Keep the bead opposite your levers pressed into the drop center. Use short lever strokes.
Look for trapped rubber under the bead before you add air.
The unseated bead
An unseated bead shows up as a steady thump that scales with road speed. It gets worse, not better.
If you feel a rhythmic bounce after a change, stop and deflate. Check the moulded rib above the rim flange on both sides. That rib should sit an even distance from the flange the whole way around.
Riding on a partly seated bead risks a blow-off as the tire heats and pressure climbs. This isn't a "get home and check it later" problem. It's a stop-now problem.
The dry brake lever
A dry lever catches experienced riders too. You refit the caliper, drop the bike off the stand, and roll away with no front brake at all.
Pump the lever until it feels firm before the bike moves. Do it once on the stand, then again after rolling a few feet. If it never firms up, air has entered the system and it needs bleeding.
The loose or over-torqued axle
An under-torqued axle nut lets the wheel walk on the axle. Over-torque crushes the bearing races and makes the wheel drag.
Both feel similar from the saddle at first. You get vague steering and a slight wander. Check the figure with a wrench you trust rather than by feel, and have that wrench calibrated occasionally.
Chain and sprocket misalignment
Misalignment after a rear refit usually shows as a vibration through the pegs at steady speed. It also chews sprocket teeth and side plates within a few thousand miles.
Swingarm marks get you close. A chain alignment tool or a straight edge across the sprocket faces gets you right. Re-check slack after the first ride, because a new chain settles quickly.
Contaminated pads and rotor
Greasy fingerprints on a rotor cause squeal and weak bite. Brake cleaner and a clean rag sort that out in a minute. Contaminated pads are a different story and usually need replacing.
Wear nitrile gloves for the brake side of the job. The same gloves keep chain lube off the tread, which is another quiet way riders lose front-end grip.
| Symptom | Probable cause | What to do |
|---|---|---|
| Flat within 10 miles | Pinched tube | Replace the tube, reset the bead |
| Rhythmic thump rising with speed | Bead not seated | Deflate, relube, reseat |
| No front brake after refit | Pistons not pumped out | Pump lever until firm, bleed if soft |
| Wheel drags when spun | Over-torqued axle or reversed spacer | Check spacer stack, retorque to spec |
| Vibration through the pegs | Chain misalignment | Align with a tool, reset slack |
| Squeal under braking | Grease on rotor or pads | Clean rotor, replace pads if soaked |
If a fault on that list shows up, don't ride it out and hope it settles. Every one of them gets worse with heat and speed.
DIY vs Shop: Real Costs, Real Timelines, and Where the Money Actually Goes
Money usually decides this question, so here are the numbers with one caveat. Labour rates swing hard by region, so treat these as ranges, not quotes.
What a shop charges
A dealer or independent shop bundles the tire, the labour, and disposal into one bill. The tire itself is often the smallest part of the total.
| Item | Typical range |
|---|---|
| Street front tire | $80 to $180 |
| Street rear tire | $110 to $250 |
| Mount and balance, wheel off the bike | $30 to $60 per wheel |
| Mount and balance, ride-in | $60 to $120 per wheel |
| New tube if needed | $15 to $35 |
| Valve stem | $5 to $15 |
| Disposal fee | $3 to $10 per tire |
UK riders see roughly £20 to £40 per loose wheel and £50 to £90 ride-in, with shop labour commonly £45 to £80 an hour. Seasonal demand pushes both figures up.
What DIY actually costs
The tool kit is the real outlay, and it lasts decades if you buy decent steel.
- Curved tire irons, two or three: $30 to $70
- Bead breaker: $40 to $120
- Rim protectors: $8 to $15
- Bead clamp or Bead Buddy: $25 to $45
- Torque wrench, 5 to 100 Nm: $50 to $120
- Static balancer and weights: $40 to $90
- Valve core tool and lubricant: $10 to $20
Add a compressor if you don't own one, and the first year of DIY can cost more than two shop visits. By year three it's clearly cheaper, and the skill travels with you.
The timeline nobody mentions
A first-timer should budget 45 to 90 minutes per wheel. Someone who's done ten of them does it in 20 to 30 minutes.
A shop takes an hour or two of actual work. The wait is the problem. In spring, a busy workshop can be booked one to three weeks out.
That gap is where DIY wins biggest, especially if your tire is already at the wear bars.
When paying is the smarter call
Some jobs really are shop work. Know where your line is.
- Single-sided swingarm with a large centre-lock nut and no matching socket
- Carbon fibre or forged wheels where a lever slip writes off four figures
- A tubeless bead you can't seat with the air supply you own
- No secure, level place to work
- A trackday or trip leaving in the morning
- Wheels with TPMS you've never handled before
The middle path: loose wheel service
Remove the wheel yourself and take it in. You keep the inspection, the spacer discipline, and the refit, and you cut the labour bill roughly in half. It's also the option most riders settle on after a couple of seasons.
Whatever you choose, ask for the old tire back or confirm where it goes. Tires are regulated waste in most jurisdictions, and a shop that quietly bins them isn't doing you a favour.
After the First Ride: Re-Torque Checks, Wear Bars, and Knowing When a Tire Is Aged Out
The job isn't done when the bike rolls off the stand. The first hundred miles decide whether it was done right.
Run a 50 to 100 mile check
Fasteners settle after heat cycles. Roll a wrench over the axle nut, the pinch bolts, and the caliper bolts at around 50 miles, then again at 100.
Check chain slack at the same time. A new chain or a freshly adjusted one stretches into its working length quickly, and slack that was correct on the stand can end up too tight.
Confirm pressures cold, not after a ride. Heat adds several psi and will flatter a tire that's actually underinflated.
Read the wear, not just the depth
Wear bars, also called tread wear indicators, sit in the tread grooves. When the tread surface sits flush with them, the tire is done.
UK riders face an MOT failure below 1 mm across three quarters of the tread width. Most manufacturers and riding schools suggest replacing well before that, because wet grip falls away faster than the tread disappears.
| Wear pattern | Usual cause |
|---|---|
| Centre flat spot | Highway miles, sustained high pressure |
| Cupping or scalloping | Underinflation, worn suspension, hard braking |
| Feathering on the edges | Aggressive cornering, pressure too low |
| Cracking in the sidewall grooves | Age and UV exposure, not mileage |
Know when a tire is simply old
Every sidewall carries a DOT code ending in four digits. The first two are the week, the last two the year. A "3219" was built in the 32nd week of 2019.
Many manufacturers advise replacement around five to six years regardless of tread. Rubber hardens, and a hard tire feels fine in the dry until it doesn't. If you're buying a used bike, check that code before anything else.
Pressure discipline and storage
Check pressures weekly on a commuter and before every ride on a bike that sits. Adjust for pillion and luggage per the manual, not by feel.
For winter storage, inflate a few psi above normal and get the tires off cold concrete if you can. Keep the bike away from sunlight, ozone sources like electric motors, and anything that off-gasses solvent.
Never dress a motorcycle tire with silicone shine products. It looks great in photos and it turns the tread into a skating rink for the first few miles.
FAQs: Tube vs Tubeless, Plugged Tires, Bead Blow-Offs, and Roadside Changes
Can you change a motorcycle tire without a bead breaker?
Yes, on many wheels. A sturdy C-clamp or a purpose-built bead breaker bar can push the bead off the flange. The catch is control.
Improvised tools slip and dent rims, so a $50 breaker is cheap insurance if you plan to do this more than once.
Do you have to balance a motorcycle wheel after a tire change?
You should. A tire change moves the heavy spot, and an unbalanced front wheel typically shows as a handlebar shake in a narrow speed band. Static balancing with adhesive weights is enough for most street riding.
Wide rear tires benefit from a dynamic spin balance.
How long does it take to change a motorcycle tire?
Plan 45 to 90 minutes per wheel for a first attempt, including setup and checks. Someone with practice does it in 20 to 30 minutes. Tubed spoked wheels take longer than cast tubeless ones.
Add time if you're also replacing a tube or a rim strip.
Can you plug a motorcycle tire and keep riding?
A tread-area puncture on a tubeless tire can often be plugged well enough to get home. Treat it as temporary. Sidewall and shoulder punctures cannot be repaired safely, and a plugged tire's speed rating no longer applies.
Replace it rather than trusting it long term.
Do you need a new tube every time you change a tire?
Not always, but often in practice. A tube that's been run for thousands of miles has taken the shape of the old tire and thinned unevenly. If it shows a crease, a patch, or a stretched section around the valve, fit a new one.
Tubes are cheap compared with a roadside failure.
Can you change a motorcycle tire at the roadside with hand tools?
On a dual-sport or dirt bike, yes. Carry compact levers, a 21-inch tube, a patch kit, and a small pump or CO2 inflator. On a tubeless street bike with a stiff bead, roadside seating is genuinely hard without a compressor.
A plug kit plus a way to reinflate is the realistic plan there.
