
Changing the oil in a generator is a 20-minute job that most owners put off until the unit won't start. Learning how to change generator oil properly comes down to four moves: warm the engine, drain the crankcase, refill to the dipstick, and check for leaks. The hard part isn't the wrench work.
It's knowing which of those moves looks different on your machine.
Small engines are far less forgiving than car engines. Manufacturer specifications indicate most portable units hold under a quart of oil, and the gap between ADD and FULL on the dipstick is often just 4 to 8 ounces. Overfill by half a cup and the crank starts whipping oil into foam.
That tight margin is why the procedure below branches by generator type before it gives you a single step.
How to Change Generator Oil
Here's how to change generator oil in four moves: warm, drain, refill, verify. Warm the engine five minutes, then shut it off. Drain the crankcase fully and inspect the old oil.
Refill slowly, checking the dipstick between pours. Run it a minute, recheck, and look for leaks.
Why Generators Are Harder on Oil Than Your Car
A car engine holds five quarts and runs a full-flow oil filter. A 2,200-watt inverter generator holds roughly 0.4 quarts and usually has no filter at all. That gap explains why the two machines need completely different service rhythms.
Air cooling is the first problem. A generator cylinder head under load runs far hotter than a water-cooled car engine, and the oil film against those surfaces absorbs that heat. Oxidation speeds up accordingly.
Oil that would survive 7,500 miles in a sedan is finished in 50 hours in a generator.
Lubrication design is the second. Most portables rely on splash lubrication, where a dipper or slinger throws oil onto the moving parts. There's no pump pushing a steady pressurized film.
Run low and parts go dry fast. Run overfull and the crank froths the oil into foam that lubricates nothing.
Fuel dilution is the third. Small carbureted engines run rich on cold start, and unburned gasoline slips past the piston rings into the crankcase. That thins the oil and drops its viscosity.
Generators that get a dozen short runs during storm season build up this dilution quickly, and it shows up later as wet, oil-soaked plugs or a unit that smokes on startup.
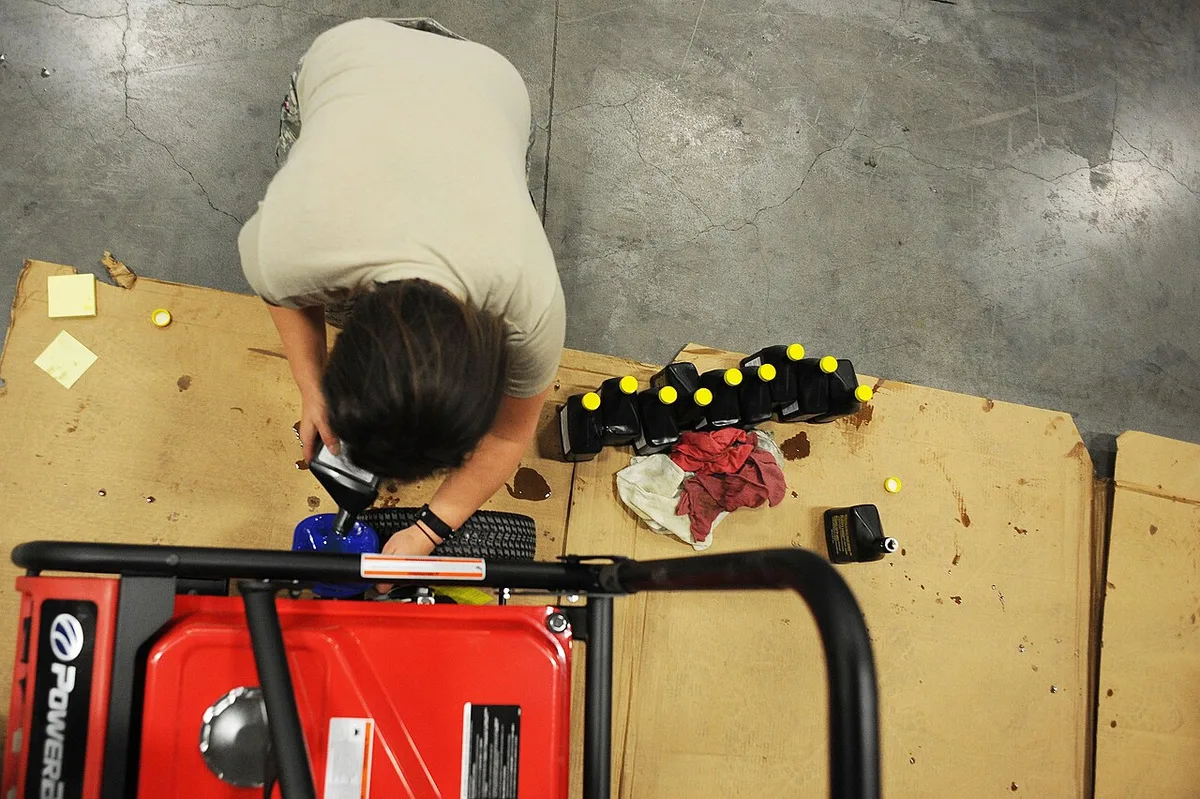
Image source: Wikimedia Commons / The National Guard
Here's the side-by-side that matters:
| Factor | Car engine | Portable generator |
|---|---|---|
| Oil capacity | 4 to 6 quarts | 0.3 to 1.6 quarts |
| Oil filter | Full-flow, changed each time | Usually none |
| Cooling | Liquid, thermostatically controlled | Air, load and ambient dependent |
| Lubrication | Full pressure from a pump | Splash, dipper or slinger |
| Typical interval | 5,000 to 10,000 miles | 50 hours or 6 months |
| Overfill tolerance | Roughly a quart | A few ounces |
Standby units close some of that gap. Air-cooled home standby generators hold 1.5 to 2.5 quarts and many carry a spin-on filter. Liquid-cooled and diesel gensets hold 3 to 6 quarts or more and run full-pressure lubrication.
Those behave much more like a car, with one big exception. They sit idle for months at a time, which is its own kind of wear.
None of this makes a generator oil change difficult. It makes it frequent, and it makes the margin for error small.
Six Questions That Decide Your Exact Procedure
Before you touch a wrench, answer six questions. Each one changes the steps, the oil, or both. Skip them and you'll follow advice written for somebody else's machine.
1. Does Your Unit Have a Drain Plug?
Some do and many don't, and the answer decides your entire drain method. Look at the base of the engine block, just above the oil pan seam, for a hex bolt head. If you find one, you drain through it with a socket or box wrench.
If you don't, the engine is a tip-to-drain design. Oil comes out through the fill neck once the unit is rotated onto the correct side. Honda's EU-series inverters, several Yamaha EF-i models, and a long list of small inverter units work this way.
Never assume. Owners who hunt for a drain plug that isn't there waste an hour. Owners who tip a unit that does have a plug dump oil across the frame.
2. Is There an Oil Filter?
Only some generator classes carry one, and it changes your step count. Air-cooled home standby units, liquid-cooled gensets, diesel units, and Cummins Onan RV generators typically have a spin-on or cartridge filter. Most portables do not.
When a filter is present, add four steps: remove it, confirm the old gasket came off with it, oil the new gasket, and pre-fill the element before spinning it on. That's the same discipline you'd apply when servicing a sealed fluid system on a vehicle. Skip the pre-fill and the engine runs dry for a beat on first start.
3. Is the Engine Still in Break-In?
Check the hour meter, because break-in rewrites the schedule. New engines shed metal fines as the rings seat, and those fines circulate in the oil. Most manuals call for the first change somewhere between 5 and 8 hours of run time.
The second change usually lands around 20 to 25 hours. After that you're on the normal 50-hour or six-month rhythm. Miss the break-in change and you leave abrasive paste in the crankcase for the engine's most vulnerable stretch of its life.
4. What Fuel Does It Burn?
Fuel type sets the oil spec, the capacity, and the interval. Gasoline portables run 10W-30 or SAE 30 in most manuals. Dual-fuel and tri-fuel units running propane or natural gas burn cleaner, so the oil stays visibly clearer longer, but moisture still accumulates from combustion byproducts.
Change on the calendar even when the oil looks new.
Diesel gensets are a different animal. They typically want 15W-40 with a heavy-duty diesel rating, hold several quarts, and run a real filter. Don't cross-shop oil specs between a gas portable and a diesel genset.
They aren't interchangeable.
5. Air-Cooled or Liquid-Cooled?
Cooling design determines how hard the oil works and how much the engine holds. Air-cooled engines run hotter and hold less oil, so the oil degrades faster and has less reserve. Liquid-cooled engines hold more, run cooler, and tolerate longer intervals.
The practical difference shows up in capacity. Small inverters take 0.3 to 0.6 quarts. Mid-size portables take 0.6 to 1.6.
Air-cooled standby takes 1.5 to 2.5. Liquid-cooled and diesel take 3 to 6 or more. Buy the jug based on your class, not on what the last guy on the forum said.
6. Has It Been Sitting?
If it sat more than six months, inspect the old oil before you refill. Oil that looks milky has absorbed moisture. Oil that smells strongly of gasoline has been diluted.
Oil with a gritty feel or sludge at the drain has been neglected.
A unit that sat also tends to be a hard starter afterward, which is a separate problem from the oil. If it cranks and won't catch, getting a stubborn engine to fire is a diagnostic question, not a lubrication one. Fix the oil first, then chase the starting issue.
Choosing the Right Oil: Viscosity, API Rating, Synthetic or Conventional
Your manual has the final word. Read the spec page before you buy anything, because the wrong grade can void a warranty claim faster than a missed interval. That said, the reasoning behind the spec is worth understanding.
Viscosity grades are defined by SAE J300, the standard that sets what a 10W-30 actually has to do at low and high temperatures. The number before the W describes cold behavior. The number after describes film strength at operating temperature.
A wider spread means more viscosity improvers in the oil, which shear down under sustained load.
SAE 30 vs 10W-30 vs 5W-30: Matching the Grade to Your Climate
Straight-weight SAE 30 is what a lot of small-engine manuals still list as the default. It has no viscosity improvers to shear, so it holds up well under sustained summer load. It also turns to sludge in a cold crankcase, which is why winter use is a bad idea.
10W-30 is the common all-purpose answer. It cranks in cold weather and holds film at summer temperatures. Most modern portables ship with it as the recommended grade.
5W-30 and 0W-30 are cold-climate choices. If you're starting a generator at 10°F during an ice storm, the thinner cold grade spins the engine faster and gets oil moving sooner.
| Grade | Best ambient range | Good for | Watch out for |
|---|---|---|---|
| SAE 30 | Above 40°F | Summer standby, sustained load | Hard cold starts, sludge in winter |
| 10W-30 | 0°F to 100°F | Most portables, year-round | Shears faster under extreme heat |
| 5W-30 | Below 40°F | Winter outages, cold cranking | Slightly thinner film when hot |
| 15W-40 | Above 20°F | Diesel gensets, large air-cooled standby | Too thick for small inverters |
API Service Categories and the Detergent Oil Question
API service categories run from SJ through SP, and each one describes a set of performance tests the oil passed. Older manuals often specify SJ or higher, which is why you'll see that phrase in a 15-year-old owner's guide. The American Petroleum Institute publishes the current category list if you want to check what a bottle's label actually means.
As of 2026, most current small-engine manuals still accept SJ or higher, and any modern SP oil clears that bar. The one nuance is zinc. Newer automotive categories trimmed zinc dialkyldithiophosphate, or ZDDP, to protect catalytic converters.
Small engines with low valve spring pressure don't need much zinc. Old flathead engines with heavy springs do.
Detergent versus non-detergent matters more than most owners realize. Modern small engines want detergent oil, which holds contaminants in suspension so they drain out. Non-detergent oil lets sludge settle in corners of the crankcase.
It belongs in antique equipment, not in a generator you're depending on during an outage.
Synthetic vs Conventional: When the Upgrade Actually Pays
Synthetic oil resists oxidation better at high temperature and flows better in the cold. Those two properties map directly onto generator duty cycles. A standby unit that sits cold for eight months and then starts under full household load is exactly the scenario synthetics handle well.
Conventional oil is perfectly adequate if you genuinely change at 50 hours. The failure mode isn't the oil base stock. It's the owner who switches to synthetic and then stretches the interval to 100 hours because the label said "extended protection."
Buy synthetic for three situations: a standby unit with long idle periods, a job-site generator running 8-hour days, or any machine stored in a shed that swings between freezing and 90°F. Buy conventional for everything else and put the savings into a spare filter and a proper drain pan.
One more thing. Don't use two-stroke premix in a four-stroke generator. It's a mistake that happens more than you'd think when both types live in the same garage.
Two-stroke fuel is oil mixed into gas for lubrication. A four-stroke engine has a separate crankcase and doesn't want oil in its fuel.
Tools and Prep: What to Gather Before You Crack the Drain Bolt
Gather everything before you start draining. Halfway through an oil change is a terrible time to discover your drain pan is too shallow or your socket set skips the size you need.
| Item | Why you need it |
|---|---|
| Drain pan, 2+ quart capacity | Wide mouth beats a shallow tray every time |
| Socket or box wrench set | Drain bolts are commonly 10mm to 14mm |
| Torque wrench | Small aluminum pans strip easily |
| Funnel with a flexible neck | The fill port is often tucked behind the frame |
| New crush washer | One-time sealing ring, never reuse a flattened one |
| Nitrile gloves and safety glasses | Used oil is a skin irritant and a splash risk |
| Sealed, labeled container | For transport to a recycling drop-off |
| Rags and absorbent | Small spills happen on every job |
| Funnel cap or plug | Keeps dirt out of the funnel between uses |
Two upgrades worth the money: a low-profile drain pan that fits under a generator frame, and a magnetic drain plug if your model takes one. The magnet catches break-in metal that would otherwise circulate.
Skip the temptation to buy the cheapest crush washers in a bulk bag from an unknown seller. Sealing rings are soft by design and cheap ones deform unevenly. It's the same logic as paying more for a better part anywhere else on a machine.
A weeping drain plug costs you an engine.
A note on power tools. You can spin a drain bolt out with an impact driver if you're careful, but hand tools are safer for installation. Over-tightening with power tools is how threads get pulled out of an aluminum pan, and that's an expensive repair on a part that was never designed for it.
Prep Steps Before You Drain
- Run the generator on level ground for 5 to 10 minutes to warm the oil.
- Shut it down and close the fuel valve.
- Pull the spark plug boot so the engine can't fire.
- Let the muffler cool before you reach near it.
- Slide the drain pan under the unit and check clearance.
- Have the new oil, funnel, and washer within arm's reach.
Warm oil drains faster and carries more suspended contamination with it. Hot oil burns. The window you want is warm to the touch on the crankcase and cool on the exhaust.
The Core Oil Change: Steps Every 4-Stroke Generator Shares
Every four-stroke generator, from a 1,000-watt inverter to a 22kW standby, follows the same skeleton. The details vary by the six questions above. The sequence doesn't.
| Step | What you're doing | Rough time |
|---|---|---|
| 1 | Warm the engine | 5 to 10 minutes |
| 2 | Shut down and isolate | 2 minutes |
| 3 | Drain the crankcase | 10 to 15 minutes |
| 4 | Inspect the old oil | 2 minutes |
| 5 | Reinstall the drain bolt or filter | 5 minutes |
| 6 | Refill to the dipstick | 5 to 10 minutes |
| 7 | Run, recheck, and leak check | 5 minutes |
Warm It Up, Shut It Down Safely
Run the engine under a light load for 5 to 10 minutes. You want the oil warm enough to flow, not hot enough to hurt. A generator that's been running an hour under full load is too hot to service safely.
Shut it down and close the fuel valve. Pull the spark plug boot so a stray pull on the recoil can't start the engine while your hands are near the drain. Unplug any loads before you begin.
Carbon monoxide is the non-negotiable part here. Never service a generator indoors, in a garage, in a basement, or near an open window. The Consumer Product Safety Commission has tied portable generator carbon monoxide to hundreds of deaths, and most of those happened in spaces the owner thought were ventilated enough.
Hot surfaces are the second risk. A muffler under load reaches 400 to 600°F and stays hot for a while after shutdown. Give it 10 minutes or wear heat-resistant gloves.
Spilled oil on a hot muffler is a fire, not a stain.
Drain It Fully and Inspect What Comes Out
Pop the dipstick or fill cap first. Venting the crankcase lets air in behind the oil, which speeds the drain and reduces the gurgling mess.
Position the pan, then remove the drain bolt or tip the unit onto the specified side. Let it run for a full 10 to 15 minutes. The last few ounces are the dirtiest ounces in the engine, and cutting the drain short leaves them behind.
While it drains, look at what's coming out:
- Metallic glitter in the first change is normal break-in wear. Glitter in later changes means something is wearing badly.
- Milky or creamy streaks mean water emulsified in the oil, usually from condensation during storage.
- A strong gasoline smell means fuel dilution, often from a carburetor that's leaking past the needle.
- Black sludge or grit means the oil ran far past its interval.
Used oil is a regulated waste stream, not trash. The EPA's used oil management standards put it in the hazardous waste category for good reason, and a single quart can foul a lot of groundwater. Pour it into a sealed container and take it to a household hazardous waste site or an auto parts store that accepts it.
Replace the crush washer, then reinstall the drain bolt by hand until it seats. Torque to the manual spec, which on small aluminum pans usually lands in the 10 to 15 ft-lb range. If your manual doesn't list a number, snug plus a slight turn is safer than guessing high.
Refill to the Dipstick, Not the Number on the Bottle
The manual says 0.63 quarts. Your engine will probably take less. A gravity drain never removes every ounce, and the residual oil plus the oil film left on internal parts accounts for the difference.
Pour half the specified capacity, wait a minute, and check the dipstick. Add in small increments after that. On most portables the dipstick rests on the threads rather than screwing in, so read it the way the manual describes or you'll get a false low reading.
On units with a filter, expect to add a bit more than a filterless unit and recheck after the first run. The filter element soaks up oil that won't show on the stick until the engine has run.
Overfilling is the mistake that does real damage. Excess oil gets whipped into foam by the crankshaft, the foam doesn't lubricate, and pressure can push oil past seals and into the breather. You'll see blue smoke, oil in the air filter housing, and a hard-starting engine.
If you overshoot, drain the excess rather than running it.
Learning to read the stick properly is the same skill as checking fluid on a dipstick anywhere else. Wipe it clean, insert it fully, pull it, and read the level at the crosshatch.
The Final Run, Recheck, and Leak Check
Start the engine and let it idle for 30 to 60 seconds. Watch the drain bolt and filter area for drips. Shut it down, wait a minute for the oil to settle back into the pan, and recheck the level.
Top off to the full mark if needed. Never above it. Run it once more under a light load for a couple of minutes and check underneath with a flashlight.
If you see a slow weep at the drain bolt, the washer is likely crushed or missing, or the bolt isn't seated. Fix it now. A weep that loses an ounce a week becomes a seized engine somewhere around week twelve.
Finish by resetting the maintenance indicator or hour meter if your model tracks service intervals. Log the date, the run hours, the oil brand and grade, and the quantity used. That log is what gets a warranty claim approved when a service writer asks for proof of maintenance.
No Drain Plug? Tip-and-Drain Without Flooding the Air Filter
If your generator has no drain plug, the factory method is to tip the whole unit and pour the oil out through the fill neck. That's exactly how engines in the Honda EU2200i class and most small inverters are designed to be serviced. Done right, it's tidy.
Done wrong, you'll be cleaning oil out of an air filter housing.
Why no plug? Manufacturers skip it to save a machined hole, a bolt, and a gasket on engines that hold under half a quart. The fill neck becomes the lowest practical point of the crankcase once the unit is rotated.
It also removes a potential leak path on a budget engine.
Here's the tipping procedure in order:
- Run the engine 5 minutes to warm the oil, then shut it down and close the fuel valve.
- Burn the fuel level down beforehand if the tank is more than half full. A full tank vents and spills when tilted.
- Let the muffler cool to the touch, because you'll be hugging this machine.
- Pull the dipstick or fill cap so air can replace the draining oil.
- Lay cardboard under a wide drain pan. Give yourself more landing zone than you think you need.
- Tip the unit slowly onto the side the manual specifies and hold it until the flow stops.
- Return it upright slowly, wipe the spill path, and refill through the neck.
Speed ruins this job. A fast tip sloshes oil before the neck is aimed at the pan. It sloshes fuel inside the tank the same way.
Pour like someone who has to mop that floor afterward.
Which Way to Tip and Why the Wrong Side Wrecks the Carburetor
Every small engine has a crankcase breather, a passageway that vents blow-by gases from the crankcase into the air filter housing. Tip the engine with the breather side low and gravity pours crankcase oil straight up that channel. The filter element drinks it like a sponge.
Then you pull the cord. The engine inhales oil-soaked air through the carburetor, floods the plug, and smokes like a fogger. Recovery costs you an afternoon.
The filter has to come out, the airbox needs wiping, and sometimes the carb throat needs a cleaning too.
If it happens, stop before the first pull. Work through this list:
- Pull the filter element and squeeze out whatever comes out.
- Wash a foam element in warm soapy water, rinse, and let it dry fully before re-oiling it lightly.
- Replace a paper element outright. Paper never recovers from oil saturation.
- Wipe the airbox interior and check the carburetor throat for pooled oil.
- Pull the spark plug and turn the engine over a few times to purge the cylinder.
- Fit a fresh plug if the old one is wet with oil.
The direction rule is simple once you see the logic. The fill neck goes low, and the air cleaner stays high. Your manual's illustration shows the exact orientation for your model, and it's worth opening before you tilt anything.
The Vacuum Extractor Alternative
An oil extractor pulls oil up through the dipstick tube using a hand pump or a small electric vacuum unit. No tipping, no wrestling a 50-pound generator over a pan. For a generator mounted in an RV bay or bolted into an enclosure, it's often the only realistic method.
There's a catch, and it matters. The tube has to reach the actual floor of the sump for a complete drain. If it stops an inch short, you leave the dirtiest ounce in the engine every time.
Test yours by comparing how deep the tube goes against the dipstick length.
Here's how the three drain methods compare:
| Method | Works on | Thoroughness | Mess factor |
|---|---|---|---|
| Drain bolt | Units with a plug | Complete with a warm sump | Lowest if the pan is placed right |
| Tip-and-drain | Plugless inverters | Good if held long enough | Moderate, needs cardboard |
| Vacuum extractor | Any dipstick-equipped unit | Depends on tube reach | Lowest, but verify the tube hits bottom |
Use the bolt or the tip when you can. Save the extractor for installed units, bad backs, and cold-weather jobs you'd rather do standing up.
Filter-Equipped Generators: Standby, Diesel, and RV Gensets
Once a generator carries an oil filter, the job changes shape. You're servicing a pressurized lubrication circuit, not just swapping a consumable. It's maybe 15 extra minutes of work, with a few extra failure points to respect.
Air-Cooled Home Standby Units
The 14 to 26kW class, meaning Generac Guardian, Kohler, and Briggs standby units, typically holds 1.6 to 2.5 quarts. Most specify a 5W-30 synthetic for the temperature swings between a cold winter start and full household load. The interval is annual or 100 to 200 hours, whichever the manual lists.
Isolate the machine before you open anything:
- Set the controller to OFF, not AUTO. An exercise cycle firing mid-drain is the stuff of nightmares.
- Disconnect the battery, negative terminal first.
- Lock out the transfer switch so nobody energizes the circuit from the utility side.
Drain with the engine warm from its weekly exercise run. The plug sits low on the block with the filter nearby. Pre-fill the new filter, oil its gasket, and hand-tighten plus three-quarters of a turn.
Then run it, shut it down, and recheck the dipstick, because the element soaks up oil that won't show until the engine has run.
One standby habit worth adopting: check the oil level monthly between changes. Weekly exercise runs burn a little oil, and discovering a low sump during an outage is a genuinely bad day.
Diesel and Onan-Class RV Gensets
Cummins Onan RV generators in the QG and MicroLite families hold roughly 1.5 to 2 quarts and want SAE 15W-40 in warm weather or 5W-30 below freezing. Cummins publishes the service documentation for these units, and the intervals vary enough by model that the manual is the only real spec sheet.
Diesel oil behavior trips up owners who came from gas portables. Combustion soot turns the oil black within hours of a change, so color tells you nothing. Change by hours, not by shade.
Look for a current API CK-4 heavy-duty diesel rating on the bottle.
Soot loading is the diesel-specific problem. Soot thickens the oil while fuel dilution thins it, and the two fight each other inside the sump. Worn injectors make the dilution side worse over time, the same failure mode owners chase when dealing with worn diesel injectors on trucks.
If the oil smells of diesel between changes, look upstream of the oil.
RV gensets live in tight bays with a hot muffler nearby. Run it warm, then let it cool before you reach in. If the bay access is too tight for a drain pan, that's the case where the extractor earns its keep.
Break-In Oil Changes: The First 25 Hours Run on a Different Clock
A new engine sheds metal. Rings seat against the cylinder wall, and that seating leaves fine ferrous debris circulating in the oil. Assembly lubricant burns off.
Machining flash from the factory lets go. All of it lands in the crankcase during the first hours of run time.
That's why break-in ignores the normal schedule. The typical pattern looks like this:
| Change | When | Why |
|---|---|---|
| First | 5 to 8 hours on many portables | Clears ring-seating debris and assembly lube |
| Second | 20 to 25 hours | Clears what the first change missed |
| Ongoing | 50 hours or 6 months, whichever first | Normal wear rate |
Check your own manual for exact numbers, because brands genuinely differ. Champion and Westinghouse commonly call for the first change around 8 hours. Generac portables often specify 5 hours.
Honda tends to phrase it as the first month or 20 hours of operation.
Expect the first drain to look alarming. Darker than you'd expect, with a faint shimmer when you tilt the pan in the light. That shimmer is normal.
Flakes and chips are not.
Here's a quick way to tell them apart. Drag a strong magnet through a bit of drained oil in a clear plastic bag. Fine gray sludge that clings is ring wear, and it's expected.
Distinct flakes or chunks mean the engine is shedding parts, and that's a warranty conversation, not an oil change.
Two more break-in points worth your money. If the unit lacks an hour meter, a stick-on vibration-sensing meter costs about $15 and installs in a minute. You can't follow a 5-hour interval on vibes alone.
And log the break-in change with the date and hours, because that log is your proof if the engine fails inside the warranty window.
Reading the Old Oil: Metal Glitter, Milky Streaks, and Fuel Smell
Drained oil is a diagnostic report if you know how to read it. The quick signs came up in the drain steps. Here's what each one actually means and what to do about it.
| Sign | Likely cause | What to do |
|---|---|---|
| Fine gray shimmer | Normal ring wear, expected in break-in | Stay on schedule |
| Metal flakes or chunks | Bearing, slinger, or gear damage | Stop running it and get it inspected |
| Milky or creamy streaks | Water from condensation or humid storage | Shorten the interval and run longer sessions |
| Strong gasoline smell | Dilution from a leaking carb needle or an open fuel valve | Fix the carb, not just the oil |
| Black and gritty | Oil run far past interval | Change now and shorten the interval |
| Noticeably thinner | Fuel dilution | Check the float and needle valve |
Milky oil usually points at how you use the machine. Generators that run 10 minutes at a time never get hot enough to boil condensation out of the crankcase. The moisture emulsifies into the oil and stays there.
The fix is longer exercise runs, not just fresher oil.
Fuel smell has a real mechanical cause behind it. A leaking float needle lets fuel trickle into the carburetor and down the intake. A fuel valve left open during storage does the same thing over weeks.
The oil change treats the symptom. The carb fix treats the disease.
There's a lab-grade option for owners who want data instead of eyeballs. Used-oil analysis kits run roughly $30 to $40 and report wear metals in parts per million, fuel percentage, water content, and total base number. It's overkill for a $400 portable.
For standby fleets and diesel gensets, it's the cheapest early-warning system money buys.
The Mistakes That Ruin Engines: Overfills, Bad Tips, Stripped Drain Plugs
Most catastrophic generator failures trace back to a short list of owner errors. Every one of them is preventable in under a minute. Here's the field guide:
| Mistake | What it does | The fix |
|---|---|---|
| Overfilling | Foamed oil, blue smoke, oil in the airbox | Drain the excess before running it |
| Underfilling | Starved rod bearing, seizure | Fill to the dipstick and recheck after runs |
| Tipping the wrong side | Oil floods the air filter | Recovery steps in the tip section above |
| Overtightening the drain bolt | Strips aluminum threads | Torque wrench and a fresh washer |
| Reusing the crush washer | Slow weep, mystery oil loss | New washer every change |
| Old filter gasket left stuck | Double-gasket blowout | Eyeball the mating face first |
| Two-stroke premix in a four-stroke | Fouled plug, smoking exhaust | Drain and refill with the correct oil |
Overfilling deserves the full explanation, because the mechanism isn't obvious. Submerge the crankshaft counterweights and they whip air into the oil like a blender. Foamed oil loses film strength, so bearings run on bubbles.
Pressure then shoves the foam out through the breather and into the airbox, which is why an overfilled generator smokes and saturates its filter. If you overshoot, drain it back out. Don't talk yourself into running it off.
Underfilling is faster and quieter. Splash-lubricated engines have no pump and no reserve, so a dry dipper means a dry rod bearing within seconds. The low-oil shutdown sensor exists to catch exactly this.
Never bypass it and never tape over it, because you're disabling the one safety part protecting the engine from you.
Stripped drain plugs are the expensive one. The crankcase is soft aluminum and the bolt is steel, so overtorque yields the threads and the fix is a thread insert kit or an oversized self-tapping plug as a stopgap. Hand tools only on reinstallation.
The same discipline applies to tightening fasteners with power tools anywhere on a vehicle. A torque wrench in the 10 to 15 ft-lb range on a small pan costs less than one repair bill.
The double-gasket failure is the sneakiest. The old filter's rubber gasket stays glued to the block, the new filter goes on over it, and the sandwich lets go under pressure. On a pressurized engine that dumps the sump in seconds.
The cure is five seconds of inspection. It's the same class of failure you get from gaskets stuck to mating faces on any engine, and the same rule wins every time: sealing surfaces get cleaned and get exactly one gasket.
One last mistake that doesn't touch the oil at all but happens right after the fill. Never do the post-change verification run in a garage, basement, or doorway. Generator exhaust carbon monoxide kills, and an open garage door doesn't make it safe.
Do the test run outdoors, away from windows and vents.
Quick Decision Guide: Intervals, Capacities, and Method by Generator Class
By now you've got the six questions in your head. This is the payoff, a single reference you can screenshot before you head to the garage. Find your class, follow the row, and you're 90 percent of the way to the right procedure.
The short version of the logic: if your unit is a plugless inverter under about 2.5kW, you tip it. If it has a bolt on the block, you drain through the bolt. If it carries a spin-on filter, you add the pre-fill and single-gasket steps.
Everything else is a variation on capacity and grade.
| Generator class | Typical capacity | Common grade | Change interval |
|---|---|---|---|
| Small inverter, 1 to 2.5kW | 0.3 to 0.6 qt | 10W-30 or SAE 30 | 50 hours or 6 months |
| Mid-size portable, 3.5 to 8kW | 0.6 to 1.6 qt | 10W-30 | 50 hours or 6 months |
| Dual-fuel or tri-fuel portable | 0.6 to 1.4 qt | 10W-30 | 50 hours, calendar if run on propane |
| Air-cooled home standby, 14 to 26kW | 1.5 to 2.5 qt | 5W-30 synthetic | Annual or 100 to 200 hours |
| Liquid-cooled standby | 3 to 6 qt | 5W-30 or 10W-30 | Annual or 200 hours |
| Diesel genset | 3 to 6+ qt | 15W-40 with CK-4 rating | 100 to 250 hours |
| RV genset, Onan QG class | 1.5 to 2 qt | 15W-40 warm, 5W-30 cold | 150 hours or annual |
Those figures are ranges across brands, not promises. Honda, Generac, Kohler, Briggs, Champion, Westinghouse, Wen, Ryobi, and Cummins Onan each publish slightly different numbers. Manufacturer specs confirm the manual always wins over any table, including this one.
Now the method side. This is where owners get stuck, because the tool you grab depends on how the machine is installed and built.
| Your situation | Drain method | Main risk |
|---|---|---|
| Drain bolt on the block | Bolt drain with a socket | Stripped aluminum threads |
| No bolt anywhere | Tip toward the fill-neck side | Oil in the air filter |
| Bolted into an enclosure or RV bay | Vacuum extractor | Tube stops short of the sump floor |
| Spin-on or cartridge filter fitted | Bolt drain plus filter swap | Double gasket from a stuck old ring |
Hours or Calendar: Which Interval Wins?
Whichever comes first. That's the honest answer, and it's the one most manuals give. A standby unit that runs 12 hours a year still needs an annual change because oil oxidizes and absorbs moisture while sitting.
A job-site portable that runs 300 hours in a summer needs four or five changes in that same window. Track both. A sticky note on the fuel tank with the last change date and hour reading beats a service app you'll stop opening.
What an Oil Change Actually Costs
| Item | Typical cost |
|---|---|
| Oil per change | $6 to $15 |
| Filter, when fitted | $5 to $12 |
| Dealer or small-engine shop visit | $100 to $250 |
| Replacement portable engine | $400 to $1,500 |
| Replacement standby engine | $1,500 to $4,000+ |
Run those numbers and the decision makes itself. You're spending maybe $20 to protect an engine that costs twenty to a hundred times that. Aggregate owner reports back this up.
The machines that die early are almost always the ones with no service record at all.
Safety and Disposal: Hot Mufflers, Carbon Monoxide, and Where Used Oil Legally Goes
Two things hurt people during this job, and neither one is the oil itself. Heat and exhaust gas. Handle those and the rest is housekeeping.
Servicing the Unit Without Getting Hurt
Carbon monoxide is the one that kills. The Consumer Product Safety Commission has documented hundreds of portable generator CO deaths, and a large share happened indoors or in attached garages the owner believed were ventilated. Never run the engine for the warm-up or the post-change verification anywhere but outdoors.
Set the unit at least 20 feet from doors, windows, and vents, with the exhaust pointed away. That's the same placement rule you'd follow during an outage. Servicing doesn't get an exemption.
Hot surfaces come second. A muffler under load runs 400 to 600°F and holds heat long after shutdown. Give it 10 minutes, or wear heat-resistant gloves if you can't wait.
Oil spilled on a hot muffler ignites. It doesn't just smoke and burn off.
Fuel and electrical round it out. Close the fuel valve, work on a cool engine, and keep flames and cigarettes well clear. Pull the spark plug boot so a stray pull on the recoil can't fire the engine while your hands are near the drain.
Unplug every load first.
For personal protection, nitrile gloves and safety glasses cover most of the risk. Used oil is a skin irritant over repeated contact, and warm oil splashes when a drain bolt lets go suddenly. Add oil-resistant footwear if you're working on a smooth garage floor.
If you're working under a machine that sits low, raise it properly rather than stacking scrap wood at random. Solid, level support matters, and the same thinking that goes into building a safe raised platform applies here. A generator that shifts mid-drain turns a tidy job into a spill.
Used Oil and Filters: EPA Rules and Free Drop-Off Points
Used oil is a regulated waste stream. The EPA's used oil management standards under 40 CFR Part 279 set the federal framework, and states layer their own household rules on top. What that means practically: it never goes in the trash, on the ground, down a storm drain, or into a septic system.
Recycling it is genuinely easy and usually free. Most auto parts stores take it, and almost every county runs a household hazardous waste site or collection day. Some programs cap drop-offs at around 5 gallons per visit, so plan two trips if you're servicing a fleet.
A few rules keep your oil acceptable to recyclers:
- Use a sealed container with a screw cap. A rinsed jug with a tight lid works fine.
- Label it clearly as used oil so nobody mistakes it for something else.
- Keep it clean. Antifreeze, brake fluid, solvent, or gasoline mixed in can make the whole batch unrecyclable.
- Don't store it outdoors where rain can get in and where a tipped jug becomes a spill.
- Transport it upright and wedged so it can't roll.
Used filters get their own treatment. Many jurisdictions require them to be hot-drained, meaning drained overnight upside down into the same container, then recycled as scrap steel. Some transfer stations want them punctured and drained first.
Check your local program before you toss one in the bin.
For spills, keep absorbent on hand before you start, not after. Kitty litter or a commercial absorbent, a scoop, and a plastic bag handle a quart-sized spill in two minutes. Large spills or anything reaching a drain or waterway need a call to your state environmental agency.
That call is cheaper than the cleanup fine.
After the Fill: Meter Resets, Service Logs, and Storage Prep
The oil is in and the level is right. Three small tasks finish the job properly, and they're the ones that separate a maintained generator from a merely running one.
Resetting the Maintenance Indicator
Most modern units track service hours and flash a reminder when you hit the interval. Reset procedures vary wildly. Some have a dedicated reset button under the control panel.
Others want a long press on the hour meter button. Standby controllers often bury it in a service menu behind a dealer code.
Look it up in your manual rather than mashing buttons. Clearing a reminder you didn't actually service is worse than leaving the light on. If your model has no indicator at all, a cheap hour meter solves the problem for good.
Keeping a Service Log That Actually Helps
Four fields are enough: date, hour meter reading, oil brand and grade, and quantity used. Add the filter part number if you have one, plus a one-line note on how the old oil looked. That last field is your early-warning system across years of changes.
Keep receipts for the oil and filters in the same folder. Most OEM warranties require documented maintenance at the specified intervals, and a service writer asking for proof doesn't accept "I always change it." A dated log with receipts ends the conversation.
Storing It Right Between Seasons
Change the oil before storage, not after. Old oil carries acids and moisture that sit against bearings and cylinder walls for months. Fresh oil with its additive package intact protects metal through the off-season.
Then handle the fuel, which causes more spring no-start problems than oil ever does:
- Add a fuel stabilizer to a full tank. A full tank leaves less room for condensation.
- Run the engine a few minutes so treated fuel reaches the carburetor.
- For storage over a few months, run the carb dry with the fuel valve closed.
- Change the oil, then fog the cylinder if the manual calls for it.
- Store level, covered, and dry. Never on its side.
- For standby units, keep the battery on a tender and let the weekly exercise cycle run.
- Check the oil level monthly. Exercise runs burn a little, and low oil during an outage is a bad surprise.
If you're hauling the unit to a jobsite or strapping it into a truck bed, tie it to solid frame points and keep it upright. Load security follows the same logic as choosing a proper anchor point on a vehicle. Straps across the fuel tank or the control panel are how switches get crushed.
Frequently Asked Questions
How often should you change oil in a generator?
Most portable generators want a change every 50 hours of run time or every six months, whichever comes first. Standby units are usually annual or every 100 to 200 hours. New engines get two early changes during break-in, typically around 5 to 8 hours and again near 20 to 25 hours.
Can you use regular car oil in a generator?
Often yes, as long as the viscosity and API category match your manual. Most small four-stroke generators accept 10W-30 or SAE 30 with an SJ or higher rating, and modern SP oil clears that bar. Skip oils blended for two-stroke premix, and skip non-detergent oils in any modern engine.
What happens if you overfill generator oil?
The crankshaft whips the excess into foam, and foam doesn't lubricate bearings. You'll see blue smoke, oil pushed into the air filter housing, and hard starting. Pressure can force oil past seals too.
If you overshoot the dipstick, drain the excess rather than running it and hoping.
Should you drain generator oil hot or cold?
Warm is right, hot is not. Run the engine 5 to 10 minutes so the oil flows and carries suspended contamination out with it. A generator that's been working under full load for an hour is too hot to service safely, and the muffler stays dangerous well after shutdown.
How do you drain a generator with no drain plug?
Tip the unit onto the side your manual specifies, with the fill neck low and the air cleaner high. Oil pours out through the fill neck. Burn off extra fuel first, vent the crankcase by pulling the dipstick, and tip slowly.
Tipping the wrong way sends oil into the air filter.
Where do you take used generator oil?
Auto parts stores and county household hazardous waste sites accept it, usually free. Keep it in a sealed, labeled container and don't mix in antifreeze, solvent, or gasoline. Used oil is regulated under 40 CFR Part 279 and is banned from trash, soil, storm drains, and septic systems everywhere in the US.
