
A leaking clutch master cylinder often shows up as a soft pedal or fluid on the floor. You might notice the clutch won't disengage fully. Fixing it quickly prevents further damage.
According to manufacturer specifications, using the wrong fluid can cause compatibility issues. Per FMVSS No. 116, glycol based fluids are standard for clutches. We'll walk you through diagnosing and repairing it step by step.
How to Fix a Leaking Clutch Master Cylinder
How to fix a leaking clutch master cylinder begins with diagnosis. Check for external wetness or internal bypass. Rebuild if the bore is good.
Replace otherwise. Always bleed the system after.
Identifying the Symptoms of a Leaking Clutch Master Cylinder
Fluid often appears on the firewall or carpet near the master cylinder. The pedal may feel spongy and sink when you press it. Some leaks stay hidden inside the bore while the pedal holds firm at first.
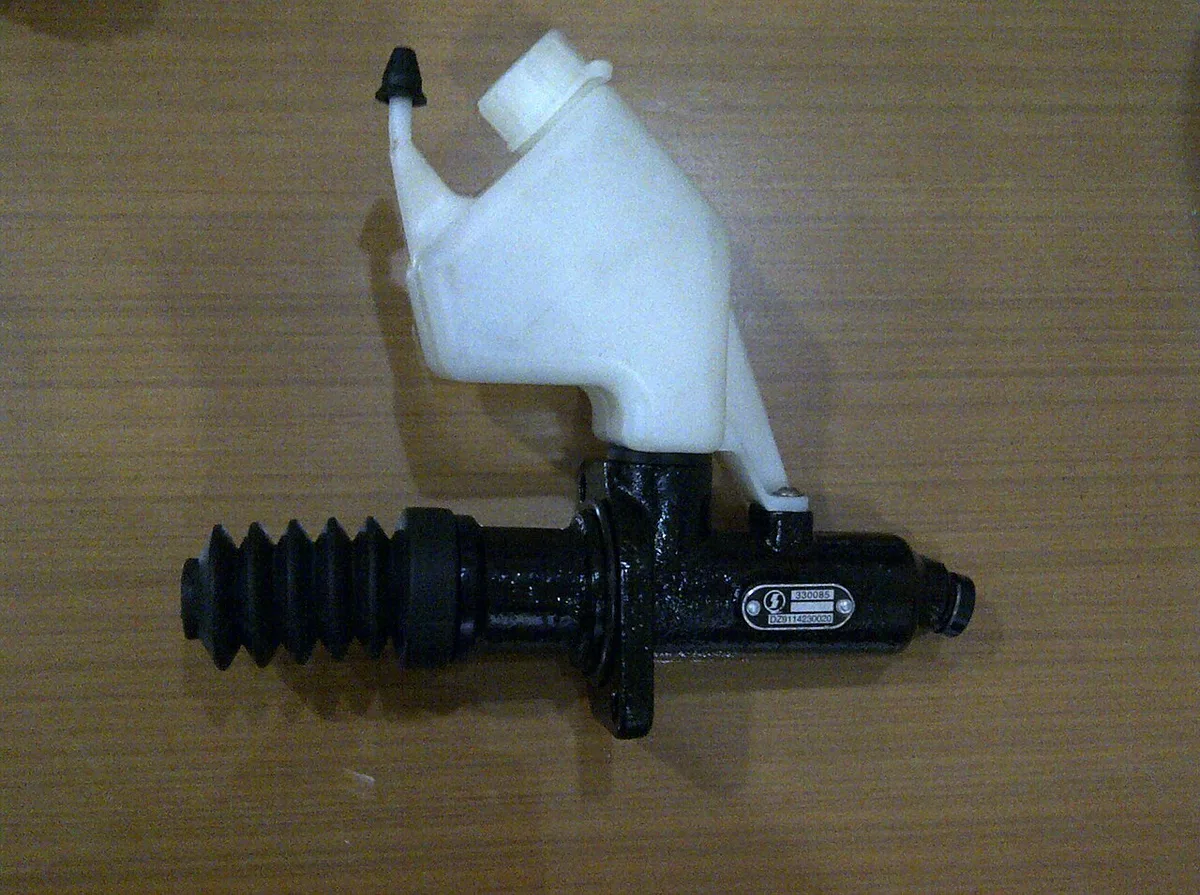
Photos reveal wet trails from the dust boot or seepage at the rear seal. An internal bypass shows little external wetness yet the pedal drops with pedal hold. The clutch fluid reservoir cap may also show moisture or a soft diaphragm.
Decision Tree: Rebuild, Replace, or Fix Another Part
If fluid wets the boot and pedal, start at the external leak path. If the pedal sinks but stays dry, check for internal bypass. Does the slave cylinder weep at the bellhousing?
Then repair or replace that part first. Is the master bore smooth and round? Rebuild with new cups and seals next.
Otherwise replace the full cylinder to avoid repeated failures.
Does the pedal free play match specs? Adjust the pushrod or clevis to uncover the compensating port at rest. Has the fluid shared the brake reservoir?
Test brake function too before driving. Follow this branch and you avoid buying the wrong part every time.
Step-by-Step Repair Process for a Leaking Clutch Master Cylinder
Protect the area with rags before opening lines. Inspect the reservoir diaphragm and remove old fluid with a syringe. Disconnect the pushrod and cap all ports immediately.
Remove the master from its mounting studs.
Bench bleed the rebuild kit until outlet flow runs solid. Remount the new or rebuilt cylinder and reconnect the hydraulic line with flare nuts. Set pushrod preload so the port uncovers at rest.
Bleed at the slave bleeder or CSC screw using the two-person pump method.
| Tool | Purpose |
|---|---|
| DOT 3 or DOT 4 fluid | Matches reservoir spec |
| Banjo wrench | Fits vehicle ports |
| Bench vise or stand | Holds master during bleed |
| Vacuum bleeder | Removes stubborn air |
| New dust boot | Seals the bore |
Test the pedal for firm hold and full clutch release. Road test at low speed to confirm no slipping gears.
Common Mistakes to Avoid When Fixing a Leaking Clutch Master Cylinder
Skipping the bench bleed leaves air pockets that cause spongy feel later. Treating an internal bypass like a simple top off ignores the real seal failure. Using DOT 5 silicone fluid on glycol seals creates a hard seal that cracks under pressure.
Ignoring bore pitting turns a rebuild into a repeat job. Driving before full bleed risks clutch disc damage. Mixing fluids from different reservoirs contaminates the whole system and drops boiling point fast.
Reusing old cups on a pitted bore tears them immediately. Forgetting to cap lines opens the reservoir to air siphon. Skipping the slave cylinder check assumes the master is the only culprit.
Adding transmission fluid in How To Add Transmission Fluid To A 2014 Ford Focus offers a similar fluid handling lesson. Using impact wrenches on lug nuts in How To Use Impact Wrench On Lug Nuts teaches torque control for fittings. Supporting the vehicle on car ramps from How To Build Car Ramps From Wood keeps access safe.
Checking automatic transmission fluid levels in How To Change Automatic Transmission Fluid Filter reminds you of shared systems. Reinstalling side mirror glass in How To Put Side Mirror Glass Back On Car shows clean assembly habits that apply to pedal boxes too.
