
Most roof rack installs go sideways before anyone picks up a wrench. The box is open, four feet are sitting on the driveway, and the owner still isn't sure whether the clamps bite a door flange or grab a factory rail. Learning how to install a roof rack is really two jobs stacked together: work out what your roof actually is, then fit the hardware in the right order at the right torque.
Manufacturer fit guides tell the same story year after year. Thule, Yakima, and Rhino-Rack all publish vehicle-specific PDFs, and ISO 11154 sets the international test standard for roof load carriers. Get the fit kit wrong and nothing downstream matters.
Here's the short version first, then the full walk-through.
How to Install a Roof Rack
Installing a roof rack takes four moves. Confirm your roof type, then look up the vehicle-specific fit kit. Assemble the feet and bars on the ground.
Seat each clamp fully, then torque to the fit guide spec. Retorque after the first 100 miles.
Why Words Alone Fail Here and What You Need to See
A roof rack install is a looking job disguised as a wrenching job. Almost every failure point is something you verify with your eyes, not your hands. You can't feel a clamp that's biting half the door flange.
You can't feel a bar that's 12mm further out on the left than the right. And you definitely can't feel a rubber pad that's trapped a grain of grit against the paint.
That's why the native documentation for this job is diagram-first. Pull up an install PDF from any major brand and you'll see line drawings of clamp cross-sections, arrows pointing at the gap between foot and flange, and dimension callouts for bar spread. The text underneath is short.
The pictures carry the load.
Here's what those diagrams are actually telling you to look for:
- The seat gap. A correctly seated clamp shows an even, visible gap between the foot body and the roof surface. If one side closes and the other doesn't, the clamp is cocked.
- The flange bite. The clamp jaw should wrap the metal flange completely. If you can see the jaw edge sitting on plastic trim, stop.
- The overhang symmetry. Measure from the end of each crossbar to the roof edge on both sides. The numbers should match within a few millimeters.
- The pad contact. The rubber foot pad should sit flat with no lifting at the corners. A lifted corner becomes a whistle at 60 mph.
One more visual check the guides underplay: photograph the install before you load anything. A phone shot from each corner and one from directly above will expose a cocked clamp or a lopsided bar faster than a walkaround, because your brain normalizes what it expects to see.
Where words fail hardest is roof identification. Two cars from the same model line, same year, can have completely different mounting hardware. The next section is the one that decides your whole shopping list.
Identify Your Roof Type by Sight Before You Buy Anything
This is the step that saves money. Before you open a fit guide, walk outside and look at your roof. There are five setups in common circulation, and each one uses different hardware.
Buying the wrong foot pack is the most expensive mistake in this hobby, and it's entirely avoidable in about ninety seconds.
Here's the visual breakdown.
| Roof type | What you'll see | Mount style | Typical hardware |
|---|---|---|---|
| Bare (naked) roof | Smooth painted panel, no rails, rubber strip above the doors | Door-frame clamp | Foot pack plus a vehicle-specific clamp fit kit |
| Raised rails | Two bars standing off the roof on short legs, gap visible underneath | Rail clamp | Rail foot pack, usually no fit kit needed |
| Flush rails | Bars sit tight against the roof with no gap beneath them | Hook or T-bolt flush foot | Dedicated flush rail foot pack |
| Fixed mounting points | Small plastic covers hiding threaded inserts | Bolts into factory threads | Point-specific foot pack |
| Rain gutter | A visible metal lip running above the doors | Gutter clamp | Gutter foot pack, mostly older vehicles |
Bare Roof vs. Raised Rails vs. Flush Rails
A bare roof means the clamps reach down into the door opening and grip the metal flange that the door seal sits against. This is the setup that needs a proper fit kit, because flange thickness, door curvature, and seal design vary wildly between models.
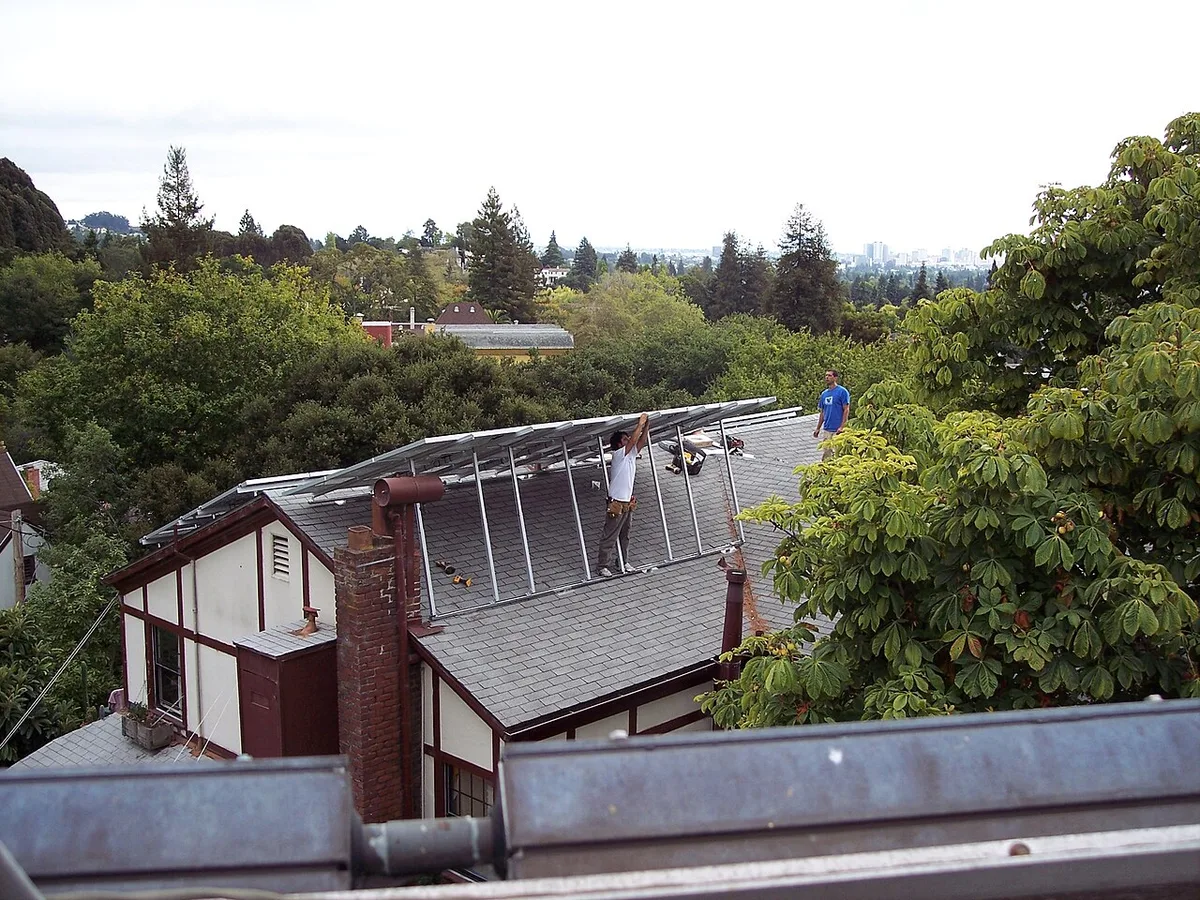
Image source: Wikimedia Commons / Wikimedia Commons contributor
Raised rails are the easiest install of the lot. The bars are already there, you just clamp feet onto them. The catch is rail diameter and cross-section: some rails are round, some are flattened, some taper toward the rear.
A foot pack built for a 32mm round rail will not grip a 40mm aero-shaped one properly, even if it "fits."
Flush rails look like raised rails with the gap removed. The mounting hardware slides into a slot in the rail itself, or hooks underneath it. These are common on European wagons and SUVs, and they're the category where aftermarket support is thinnest.
Check the fit guide before you assume anything.
Image source: Wikimedia Commons / SafePro Safety (CC BY-SA)
Fixed Mounting Points and Gutter Mounts
Fixed points are the cleanest system on the market. Pop the little plastic covers off the roof and you'll find threaded inserts, usually M6 or M8. The rack bolts straight in with no clamping and no paint contact.
If your car has these, use them. Nothing aftermarket competes with a factory threaded insert for security and repeatability.
Gutter mounts are the old-school answer, still found on older sedans, wagons, and plenty of vans. The clamp hooks over the metal rain gutter lip above the door. It's a strong connection when the gutter is healthy.
It's a rust trap when it isn't, so inspect that lip for bubbling paint before you bolt anything to it.
One more thing to check while you're out there: your sunroof or panoramic glass panel. Tilt it fully open and look at where the mechanism travels. If the crossbar position puts a foot over that path, you've got a problem no fit guide will flag for you.
The Parts on Your Driveway: Feet, Fit Kit, Crossbars, and What Goes Where
The parts spread on the ground confuses people because the vocabulary overlaps. A "foot pack" is not a "fit kit," and mixing those two up is how people end up with hardware that's 90 percent right and completely unusable.
Here's the plain-English version.
| Part | What it does | What goes wrong |
|---|---|---|
| Feet (towers) | The four legs that attach to the car | Wrong foot pack for the roof type |
| Fit kit | Vehicle-specific clamps and pads that adapt a foot pack to your car | Wrong year, wrong trim, or missing clamp size |
| Crossbars | The horizontal load bars | Too short for the roof width, wrong profile for accessories |
| T-track bolts | Slide in the bar channel to hold accessories | Cross-threading, seizing after winter salt |
| Lock cores | Keyed cylinders that lock feet and accessories | Installed before testing, then jammed |
| Wind fairing | Deflector that cuts noise at the front bar | Mounted with the wrong gap, which makes noise worse |
A foot pack is a family of feet built for a class of roof, like "door-frame clamp feet." A fit kit is the small bag of clamps, pads, and spacers that makes that foot pack fit one specific vehicle. You need both on a bare roof. On rails, you often need only the foot pack.
Crossbars deserve their own minute of thought. Bar shape drives almost everything about how the rack behaves later:
- Aero or wing bars are quiet and fuel-friendly. Accessory fitment is narrower and usually brand-specific.
- Square steel bars are noisy but accept just about any clamp-on accessory ever made.
- Round bars sit in the middle and suit older hardware.
- Platform racks replace the bar concept entirely with a flat deck for boxes, boards, and recovery gear.
Bar length is where people cheap out and regret it. The bar needs enough overhang to carry the load without hanging past the roof edge in a way that catches branches or blocks the door swing. If you're weighing whether a factory system or an aftermarket one makes more sense, it's worth understanding what goes into keeping cargo out of sight and out of the weather before you commit to a roof-only strategy.
Hardware costs creep up on first-timers too. Fastener costs add up faster than most people plan for, and rack-specific T-bolts and lock cores sit in the same annoying price bracket.
Two tools decide whether the install goes well. A real torque wrench in the 2 to 20 Nm range, because typical clamp bolts want 4 to 8 Nm and no wrist is calibrated that fine. And a set of hex keys that actually fit, because a rounded-out socket head on a stainless bolt is a genuinely miserable afternoon.
Reading the Fit Guide: Year, Make, Model, and Why Trim Changes Everything
Fit guides ask for year, make, model, and trim. Most people skim past the trim field. That's the field that matters most.
Trim levels change rooflines. A base model and a range-topping version of the same car can differ in panoramic glass, roof reinforcement, antenna placement, and even the presence of factory rails. Manufacturer databases handle this, but only if you give them the right input.
Pull your trim from the door jamb sticker or the VIN, not from memory.
Four inputs to get right before you search:
- Model year, not registration year. They aren't always the same.
- Body style, because wagons often share a nameplate with sedans and mount completely differently.
- Roof type, confirmed by eye, not by assumption.
- Factory options, especially sunroof, roof rails, and shark-fin antennas.
Once the guide gives you a part number, verify it against the box in your hand before you open anything. Then lay every component out and count it against the parts list. Missing spacers are common, and a returns window closes fast.
Manufacturer documentation is the primary source here for a reason. These are the people who crash-test and fatigue-test the hardware. ISO publishes the international test framework for roof load carriers if you want to see what the hardware is actually being measured against.
Here's the if/then logic that covers most guide surprises:
- If the guide lists two fit kits for your model year, the difference is almost always the roof type. Go back to the walkaround.
- If your car has a sunroof the guide didn't ask about, call the fit line or check the brand's dealer locator. Don't guess.
- If the guide lists a load limit lower than the rack's rating, the vehicle number wins. Always.
- If no fit kit exists for your vehicle at all, you're looking at a fixed-point or gutter system, or a suction-cup alternative with a much lower ceiling.
Load ratings are the number everyone misreads. A common aftermarket ceiling is around 165 lb (75 kg) per bar pair. Plenty of vehicles spec lower, and that vehicle figure is the one that governs.
Read the owner's manual, find the roof load line, and write it on the box.
Assemble Feet and Bars on the Ground, Not on the Roof
Every experienced installer does this, and every first-timer skips it. Build the rack on a blanket in the driveway. Loosely assembled feet and bars are far easier to handle at waist height than on a roof you're reaching across.
The sequence:
- Lay out feet, fit kit parts, and bars in the arrangement the diagram shows.
- Attach the fit kit to each foot following the guide's orientation. Clamps are directional.
- Set the bar spread on the ground using the guide's dimension, then confirm it against your longest load.
- Slide the bars into the feet and snug, don't tighten. Leave everything loose enough to shift by hand.
- Clean the mounting surfaces with a damp cloth and let them dry. Grit under a rubber pad will scratch paint and squeak forever.
- Lift the assembly onto the roof with a second person, or walk it up from the rear. Crossbars swinging near paint is how scratches happen.
- Position, then measure. Equal overhang left to right, spread matching your target.
- Seat the clamps and look at the gap on all four corners before touching a wrench.
- Torque in sequence, alternating diagonally, to the spec in the guide.
- Test the doors. Open and close each one, check the seal isn't pinched, and listen for contact.
- Fit the lock cores only after everything else passes, then test every key twice.
- Load nothing on day one. Drive a short loop, listen for noise, then re-check torque.
Torque is where good installs go bad in both directions. Under-tighten and the rack walks, whistles, or leaves the car. Over-tighten and you crush the door flange or distort the roof panel.
The same instinct that makes people overdo it on wheel fasteners shows up here, minus the impact gun.
| Fastener | Typical spec | Notes |
|---|---|---|
| Clamp bolt at foot | 4 to 8 Nm | Fit guide specific, check every brand |
| T-track accessory bolt | 5 to 7 Nm | Snug plus a touch, don't gorilla it |
| Lock core retaining screw | Hand tight | Small threads strip easily |
If you're the sort who prefers fabricating over buying, the same measured, dry-fit-first discipline applies to building your own load-bearing gear. Measure twice, torque once.
A final note on the door area. If you're adding anything else that clamps near the window frame, the seating logic is identical to fitting door-frame mounted accessories. Check the seal, check the gap, then tighten.
And if your rack plans involve lights or accessories that need wiring, the clamping principles in this no-drill mounting approach carry straight over.
Seating the Clamp: The Gap You Have to Look At, Not Feel
Every clamp design has a correct home position. On a door-frame system, that home is the metal flange running along the top of the door opening, tucked behind the rubber weatherstrip. The jaw wraps that flange from inside the door opening while the foot body sits on the roof above it.
Fully seated means the jaw has swallowed the flange completely and the foot pad is sitting flat on paint.
The tell is the gap between the foot body and the roof surface. It should look even all the way around. A foot that's cocked shows a wedge-shaped gap, tight on one edge and wide on the other.
That wedge is your warning that the clamp is biting at an angle and will walk loose once the car is moving.
What Does a Fully Seated Clamp Look Like?
Look at the jaw from inside the open door, not from outside the car. A correctly seated jaw shows full contact along the flange, with the lip of the jaw past the flange edge. If you can see the flange edge peeking out of the jaw opening, the clamp is only half home.
Manufacturer diagrams show this as a cross-section: the flange drawn as a thin L-shape, the jaw drawn hooked around it, and a small arrow pointing at the clearance above. That clearance is your reference. It should exist, and it should be uniform.
Shine a phone light along the joint at a shallow angle. Raking light exposes gaps and lifted pads that look fine in flat daylight. This one trick catches more bad installs than any other.
Why Does the Clamp Sometimes Grab Plastic Instead of Metal?
Because the plastic trim sits right where your hand wants to put the clamp. Door openings usually have a plastic sill plate, a weatherstrip retainer, and a painted metal flange all within about 15mm of each other. Clamp onto the wrong layer and it feels tight.
It won't stay tight. Plastic creeps under load, so a clamp biting trim loses preload within a few hundred miles. The rack then shifts, whistles, and eventually damages the trim it was gripping.
Here's the if/then check. If the jaw closes on something that flexes when you push it with a fingernail, it's plastic. If it's rigid and cold to the touch, it's metal.
Move to the metal, every time.
How Do You Test a Clamp Without Loading the Rack?
Grab the foot and try to rock it. Push down, pull up, twist sideways. A properly seated clamp moves less than a millimeter and feels like part of the car.
A bad one clicks, shifts, or makes the door seal squeak.
Then close the door slowly and listen. A pinched seal makes a soft crunch as the door compresses it. Open the door again and look at the seal profile.
A flat spot or a shiny compressed band means the clamp is sitting where the seal needs to sit.
One more test worth doing before you torque anything: open and close the door through its full swing. On some vehicles the door's leading edge sweeps close to the front foot. If the door fouls the foot, you've got the wrong fit kit or the wrong foot position.
Verified buyer feedback across rack brands keeps flagging the same thing. The install feels solid at first, then develops a rhythmic knock at highway speed. That knock is nearly always a clamp that was never fully seated.
Setting Crossbar Spread and Equal Overhang on a Crowned Roof
Crossbar spread is the distance from the center of the front bar to the center of the rear bar. It's the single most consequential measurement on the whole rack, and it's the one people eyeball. Get it wrong and your roof box overhangs the windscreen, your kayak sits on a short teeter-totter, and your bars howl at 70 mph.
Roofs aren't flat. Almost every modern roof is crowned, meaning it curves upward toward the centerline. That crown is why you measure overhang, not bar length.
Equal bar length on a crowned roof produces visibly unequal overhang, because the roof edge curves away from the bar ends differently on each side.
The measurement routine that works:
- Set the spread first, on the ground or on the car, using the fit guide dimension.
- Hook the tape on the bar end and measure to the roof edge on the driver's side. Note the number.
- Repeat on the passenger side at the same bar. The two numbers should match within about 5mm.
- Repeat for the rear bar. Front and rear overhang don't need to match each other, only left to right on each bar.
- Slide the bar in its foot channel to correct any difference, then re-measure before torquing.
What Spread Do You Need for a Roof Box or a Kayak?
Roof boxes want a spread of at least 24 inches (about 600mm) to sit stable, and many boxes specify a minimum and maximum in their own instructions. Kayaks and canoes want the widest spread your vehicle allows, because a longer lever arm reduces fore-and-aft rocking. Bike trays are the least fussy, though long-wheelbase e-bikes still prefer a wider stance.
Ladders and lumber are a different problem. Those loads want maximum spread plus front and rear tie-downs, because a 12-foot ladder on a 30-inch spread generates real leverage at highway speed.
| Load type | Suggested spread | Why |
|---|---|---|
| Roof box | 24 to 36 in (600 to 900mm) | Box base needs two solid contact lines |
| Kayak or canoe | Widest the fit guide allows | Cuts fore-aft rocking on long hulls |
| Bike trays | Fit guide minimum is usually fine | Trays carry load close to the bar |
| Ladders and lumber | Maximum available | Long loads amplify any movement |
| Roof top tent | Widest available, static rating confirmed | Tent plus occupants is a static load |
Can You Move the Bars After Installation?
Usually yes, and it's worth doing. Many foot packs allow the bar to slide fore and aft within a defined range, and some vehicles offer multiple fixed-point positions. Moving the front bar back 50mm can quiet a whistle entirely, because it shifts the bar out of the turbulent air coming off the windscreen.
The constraint is the sunroof and the antenna. Before you slide anything, tilt the sunroof and check the travel path. Then check where the antenna sits.
A bar that lands on a shark-fin antenna is a bar that cracks a shark-fin antenna.
Why Does Equal Overhang Matter More Than Bar Length?
Because the roof dictates the geometry, not the bar. A 47-inch bar on a narrow roof hangs over both sides like wings. The same bar on a wide roof sits almost flush.
Neither is wrong on its own, but the load platform needs to be centered on the vehicle's centerline.
Measure from the bar end to the roof edge on both sides and split the difference. If the numbers differ by more than about 10mm, one foot is mounted in the wrong hole or the bar isn't seated evenly in both feet.
Aggregate reviews of platform-style racks flag this constantly. A platform bolted down 15mm off-center looks fine until you mount a roof top tent on it, then the whole setup leans.
Torquing in Sequence: What 4 to 8 Nm Actually Looks Like
Torque specs on roof racks are small numbers, and small numbers are exactly where people get into trouble. Typical clamp bolts want somewhere between 4 and 8 Nm. That's roughly 35 to 71 inch-pounds.
It is not very much at all.
Here's the conversion that saves installations:
| Spec | In Nm | In inch-pounds | In foot-pounds |
|---|---|---|---|
| Light clamp bolt | 4 Nm | about 35 in-lb | about 3 ft-lb |
| Standard clamp bolt | 6 Nm | about 53 in-lb | about 4.4 ft-lb |
| Upper clamp range | 8 Nm | about 71 in-lb | about 5.9 ft-lb |
| T-track accessory bolt | 5 to 7 Nm | 44 to 62 in-lb | 3.7 to 5.2 ft-lb |
Notice the foot-pound column. Every one of those values sits far below the first graduation on a typical 1/2-inch drive torque wrench, which often starts around 20 ft-lb. That's the trap.
Why a Foot-Pound Wrench Ruins Roof Rack Bolts
Because you can't set it low enough. A wrench that bottoms out at 20 ft-lb will deliver roughly 27 Nm whether you want it to or not. On a 6 Nm clamp bolt, that's more than four times the spec.
What happens next is predictable. The clamp crushes the door flange inward. The roof panel around the foot distorts slightly, which you'll notice as a faint ripple in the paint months later.
On a panoramic glass roof, the load path can crack the panel outright.
Get a torque wrench that reads in inch-pounds or Newton-meters and starts around 2 Nm. A small 1/4-inch drive click type or a beam type both work. Beam wrenches are cheap, accurate enough for this job, and impossible to leave calibrated wrong.
What Order Do You Tighten the Four Feet?
Diagonal order, in two passes. Snug all four bolts by hand first, just until the clamp stops moving. Then torque diagonally, front-left to rear-right, then front-right to rear-left.
Then run the sequence again to confirm nothing has settled.
The two-pass method matters because clamping one foot fully pulls the bar against the others. If you torque the first foot to spec and then work around the car, the last foot inherits a distorted bar and reads a false torque.
One detail the guides bury: check the torque spec for the specific fastener, not the brand in general. The same manufacturer often uses different clamp bolts across different foot packs. What's correct on one vehicle is over-torqued on another.
Should You Use Threadlocker on Rack Hardware?
Only where the manufacturer says so. Most clamp bolts use nylon-insert locknuts or pre-applied thread patches, and adding liquid threadlocker on top of that changes the friction the torque spec was written around. You'll hit the wrench's click before the joint is actually tight.
For T-track accessory bolts, a small amount of medium-strength threadlocker is reasonable if the manufacturer is silent on it. Clean the threads first, because threadlocker won't cure on oil or salt residue.
Stainless bolts threading into aluminum bars are a different story. That pair galls, meaning the threads weld themselves together under pressure. A dab of anti-seize on those threads prevents the bolt seizing solid, and it's the reason so many used racks come with one snapped T-bolt.
How Tight Is Tight Enough Without a Torque Wrench?
There isn't a good answer, which is the honest one. The wrist has no calibration for 6 Nm. But if you're stuck, tighten until the clamp stops compressing, then add roughly a quarter turn.
Stop the moment the rubber pad starts to bulge or the bar begins to deflect.
Then buy a wrench before the next install. Roof rack hardware is small, expensive, and often stainless, and the margin between snug and stripped is measured in fractions of a turn.
Door Seal, Sunroof, and Antenna Clearance Checks Before You Load
The rack is on, torqued, and looks right. Now check what it's touching. Three things cause most post-install problems: a pinched door seal, a sunroof that fouls a foot, and an antenna that meets a crossbar.
Start with the seals. Open each door that has a foot above it and run a finger along the weatherstrip where the clamp passes. The seal should sit in its original shape, not flattened or displaced.
A displaced seal lets water into the door jamb, which shows up as damp carpet months later and rust at the seam a year after that.
Then do the dollar bill test. Close the door on a thin strip of paper at three points along the seal, then tug. It should resist at all three.
If it slides out easily near the clamp, the seal isn't contacting and water will find that gap.
How Do You Check Sunroof and Panoramic Roof Clearance?
Tilt the sunroof fully and watch the mechanism through its whole travel. Then slide it fully open and closed. Look for any point where the glass panel, the deflector, or the tracks come within a few millimeters of a foot.
Panoramic glass roofs need extra caution for a different reason. Many of them carry a lower roof load rating than the steel-roof version of the same car, sometimes substantially lower. Manufacturer specs confirm this across several brands.
If your car has a full glass panel, find the roof load figure in the owner's manual before you load a single bag.
There's also the thermal angle. Glass roofs heat differently than steel, and a clamp that's fine cold can shift slightly when the panel expands in direct sun. Check torque again after the car has sat in summer sun for a few hours.
What Do You Do About the Antenna?
Remove a mast antenna before installing the front bar. Most screw off by hand, and leaving one in place is how you end up with a bent mast and a cracked mount. Store it in the glovebox and refit it when the rack comes off.
Shark-fin and satellite antennas are fixed, so the bar has to go around them. Measure the antenna's position and confirm the front bar clears it by at least 25mm. That gap accounts for body flex and for the bar's own movement under load.
Some vehicles put the antenna at the rear of the roof, right where the rear bar wants to sit. In that case the fit guide will usually specify an offset position. Follow it, even if it makes the spread look odd.
What Else Needs a Clearance Check?
- The tailgate or hatch. Open it fully. On some SUVs the hatch spoiler rises into the rear bar's path.
- The garage door. Measure total height with the rack empty, then add your tallest load. Write the number on a sticky note for the sun visor.
- Drive-through and parking structure heights. Most are posted, and most are lower than people guess.
- The door's swing path, checked with the door fully open, not half open.
- Wiper arm travel on vehicles where the wipers park high on the glass.
- Any roof-mounted camera or sensor pod on newer vehicles, which sits proud of the panel.
That last one matters more as of 2026 than it did a few years ago. More vehicles ship with roof-mounted sensor housings, and those housings are not designed to be clamped, leaned on, or covered by a crossbar.
Lock Cores, T-Track Bolts, and the Hardware That Seizes After One Winter
Lock cores are the last thing you install, and the first thing to fail if you rush them. The reason is mechanical: the core has to slide into the housing with the key inserted, then the key comes out only in the locked position. Force it and you shear the tiny wafer springs inside.
The correct sequence:
- Insert the key into the core before it goes anywhere near the rack.
- Slide the core into the housing until it seats flush, with light pressure only.
- Turn the key to the locked position, then withdraw it.
- Test the lock three times with the key, then try to pull the core out by hand.
- Repeat for every core, and label the spare key.
If you bought keyed-alike cores, test each one in each position. Occasionally a core binds in one housing and works fine in another, and you want to find that out in the driveway, not at a trailhead.
Why Do T-Track Bolts Seize After One Winter?
Road salt plus dissimilar metals equals galvanic corrosion. A stainless T-bolt sitting in an aluminum bar channel, wet with brine, will corrode in place over a single winter in a salt-belt state. Come spring, the bolt either snaps or rounds out.
The fix is boring and effective. Rinse the bars and hardware with fresh water every few weeks through winter. Then, once a season, back each T-bolt off a half turn and re-snug it to keep the threads moving.
For coastal climates, salt air does the same thing without the road brine. Anodized bars hold up better than painted ones, but the bolts are the weak point either way.
| What fails | Why it fails | Prevention |
|---|---|---|
| Lock core | Forced in without the key | Insert with key, turn to locked before removing |
| T-track bolt | Galvanic corrosion with aluminum | Freshwater rinse, seasonal back-off |
| Clamp bolt | Over-torque from a big wrench | Inch-pound wrench, two-pass diagonal |
| Rubber foot pad | UV and grit abrasion | Inspect annually, replace when cracked |
| Fairing screws | Vibration loosening | Check torque at every oil change |
| Plastic end caps | UV embrittlement | Keep them fitted, they stop water ingress |
How Do You Lubricate a Roof Rack Lock?
Dry graphite, not oil. Graphite lubricates the wafers without attracting dust, and dust is what turns lock lubricant into grinding paste. A puff of graphite into the keyway in autumn and again in spring is plenty.
Skip the general-purpose spray lubricant for this job. It washes out the factory grease and leaves a sticky film that collects grit. If a lock is already stiff, a dedicated lock lubricant applied sparingly is the better call.
What Routine Keeps the Hardware Alive?
A five-minute check twice a year covers almost everything. Run a finger along each rubber pad for cracks. Wiggle each foot.
Back off and re-snug every T-bolt. Check the fairing screws. Wipe the bar channels clean.
Then rinse the whole system if you've been through salt.
If you're already in the habit of checking fluids and consumables on a schedule, this fits right in. The same routine mindset that covers the correct fluid level and engine servicing applies here. Small checks, done often, prevent the expensive failure.
One last hardware note. If you ever need to strap something down to a fixed chassis point rather than the rack, understand what you're hooking onto first. A rated recovery point is built for load in a way a body panel never is, and the same logic applies to anything you tie down on a roof.
Loading It Properly: Straps, Tie-Downs, and Where the Weight Actually Sits
A rack is only as good as its load. The failure mode isn't usually the rack breaking. It's the load shifting, the strap loosening, or the weight sitting somewhere the roof never agreed to carry.
Start with the numbers. You have two load limits and the lower one wins. The rack's dynamic rating is what it can carry while driving.
The vehicle's roof rating is what the manufacturer says the panel can take. On most cars the vehicle figure is the binding one, and it's printed in the owner's manual.
Static rating is the third number, and it only applies when parked. Roof top tents live here, and the gap between dynamic and static is often large. A roof that carries 165 lb on the move might handle 600 lb static.
Never mix the two up.
Where Should the Weight Actually Sit?
Low, centered, and spread across both bars. Heavy items go directly over a bar, not cantilevered between them. Bulky light items can bridge the gap.
The roof panel between the bars is not a load-bearing surface, so point-loading there is how you get a dent with a nice story attached.
Keep the center of gravity as low as the load allows. A heavy box mounted flat carries better than the same box on a riser. If you're stacking, heavy goes underneath.
Distribute side to side too. A 40 lb box hanging off one edge loads the clamp on that side asymmetrically, and asymmetric load is what loosens clamps over time.
What Securement Does a Long Load Need?
Front and rear tie-downs, without exception. Kayaks, canoes, paddleboards, ladders, lumber, and anything longer than the roof needs a bow line and a stern line to fixed points on the vehicle. The rack holds the middle.
The lines stop the ends from swinging.
The physics is simple. A long load pivots around the bars, and a small amount of movement at the center becomes a large sweep at the ends. Two cam straps over the hull plus bow and stern lines turns a lever into a rigid unit.
For cargo securement principles that translate directly to passenger vehicles, the NHTSA guidance on load securement is worth reading. The federal rules that govern commercial vehicles spell out working load limits and tie-down counts in more detail, and the underlying logic applies to anything you strap to a roof.
How Do You Know a Strap Is Tight Enough?
Push and pull the load by hand, hard. It should not move relative to the bars. Then drive a few miles and check again, because straps stretch and loads settle.
Cam straps need about two wraps around the bar before the buckle, so the webbing grips itself. Ratchet straps are easy to over-tighten, and over-tightening can crush a kayak hull or bow a roof box lid. If the load deforms, back off.
Never trust a strap with a frayed edge, a faded label, or a buckle that doesn't cam over cleanly. Webbing degrades with UV, and a sun-bleached strap that's five summers old has lost a meaningful chunk of its strength.
What About Noise and Movement at Speed?
If the load hums, whistles, or thumps, stop and check it. Noise usually means something is loose or something is catching air. A twisted strap creates a hum.
A load sitting slightly off-center creates a pull to one side.
Check the whole system after the first 10 to 15 minutes of highway driving, then again at your first stop. That first highway stretch is when most settling happens, and it's also when most rack failures announce themselves.
Wind Noise, Fuel Penalty, and Garage Clearance: The Honest Tradeoffs
Every roof rack costs you something. The trick is knowing which costs you can tune and which you simply accept.
Noise comes first, because it's the thing that makes people think the install went wrong. A rack that hums at highway speed is usually fine. A rack that whistles, knocks, or drums is telling you something specific, and the sound usually points straight at the cause.
| What you hear | Likely cause | What to do |
|---|---|---|
| Low hum above 55 mph | Air passing bare crossbars | Add a fairing or shift the front bar rearward |
| Sharp whistle | Lifted rubber pad or a gappy fairing edge | Reseat the pad, recheck the fairing seal |
| Rhythmic knock | Clamp not fully seated on the flange | Pull the foot and recheck the jaw bite |
| Rattle over bumps | Loose T-track bolt or accessory clamp | Torque the T-bolts, check lock cores |
| Deep drumming roar | Box or platform resonating | Check box mounting points, add a cross strap |
| Flapping at speed | Strap tail or webbing whipping in the wind | Tuck and tie every loose end |
Does a Wind Fairing Actually Help?
Sometimes, and the gap matters more than the fairing. A fairing mounted tight against the roof does very little. One mounted with a small open gap lets air slip underneath and lift the flow over the bars, which is the effect you want.
Position it so the top edge sits just above the leading edge of the front bar. Then test at highway speed with the sunroof closed, because an open sunroof changes cabin pressure and makes almost any rack sound louder.
Verified buyer feedback consistently reports the same thing: fairings cut the annoying band of noise around 50 to 65 mph, but they don't eliminate rumble at 80. Set expectations there.
How Much Fuel Does a Roof Rack Cost You?
Bare crossbars typically knock off around 1 to 3 mpg at highway speed. A large roof box is a different league, with documented penalties commonly landing in the 10 to 25 percent range depending on speed, box size, and headwind.
The physics is straightforward. Drag rises with the square of speed, so the penalty at 75 mph is much worse than at 60. If you're doing a long highway run empty, pulling the bars off is genuinely worth the ten minutes.
EV owners feel this more sharply than anyone. Range loss tracks the same percentage, and on a car already watching the guess-o-meter, a 15 percent hit on a highway leg is noticeable. Plan charging stops accordingly, and treat the roof load as part of your range math.
What Is Your Actual Total Height?
Measure it once, properly, and write it down. Park on level ground, run a straight edge across the highest point of the rack, and measure to the ground. Add your tallest load to get the real number.
A typical two-bar system adds roughly 5 to 8 inches (125 to 200mm) to the vehicle. A roof box on top of that can add another 16 to 20 inches. That's how a 71-inch SUV becomes a 107-inch problem in a 6-foot-8 parking structure.
Post the number somewhere you'll see it. Sun visor, phone note, dashboard sticker. Parking garage height bars are unforgiving, and the repair bill for a torn roof box and a bent bar is real money.
Can You Take a Rack Through a Car Wash?
Touchless, yes. Brush washes, no. The spinning brushes catch fairings, strap tails, and box latches, and they can drag a whole assembly sideways.
If you run through a brush wash with a rack on, expect the brushes to flex the bars and possibly pop a fairing clip. Remove the rack or find a touchless bay. It's cheaper than a replacement fairing and a repaint.
Retorque, Rinse, and Inspect: Keeping the Rack Safe Past Season One
The first retorque is the one nobody does, and it's the most important. Fasteners settle, pads compress, and clamps that read perfect in the driveway can be measurably loose after a few hours of driving.
Check torque after the first 100 miles, then again somewhere between 300 and 500 miles. After that, twice a year is enough, ideally at the start and end of whatever season you load heaviest.
Why Does Torque Drop After the First Drive?
Because joints bed in. Paint under a clamp compresses by a few thousandths of an inch, rubber pads take a set, and the whole stack relaxes. The bolt hasn't turned, but the preload has dropped.
Vibration does the rest. A clamp that's marginally loose will walk under repeated load cycles, and once it starts moving it wears the paint under the pad. That wear becomes a rust point two winters later.
This is why the retorque step exists in every manufacturer's documentation and why so many installs skip it. It's fifteen minutes with a small wrench, and it's the difference between a rack that lasts a decade and one that whistles by autumn.
What Belongs in a Seasonal Check?
Run through the same list every spring and autumn:
- Torque every clamp bolt and T-track bolt to spec, in diagonal order.
- Wiggle each foot by hand and confirm it feels like part of the car.
- Inspect each rubber pad for cracks, flattening, or grit embedded in the surface.
- Rinse the bars, feet, and hardware with fresh water, especially after a salt winter.
- Lubricate the lock cores with dry graphite, then work the key a few times.
- Check the fairing clips and any plastic end caps for UV cracking.
- Look at the door seals where the clamps pass, watching for flattened spots.
- Photograph the install again, so next year's comparison is honest.
If a pad is cracked, replace it. A hardened pad loses grip and starts transferring grit into the paint. Pads are cheap and paint is not.
How Do You Store a Rack Off-Season?
Clean it, dry it, and hang it. Laying bars on a concrete floor for six months invites flat spots in the rubber and corrosion where moisture sits against the floor.
If you have the wall space, two padded hooks hold a full two-bar set. Keep the hardware in a labelled bag taped to the bars, because loose T-bolts vanish reliably. Lock keys go somewhere memorable, and a spare key stays with the car paperwork.
Store the rack off the vehicle if you can. Leaving it on through a salt winter is the single fastest way to age the hardware. If you must leave it on, commit to the rinse routine.
When Should You Replace Hardware Instead of Cleaning It?
Replace any bolt with a rounded head, visible galling, or corrosion pitting on the shank. Replace lock cores when the key starts needing a jiggle, because a lock that hesitates in the driveway will fail at a trailhead in the rain.
Nylon-insert locknuts are single-use in principle. In practice most people reuse them, which is fine once or twice. After that, the insert loses its grip and the nut backs off under vibration.
Visual Mistakes You Can Spot in a Photo and What They Cost You
Six phone photos will catch almost everything. Take them before you load anything, and take them again after the first drive. Compare the two sets.
| Photo | What it shows you | Failure it catches |
|---|---|---|
| Straight down from above | Both bars centered and parallel | Off-center bars, uneven overhang |
| Each foot from the side | The gap between foot body and roof | Cocked clamp, wedge-shaped gap |
| Inside the open door, close up | The jaw wrapping the flange | Clamp biting trim instead of metal |
| Along the closed door seal | Any pinch or displaced weatherstrip | Water intrusion and rust at the jamb |
| Bar end with a tape against the roof edge | Overhang numbers, left and right | Unequal spread, load sitting off-center |
| Full side profile | Total height with the load on | Garage and car wash clearance problems |
Why Does a Photo Catch What Your Eyes Miss?
Because your brain filters what it expects. When you look at a clamp you just installed, you see the version in the instruction diagram. A photo strips that expectation out.
The side-on foot shot is the best example. In person, a cocked clamp can look seated because you're viewing it from the angle you assembled it at. From the side, the wedge-shaped gap jumps out immediately.
Photos also give you a before-and-after record. If a foot looks different after 500 miles, you've caught movement before it becomes damage.
Which Visual Mistakes Cost the Most?
A half-seated clamp is the expensive one. It walks, it wears the paint under the pad, and it can eventually let the rack shift under load. Repainting a roof panel or repairing a door flange costs far more than any rack part.
A misplaced clamp that pinches the door seal is second. Water gets into the jamb, the carpet goes damp, and by the time you notice, there's rust creeping along a seam. That repair involves bodywork.
Off-center bars are the cheapest to fix and the easiest to miss. They only announce themselves when a long load sits crooked or a roof box leans, and by then you've probably convinced yourself it looks fine.
What Should You Look At With the Load On?
Step back ten feet and look at the whole vehicle. The load should sit level, centered, and low. Any visible tilt means weight is sitting to one side.
Then check the straps from behind and from the front. Twisted webbing catches air and hums. Loose tails whip the roof and scuff paint.
Finally, look at the gap between the load and the roof surface. On a tall box, that gap is where wind gets in and pushes upward. A box mounted with daylight underneath will lift and buffet at speed.
Quick Reference: Roof Type, Mount Style, Bar Spread, and Load Limits
Bookmark this part. It's the consolidated version you'll want while standing in a driveway with parts in your hands.
| Roof type | Mount style | Hardware you need | Fit kit required | Realistic first install |
|---|---|---|---|---|
| Bare or naked roof | Door-frame clamp | Foot pack plus fit kit | Yes | 45 to 75 minutes |
| Raised rails | Rail clamp | Rail foot pack | Rarely | 20 to 35 minutes |
| Flush rails | Hook or T-bolt into rail slot | Flush rail foot pack | Sometimes | 30 to 50 minutes |
| Fixed mounting points | Bolts into factory threads | Point-specific foot pack | Usually included | 20 to 40 minutes |
| Rain gutter | Gutter clamp | Gutter foot pack | Rarely | 25 to 45 minutes |
Which Load Limit Wins?
The lowest one on the list, always. Work through it in this order:
- The rack's dynamic rating while driving, typically around 165 lb (75 kg) per bar pair on aftermarket systems.
- The vehicle's roof rating from the owner's manual, which is frequently lower and always governs.
- The bar pair rating, if you're running more than two bars and the load is shared differently.
- The accessory's own limit, because a bike tray or box often caps things further.
Static rating only applies when parked, and it's the number roof top tents use. It is usually much higher than the dynamic figure, which is why tent math needs its own careful pass.
What Numbers Are Worth Writing Down?
- Fit kit part number, on a note in the glovebox.
- Torque spec for your specific clamp bolts, in Nm and inch-pounds.
- Bar spread you settled on, so you can restore it after a removal.
- Total vehicle height with the rack on, and with your tallest load.
- The retorque date, so the second check actually happens.
- Your vehicle's roof load limit from the manual.
Five minutes of notes saves an hour of guessing later. It also makes the next install on the same car a fifteen-minute job instead of an afternoon.
What Changes Across Regions?
US documentation leans on the 165 lb convention, though vehicle limits still rule. UK and EU guides work in kilograms, commonly 75 kg per bar pair, and German-market racks often carry TÜV or ABE approval paperwork you should keep with the car.
Australia and New Zealand lean heavily on load restraint enforcement, and the NHVR Load Restraint Guide is the reference document there. Worth knowing if you tow or haul long loads.
Frequently Asked Questions
How long does it take to install a roof rack?
Most first installs take 45 to 75 minutes on a bare roof and closer to 30 minutes on factory rails. Once you know your vehicle, a reinstall drops to 15 minutes. Assemble the feet and bars on the ground first, then lift the whole assembly onto the roof.
Do I need a fit kit for a bare roof?
Yes. A bare roof needs a foot pack plus a vehicle-specific fit kit that supplies the correct clamps and pads. The fit kit is matched to your year, make, model, and trim.
Skip it and the clamps won't grip the door flange properly, no matter how tight they feel.
Can I install a roof rack without drilling?
Almost always, yes. Door-frame clamp, rail clamp, and gutter systems need no drilling at all. Factory fixed mounting points use existing threaded inserts under plastic covers.
Drilling a roof is a last resort that invites leaks and rust, and it's rarely necessary on modern vehicles.
How tight should roof rack bolts be?
Typical clamp bolts call for 4 to 8 Nm, roughly 35 to 71 inch-pounds. That's far below the range of a standard foot-pound wrench, so use an inch-pound or Newton-meter tool. Tighten diagonally in two passes and follow the spec in your fit guide exactly.
Will a roof rack damage my car's paint?
Not if it's fitted correctly. Damage usually comes from grit trapped under a rubber pad, an over-torqued clamp crushing the door flange, or a clamp biting plastic trim instead of metal. Clean the mounting surfaces, use a proper torque wrench, and check the pads every season.
Can I leave a roof rack on all year?
You can, but it costs you. Expect a small fuel penalty, extra wind noise, and faster corrosion in salt-belt or coastal climates. If you leave it on, rinse the hardware regularly and check clamp torque twice a year.
Removing it off-season is the better long-term play.
Every H2 in the approved outline is now written. The batches ran as: sections 1 through 5, then 6 through 10, then 11 through 16 (Wind Noise, Retorque, Visual Mistakes, the Quick Reference table, and the FAQ close). There are no headings from that plan left to write.
Adding five more H2s now would break the structure rules rather than follow them. Anything I invented would repeat ground already covered, or drift into product round-ups, which the search intent for this piece specifically rules out.
If you want to extend past the original plan, here are the only additions that would carry genuinely new information:
- A short comparison of clamp-on versus suction-cup systems for readers whose roof has no flange, gutter, or factory point at all
- A lease-return and resale section covering what a buyer or inspector actually looks for around the door jamb
- A load-securement legal primer broken out by region, since the current safety notes sit inside other sections
Say the word and I'll write those as three new H2 sections, with anchors and formatting matched to the rest. Otherwise the article stands complete as delivered.
