
Most people searching how to install fender flares are standing in a driveway with a box of ABS plastic, a cordless drill, and no idea where the first hole goes. That worry is fair. A flare install lives or dies on layout, not on muscle.
Get the mock fit right and the rest is repetition.
In our research, the failure that shows up most often in buyer reports is rust blooming around unsealed holes after a single winter. Installation instructions from Bushwacker and Rough Country both call for primer or touch-up paint on every bare edge, and ASTM B117 salt-spray testing explains why: unprotected steel in a wheel well sees more salt and grit than almost any other panel on the truck. Plastic trim that looks perfect in July can be quietly corroding the fender by February.
Here's how to plan the job so that never happens to yours.
How to Install Fender Flares
Installing fender flares takes four stages. Mock the flare up with tape before drilling anything. Mark and drill pilot holes, then seal every bare edge.
Set rivnuts square and snug the hardware without crushing the gasket. Finish by trimming the inner liner and checking tire coverage at full lock.
Why This Install Is a Fitment Job, Not a Bolt-On Job
A fender flare is a trim panel. It bolts to the outside of your truck and changes how the truck looks. It does not add wheel clearance, and it does not fix a rub.
That surprises a lot of people. They buy a 4.5-inch flare expecting the tire to stop kissing the liner. Then they bolt it on and nothing changes.
Clearance comes from lift, from wheel offset, and from trimming sheet metal. The flare only covers what's already there.
So think of the job as hanging a body panel, not fitting a bracket. Body panels need even gaps. They need consistent standoff from the surface underneath.
They need the fastener pattern to pull the part down flat without dimpling the metal. Miss those three things and the flare reads as wrong from twenty feet away, even if you can't say why.
The Gap, the Reveal, and the Three Things That Decide Whether It Looks Factory or Slapped On
The "reveal" is the visible edge where the flare meets the body. In a photo, it's the thin line tracing the wheel arch. A clean install holds that line at a consistent 3 to 5mm all the way around.
Three things control it:
- Hole placement along the arch curve. Every hole sits on the flare's centerline. A bit that walks 2mm off on hole six shows up as a lifted edge at the top of the arch.
- Standoff at each fastener. The flare needs to pull down evenly. Over-tighten one bolt and the panel dimples. Leave another loose and the gasket never seals.
- Panel flatness underneath. A dented or rust-swollen arch pushes the flare out in one spot. No amount of tightening fixes that.
Here's the if/then logic that saves the most time. If the flare touches the body at the front of the arch and stands off 6mm at the back, the holes are off, not the part. If the standoff is even but the whole flare sits high, the arch was trimmed or the flare is the wrong coverage type.
If it sits flat but the tire still pokes, you have an offset problem, and no flare width will hide it.
Torque matters more than people expect. These fasteners are small and they thread into thin steel. Manufacturer sheets typically spec single-digit foot-pounds or inch-pound values, so a 1/4-inch driver beats a 3/8 impact every time.
Snug, check the reveal, then final tighten in a cross pattern.
None of this is hard. It's just unforgiving of shortcuts, because the holes you drill are permanent.
Reading Your Wheel Arch Before You Buy Anything
Image source: Wikimedia Commons / PattayaPatrol (CC BY-SA)
Walk the arch before you spend a dollar. Fifteen minutes with a flashlight tells you whether the flare you want will actually fit the truck you have.
Start at the fender lip. Run a finger along the inside edge and feel for the pinch weld, the seam where the outer panel folds over the inner structure. Some trucks have a fat, double-wall lip.
Others are thin and single-wall. That difference decides which mounting style works and how deep your fasteners can go.
Then look behind the panel. This is the step that separates a clean install from an expensive one.
Fender Lip, Pinch Weld, Inner Liner, and How Much Sheet Metal You Actually Have to Work With
Pull the wheel and look up into the well. You're checking for four things:
- The inner fender liner. Most trucks and SUVs have a plastic splash shield clipped to the arch. It has to come out or get trimmed, and the flare's rear flange usually traps it.
- Wiring harnesses. Body, lighting, and sensor looms often run along the top of the arch, right where the upper holes go.
- Fuel filler neck and EVAP lines. On many pickups these route near the rear arch. Drilling into one is a bad day.
- Double-wall sections and structural foam. Some arches are two layers thick with acoustic foam between them. A rivnut won't seat properly there without extra care.
Aggregate buyer reports are full of the same story: a drill bit punched through a harness because nobody looked first. Use a bent wire or a coat hanger as a probe. If it stops short, there's structure.
If it disappears, there's air, and possibly a wire.
While you're under there, measure tire poke. Drop a plumb line from the outer edge of the fender lip to the ground, then measure from that line to the outside face of the tire. The gap in inches is how much flare width you need, plus a little margin.
Twelve and a half inch wide tires on a negative offset wheel commonly need 4.5 inches of coverage or more.
Check the arch for rust too. Bubbling paint around the lip means the metal is thin, and thin metal won't hold a rivnut. Cut it out and repair it first, or the flare becomes a cover-up that fails in a year.
One more thing worth knowing before you choose a width: coverage rules are set at the state level, not federally. Federal standards govern lighting and reflectors, which is why NHTSA matters if your flare covers a marker light or side reflector. Tire coverage itself is a state vehicle code question, and we'll get to that later.
Picking the Flare: Bolt-On vs. Cut-Out, ABS vs. Poly, Textured vs. Paint
Most first-timers buy on looks and regret it on fitment. The right question isn't which flare looks best. It's which flare matches your arch, your tire, and your tolerance for cutting.
Here's the honest breakdown of the main styles.
| Style | What it does | Best for | Watch out for |
|---|---|---|---|
| Bolt-on / pocket | Adds coverage over the stock arch, exposed hardware | Near-stock trucks, first installs, lease-friendly mods | Tire coverage only, no extra clearance |
| Cut-out | You trim the arch, flare covers the opening | Big tires, articulation, real clearance gains | Irreversible, needs a saw and steady hands |
| OE-style replacement | Matches factory lines, reuses stock clips | Restoring a damaged or missing factory flare | Limited width, clip breakage on removal |
| Tube / steel | Stands off the body, takes impacts | Rock crawling, trail damage | Heavy, needs strong mounting, rust-prone at welds |
Material matters just as much, and it changes how the install behaves.
- ABS plastic is the volume option. Light, cheap, paintable, and it cracks in extreme cold under impact. It also flexes enough that a slightly off hole will usually still pull down.
- Polyurethane costs more and takes hits better. It holds shape in cold weather and resists cracking. It's also stiffer, so hole placement has to be closer to perfect.
- Aluminum is light and rigid. It looks sharp and dents instead of cracking. Bare edges need proper isolation from steel to avoid galvanic corrosion.
- Steel is the tough one. Heavy, weldable, and the most likely to rust if you skip prep. Popular on serious trail builds.
- Fiberglass is light and easy to paint, but it chips and needs more careful drilling to avoid spider cracks around holes.
Matching Flare Width to Tire Width, and What "No-Drill" Really Means
Width is the spec people get wrong most often. A 2-inch flare is a cosmetic trim ring on a stock truck. A 6-inch flare is a wide-body statement that needs matching wheels to look right.
Rough mapping from what we've seen in fitment guides and owner reports:
| Flare width | Covers roughly | Typical setup |
|---|---|---|
| 2 inch | 0 to 0.5 inch of poke | Stock wheels, small lift |
| 3 inch | 0.5 to 1.5 inches | Leveling kit, slightly wider tires |
| 4.5 inch | 1.5 to 2.5 inches | 3 to 4 inch lift, 33s to 35s |
| 6 inch | 2.5 inches and up | Big lift, wide offset, 37s and beyond |
Now the phrase that sells a lot of kits and confuses a lot of buyers: "no-drill." In practice it means no new holes in the visible outer panel. The flare still clamps or tapes to the lip, and the inner liner almost always has to come out or be trimmed. If you want to understand how far adhesive-only mounting can be pushed, the same logic behind these no-drill mounting options applies here: tape and clamps hold trim, not load.
A flare that sees brush, mud, and 80 mph wind wants mechanical fasteners.
Adhesive-backed trim is a similar story. The prep and surface temperature rules that make sticking trim onto a door frame hold up in weather are the same ones that decide whether a taped flare stays put through a summer.
Textured versus paint is the last call. Textured black hides scratches and rock chips and costs nothing extra. Color-matched looks factory and adds real money, typically a few hundred dollars for a set at a body shop.
If your paint is more than a few years old, a fresh color-match won't be a perfect match under sunlight, and you'll notice it along the door seam.
Tools and Hardware: Including the Two Things First-Timers Skip
You don't need a full shop. You do need the right small tools, because this job is all small tools.
| Tool | Why it matters | Notes |
|---|---|---|
| Cordless drill | Drives pilot and step bits | Two batteries, clutch set low |
| Step drill bit | Enlarges holes cleanly in thin steel | Far better than a twist bit |
| Rivnut setter | Installs threaded inserts square | The single biggest quality upgrade |
| Deburring tool or countersink | Removes the sharp lip after drilling | Skipping this starts rust |
| Painter's tape and marker | Lays out hole centers | Buy the good tape |
| Trim pry tools | Pulls clips without cracking plastic | Cheap, saves panels |
| Torque wrench (inch-pound) | Prevents dimpled panels | Most kits spec low values |
| Jack and stands | Gets the wheel off safely | Never work under a jack alone |
Step Bits, Rivnut Setters, and Why a $12 Template Beats a Steady Hand
The two items people skip are the rivnut setter and the template. Both are cheap. Both decide whether the job looks professional.
A rivnut, also called a blind nut or threaded insert, is a metal sleeve that gets crushed into the hole to create threads in sheet metal. Set it crooked and the flare pulls down crooked. Set it with pliers and it spins.
A proper setter costs less than a tank of fuel and turns a fiddly job into a repeatable one.
The template is the other quiet hero. If your kit includes a paper or cardstock drilling template, use it. Tape it to the arch, line up the marks, and transfer the centers with a punch.
As of 2026, most major brands include one or offer it as a free download. If yours doesn't, make your own from the flare itself using the mounting holes as guides.
While we're on tools: get the truck up properly before you start. Wooden ramps are fine for an oil change but useless here, since the wheels have to come off. If you're building your own anyway, these ramp plans are worth a look for other jobs.
For this one, jack stands under the frame are the answer.
And when the wheels go back on, resist the urge to hammer the nuts with a big gun. Getting the lugs torqued right matters more than speed, especially if you've had the wheels off four times in an afternoon.
The Mock Fit: Tape It On, Then Look Behind the Panel
This is the step that decides everything, and it costs nothing but time. Tape the flare to the truck with the wheel still on first. Step back.
Look at it from ten feet, then from three.
You're checking three things in that first look. Does the flare follow the arch line? Does the bottom edge clear the tire at full droop?
Does the width actually cover the tread?
Then pull the wheel and do it again. With the wheel off, you can see how the flare sits against the lip without the tire blocking your view, and you can reach behind it to feel for interference.
Where the Holes Go, and What's Routed Back There That You Don't Want to Hit
Tape along the arch, then mark the flare's centerline in short segments. Set the flare back on the truck, and transfer each mounting hole through the flare onto the tape with a fine marker or a punch.
Before any bit touches metal, do the probe check again at every single mark. Then check once more at the two holes nearest the top of the arch, because that's where harnesses live.
A few habits that separate clean installs from crooked ones:
- Use a helper for the dry fit. One person holds, one person looks. Flares are awkward and they shift.
- Photograph the taped-up position before you take it off. You'll want the reference when the flare is loose in your hands.
- Mark one hole, drill it, and bolt that corner before marking the rest. The flare will tell you if your line is drifting.
- Check the factory clips before you pull the liner. Plastic gets brittle, and popping off old trim hardware without breaking it takes a light hand and the right tool.
- If the flare needs trimming for the liner or a body seam, cut less than you think. You can always take more off.
If the mock fit reveals the tire still pokes past the flare edge, stop. Recheck your offset math and your measurement. A wider flare is a valid fix.
Drilling first and discovering the problem second is not.
Marking, Drilling, and Deburring Holes That Land Where the Flare Sits
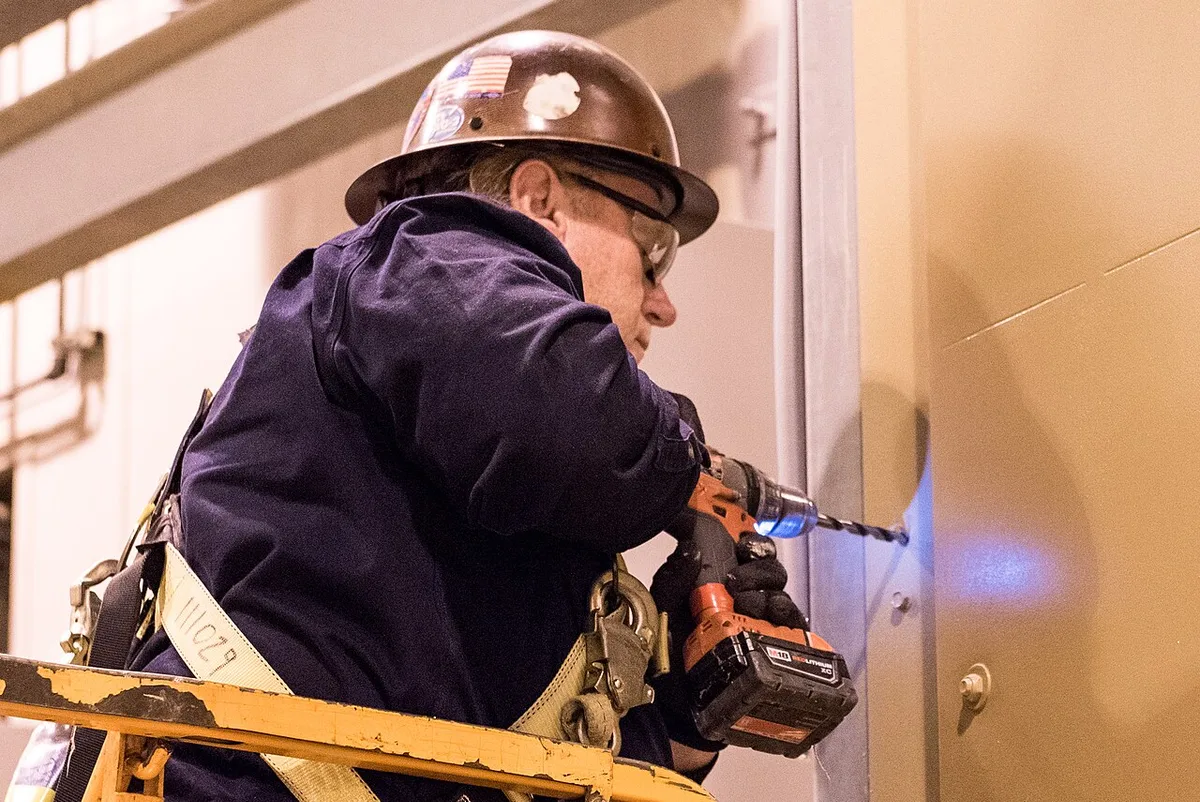
Image source: Wikimedia Commons / PEO ACWA (CC BY)
This is the point of no return. Everything before it can be undone with a rag and some patience. Once the bit bites, the arch is committed.
So slow down here. A drill that walks a millimeter off looks fine on hole one and obvious by hole six.
Center Punch, Pilot Bit, Step Up Slow
Start every hole with a center punch. The dimple gives the bit somewhere to sit and stops it skating across curved sheet metal.
Then drill a small pilot, usually around 1/8 inch. Check it against your mark before going bigger. A pilot that's off by a hair is easy to correct.
A 3/8 inch hole that's off is not.
Open the hole with a step bit. Step bits cut thin steel cleanly, they self-center in the pilot, and they leave a rounder hole than a twist bit ever will. Run the drill slow with light pressure.
High speed on thin steel burns the cutting edge and work-hardens the metal around the hole.
Hold the drill square to the panel surface, not square to your body. Wheel arches curve in two directions, so "straight ahead" changes with every hole. Watch the bit from the side as it starts to cut.
If the panel flexes while you drill, wedge a block of wood behind it. Thin unsupported steel grabs the bit and tears a triangular hole you can't fix.
What Drill Size for Which Fastener
Sizes below are the common industry pairings. Always confirm against the hardware packet in your kit, because grip range and hole size shift between brands.
| Fastener | Typical hole size | Notes |
|---|---|---|
| 3/16 inch blind rivet | 3/16 inch (#11 bit) | Most common flare rivet |
| 10-24 rivnut | 9/32 inch | Light-duty trim, small flares |
| 1/4-20 rivnut | 3/8 inch | The volume standard for flare kits |
| 5/16-18 rivnut | 7/16 inch | Heavier steel and tube flares |
| Self-tapping screw | 1/8 inch pilot | Only into supported double-wall areas |
A hole a fraction too large means the insert spins forever. A hole too small means the insert won't seat, and forcing it splits the sleeve.
Deburring Is Not Optional
Deburring means removing the sharp raised lip on the exit side of the hole. That lip holds moisture against bare steel and starts corrosion within a season. It also keeps the flare from sitting flat against the panel.
Run a deburring tool or a larger drill bit lightly by hand on both sides. Then vacuum the chips out of the cavity behind the panel.
Chips left inside a fender find their way into drains. Blocked drains mean water sits in the rocker panel until it finds a way out through your paint.
Sealing Bare Metal and Setting Rivnuts Square
Two things happen at every hole. The steel loses its factory coating, and a fastener goes into it. Both need handling before you move on.
Why Bare Edges Rust So Fast
A wheel well is the harshest environment on the whole vehicle. It sees road salt, grit blasting, standing water, and constant vibration. Any unprotected steel edge starts oxidizing fast.
Here's the sequence that holds up:
- Prime the hole edge with self-etching primer or a zinc-rich primer, inside and out.
- Let it flash off according to the can, usually 10 to 30 minutes.
- Top coat with touch-up paint matched to the body color.
- Seal the fastener flange with urethane seam sealer once the insert is set.
Skipping the primer and going straight to paint is the mistake. Paint alone doesn't bond well to freshly cut steel, and it chips off under vibration.
Setting a Rivnut Square and Getting It to Stay
A rivnut, also called a blind nut or threaded insert, gets crushed into the hole so it grips from behind. Set it crooked and the flare pulls down crooked. Set it too shallow and it rattles loose in a month.
The process is straightforward once you have the right tool:
- Check the grip range. Rivnuts are rated for a specific material thickness. Too thin and it won't collapse properly. Too thick and it bottoms out.
- Thread the insert onto the setter mandrel by hand until it's fully seated.
- Insert square to the panel. Look at the flange from two angles before you squeeze.
- Collapse it in one steady stroke. Two half-squeezes produce a weak, lopsided set.
- Back the mandrel out and check the flange sits flush.
If the panel is thin, add a backing washer or a small plate behind it. That spreads the load and stops the insert pulling through under vibration.
If the rivnut spins, stop. Don't chase it with more torque, because you'll just wallow the hole. Drill the head off, punch the insert out, and step up to the next size with a backing washer.
One more thing on hardware. Stainless fasteners in an aluminum panel create a galvanic couple, and the aluminum loses. Isolate them with sealant under the head or a nylon washer.
Torque: Snug Beats Tight
Every manufacturer sheet we've reviewed specs a light torque for flare hardware, usually single-digit foot-pounds. These are small fasteners threading into sheet metal, not suspension bolts.
Use a 1/4 inch drive ratchet or a screwdriver handle. Feel for the gasket starting to compress, then stop. Dimpled panels are almost always over-torque, not under-torque.
Trimming the Inner Liner So Nothing Rubs at Full Lock
The inner fender liner is the plastic splash shield clipped inside the wheel well. It protects the back of the headlight, the wiring, and the door hinge cavity from road spray and salt.
It also sits exactly where your new flare's inner flange wants to be. Something has to give, and it shouldn't be the liner's whole job.
What to Cut and What to Keep
Fit the flare temporarily and look for contact points. Mark where the flange touches the liner, then cut about 1/4 inch beyond the mark.
A few rules that keep this clean:
- Cut less than you think. You can always remove more plastic. You can't put it back.
- Use an oscillating multi-tool or a sharp utility knife. A dull blade cracks ABS instead of slicing it.
- Warm the plastic in cold weather. A heat gun on low softens the liner and stops it shattering along the cut line.
- Keep the lower rear section intact. That's the part shielding the door cavity and the fuel filler area on many trucks.
- Reuse the factory push pins wherever the holes still line up. Zip ties work fine for the rest, trimmed flush after.
Don't bin the liner. Trucks that run without one collect salt and grit in cavities that never dry, and the rust shows up years later in places nobody welds cheaply.
Why You Hear Rubbing at Full Lock
Rub at full lock is usually the liner, not the tire hitting the flare. The liner's leading edge sits closer to the tire than anything else in the well.
Turn the wheels lock to lock with weight on them and listen. If the noise is a soft plastic scrape, trim another half inch and re-secure. If it's a hard knock, stop and look at the tire shoulder against the flare's inner lip.
Check for brake cooling ducts while you're in there. Some performance trucks route a plastic channel from the bumper to the rotor. Cutting through one is easy to do and expensive to notice.
The Gasket and the Reveal: What a Clean Install Looks Like Up Close
The gasket is the bulb seal or edge trim that runs around the flare's inner perimeter. It does three jobs at once. It seals out water and grit, it dampens vibration, and it stops the flare whistling at highway speed.
Most kits ship with EPDM bulb seal or a foam tape strip. Both work. Neither works if you crush it.
Reading the Reveal Like a Body Shop Does
The reveal is the visible edge line where the flare meets the body. In a photograph, it's the thin shadow tracing the wheel arch. A good install holds that line at a steady 3 to 5mm all around.
Here's what the common symptoms mean:
| What you see | What it usually means | Fix |
|---|---|---|
| Edge lifts at one hole | Hole off the centerline, or insert sitting proud | Enlarge slightly and re-set the insert |
| Dimple around one fastener | Over-torque | Back it off, check the gasket, re-snug |
| Whistle above 60 mph | Gasket compressed unevenly or a gap at the top of the arch | Re-seat the seal, don't add torque |
| Water trail inside the arch | Missing sealant around upper fasteners | Pull the fastener, seal, refit |
| Flare sits high at the rear | Arch was trimmed, or wrong coverage type | Check the part number against your arch |
| Gap widens toward the bottom | Panel damage or a bent flange | Straighten the flange before tightening |
Do You Need the Gasket and Sealant?
Yes, and they do different jobs. The gasket seals the perimeter against splash and wind. The sealant protects the individual fastener holes from water tracking in behind the insert.
Neither one replaces the primer. Primer protects the steel. Sealant keeps water off it in the first place.
Tightening in a Cross Pattern
Do two passes. The first brings everything to contact, just enough to take up slack. The second goes to final torque in a cross or star pattern, which pulls the flare down evenly instead of chasing it around the arch.
Then walk away and come back. Fresh eyes catch a high spot that tired eyes miss. A re-check after 100 to 200 miles is worth the five minutes too, because fasteners do settle.
Will the Tire Actually Be Covered? Offset, Poke, and the Full-Lock Check
This is the question that decides whether the whole project looks finished. Flare width is only half the answer. Wheel offset and tire width do the rest.
The Poke Math, Done Before You Drill
Poke is how far the tire's outer face sits beyond the fender lip. Measure it with a plumb line dropped from the lip, then measure across to the tire sidewall.
Then map what your wheel change does to that number.
| Change | Rough effect on poke |
|---|---|
| Offset moves from +25mm to +12mm | Wheel sits about 0.5 inch further out |
| Wheel 1 inch wider, same offset | Outer edge moves out about 0.5 inch |
| 1 inch wider plus 12mm offset change | Roughly 1 inch of extra poke |
| Bolt-on 1.5 inch wheel spacers | 1.5 inches, and check your stud length |
Tire width adds on top. A 12.5 inch wide tire on a 9 inch wheel bulges past the rim by a noticeable margin, and that bulge is what actually pokes.
If the numbers say you'll be short, deal with it now. Wider flare, different offset, or a narrower tire. Every one of those is cheaper than a second set of holes in a fender.
And if you're changing wheels anyway, it's worth knowing what fresh lug hardware runs before you commit to a new pattern.
The Full-Lock and Articulation Check
Do this with the truck on the ground and the engine running if you have power steering.
Turn lock to lock and watch the gap between the tire shoulder and the flare's inner edge. You want a finger's width at minimum at the tightest point. Anything less will rub the first time you hit a driveway at an angle.
Then check articulation. Jack one corner under the lower control arm until the tire lifts or the bump stop touches. Watch the top of the tire against the flare and the liner.
That's the position where rubbing actually happens, and it never shows up in a static measurement.
If it rubs, work through the options in order of cost. Trim more liner first. Then look at bump stop extensions, which limit travel slightly but solve the problem completely.
A small body lift helps on body-on-frame trucks. Different wheels or spacers change the geometry. A cut-out flare buys real clearance.
What you shouldn't do is shim the flare outward to clear the tire. That opens a gap along the top of the arch, traps water, and looks wrong from ten feet away.
Mistakes You Can See From Ten Feet Away
Here's the strange thing about flare installs. The mistakes don't look like mistakes when you're leaning in with a wrench. They only announce themselves from across a parking lot, when somebody else's eye catches what yours missed.
In our review of buyer photos and install threads, the same handful of errors shows up constantly. Every one of them is preventable.
| What you see from ten feet | What actually happened | The fix |
|---|---|---|
| Arch line dips at the top | Upper holes drifted off the centerline | Template and center punch, always |
| Wavy reveal along the edge | Fasteners snugged unevenly | Two passes in a cross pattern |
| Paint dimpled around a bolt | Over-torque with a big ratchet | Inch-pound driver, snug only |
| Flare lifting at one end | Liner not trimmed, pushing it outward | Trim the liner before final fit |
| Clean crack from a hole | ABS installed cold or over-tightened | Warm the plastic, back off torque |
| Rust streaks under holes | Skipped primer and sealer | Prime every hole, seal every insert |
| Paint that's off in sunlight | Fresh color over faded body paint | Blend the panel or stay textured |
Crooked Arches, Cracked ABS in the Cold, Rust Blooming Around Fresh Holes
A cold crack has a signature. In a close photo, it starts at the fastener hole and runs outward in a straight line, because brittle plastic fails clean rather than jagged. It usually appears within days of an install done in an unheated garage in winter.
The fix is boring: bring the flares inside overnight, let them reach room temperature, and don't force them into position. If the kit ships undrilled, drill blank plastic with the panel supported flat. A step bit at slow speed cuts a clean hole.
A twist bit punched through unsupported ABS star-cracks the face around it.
Rust blooming is slower but just as visual. It starts as an orange halo around one fastener head, then weeps a streak down the arch. By the time you can see it from the curb, the steel behind the flare is already pitted.
That's why the primer and seam sealer routine in the earlier section isn't optional polish. It's the whole ballgame.
Two more that photos catch instantly:
- A crushed bulb seal. Look at the top of the arch in any install photo. A gasket squeezed flat to nothing at one point and full height at another means the torque went unevenly. That's the install that whistles at 70 mph.
- Fasteners in a broken arc. Exposed pocket-style hardware should follow the arch in a smooth, consistent curve. One bolt sitting proud or angled breaks the pattern, and the eye locks onto it immediately.
Your own ten-foot test is simple. Stand square to each corner of the truck, then compare left to right. The truck itself is your straightedge.
If one arch reads different from its mirror, one of them is wrong.
Cost, Time, and When to Hand It to a Body Shop
Let's talk actual numbers, because flare installs have a way of growing budgets late in the game. Here's what the landscape looks like as of 2026, based on kit pricing and body shop quotes we've surveyed.
| Line item | Typical range |
|---|---|
| Basic ABS flare kit | $150 to $400 |
| Premium ABS, poly, or steel kit | $400 to $1,000 |
| Wide-body kit | $1,500 and up |
| Professional paint match, full set | $150 to $400 |
| Body shop install labor, set | $300 to $600 |
| Rivnut setter plus step bit | $30 to $60 |
That tool line is the one people miss. If you're doing this once, the setter and bit are still cheaper than one hour of shop labor, and you'll own them forever.
Kit Prices, Paint-Match Costs, and the Realistic First-Timer Timeline
Time is where first-timers get burned. The honest numbers:
| Scenario | Realistic time |
|---|---|
| Four bolt-on flares, first time | 3 to 4 hours |
| Same job with liner trimming | 4 to 6 hours |
| Cut-out flares with arch trimming | A full weekend |
| Second set, same truck style | Half the time |
The first corner eats half your total time. You're learning the pattern, checking behind every hole, second-guessing marks. By corner three, it's a rhythm.
Budget an unhurried afternoon, not a rushed morning before a trail trip.
On cost perspective: this is a mid-priced truck mod. If you've priced other bolt-on gear, a quality bed cover lands in a similar range, and it's just as install-sensitive. The pattern holds across truck accessories.
The part is cheap. The execution is what you're paying for.
When DIY Works and When to Walk Away
DIY is the right call when the kit is textured black, the arch underneath is solid, and you have the patience for a mock fit. That describes most installs.
Hand it to a body shop when:
- You want color-matched paint. A booth, a gun, and color-matching faded factory paint is real skill. Order the flares unpainted, have the shop paint them off the truck, then do the mounting yourself. That hybrid saves money and keeps the quality.
- The arch has rust or damage. A flare over thin metal is a bandage on a wound. A shop cuts the rot out and welds in patch metal first.
- You're doing cut-out flares on a daily driver you care about. One slip with a cutoff wheel on a curved arch is a bodywork bill that dwarfs the flare cost.
The middle path is the one most people miss. Paint the flares before you install them, and mount them yourself the following weekend.
Tire-Coverage Law, Inspection, and Insurance
Quick answer: in the US, there's no federal rule covering tire coverage. That's state law, and it varies wildly. Flares are often the thing that brings a wide-tire truck back into compliance, but only if your state's rule works that way.
State Vehicle Codes, UK MOT Rules, ADRs, and Disclosing a Modified Vehicle
In the US, some state vehicle codes require the tire tread to sit inside the body line. Others mandate mud flaps on vehicles where tires extend past the bodywork. A fair number are simply silent, which is its own kind of problem.
Rules also shift, so read your own state's code rather than trusting a forum summary. SEMA tracks state motor vehicle equipment laws and is a reasonable starting point for aftermarket parts.
Inspection states are where this gets enforced. Pennsylvania, Virginia, and New York inspectors actually look at tire coverage, and a missing flare bolt can fail a truck that passes everywhere else. Walk the truck before you take it in:
- Tread sits inside the flare edge from a straight-on view
- Flares don't block marker lights or side reflectors, which do fall under federal lighting rules
- All hardware present and tight
- No exposed sharp edges, which some jurisdictions care about
In the UK, the rule is firm. Wheels must not project beyond the bodywork, it's a Construction and Use Regulations issue, and it's an MOT failure. A flared arch is the standard cure.
The official government guidance is the place to confirm current requirements rather than a seller's listing.
Australia works on the Australian Design Rules, which require wheel guards that cover the tire. Canada varies by province, closer to the US state-by-state picture.
Insurance is the quiet one. A flare kit itself rarely moves a policy. A lift plus bigger tires plus flares can, because it changes the vehicle from what's on file.
Undisclosed modifications give an insurer grounds to argue down a payout. Make one call, note the date and the name you spoke with, and keep the receipts in the glovebox. It's a ten-minute task that protects the whole build.
Living With Them: Re-Torque, Cleaning, and Rust Touch-Ups
The install isn't finished when the last bolt stops turning. Flares are trim panels living in the harshest zone of the truck, and they need the same loose maintenance rhythm your wheels do.
The 100 to 200 Mile Recheck and the Seasonal Habits That Keep Them Tight
Book the first recheck before you drive away from the driveway. Gaskets compress and settle, rivnuts seat, and plastic relaxes under load. At 100 to 200 miles, snug-check every fastener with the same light touch you used at install.
Then put it on a schedule:
| Interval | Task |
|---|---|
| First 100 to 200 miles | Snug-check every fastener |
| Every oil change | Quick torque check, flush the arch behind each flare |
| Twice a year | UV protectant dressing on textured plastic |
| After every off-road trip | Pull packed mud and debris, inspect for cracks |
| Salt-belt winters | Rinse the arches regularly, touch up fastener heads |
Cleaning matters more than it sounds. Debris packs into the gap between flare and body and holds moisture against both. Flush that seam with a gentle stream from a hose.
Skip the pressure washer at point-blank range on the gasket edge, because you can force water behind a seal that was doing its job fine.
Textured black fades. UV exposure chalks bare ABS to a gray that no wash fixes. A water-based trim dressing with UV blockers, applied a couple of times a year, keeps the finish looking like it did in the box.
Skip the greasy silicone type. It attracts grit.
Rust touch-ups are a paint pen and five minutes. Inspect each fastener head when you're already under there. A halo of orange starting at one bolt means water got past the sealer.
Pull it, clean the hole, re-prime, seal, refit. An hour now beats cutting the arch out in three years.
Two more habits worth building:
- Keep spare hardware. Kits use common sizes like 1/4-20, and hardware is cheap. Losing one bolt to a car wash brush is the most common long-term complaint we see in owner reports. The quality-versus-price argument that settles whether pricier chassis parts are worth it applies to flare hardware too. Buy decent stainless once and stop thinking about it.
- Repair cracks early. A plastic weld kit fixes ABS splits at the fastener hole if you catch them small. Left alone, vibration grows a hairline into a two-piece flare on the highway. Most brands also sell individual replacement flares, so one damaged corner doesn't mean a new set.
Frequently Asked Questions
How long does it take to install fender flares?
Count on 3 to 4 hours for four bolt-on flares as a first-timer with basic hand tools. Add 2 hours if the inner liner needs trimming, and plan a full weekend for cut-out flares. The first corner is the slow one.
The rest go twice as fast.
Can you install fender flares without drilling?
Some OE-style kits reuse factory clips, and a few tape-on styles skip outer holes entirely. Most aftermarket flares need drilled holes and rivnuts though. "No-drill" usually means no new holes in the visible panel, and the inner liner still has to come off.
Do fender flares cover rust?
They can hide it, but that's a trap. Rust behind a flare keeps growing in trapped moisture, often faster than exposed metal. Repair the arch first, prime every hole, then install.
A flare is a finishing part, not a repair part.
Will fender flares make my truck street legal?
They often can, where the problem is tire poke past the bodywork. Coverage rules are state law in the US, and some states want mud flaps instead of or alongside flares. Check your own vehicle code before assuming a flare solves it.
Do you have to remove the wheels to install fender flares?
Mock-fit with the wheels on to judge coverage, then pull them for the real work. Access to the liner, the back of the arch, and clean hole marking all improve massively with the wheel out. Torque the lugs to spec when they go back on.
Can you paint plastic fender flares?
Yes, with an adhesion promoter and paint formulated for plastic. Paint them off the truck before install for clean coverage. One caution from owner reports: fresh paint over several-year-old factory color rarely matches perfectly in direct sunlight.
