
Installing mud flaps looks like a twenty-minute bolt-on until you're on your back trying to work out what's behind the fender liner. Knowing how to install mud flaps really comes down to one question you answer before you touch a tool: does your vehicle already have the mounting points, or are you about to make your own? Get that wrong and you're drilling blind into a wheel well full of wiring and brake lines.
Get it right and the job is often half an hour with a trim tool and a socket.
Flap material typically runs 3 mm to 6 mm thick, roughly 1/8 inch to 1/4 inch, and the federal splash-guard standard in 49 CFR 393.86 is the language most state codes borrow from. OEM accessory instructions for the popular half-ton trucks specify hand-tight fasteners at factory clip locations, no new holes at all. That single detail decides which of three install paths you're on today.
Why Mud Flap Installs Go Wrong Before You Ever Turn a Screw
Nearly every flap job that ends badly was already going wrong before the first fastener went in. Someone drills in the wrong spot. Or they guess the flap length by eye and find out on the first steep driveway.
Nobody plans it that way. It happens because a wheel well is a blind space, and the flap is the last thing on your mind while you're crouched under a fender.
In our research across owner forums, installer write-ups, and OEM accessory instruction sheets, the failures keep landing in the same four buckets. Three of them are decisions, not skills. A careful person with a hand drill beats an impatient person with a full shop every time.
- Drilling blind. You can't see what's behind the liner, and modern wheel wells are crowded with things that don't forgive a 1/4-inch bit.
- Fastening into thin metal. Self-tappers into 22-gauge steel grab fine in July and wallow out by February, especially in salt.
- Skipping the clearance check. A flap that clears in the driveway can rub at full lock or under a loaded bed.
- Leaving bare metal. An unsealed hole rusts from the inside out, right where nobody looks until the paint bubbles.
| Failure | What it actually costs | The fix |
|---|---|---|
| Drilled wiring or brake line | A harness repair or a brake job, plus the tow | Look and feel behind the liner first |
| Screws into thin sheet metal | A flap that hangs loose within a season | Use factory holes, clips, or a backing plate |
| Tire contact at compression | A sidewall that can't be patched | Check clearance loaded and at full lock |
| Bare drilled holes | Rocker panel rust years later | Primer, paint, or sealant on every hole |
That third one is the scary one. A flap that just kisses the tire at full lock will saw into the sidewall over a few thousand miles. Sidewall damage isn't repairable, and federal tire safety guidance treats it as a replacement item rather than a patch.
We treat clearance as a safety check, not a styling detail.
The fitment trap that catches careful people
Fitment is where good intentions go sideways. A direct-fit kit that lists your model year can still be wrong for your trim, your flares, or your build date.
Manufacturers split production mid-year more often than owners expect. A flap designed for a truck without fender flares will not sit flush on one that has them. The same goes for sport packages with side skirts and for dual rear wheel trucks.
- Check the VIN or the door jamb build date, not just the model year.
- Confirm 2WD versus 4WD, since the arch depth differs.
- Confirm whether the truck came with factory flaps already fitted.
- Confirm wheel offset if the truck runs wider-than-stock tires.
If you're leasing, drilling is a resale decision as much as a mechanical one. A no-drill path protects the lease return. A drilled hole is something a dealer can point at.
How to Install Mud Flaps
Installing mud flaps is a match-and-fasten job, not a fabrication job. Park on level ground, chock the wheels, and turn to full lock. Test-fit each flap and check tire clearance before you drill.
Fasten with the kit hardware and tighten until snug. Re-check clearance at full lock, loaded and empty.
Your Install Follows One of Three Paths
Which path you take depends entirely on what's already on the vehicle. Work this out first, because it changes your tool list, your time estimate, and whether you drill at all.
| Install path | When it applies | Realistic time |
|---|---|---|
| No-drill | Factory flaps, push pins, dimples, or existing holes behind the liner | 20 to 45 minutes |
| Drill-in | Flat universal flaps, or a direct-fit kit on a truck with no provisions | 1 to 2 hours |
| Bracket or clamp-on | Hitch-mounted guards, quick-release off-road flaps, dual rear wheel setups | 30 to 90 minutes |
If you find push pins, plastic rivets, or dimples behind the liner, you're on the no-drill path. Reuse the factory hardware where it's intact and buy fresh clips where it isn't.
If the arch is bare metal with no provisions at all, you're drilling. That means a pilot hole, a step up in size, deburring, and sealing the bare edge before the fastener goes in.
If the flap hangs from a bracket, a hanger, or a hitch bar, you're clamping rather than drilling into body panels. That's the friendliest path for a leased truck, and the quick-release versions come off before a trail run.
The same logic that applies to adding accessories without punching new holes holds here. Use what the factory gave you before you make your own.

Image source: Wikimedia Commons / MercurySable99 (CC BY-SA)
One more branch before you commit. If the truck already has flaps and you're replacing them, the job is removal plus refit. Don't drill new holes next to old ones just because the new flap sits slightly differently.
Step Zero: Find Out What's Behind Your Wheel Well Liner
Before you mark a single hole, get a light and your hand behind that liner. This is the step people skip, and it's the one that decides whether the job stays cheap.
On front wheels, turn the steering to full lock. That opens a gap between the tire and the arch wide enough to reach through on most vehicles. On rears, you'll usually need to release a few liner clips or reach up from behind the tire.
| What's hiding back there | Where you'll find it |
|---|---|
| ABS wheel-speed sensor wiring | Along the knuckle and inner fender on most vehicles |
| Brake and fuel lines | Clipped to the floor pan, often inches from the arch |
| Evap canister and vent lines | Rear wheel wells on many pickups |
| Airbag impact sensors | Near the front wheel wells on a lot of modern cars |
| High-voltage cabling and pack edges | Hybrids and EVs, usually wrapped in orange |
| Body cavity and rocker backside | Directly behind the outer skin you're drilling |
The two-minute check that saves a harness
Run your hand along the inside of the panel where you plan to drill. You're feeling for anything that moves, anything wrapped in tape or loom, and anything round and rigid.
Then look. A cheap inspection light or a phone camera on video mode pushed behind the liner will show you more than your eyes will at that angle. If your phone fits, record ten seconds while you sweep it around.
Watch it back before the bit comes out.
Mark your drill spot on the outside, then go back and confirm nothing sits within an inch of that spot on the inside. Metal is thin here. A bit that punches through will keep going.
If you can't see behind the panel, stop. That's not a defeat, it's the whole point of the check.
When this stops being a driveway job
Some vehicles should go to a shop, and it's usually about access rather than difficulty. Full wheel well liners, integrated air suspension, and underbody panels that need a lift all push the job out of driveway territory.
- Any hybrid or EV with orange cabling in the wheel well. High-voltage systems are not a guess-and-drill situation.
- Vehicles with airbag impact sensors mounted in the front wheel well area.
- Trucks with aftermarket flares, liners, or running boards that block access. Sometimes you need to clear space around running boards before anything else.
- Anything where the drill angle would be blind and awkward. A shop with a lift sees what you can't.
Releasing the liner without breaking clips
Plastic liner clips get brittle with age and heat. Pry them with a proper trim tool, not a flathead, and work slowly at the seam.
Cold weather makes clips snap. If it's below freezing, warm the area with a heat gun on low or wait for a milder day. Replacement clips are cheap, but a liner that never seats flush again will rattle at highway speed for the rest of the truck's life.
Keep the clips in a cup, not a pocket. You'll want to know which ones came from where when it goes back together.
Match the Flap to the Truck: OEM, Direct-Fit, or Universal
Three families of flap cover almost every vehicle on the road, and each one suits a different owner. The right answer depends on how much you care about factory looks, how odd your vehicle is, and whether drilling is acceptable.
| Type | Best for | Trade-off | Typical pair price |
|---|---|---|---|
| OEM accessory | Lease vehicles, warranty-sensitive owners, factory look | Higher cost, limited size options | $60 to $220 |
| Direct-fit aftermarket | Most trucks and SUVs, good coverage without drilling | Fitment varies by trim and year | $50 to $150 |
| Universal cut-to-fit | Budget builds, oddball vehicles, trailers, equipment | You drill, and it can look homemade | $20 to $60 |
As of 2026, a direct-fit pair for a popular half-ton still lands in that middle band, and OEM kits sit at the top. Premium rally-style sets with quick-release hardware run higher again.
Commercial operators have their own math. Federal splash-guard rules under FMCSA regulations set expectations for coverage and height on covered trucks and trailers, so the flap isn't purely a cosmetic choice there.
Material matters more than most people think
Rubber, thermoplastic, and polyurethane all behave differently once the temperature drops. That difference shows up as noise, cracking, and how long the flap survives a curb.
- EPDM rubber. Quiet, flexible, forgiving in cold, and heavier. It drapes rather than shatters.
- TPE and TPO plastic. Stiff, sharp-looking, keeps its shape. Can crack in deep cold on cheap versions.
- Polyurethane. Tough and abrasion-resistant, popular for rally and gravel use, priced accordingly.
- ABS and polyethylene. Common on budget universal sheets, fine for trailers and equipment.
Thickness is the other number to check. Anything around 1/8 inch flexes a lot at speed and can fold back. A 1/4 inch flap holds its shape but slaps louder over bumps.
Width, length, and the numbers that actually matter
A flap should be at least as wide as the tire tread, especially with offset wheels or wider-than-stock tires. Too narrow and the spray just goes around it.
Length is a Goldilocks problem. Too long and it drags on driveways and gets torn off in reverse. Too short and your rocker panels take the gravel.
A few inches of clearance above the tire's lowest point is the usual target.
If the truck goes off-road, check what you'd want accessible before a trail run, the same way you'd check the recovery points you'd rely on. Quick-release flaps solve the same problem: pull them before the rough stuff, refit them for the drive home.
Factory-clip designs aren't unique to flaps either. The same push-pin logic shows up in other factory-clip accessories, and once you've popped one trim panel, the rest make sense.
Tools and Setup: What to Have in Reach Before the Wheels Turn
Half the frustration in this job comes from crawling out from under the truck four times for a tool you left on the bench. Lay everything out first.
| Tool or material | What it's for |
|---|---|
| Trim removal tool and clip pliers | Releasing liner clips without snapping them |
| Cordless drill with 1/8 inch and 1/4 inch bits, plus a step bit | Pilot holes that step up cleanly |
| Socket set and a short extension | Body bolts and factory fasteners |
| Torque wrench (inch-pound range) | Snug, not crushed, on plastic and thin metal |
| Masking tape and a fine marker | Marking hole locations you can actually see |
| Anti-seize and nylon washers | Steel fasteners into aluminum or thin panels |
| Primer, touch-up paint, or sealant | Sealing every bare hole edge |
| Ramps or jack and stands, plus chocks | Safe access, and level ground |
| Work light and eye protection | Seeing behind the liner, and overhead drilling |
Ramps, jack stands, or neither
Most flap installs don't need the vehicle raised at all. Turn the wheels to full lock and you'll reach the front fasteners from the ground. Rears are usually accessible by kneeling.
If you do need height, ramps beat a jack for this job because they're stable and quick. Building a set of wooden ramps is a weekend project in itself, and a solid set of wooden ramps will serve you for years of maintenance. Never work under a vehicle held up by a jack alone.
Chock the wheels you're not lifting. Set the parking brake. Do this even on flat concrete, because "flat" is never as flat as it looks.
Fasteners: where people overdo it
Small fasteners into plastic and thin steel need very little torque. Manufacturer specs for M6 body bolts typically land somewhere around 5 to 9 lb-ft, and that's less than most people apply by feel.
Over-tightening cracks the flap, distorts the liner, and spiderwebs the paint around the hole. A nylon washer under the head spreads the load and lets you get snug without chewing the surface.
Use anti-seize where steel meets aluminum, or you'll be drilling out a snapped bolt next winter. That's the same reason you don't put an impact gun on wheel fasteners and call it done. Small fasteners and impact tools don't mix.
The setup check before you mark anything
Run through this list once and the rest of the job gets simple.
- Level ground, parking brake set, wheels chocked.
- Steering at full lock for front work, straight ahead for rear.
- Flap test-fitted with the hardware loose.
- Tire-to-flap gap confirmed by hand at full lock both directions.
- Drill spot marked with tape, then verified again from behind the panel.
- Eye protection on, light aimed where you're drilling.
If any line on that list doesn't check out, fix it before the bit touches metal. The flap can wait. A drilled hole can't be undrilled.
Branch 1: The No-Drill Install with Factory Holes, Push Pins, and Clip Kits
If your vehicle already has provisions, this branch is the whole job. No drill, no bare metal, no rust risk. Just a trim tool, a socket, and twenty minutes of patience.
Factory provisions show up in a few predictable forms. Dimples stamped into the sheet metal. Blanking plugs in the liner.
Threaded inserts already welded in place. Plastic J-nuts clipped to the panel from behind. Sometimes the flap kit arrives with a hardware bag that maps directly to holes you can't see until the liner moves.
Here's the if/then logic that sorts it fast.
- If you find dimples only, you're drilling, but the factory told you where. Skip to the drill-in branch.
- If you find open holes with push pins or threaded inserts, this is your branch.
- If you find plastic J-nuts or U-nuts already clipped on, the vehicle was built for flaps. Fit them and stop looking for more work.
- If the truck already has flaps, treat it as removal and refit. Don't chase new holes.
| Retainer type | How it releases | Watch out for |
|---|---|---|
| Push-type retainer clip | Pry the center pin up, then lift the clip | Brittle after years of heat cycles |
| Plastic rivet or scrivet | Drill the head or use a rivet tool | Needs the correct replacement size |
| J-nut or U-nut | Unscrew the bolt, clip stays on the panel | Loses spring tension if overtightened |
| Spring clip | Squeeze and pull | Easy to launch across the garage |
| OEM expanding insert | Unscrew, then push out from behind | Swells and seizes in salt |
Can you reuse the old clips?
Yes, if they come out intact and still click. Any clip with a cracked collar, a chewed head, or no audible snap when it goes back in is finished.
Heat-cycled plastic loses tension long before it looks bad. A clip that grips in July will let the liner sag by winter. Replacements cost pennies at a parts counter, so buy a small box.
Measure the hole diameter, not the old clip. Generic assortments sell by hole size, and a clip that's one size off will rattle at highway speed and never seat the panel flush.
The no-drill sequence, step by step
- Test-fit the flap with the hardware loose. Confirm the contour sits flat against the arch.
- Map the hardware. Lay the kit out and match each fastener to a specific hole before you start.
- Start at the top fastener. Hanging the flap from the highest point lets it settle into position.
- Leave every fastener loose until all of them are started. Threads cross when you lock one corner down first.
- Align the flap edge to the body line, not to the tire. Body lines are what people see.
- Snug the fasteners in a cross pattern, like wheel lugs. Snug means the flap stops moving, not that the tool stops turning.
- Reinstall the liner clips and press each one until it clicks. Run a hand along the seam and feel for gaps.
If a factory fastener fights you going back in, back it out and check the clip alignment. Forcing it strips the insert, and a stripped insert on a body panel is a much bigger job than a mud flap.
What to do when the factory hole doesn't line up
It happens on mid-year production splits and on trucks with non-stock flares. The hole is close, but not close enough.
Don't wallow the factory hole out. Slot the flap instead. A round file on a plastic flap mounting hole gives you a few millimeters of adjustment and keeps the body panel untouched.
If the mismatch is bigger than a few millimeters, the kit is wrong for your trim. Return it and confirm fitment by VIN. Fighting a wrong kit always ends in extra holes.
Branch 2: The Drill-In Install, Marking, Piloting, Sealing, and Fastening
Now the branch that separates a clean install from a future rust repair. Drill-in work is not hard. It's just unforgiving, because every hole is permanent.
You need three things working in your favor: a confirmed drill spot, a bit that doesn't grab and tear thin steel, and a plan for the metal edge you just exposed.
Test-Fit at Full Steering Lock Before the Bit Touches Metal
Turn the wheels lock to lock with the flap clamped or taped in place. This is the single most useful two minutes in the entire job.
At full lock, watch the tire's inner shoulder and the flap's outer edge. You want a gap you can slide a finger through at the tightest point. Anything less and the tire will find that flap under cornering load.
Do the same check with weight in the truck if you haul or tow. Suspension compression moves the tire closer to the flap, and the driveway test won't show it.
Angle matters too. A flap hanging perfectly vertical looks right in photos and sprays water straight back into traffic. A slight rearward rake throws spray down and away.
Most kits account for this, but universal sheets don't.
Mark, Then Verify From Behind
Tape the flap in place with masking tape. Mark hole centers with a fine marker, then punch a small dimple with an awl or center punch so the bit doesn't walk.
Now go behind the liner and confirm each mark. Nothing should sit within an inch of any hole on the backside. Check for wiring loom, brake line, fuel line, evap hose, and any sensor body.
If the mark lands near something you can't identify, move it. Shift the flap up or down 10 mm and re-tape. There's almost always room to relocate one hole.
Drill, Deburr, and Seal the Bare Metal
Start with a small pilot, usually 1/8 inch. Step up gradually instead of jumping to final size. A step bit is kinder on thin sheet metal because it shears rather than screws its way through.
Deburr both sides of the hole. The burr on the inside is the one that cuts wiring and traps moisture.
Then seal it. Primer, touch-up paint, or a dab of seam sealer on the bare edge. Skip this and rust starts at the hole and blooms outward under the flap, where you'll never see it until the paint lifts.
| Hole stage | Tool | Why it matters |
|---|---|---|
| Mark | Awl or center punch | Stops the bit wandering on curved panels |
| Pilot | 1/8 inch bit | Creates a guide before full size |
| Final | Step bit or 1/4 inch bit | Cleaner edge on thin gauge steel |
| Deburr | Countersink or deburring tool | Removes the burr that cuts wires |
| Seal | Primer, paint, or sealant | Stops corrosion at the exposed edge |
Fasteners Done Right: Anti-Seize, Nylon Washers, and Torque
A steel fastener into aluminum or thin galvanized steel is a corrosion couple waiting to happen. Anti-seize on the threads buys you a fastener you can remove in three years.
A nylon washer under the head does two jobs. It spreads load on plastic flaps and it protects the paint from a spinning screw head.
Torque matters more than most people expect. Manufacturer specs for M6 body fasteners generally sit around 5 to 9 lb-ft. That's a light hand on a small ratchet, nowhere near a grunt.
| Fastener | Typical use | Snug target |
|---|---|---|
| M6 body bolt | Factory threaded inserts | 5 to 9 lb-ft |
| 1/4-20 bolt and lock nut | Brackets and thicker flaps | 6 to 8 lb-ft |
| #10 or #12 self-tapper | Plastic liners, light duty only | Snug by feel, stop at first resistance |
| 8 mm push pin | Liner and trim panels | Fully seated, no tools |
Self-tappers into unsupported sheet metal are the weak point of every drill-in install. If you must use them, add a backing plate or a J-nut so the load spreads past the hole. Otherwise the screw wallows out after one winter of salt and road vibration.
Replacement hardware is cheap enough that guessing isn't worth it. Our breakdown of what a set of replacement fasteners runs covers the same logic at a bigger scale.
Working a Plastic Liner Without Cracking It
Inner fender liners are usually ABS or polypropylene, and they get brittle with age. Drill them with light pressure and let the bit cut.
Don't over-tighten a fastener through a plastic liner. The liner needs to float a little so it can expand with heat. Pinch it hard and it cracks at the hole on the first hot day.
If a liner hole does crack, a fender washer on each side saves it. Cheap fix, invisible once the flap is on.
Branch 3: Bracket-Mount, Hitch-Mounted, and Quick-Release Flaps
Not every flap bolts to the body. Some hang from a bracket, some clamp to a frame or step bar, and some slot into a receiver. This branch is the friendliest one for leased vehicles and for anyone who goes off-road.
Hitch-Mounted Rock Guards
A hitch-mounted guard slides into your receiver and hangs a wide rubber curtain behind the rear axle. It's built for towing, and it works well at that job.
The trade-offs are real. It adds tongue-area bulk, it hurts departure angle, and it does nothing for your daily driving. You also have to remember it's there before backing into a steep driveway.
- Best for: people towing trailers, boats, or enclosed rigs on gravel.
- Watch for: ground contact on dips, and the drag penalty at highway speed.
- Skip it if: your truck sees more parking garages than gravel roads.
Quick-Release Rally-Style Flaps
These use a hanger bracket bolted to the body and a flap that slides out on thumbscrews. The bracket stays, the flap comes off. Pull them before a trail run, refit them for the drive home.
Aggregate owner feedback on quick-release sets is generally positive, with one recurring complaint: hardware loosening over time. Thread locker on the bracket bolts and a periodic check solves it.
Off-road parks and some trail organizations require flaps on entry. Quick-release solves the conflict between trail clearance and road legality in one part.
Clamp-On and Kickback Hangers
Clamp-on brackets grip a frame rail, a step bar, or a bed corner without drilling. Good for trailers, equipment, and anything you don't want to modify.
Kickback hangers are the commercial answer. They let the flap swing back if something catches it, so a curb doesn't rip the whole assembly off. That matters on a truck that backs into loading docks all day.
Dual rear wheel trucks and semis usually run quarter fenders rather than a simple flap, and the coverage rules change with them. Federal splash-suppression language applies to those vehicles, so check the current text before you fit anything.
Anti-Sail Ribs and Flap Weights
A flap that folds back at 70 mph is doing nothing. Anti-sail ribs, stiffer material, or a stainless weight bar at the bottom keeps it hanging where it belongs.
Weights are common on lifted trucks with big tires. They cost little and they stop the flap from flapping against the tire at speed. If your flaps slap on the highway, this is the fix.
The Clearance Checks That Decide Whether the Job's Done Right
Clearance is the difference between a flap that lasts and a tire that fails. Every check here happens after the hardware is on and before you call it finished.
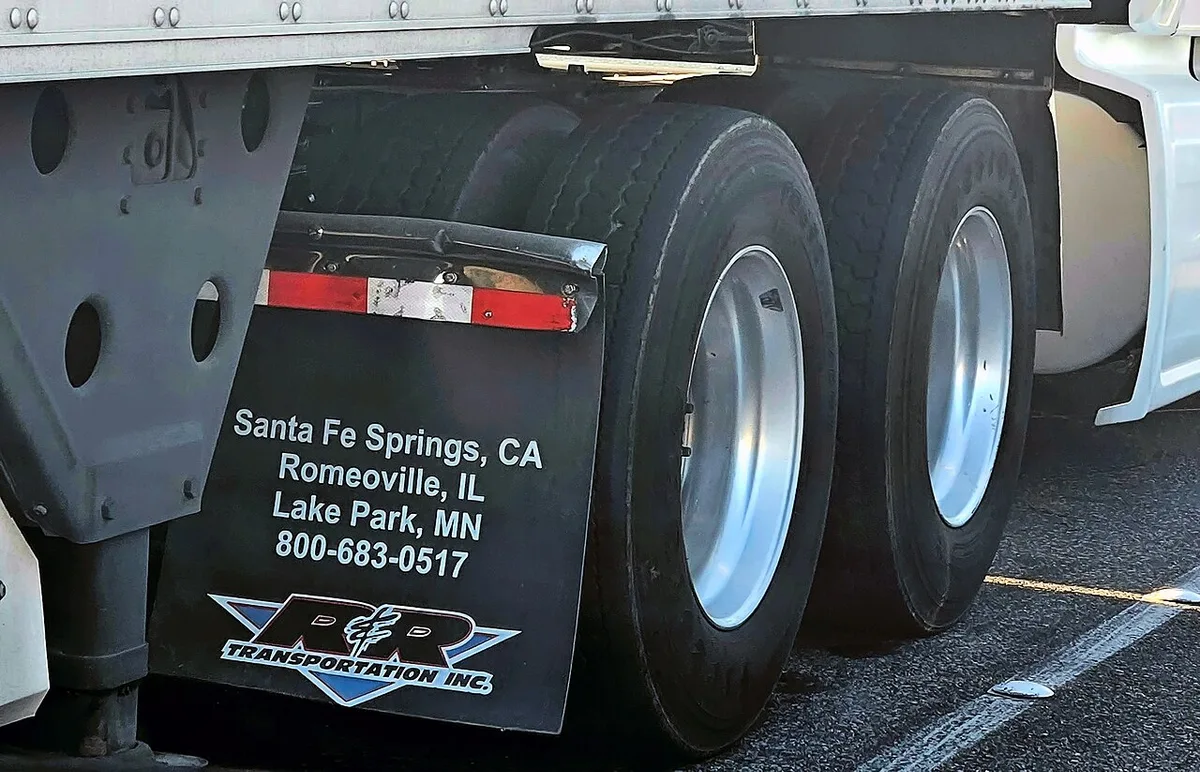
Image source: Wikimedia Commons / Eric Polk (CC BY-SA)
Tire Width vs. Flap Width
Measure the tread width across the tire, not the sidewall bulge. The flap needs to be at least that wide, and ideally a bit wider.
Offset wheels and wider-than-stock tires change the math. A wheel pushed outward throws debris outside the arch, straight past a stock-width flap. If your tires poke out, you need a wider flap, not a longer one.
Wheel spacers make it worse. The further the tire sits from the body, the more coverage you lose.
Loaded Bed and Suspension Compression
Check clearance empty, then check it loaded. The gap at the top of the flap closes as the suspension compresses, and that's where contact happens.
For a half-ton, a few hundred pounds in the bed is enough to matter. For anyone towing, tongue weight does the same thing. Load it, or simulate the load, and re-check.
Rear flaps are the usual victims here. Front flaps are more about steering angle than weight.
Ground Clearance and Reverse-Drag
The lower edge should sit a few inches above the tire's lowest point. Low enough to block spray, high enough to clear a curb, a speed bump, and a steep driveway apron.
Too long is a common mistake on lifted trucks. Owners add flap length to cover bigger tires, then tear the flap off backing out of a driveway.
Test it in reverse on a slope. If the flap touches, trim it. Cutting an inch off the bottom costs nothing.
What the full-lock check actually shows you
Put the truck on flat ground. Turn the wheel fully one way. Get down at tire height and look along the gap between the tire shoulder and the flap.
You're looking for even clearance along the flap's height, not just at one point. A gap that pinches at the bottom means the flap is angled wrong. A gap that pinches at the top means compression will close it completely.
Repeat on the other side. Then straighten the wheels and look at the flap edge and the body line. If one side hangs lower than the other, something is off in the mounting, not in the flap.
- Finger-width gap minimum at the tightest point.
- No contact at compression, loaded.
- Flap edges level side to side.
- Nothing protruding below the bumper line or the departure angle.
The Mistakes That Cost You a Tire, a Harness, or a Warranty Claim
Most of these have shown up earlier in one form or another. Grouped together, they read like a checklist of everything that turns a cheap job expensive.
| Mistake | What happens | How to avoid it |
|---|---|---|
| Drilling without checking the backside | Punctured harness, brake line, or fuel line | Light and camera behind the liner first |
| Self-tappers into unsupported thin steel | Holes wallow out, flap hangs loose | Factory inserts, J-nuts, or backing plates |
| Skipping the seal on drilled holes | Rust blooms under the flap | Primer or sealant on every bare edge |
| Judging flap length by eye | Drag on driveways, torn off in reverse | Measure and test in reverse on a slope |
| Overtightening plastic | Cracked flap, spiderwebbed paint | Torque wrench, nylon washers |
| Ignoring loaded clearance | Tire sidewall sliced over time | Re-check with weight in the truck |
| Mixing clip sizes | Liner never seats, rattles at speed | Match clips to hole diameter |
| Forgetting the rear of the front tire | Rocks thrown at the door and rocker | Fit front flaps, not just rears |
The tire contact failure nobody catches in time
Sidewall damage from a rubbing flap doesn't announce itself. It shows up as a faint scuff, then a shallow groove, then a tire that can't be repaired.
There's no safe patch for a sidewall. Once the cords are exposed or the groove is deep, the tire is scrap. That's a couple hundred dollars minimum, and it's entirely avoidable with one full-lock check.
If you find a rub mark after a few thousand miles, don't just trim the flap. Find out why it moved. Loose hardware, a sagging mount, or a suspension change will do it.
Drilling, warranties, and lease returns
In the US, the Magnuson-Moss Warranty Act means an aftermarket part doesn't automatically void your whole warranty. A dealer that denies a claim has to tie the failure to your modification.
That's the letter of it. In practice, a drilled hole near a failed component gives a dealer an argument. If you're within warranty on a new truck, the no-drill path removes the argument entirely.
Leases are simpler and stricter. Drilling is a modification, and lease-end inspection standards vary. A no-drill OEM kit comes off clean.
A row of holes in the wheel well does not.
Keep the factory flaps if you remove them. A $40 set of flaps in the garage is worth more at lease return than any argument at the counter.
When to stop and hand it over
Stop if you can't see behind the panel. Stop if there's orange cabling anywhere in the wheel well. Stop if the drill angle requires you to guess.
Also stop if the vehicle has air suspension settings that could drop while you're under it, or underbody panels that hide the structure you'd be drilling into. A shop with a lift sees what a driveway never will.
There's no prize for finishing a job you shouldn't have started. A flap that goes on next weekend beats a repair bill that arrives next month.
Safety and Legal: What Not to Drill and the Splash-Guard Rules That Actually Apply
Two separate rule sets matter here, and people mix them up. One is the law about whether your vehicle needs flaps at all. The other is the physical safety rules about where a drill bit can legally and physically go.
Start with the law, because it's simpler than the forum arguments suggest.
Who actually has to run flaps
In the US, federal rules apply to commercial vehicles. The splash-guard requirement in 49 CFR 393.86 covers trucks, tractors, and trailers above the light-duty threshold. It asks for guards behind the rearmost wheels, wide enough to cover the tire tread, with the lower edge close to the road surface when the vehicle is empty.
Passenger cars and light trucks fall under state law instead. Most states have a fender or mudguard statute on the books. California Vehicle Code 27600 is a well-known example, and it's written broadly: the vehicle must be equipped with devices adequate to protect other road users from mud, water, and debris.
| Rule set | Who it applies to | What it generally asks |
|---|---|---|
| 49 CFR 393.86 | Commercial trucks and trailers | Guards behind rear wheels, full tread width, low edge near the road when empty |
| State vehicle codes | Passenger cars and light trucks | Some form of fender, cover, or guard that keeps debris contained |
| UK Construction and Use Regulations | Vehicles used on UK roads | Wings or mudguards fitted to catch spray and debris |
| State inspection programs | Vehicles in inspection states | Flap presence and height checked at test time |
Read your own state's code before you rely on a number. Height thresholds and coverage language vary, and several states tie the requirement to suspension height or tire poke rather than the flap itself.
If your truck is lifted and your tires sit outside the arches, you're the person those statutes were written for. Flaps in the right width solve a legal problem and a paint problem at once.
The high-voltage rule that overrides everything
If the vehicle is a hybrid or a plug-in hybrid or a full EV, stop before you drill. High-voltage cabling in the wheel well area is wrapped in orange conduit for a reason.
That cable carries hundreds of volts. A drill bit that nicks it is not a wiring repair, it's a serious hazard and a very expensive one. Manufacturer service information generally directs high-voltage work to trained technicians with the system de-energized.
Our advice is blunt. Fit a no-drill kit on those vehicles, or pay someone who has the training and the lift. There's no version of this job worth that risk.
What not to drill, in plain terms
- Brake lines, especially where they clip along the floor pan.
- Fuel lines and evap hoses on rear wheel wells.
- ABS wheel-speed sensor wiring running to the knuckle.
- Airbag impact sensors mounted near the front wheel arches.
- Body harness loom, usually taped and clipped behind the liner.
- Any structural section you can't identify. If it's thicker than the surrounding panel, leave it alone.
Jack safety and the parts people skip
Most flap jobs don't need the vehicle raised. When they do, ramps or stands, never a jack on its own. Chock the wheels you're not lifting, set the parking brake, and keep your body out from under a vehicle held only by hydraulics.
Eye protection matters more than usual here. You're often drilling overhead with grit falling toward your face. Safety glasses, not sunglasses.
Rust, seals, and the corrosion rule
Every hole you make is bare metal, and bare metal in a wheel well is a rust nursery. Primer, touch-up paint, or sealant on the exposed edge is not optional in a salt state.
Sealant under the fastener head does double duty. It keeps water out and it stops the fastener from seizing in place. A dab of anti-seize on the threads finishes the job.
Warranty and lease realities
The Magnuson-Moss Warranty Act stops a dealer from voiding your entire warranty just because you added a part. They have to connect the failure to your modification. That's the law on paper.
Reality is messier. A drilled hole two inches from a failed component invites a conversation you'd rather not have. A no-drill OEM kit removes the argument entirely, which is why it's the default recommendation for anything still under factory coverage.
Leases are stricter and less forgiving. Drilling counts as a modification, and lease-end inspection standards are set by the lessor, not by you. Keep the factory flaps in a box if you swap them, and you'll have something to hand back.
What It Costs: Kit Prices, Hardware, and Realistic Time
Flaps are one of the cheapest protective mods you can bolt to a vehicle. The spread between the cheapest and the most expensive option is wide, but even the top end is small next to paint repair.
Here's what the market looks like as of 2026.
| Option | Typical pair price | Best for |
|---|---|---|
| Universal cut-to-fit | $20 to $60 | Budget builds, trailers, equipment |
| Direct-fit aftermarket | $50 to $150 | Most trucks and SUVs |
| OEM accessory | $60 to $220 | Lease vehicles, factory look, warranty comfort |
| Premium rally or quick-release | $150 to $350 | Off-road, gravel, frequent removal |
| Hitch-mounted rock guard | $200 to $450 | Towing on gravel |
| Commercial flap, each | $25 to $70 | Work trucks, semis, fleet |
The small parts that add up
The kit price isn't the whole bill. Hardware, clips, and consumables usually add $15 to $40 on a drill-in job.
- Replacement liner clips: $5 to $15 for an assortment.
- Step bit or a set of bits: $10 to $25.
- Anti-seize, primer, sealant: often already in the garage, otherwise $10 to $20.
- Nylon washers and stainless fasteners: $5 to $10.
None of that is wasted money. It's the difference between a flap that stays put and a flap that hangs by two screws next winter.
What a shop charges
Independent shops typically bill $80 to $150 an hour in most US metros. A flap install on a vehicle with factory provisions is often booked at half an hour. A drill-in job on a bare arch usually lands at one to one and a half hours.
Dealer accessory installation runs higher, and you're paying for the kit and the labor together. Expect $100 to $250 for labor on top of parts, depending on the brand.
Doing it yourself saves the labor. It also means the person responsible for the clearance check is you, which is worth remembering if a tire fails later.
The honest comparison
A pair of flaps at $60 versus a rocker panel repaint at $500 to $1,500 says most of what needs saying. Throw in a chipped door edge or a sandblasted rear bumper and the case gets stronger.
Where the math flips is when cheap hardware fails. A $20 universal set that wallows out, rusts, and tears off in a year costs more than a $120 direct-fit set that lasts the life of the truck. The same principle applies to suspension parts, where paying for better metallurgy usually pays back over the miles.
Trailer owners have an extra line item. A set of flaps on the tow vehicle protects a trailer front panel and gelcoat that costs far more to refinish than the flaps do to buy.
Time, realistically
| Job | Time on the ground |
|---|---|
| No-drill OEM pair | 20 to 45 minutes |
| Direct-fit with light drilling | 1 to 1.5 hours |
| Universal cut-to-fit | 1.5 to 2 hours |
| Hitch-mounted guard | 15 to 30 minutes |
| Commercial quarter fenders | 1 to 2 hours, often with a lift |
Add half an hour if you're working in cold weather and being careful with brittle clips. Add another half hour if you have to remove running boards or a bed liner lip to get access.
Salt, Seasons, and Fasteners: Keeping the Install Alive
An installed flap isn't finished business. It's a part that lives in the worst environment on the vehicle: wet, salted, grit-blasted, and out of sight.
The good news is that maintenance takes minutes, not hours. The bad news is that skipping it quietly undoes the whole point of the install.
The seasonal check that matters most
Rinse the wheel wells out when the salt season ends. A hose is enough. You're flushing the trapped salt and grit that sits between the flap and the body, which is where rust starts.
Do it again mid-winter if you live somewhere that brines the roads. Frozen slush packed behind a flap is heavy, and it pushes the flap into the tire when it refreezes.
While you're there, look at the fastener heads. Rust weeping from a head means water is getting in.
Fastener checks, fall and spring
- Hand-check every fastener. Loose hardware is the start of most flap failures.
- Re-torque body bolts to spec after the first 300 miles on a new install. New fasteners settle.
- Add thread locker if a bracket bolt keeps backing out.
- Replace any clip that no longer clicks.
- Look for cracks radiating from a fastener hole in the plastic.
A cracked mounting hole doesn't heal. Add a fender washer on both sides, or drill a fresh hole 10 mm away and seal the old one.
Do mud flaps actually prevent rust?
Yes, when they're fitted and maintained, and no, when they trap debris. Flaps stop the gravel and salt spray that sandblasts paint off rocker panels. That's the main rust pathway on trucks, and it's why the lower body goes before the frame does.
But a flap pressed tight against a dirty panel holds moisture against the metal. Leave a small gap, rinse it out, and the flap does the job it was designed for.
This is also why undercoating and flaps work well together rather than as alternatives. Flaps reduce the incoming damage. Undercoating protects what's already exposed.
When to replace rather than repair
Replace a flap when it's torn more than a couple of inches, when the mounting holes have grown into slots, or when the material has gone hard and shiny.
Cold-cracked plastic is a replacement item. It doesn't flex anymore, so the next curb takes the whole corner off and possibly the liner with it.
Rubber flaps last longer in cold but sag with age when they're hung from a single point. If a rubber flap hangs like a curtain with a wave in it, the top holes are working loose.
UV fade in the desert Southwest makes plastic brittle faster than most owners expect. A flap that looks chalky is a flap on borrowed time.
Long-term habits worth building
- Keep the spare hardware bag in the truck. Ten clips cost almost nothing and they save a trip.
- Photograph the install. When you sell the vehicle, showing the factory holes were reused is a selling point.
- Wash the lower body more often than the rest of the truck. That's where the damage lands.
- Check flap clearance after any tire, wheel, or suspension change. Nothing else moves the geometry.
- If you add load-rated accessories that change the rear weight bias, re-check the loaded gap.
Owners who treat flaps as a once-and-done bolt-on usually discover the cost of that assumption at inspection time, or when a tire shop points at a scuff on the sidewall. A five-minute check twice a year avoids both.
Frequently Asked Questions
Do I need to remove the wheel to install mud flaps?
Usually no. Turning the front wheels to full lock opens enough gap to reach the mounting points on most vehicles. Rear flaps are typically accessible by kneeling behind the tire.
Remove a wheel only if the flap sits deep in the arch or the liner needs full access. If you do remove it, torque the lug nuts to spec afterward.
Can I install mud flaps without drilling?
Yes, and many vehicles are built for it. If your truck has factory threaded inserts, push-pin holes, dimples, or a supplied clip kit, the install is a bolt-on with hand tools. Direct-fit kits from major brands also use existing points on a lot of applications.
Check your specific trim before buying anything.
How long should mud flaps be, and how close to the ground?
Low enough to block spray, high enough to clear curbs and driveway aprons. A few inches above the tire's lowest point is the usual working target. Commercial rules use a different figure, and 49 CFR 393.86 sets the lower edge close to the road when the vehicle is empty.
Test in reverse on a slope before you commit.
Will mud flaps rub wider or offset tires at full lock?
They can, and that's the check most people skip. Turn the wheels lock to lock with the flap test-fitted and look for a finger-width gap at the tightest point. Then repeat with weight in the bed or on the tongue.
A flap that kisses the tire at compression will groove the sidewall over a few thousand miles.
Are mud flaps required by law where I live?
Sometimes, and it depends on the vehicle, not just the state. Commercial trucks and trailers fall under federal splash-guard rules. Light vehicles fall under state codes, and several states tie the requirement to suspension height or tire coverage.
Check your state's vehicle code or ask at inspection. Fitting them anyway is rarely a bad call.
Will drilling for mud flaps void my warranty or hurt a lease return?
A modification doesn't automatically void a US warranty, and the dealer has to link the failure to your part. In practice, holes near a failed component create arguments. Leases are stricter, since drilling counts as a modification under most lease-end standards.
A no-drill kit avoids both problems for a modest price premium.
Decision Guide: Which Install Path Fits Your Truck Today
Work down this list in order. The first line that applies to your vehicle is your answer.
- Factory flaps already fitted, and you're replacing them. Removal and refit. Reuse the hardware, buy fresh clips, drill nothing.
- Threaded inserts or push-pin holes behind the liner. No-drill path. Twenty to forty-five minutes, hand tools only.
- Dimples stamped in the arch but no holes. Drill path, at factory-marked locations. Pilot, seal, fasten.
- Bare arch, no provisions, standard tires. Drill path with a direct-fit kit. One to two hours.
- Bare arch, wider-than-stock or offset tires. Drill path, but confirm flap width against tread width first. This is where fitment goes wrong.
- Hybrid or EV with orange cabling in the well. No-drill or professional install. No drilling, no exceptions.
- Leased vehicle or one under factory warranty. No-drill OEM or bracket-mount. Protect the resale and the paperwork.
- Towing on gravel regularly. Fixed rear flaps plus a hitch-mounted guard for trips. Pull the guard for daily driving.
- Off-road use with trail clearance needs. Quick-release flaps on a bolted hanger bracket. Thread locker on the bracket bolts.
- Commercial truck or trailer. Check 49 CFR 393.86 coverage and height first, then fit to that spec.
| Your situation | Path | Time | Drilling |
|---|---|---|---|
| New truck, factory provisions | No-drill OEM | 20 to 45 min | No |
| Older truck, bare arches | Drill-in direct-fit | 1 to 2 hours | Yes |
| Lifted truck, big tires | Drill-in, wide flaps plus weights | 1.5 to 2 hours | Yes |
| Lease return in three years | Bracket or OEM no-drill | 30 to 60 min | No |
| Trailer tow rig | Fixed rears plus hitch guard | 30 to 45 min | Sometimes |
| Hybrid or EV | No-drill or shop install | 30 min or booked | No |
Whatever path you land on, three checks decide whether the job holds. Confirm nothing sits behind the panel before the bit turns. Confirm tire clearance at full lock, loaded and empty.
Seal every hole you make.
Get those right and the flaps will outlast the tires. Skip them and you'll meet the wheel well again sooner than you'd like, usually with a rattle, a rust bubble, or a scuffed sidewall to explain.
