
A dull blade doesn't announce itself. It just stops slicing and starts tearing, and your lawn looks sun-bleached and ragged a day after you mowed it. Learning how to sharpen lawn mower blades comes down to two things: knowing when the edge is gone, and knowing which tool you already own can bring it back.
The rest is technique, and none of it is difficult.
Per ANSI/OPEI outdoor power equipment standards, blade tip speed on a walk-behind mower runs close to 19,000 feet per minute, which is fast enough for an unbalanced or damaged blade to turn into real vibration within seconds. Owner manuals from Briggs & Stratton, Honda, and Toro all publish a torque figure for the blade bolt, and skipping it is how blade adapters crack. So before we touch a file or a grinder, let's establish what condition your blade is actually in.
How to Sharpen Lawn Mower Blades
Knowing how to sharpen lawn mower blades starts with the spark plug boot. Tip the mower carburetor side up and pull the blade bolt. Clamp it in a vise and file along the existing bevel.
Match the factory angle, usually 30 to 45 degrees. Balance the blade after grinding, then torque to spec.
Why a Torn, Frayed Lawn Is Usually a Blade Problem
Grass doesn't heal. A clean cut leaves a small wound that closes over within hours. A torn cut leaves a frayed, stringy tip that browns by the next morning.
That's the whole tell. If your lawn looks pale and shredded a day after you mowed, the blade isn't cutting. It's ripping.
Turf specialists have made this point for decades, and university extension turf programs still do. A clean cut limits moisture loss at the tip and leaves fewer openings for fungus to move in. A dull blade hands you both problems at once.
Here's what that actually costs you:
- Fuel. A dull blade drags through the grass, so the engine works harder for a worse cut. More throttle, more gas, same result.
- Time. Torn grass flops over instead of standing up, so you end up going back over the same strip twice.
- The lawn. Ragged tips dry out and recover slowly. In a humid stretch, that's an open door for turf disease.
- The machine. A dull edge hammers rather than slices. That shock goes straight into the spindle bearings and, on single-cylinder engines, the crank seal.
- Money. People will buy a new mower, new fertilizer, and new seed before they spend ten dollars on a file. The file is usually the fix.
The frustrating part is how easy the real cause is to miss. You fertilize. You water more.
You reseed the thin patch by the driveway. Nobody looks at the edge.
So start there. Thirty seconds with a flashlight tells you more than a season of guessing.
The 30-Second Condition Check: Dull, Nicked, Bent, or Cracked
You don't need to remove the blade to grade it. You do need to look properly, because "dull" is only one of four conditions and the other three change the whole plan.
Do this with the engine off and the plug boot pulled. Tip the mower so the carburetor and air filter face up, then get light across the cutting edge at a low angle.
- Sight test. A dull edge throws light back at you along its whole length. A sharp edge looks almost matte because the light falls off the bevel.
- Fingernail drag. Pull the edge lightly across a thumbnail at a shallow angle. If it skates, it's dull. If it bites and leaves a mark, the edge still has life.
- Burr check. Run a fingertip along the flat back of the blade. A thin, curled wire edge means someone sharpened it once and never honed the back.
- Nick count. Look along the cutting edge for chips. Note roughly how deep they are and whether the metal around them has started to crack outward.
- Straightedge test. Lay a straight edge along the blade near the center hole and again near each tip. Any gap is a bend, and a bent blade doesn't get straightened.
- Crack inspection. Check around the center hole, along the line where the sail meets the flat, and at the tips. Hairline cracks like to start in those three places.
- Sail wear. The upturned wing is what creates lift and throws clippings. If it's worn thin, bent flat, or holed, the blade is done regardless of how the edge looks.
Now match what you found against this:
| What you see | How you confirm it | Verdict |
|---|---|---|
| Edge reflects light, grass tips are frayed | Fingernail skates instead of biting | Dull, sharpen it |
| Small chips under 1/8 inch | Visible notches, no cracking | Sharpen and file the nicks out |
| Chips over 1/8 inch or clustered | Deep notches, thin remaining edge | Replace |
| Blade won't sit flat on a straightedge | Visible gap at center or tip | Replace |
| Any crack at all | Hairline line near hole, sail, or tip | Replace, never weld |
| Sail worn thin or holed | Sail bends easily, edges rounded off | Replace |
| Purple or blue discoloration | Color change from grinding heat | Replace, temper is gone |
That last one catches people out. A blade that turned blue was overheated on a grinder, and overheated steel loses its temper. It will feel sharp for about a week and then fold over on the first patch of sandy grass.
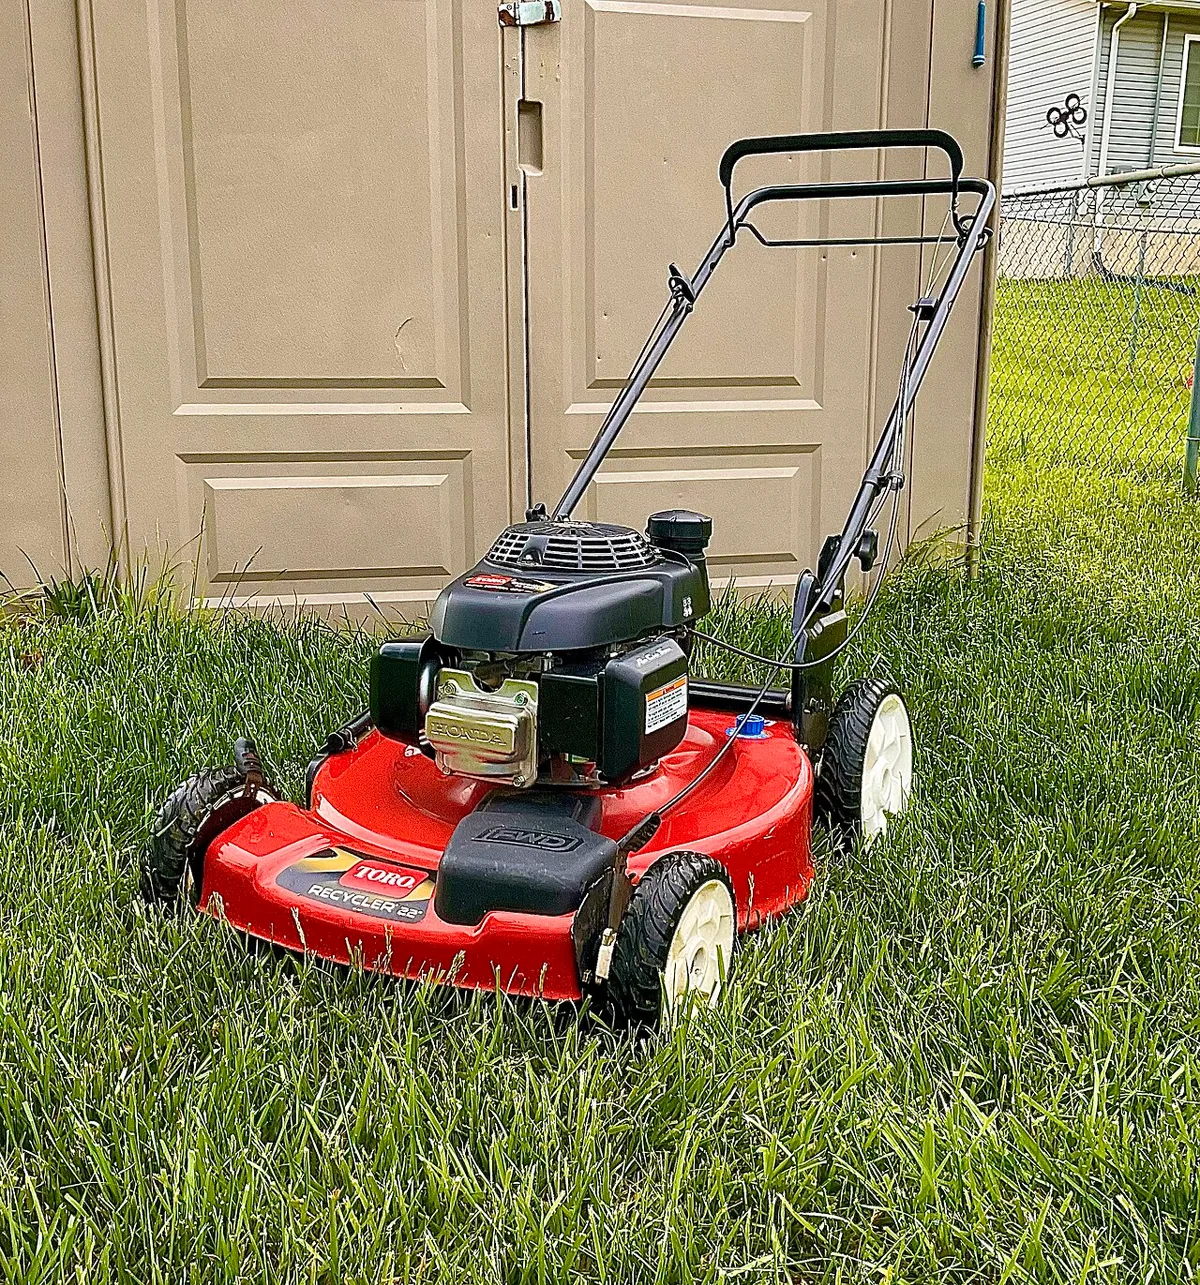
Image source: Wikimedia Commons / Garylittlewood (CC BY-SA)
One more thing worth checking while the mower is tipped. The U.S. Consumer Product Safety Commission logs thousands of mower-related injuries every year, and blade contact plus thrown objects account for a large share.
A cracked blade is not a maintenance nuisance. It's a piece of steel spinning at tip speeds near 19,000 feet per minute.
Image source: Wikimedia Commons / Lancaster, Edmund Banning
Sharpen or Replace? The Decision Branches That Actually Matter
This is where most guides go flat. They say "sharpen your blade" and skip the part where half the blades people bring to a bench should never be sharpened again.
Run the branches in order.
If the blade is dull but structurally sound, sharpen it. No chips, no bend, no cracks, sail intact. This is the common case, and a file brings it back in about ten minutes per blade.
If there are small nicks under about 1/8 inch, sharpen and file them out. Work the notch down until the edge is continuous again. You'll remove a little more metal at that spot, which is why balancing matters afterward.
If a nick is deeper than 1/8 inch, replace it. Grinding a deep notch out means removing a lot of hardened steel from one small area. The blade ends up unbalanced, and the edge around the repair gets thin and weak.
If the blade is bent, replace it. Never bend one back. Steel that has already yielded won't hold its shape, and a blade that flexes at speed is the one that eventually lets go.
If there's a crack anywhere, replace it. No welding, no brazing, no "it's only a hairline." Cracks at the center hole or along the sail are the failure points that put metal through a deck.
If the sail is worn thin, flattened, or holed, replace it. The cutting edge is only half the job. A dead sail means poor lift, poor discharge, and a deck that clogs.
If it's been sharpened so many times the blade has visibly narrowed, replace it. At some point the hardened layer is gone and the blade is soft steel pretending to be a blade.
If it went blue, purple, or straw-colored from heat, replace it. You can't put temper back with a file.
The economics are simple enough, and they cut both ways. As of 2026, replacement blades run roughly $15 to $50 depending on length and brand, shop sharpening runs about $5 to $20 per blade, and a decent mill bastard file costs $10 to $15 and lasts years.
| Situation | Sharpen | Replace | Why |
|---|---|---|---|
| Dull, otherwise clean | Yes | No | Ten minutes of work, full service life ahead |
| Light nicks, no cracking | Yes | No | Nicks come out with a few extra strokes |
| Deep or clustered nicks | No | Yes | Too much metal lost from one spot |
| Bent | No | Yes | Yielded steel won't stay true |
| Cracked | No | Yes | Structural failure risk, no safe repair |
| Sail worn or holed | No | Yes | Lift and discharge are gone |
| Overheated to blue | No | Yes | Tempered edge is lost |
Cheap aftermarket blades are the other trap here. A stamped blade with soft steel will dull twice as fast as a hardened OEM blade, and you'll spend the difference in filing time. That's the same logic that applies when whether paying more actually pays off for suspension parts.
Hardened steel earns its price.
And don't overlook what the parts counter charges for convenience. Most off-the-shelf replacement pricing at a chain store runs higher than a mail-order blade of the same spec, so price both before you decide.
Match Your Mower: Walk-Behind, Riding, and Battery Blades
The sharpening motion is the same on almost every rotary blade. What changes is access, hardware, and how many blades you're dealing with.
| Mower type | Blade setup | What changes for you |
|---|---|---|
| Gas walk-behind (push or self-propelled) | One blade, 16 to 22 inches | Easiest job. Tip it, pull one bolt, done |
| Battery push mower | One blade, lighter gauge steel | Pull the battery pack first, then same process |
| Lawn tractor or riding mower | Two or three blades on spindles | Deck lift or removal, three bolts, three balances |
| Zero-turn | Two or three blades, higher tip speed | Same as a rider but sharpened more often |
| Reel mower | No rotary blade, uses a bedknife | Different job entirely, backlapping or bedknife adjustment |
| Robotic mower | Small razor blades on a disc | Replace only, never sharpen |
Walk-behind and battery mowers
These are the friendliest. One blade, one center bolt, usually a 5/8-inch or 9/16-inch socket. Mark the blade orientation before it comes off, because the cutting edge has to face the ground when it goes back on.
Battery models deserve one extra step: remove the battery pack, not just the key. There's no spark plug to pull, so the pack is your only disconnect.
Watch the center hole shape when you buy a replacement. Round, five-point star, double-D (bowtie), and hex spline are all common, and the wrong one won't seat on the adapter.
Riding mowers and zero-turns
Multi-blade decks multiply everything. Three blades means three edges to check, three balances, and three torque specs. It also means the deck usually has to come off or be raised high enough to work underneath.
Don't shortcut this with a hydraulic jack alone. Use a proper set of wooden ramps or jack stands rated for the machine's weight. A deck dropping on a hand is a bad afternoon.
Sequence matters on a rider. Disconnect the battery, remove the deck or raise it, then remove blades one at a time and label them by position. Blades on the same deck can differ in length, and swapping two of them creates an instant vibration problem.
One gas-engine caution applies to every mower you tip. Tip it carburetor side up. Tip it the other way and oil runs into the air filter and the intake, which is exactly the mess behind most oil soaking the air filter complaints after a tune-up.
If it won't fire cleanly afterward, you're usually chasing a fouled plug rather than a real ignition fault.
Reel and robotic mowers
Reel mowers don't sharpen like rotary blades. The cutting action happens between the reel blades and a stationary bedknife, and the service job is backlapping or adjusting that clearance. Different tools, different feel.
Robotic mowers use tiny razor blades on a spinning disc. They're stamped, disposable, and designed to be swapped, not filed. Sharpening one is a waste of an afternoon.
Pick Your Tool: Hand File, Angle Grinder, Bench Grinder, or Drill Attachment
Four tools cover almost every home sharpening job. They differ in speed, control, and how much damage you can do in a careless second.
| Tool | Cost | Speed | Risk | Best for |
|---|---|---|---|---|
| Mill bastard file, 8 to 10 inch | $10 to $15 | Slow, 10 to 20 min per blade | Almost none | Beginners, one or two blades a year |
| Angle grinder with flap disc | $40 to $100 | Fast, 2 to 5 min | High, easy to gouge or overheat | Experienced hands, multiple blades |
| Bench grinder | $60 to $150 | Fast | High, blueing is common | Shop use with a light touch |
| Drill-mounted sharpener | $10 to $25 | Slow to medium | Medium, follows the bevel poorly | Light touch-ups between filings |
The hand file wins more often than people expect
A mill bastard file is the default recommendation for a reason. It removes metal slowly, which is the whole point. You can't burn a blade with a file, you can't gouge a bevel in half a second, and you can feel the edge come up as you work.
Clamp the blade in a vise with the cutting edge angled up. Push the file away from you along the existing bevel, at the same angle the factory ground. One direction, even pressure, full strokes.
Lift on the return.
Ten to fifteen strokes per inch of edge is a reasonable pace. Check the edge every few passes with the fingernail test. When it bites along the whole length, you're done.
When a grinder makes sense
If you're running three blades on a zero-turn every couple of weeks, a file gets old fast. An angle grinder with a flap disc will do in three minutes what a file does in fifteen.
The tradeoff is control. A grinder removes metal faster than you can react, and holding it in one spot turns the edge blue in seconds. Keep it moving, use light pressure, and dip the blade in water if it starts feeling warm.
A bench grinder works too, but the wheel is unforgiving. It's easy to grind a hollow into the bevel that changes the angle. If you use one, rest the blade on the tool rest and make quick, light passes across the wheel.
Drill attachments: fine for touch-ups, not for real sharpening
These little carbide or stone attachments chuck into a drill and run along the bevel. They're cheap and convenient, and that's about where the praise ends.
The angle is fixed by the tool, not by your blade. On a blade with a different factory bevel, you're grinding a second angle into the steel. Use one for a quick touch-up mid-season if you like, but do the real work with a file.
How to choose without overthinking it
If you own one mower and sharpen twice a season, buy a file and a balancer. Total outlay under $30, and you'll never damage a blade.
If you maintain several machines, add an angle grinder. Budget for a flap disc and a light hand.
If you've never sharpened a blade before, don't start with a grinder. Learn the bevel angle with a file first. You'll feel what "sharp" means before you have power tools removing metal.
The same buying discipline applies here as anywhere else. Don't spend on a tool you'll use twice a year, which is the identical math behind buying a scan tool for the car. Buy for the job you actually have.
Before You Touch the Blade: Fuel Level, Spark Plug Boot, and Tipping the Right Way
Nine out of ten sharpening injuries happen in the ten minutes before anyone picks up a file. Not during the grinding. During the setup, when the mower is still live and the blade is still spinning in someone's imagination.
So lock the machine down first.
Why the spark plug boot comes off first
Pull the spark plug boot off the plug and tuck it away from the engine. That single step removes the ignition source. A mower blade turned by hand can still fire a cylinder if the plug is connected, and a bump-start while your fingers are under the deck is how hands get lost.
Electric mowers have no plug. Your disconnect is the battery pack, and it comes out completely, not just switched to off. Some models hold residual charge in the capacitor circuit, so give it a minute before you reach under there.
Gas riders get one extra: disconnect the negative battery terminal if you're going to be working near the wiring harness. It costs thirty seconds and saves a lot of swearing.
How much fuel should be in the tank
Drain it or run it low before you tip the mower. A full tank plus a tipped deck equals fuel in the carburetor, fuel in the air filter, and a strong gasoline smell that lingers for days.
If your mower has a fuel shutoff valve, close it and run the engine until it dies. That empties the float bowl and prevents the flood. No shutoff valve?
Run the mower until it sputters out, or siphon the tank into a approved container.
Manufacturer specs from Briggs & Stratton and Honda both warn against tipping with a full tank. It's not a suggestion. It's the difference between a clean job and a hydro-locked engine.
Which way to tip a mower, and why it matters
Tip it carburetor side up, air filter side up. Always.
Tip it the other way and oil migrates past the rings into the combustion chamber and the intake tract. The engine smokes on the next start, sometimes refuses to start at all, and you spend an hour diagnosing a problem you created.
I've seen this play out in forum threads constantly. Someone sharpens a blade, the mower won't start, and they're convinced the ignition failed. It was oil in the wrong place.
If you do flood it, pull the plug, crank it a few times to clear the cylinder, and clean up the fouled plug situation before trying again.
On a walk-behind, tip it back so the handle rests on the ground and the deck faces the sky. That puts the carb on the high side on most models. Check yours before you commit.
What to wear and where to work
- Cut-resistant gloves. A dull blade cuts flesh better than it cuts grass.
- ANSI Z87.1-rated safety glasses or a face shield, especially grinding.
- Closed-toe boots. Bare feet and dropped blades don't mix.
- Hearing protection if you're using a grinder.
Work on a hard, level surface. Concrete is ideal. Gravel and grass swallow dropped washers and hide blade bolts.
Preparation checklist before any blade work
| Step | Why it matters | Time |
|---|---|---|
| Run fuel low or close the shutoff valve | Prevents carb and air filter flooding | 2 min |
| Disconnect spark plug boot or remove battery pack | Removes ignition and start risk | 1 min |
| Tip mower carburetor side up | Keeps oil out of the intake | 1 min |
| Wear gloves and eye protection | Blades bite, debris flies | 30 sec |
| Clear the work area of kids and pets | Thrown objects travel | 1 min |
| Have a vise, socket, and breaker bar ready | Fewer trips, fewer rounded bolts | 2 min |
How to Remove a Blade, Including Stuck and Rusted Bolts
The bolt itself is simple. Getting it to move is where the job lives or dies.
Step by step on a walk-behind
- Tip the mower so the deck faces up and the carb is high.
- Mark the blade with a paint pen or a scratch so you know which side faced the ground.
- Wedge a block of soft wood between the blade tip and the deck housing. That stops the blade from turning.
- Fit the correct socket. Most walk-behinds run a 5/8-inch or 9/16-inch hex, some use 13mm or 15mm.
- Turn counterclockwise with a breaker bar. Steady pressure beats a jerk.
- Slide the blade off the adapter and keep the washer and any spacer in order.
A blade holder tool does the same job as the wood block and does it better. It's a flat bar with a slot that locks onto the blade near the center hole. Worth the ten dollars if you sharpen regularly.
Step by step on a riding mower or zero-turn
The deck changes everything. You need height, and you need it stable.
- Raise the deck to its highest setting or remove it entirely.
- Support the machine on jack stands or ramps rated for its weight. Never a hydraulic jack alone.
- Disconnect the battery before you go under.
- Remove blades one at a time and label each one by position. Deck blades can differ in length, and swapping two of them creates instant vibration.
- Keep each blade's hardware with that blade. Spacers and washers are not always interchangeable between spindles.
On some decks, removing the blade bolts is easier with the deck slid out on a dolly. That's a fifteen-minute job that saves your shoulders.
If the bolt won't budge, work through this order
If it's just tight, add leverage. A longer breaker bar or a pipe slipped over the handle multiplies your force. Steady push, no bouncing.
If it's rusted, soak it. Penetrating oil, then wait. Twenty minutes minimum, overnight is better. Reapply once.
If it's still stuck, shock it. A sharp tap on the bolt head with a hammer and punch breaks the corrosion bond. Then try again with the breaker bar.
If it's really seized, add heat. A heat gun or a careful pass with a propane torch on the bolt head, not the blade. Heat expands the bolt and breaks the grip. Keep the flame away from fuel lines and plastic.
If the head is rounding, stop and reassess. A six-point socket grips better than twelve-point. A bolt extractor socket bites into a damaged head. If you're past that, the bolt gets drilled out, which is a shop job.
If it's reverse-threaded, you're turning the wrong way. Some machines, particularly certain older riders and a few European models, use a left-hand thread. Check the manual before you hang off a breaker bar in the wrong direction.
An impact wrench will spin a blade bolt off in seconds, but it can also over-torque on reinstall and crack an adapter. If you use one, use it for removal only and torque by hand going back on. That's the same discipline behind doing the job properly with power tools on wheel nuts.
What to keep track of when it comes off
Photograph the assembly before you slide the blade off. The order of washer, blade, and spacer matters, and a blade installed without its hardened washer will loosen.
Pay attention to two things especially:
- Center hole shape. Round, five-point star, double-D (bowtie), and hex spline all exist. A star blade has to index onto a star adapter. If it doesn't drop on cleanly, it's the wrong blade or it's misaligned.
- Which face was down. The cutting edge points toward the grass. The sail, the upturned wing, points up toward the deck. Getting this backwards means no lift and no discharge.
While the blade is off, scrape the caked grass off the underside of the deck. It's a five-minute job that improves airflow and stops rust from spreading. Most people skip it because they're focused on the blade.
Sharpening Step by Step: Matching the Factory Bevel Angle
Here's the core idea, and it's the one thing that separates a good sharpen from a ruined blade: you're not creating a new edge. You're restoring the one that's already there.
The factory ground a specific bevel angle into that steel. Your job is to follow it. Not invent it.
Clamp it so you can actually work
Put the blade in a vise with the cutting edge angled up and toward you. Clamp near the center hole, not on the cutting edge, because vise jaws will mar a bevel you just spent ten minutes on.
The blade should be rigid. Any flex in the setup turns your file strokes into guesswork.
Stand so you can push the file away from your body along the full length of the edge. If the vise is too low, raise it. Working bent over a blade on a tailgate is how the angle drifts.
Read the existing bevel before you cut
Look at the blade under good light and find the factory grind. It's the bright polished band running along the cutting edge. That band has an angle.
Your file has to match it.
Most rotary mower blades sit somewhere between 30 and 45 degrees. Mulching blades often run a shallower angle. Some high-lift blades and certain commercial designs sit closer to 40 degrees.
| Blade type | Typical bevel | Notes |
|---|---|---|
| Standard 2-in-1 discharge | 30 to 35 degrees | Most common on walk-behinds |
| Mulching / 3-in-1 | 30 to 40 degrees | Shallower edge, more airflow shaping |
| High-lift | 35 to 45 degrees | Sturdier edge for heavy grass |
| Commercial / heavy-duty | 30 to 40 degrees | Check the manual, varies by maker |
Don't chase a number. Chase the existing grind. The blade is telling you the angle.
A quick trick: color the bevel with a marker pen, make one light file stroke, and look. If you removed ink along the whole band, your angle matches. If you're only touching the top or bottom of the band, adjust until you're hitting all of it.
File strokes that actually cut
- Push the file away from you along the bevel, at the factory angle.
- Use the full length of the file, not the middle third.
- Keep even pressure. Let the teeth cut on the forward stroke.
- Lift the file off the blade on the return. Dragging it back dulls the file fast.
- Work the full length of the edge, not one spot at a time.
- Count your strokes loosely and keep both ends of the blade roughly even.
A mill bastard file cuts in one direction. It's a pushing tool. Ten to fifteen strokes per inch of edge is a reasonable starting pace, then check the edge.
If you're fighting a hard blade, chalk the file. Rubbing chalk into the teeth stops pinning and keeps the cut smooth.
Grinder users, same bevel, less pressure
The angle doesn't change just because the tool is faster. What changes is your margin for error.
- Keep the grinder moving. Never park it in one spot.
- Use a flap disc, not a grinding wheel. Flap discs run cooler and cut smoother.
- Light pressure only. Let the abrasive do the work.
- Dip the blade in water if it feels warm to the touch.
- Stop the instant you see straw, purple, or blue color. That's temper leaving the steel.
Overheating is the number one grinder mistake. The edge looks beautiful and it's dead. Soft steel folds over on the first pass through sandy grass, and you're back at the bench a week later.
How sharp is sharp enough
Butter-knife sharp. That's the target.
A mower blade is not a kitchen knife. A razor edge has almost no supporting metal behind it, and it folds the first time it meets grit. A slightly thicker, cleanly ground edge lasts longer and cuts just as well.
Test it with a fingernail. Drag the edge across a thumbnail at a shallow angle. If it bites and leaves a light mark along the length, you're there.
If it skates, keep going.
Then stop. More strokes past that point remove metal without improving the cut.
Sharpening without removing the blade
You'll see this search suggestion everywhere. It's possible on some mowers, with a file and the deck raised, working by feel.
It's also a bad trade. You can't inspect for cracks, you can't check balance properly, and you can't see the bevel. Balance is the reason to remove the blade, and balance is what protects your spindle bearings.
Do it right. Take the blade off.
Hone the Burr and Balance the Blade
Two steps get skipped more than any others in this whole process. Both take about two minutes. Both decide whether your mower runs smooth or shakes itself apart.
The burr pass
Filing the bevel pushes a thin curl of steel over the back edge. That's the burr, or wire edge. It feels sharp and it isn't.
It bends over on the first cut and leaves you with a blade that seems to go dull overnight.
Remove it with a flat pass. Lay the blade flat, put the file nearly flush with the flat back, and take two or three light strokes along the length. You're not grinding an angle here.
You're slicing off the curl.
Feel the back edge afterward. Smooth means done. Still catching means another light pass.
Don't overdo this. Grinding a big secondary bevel into the back of the blade changes the cutting geometry and removes hardened steel for no gain.
Why balance is not optional
A blade spinning at roughly 19,000 feet per minute at the tip doesn't tolerate imbalance. A few grams of extra weight on one end turns into a vibration you can feel through the handlebars. Keep running it and that vibration goes looking for something to destroy.
What it usually finds:
- Spindle bearings. The first casualty. A worn bearing howls, then seizes.
- Crank seals. On single-cylinder engines, the vibration load works the seal until it leaks.
- Deck mounting points. Cracks start at the hangers and weld seams.
- Blade bolts and adapters. Vibration loosens hardware and cracks star adapters.
- The deck itself. Standing waves in the steel, then fatigue cracks.
The fix costs almost nothing. A cone balancer runs $5 to $20. A magnetic balancer is a bit more and easier to read.
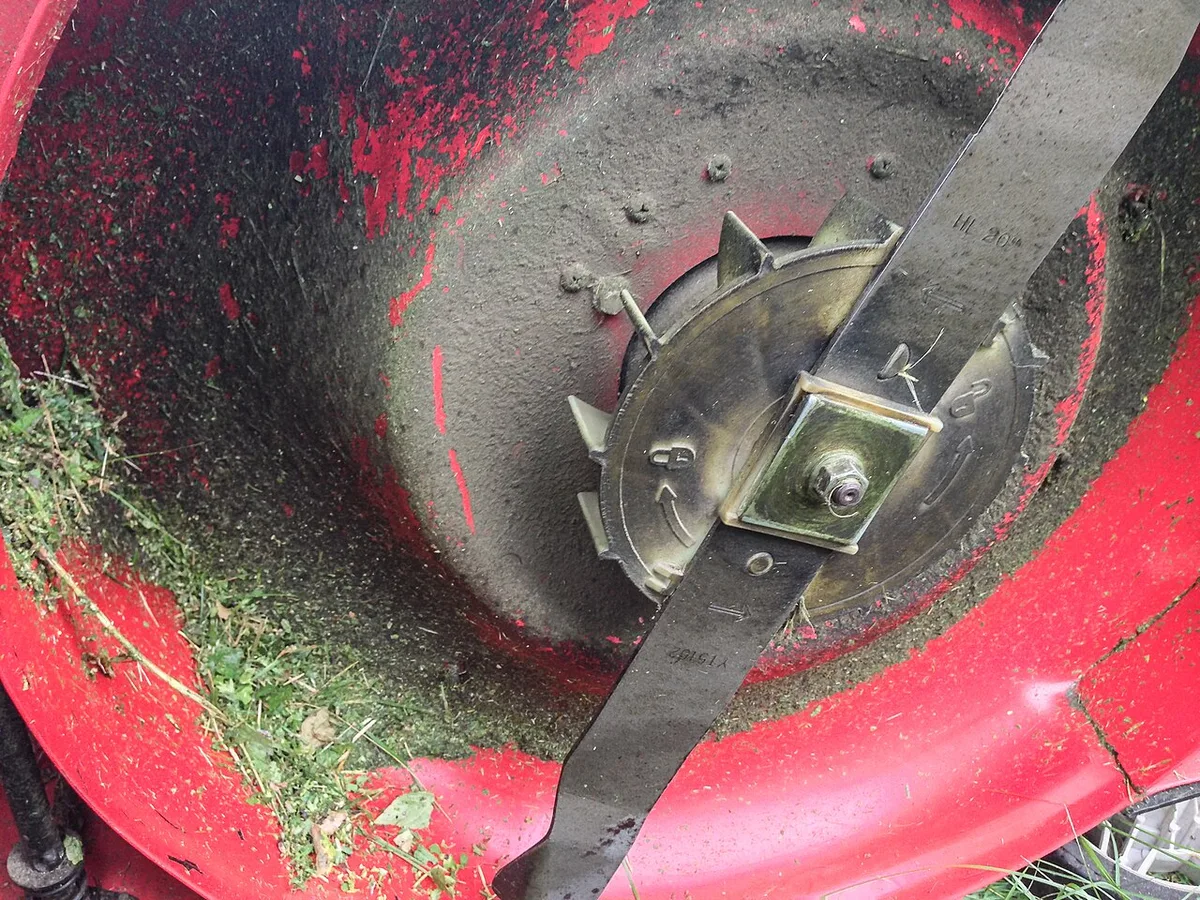
Image source: Wikimedia Commons / Tony Webster from Minneapolis, Minnesota, United States (CC BY)
Three ways to check balance
| Method | How it works | Accuracy | Cost |
|---|---|---|---|
| Cone balancer | Blade sits on a tapered cone, heavy end drops | Good for home use | $5 to $20 |
| Magnetic balancer | Blade rides on magnets, near-frictionless | Best of the three | $20 to $40 |
| Nail in the wall | Hang the blade on a nail through the center hole | Crude but usable | Free |
The nail method works better than people expect. Hang the blade on a horizontal nail through the center hole. If one side drops, that side is heavy.
Rotate it 90 degrees and repeat to confirm.
If it's out of balance, remove metal here
Grind or file the heavy end. Not the cutting edge, the sail.
Take a little off the trailing edge of the sail on the heavy side, or file the tip of the sail. Check again. Repeat in small increments.
A few strokes is usually enough. You're correcting grams, not ounces. Chasing perfect balance with big grinder passes is how a good blade becomes scrap.
If the blade won't balance after several attempts, replace it. A blade that far out was either badly made or badly damaged. It's not worth the spindle bearings.
The reassembly check nobody does
Before the blade goes back on, spin it on the adapter by hand with the mower still tipped. It should sit flat and rotate freely without wobble.
Any rocking means the blade isn't seated on the adapter, the washer is missing, or the center hole is worn. Fix that before you torque anything.
Reinstall It the Right Way Up: Cutting Edge Down and Torque Specs
Putting a blade on backwards is the most common reassembly error, and it doesn't announce itself. The mower starts fine. It just cuts badly and throws clippings the wrong way.
Which way is up
The cutting edge faces the grass. The sail, the upturned wing, faces the deck.
On a walk-behind, that means the sharpened edge points down when the mower is sitting on its wheels. On a riding mower deck, the same rule applies. Cutting edge down, sail up.
Get it backwards and the blade still spins. It just creates no lift, so clippings don't get thrown into the bag or out the chute. The deck clogs, the cut looks ragged, and people chase the wrong problem for weeks.
Line up the center hole properly too. A star blade has to index onto the star adapter. A double-D blade has to drop onto the flats.
If it doesn't seat cleanly, don't force it and don't tighten the bolt hoping it pulls straight.
Torque specs, and why the number matters
Under-torque and the bolt works loose. Over-torque and you crack the adapter or stretch the bolt. Neither failure is subtle when it happens at speed.
| Machine type | Typical blade bolt torque | Notes |
|---|---|---|
| Gas walk-behind, push or self-propelled | 30 to 40 ft-lb | Check the manual, varies by brand |
| Battery push mower | 15 to 30 ft-lb | Lighter hardware, lower spec |
| Lawn tractor, 2 to 3 blade deck | 40 to 70 ft-lb | Often higher on larger decks |
| Zero-turn commercial deck | 60 to 90 ft-lb | Follow the deck manufacturer exactly |
Those ranges are a guide, not a rule. Manufacturer specs win every time. Honda, Toro, John Deere, Husqvarna, and Cub Cadet all publish the number for their specific deck in the owner's manual, and it's usually on the same page as the blade removal instructions.
Use a torque wrench. Not a breaker bar with a guess. Not an impact wrench on full power.
If you don't own one, this is the job that justifies buying it, the same way wheel hardware does when you're tightening lug nuts correctly on a car.
Anti-seize or threadlocker?
Both arguments exist, and both have merit.
Anti-seize makes the next removal easy. It also slightly reduces friction, which means the bolt can loosen under vibration if you torque to the dry spec.
Threadlocker keeps the bolt put. It also makes removal harder next season, though medium-strength blue compound breaks free with hand tools.
The safest route: follow the manual. If it specifies dry torque, install dry. If it specifies a threadlocker, use medium-strength and torque to spec.
Never use high-strength red compound on a blade bolt.
A light coat of oil or anti-seize on the bolt threads is common practice in small engine shops, with torque reduced about 20 percent to compensate for the lower friction. If you go that route, be consistent about it.
First-start checklist after reinstall
Run through this before you pull the cord.
- Blade seated flat on the adapter, no wobble.
- Cutting edge facing down, sail facing up.
- Washer and spacer in the correct order.
- Bolt torqued to the manual spec with a torque wrench.
- Block of wood removed from the deck.
- Spark plug boot pushed back on firmly, or battery pack reinstalled.
- Mower back on its wheels, oil level checked.
- Deck underside clear of tools, rags, and loose hardware.
Start it up and listen. A balanced, correctly installed blade runs smooth with a steady hum. Any new vibration, rattle, or grinding means something's wrong.
Shut it off and check your work.
Recheck the blade bolt torque after the first mowing session. New installations settle, and a bolt that was perfect on the bench can loosen slightly after twenty minutes of cutting. It takes one minute and it catches the rare case before it becomes expensive.
Riding Mower and Multi-Blade Deck Workflow
A rider deck is the same sharpening job repeated two or three times with worse access. Get the machine up safely and the rest is routine.
Get the deck to a workable height
You want 12 to 18 inches of clearance under the deck. That is enough to reach the blade bolts with a socket and breaker bar without lying on your back in the grass.
Three ways to get there:
- Mower lift. A screw-driven or hydraulic lift raises the front end in seconds. Costs roughly $150 to $300. If you sharpen three blades twice a season, it earns its keep fast.
- Ramps. Drive the front wheels up onto rated ramps, then chock the rear wheels. Solid and cheap, but you're still working at chest height with your arms above your head.
- Jack stands. Jack the machine up, then set stands under the frame. Never trust a hydraulic jack alone, and never use cinder blocks. They shatter.
Whichever route you take, disconnect the battery before you go under. A rider has a starter, a PTO clutch, and a safety switch circuit. The battery is your ignition disconnect.
Should you drop the deck or work under it?
Drop it if you have the space. Removing a deck takes 15 to 30 minutes and gives you clean, unobstructed access to every spindle.
Work under it if the deck is easy to raise and you're only refreshing edges. It's faster, but you'll be reaching blind on the rear blade of a 54-inch cut.
If you drop the deck, photograph the belt routing first. Belt diagrams are in the manual, but a photo of your actual machine beats a generic diagram every time. Note which side the tensioner spring sits on.
One more thing before the deck comes off. Set the deck height to its lowest position so the hangers release tension. It makes the pins slide out with your fingers instead of a pry bar.
Label the blades by position
This is the step that saves you a vibration problem. On many decks, the center blade is a different length from the outer two. Swap them and you've built an unbalanced rotor set.
Mark each blade with a paint pen or a scribble of chalk. Write "L," "C," and "R" on the sail as you remove it, and keep each blade's washer with its own spindle.
Check the spindles while you're in there
A sharp blade on a worn spindle still cuts badly. Take thirty seconds per spindle:
- Rock test. Grab a blade tip and push it up and down. Any vertical play means the bearing is worn and the spindle needs attention.
- Spin test. A healthy spindle turns smoothly with a faint drag from the grease. Grinding or a gritty feel means contamination.
- Shaft check. Sight along the shaft while the blade is off. A bent spindle shaft makes the blade wobble, no matter how well you sharpened it.
- Grease points. Many decks have zerks on the spindles. Two pumps of grease now saves a bearing later.
A worn spindle bearing shows up as a howl that changes with engine speed. If you hear that, sharpening is not your problem.
Blade timing on timed decks
Some decks, particularly certain commercial and high-end residential models, are timed. The blades must sit at a specific angle relative to each other or they strike one another when they spin.
Check the manual. If your deck is timed, mark the blade positions with paint before removal and index them the same way going back on. A collision between blades at 19,000 feet per minute doesn't just ruin two blades.
It can crack the deck shell.
Reinstall and level the deck
Put the deck back in the reverse order you took it off. Belt first, then hangers, then height adjustment.
Then check level, because a deck that came off level rarely goes back on level. Measure from the blade tips to the ground:
| Measurement | Typical target | How to check |
|---|---|---|
| Side to side | Equal within 1/8 inch | Measure both outer blade tips to the floor |
| Front to rear | Front 1/8 to 1/4 inch lower | Measure front tip and rear tip of the same blade |
| Tire pressure | Per manual, usually 12 to 14 psi | Check before measuring anything |
Inflate the tires first. A soft rear tire throws off every measurement you make afterward.
Rotate each blade so the tips point straight out sideways, then measure. That gives you the truest reading.
Finish with a spin check by hand and a slow first run at idle. Listen for anything new before you engage the blades.
| Deck size | Blade count | Typical use | Sharpening time |
|---|---|---|---|
| 38 to 42 inch | 2 | Small yards, tight gates | 20 to 30 min |
| 46 to 48 inch | 2 or 3 | Standard suburban lots | 30 to 40 min |
| 54 inch | 3 | Larger properties | 40 to 50 min |
| 60 to 61 inch | 3 | Acreage and light commercial | 45 to 60 min |
Mistakes That Cost You a Spindle, a Crank Seal, or a Deck
Most of these take five seconds to avoid and a weekend to fix. Read them once and you won't make them.
Sharpening mistakes
- Grinding until the edge turns blue. Heat kills temper. The blade feels sharp for a week, then folds over. Replace it, don't re-sharpen it.
- Sharpening one end more than the other. You've just built an unbalanced blade. Count strokes and keep both ends even.
- Chasing a razor edge. A thin, polished edge has no metal behind it. Butter-knife sharp is the target, not shaving sharp.
- Changing the bevel angle. Filing at a steeper angle than the factory grind creates a second facet and weakens the edge. Follow the existing band.
- Skipping the burr pass. The wire edge bends on the first cut and leaves you convinced the blade went dull overnight.
- Skipping the balance check. This is the expensive one. Imbalance is what destroys spindles and crank seals.
- Filing past the hardened layer. A blade sharpened many times gets thin and soft. At that point it's scrap.
Installation mistakes
- Blade upside down. Cutting edge up means no lift, no discharge, and a clogged deck. The mower runs fine, which is why people miss it.
- Missing hardened washer. The blade seats metal to metal, loosens under load, and eventually walks off the adapter.
- Wrong center hole. A star blade on a round adapter will not index. Forcing it and tightening the bolt cracks the adapter.
- Impact wrench on reinstall. Fast, and a reliable way to over-torque a bolt past spec and crack hardware.
- No torque wrench. Guessing at 40 to 70 ft-lb by feel is not a spec.
- Bolts reused after stretching. A stretched bolt loses clamp load. New bolts are cheap.
- Mixing blade positions on a multi-blade deck. Different lengths on different spindles equals instant vibration.
Machine-handling mistakes
- Skipping the spark plug boot. A mower can fire if the blade is turned by hand with the plug connected. That's how fingers get lost.
- Tipping the mower the wrong way. Carburetor side down floods the air filter, the intake, and sometimes the cylinder. Then you spend an hour chasing a "no start" that you caused.
- Tipping with a full tank. Fuel finds every opening. Run it low first.
- Jacking a rider on a hydraulic jack alone. Decks and frames are heavy. Use stands or ramps.
- Mowing over debris first, sharpening later. Rocks, roots, edging stones, and forgotten toys are what nick and bend blades in the first place. Walk the yard before you mow.
| Mistake | What breaks | Typical repair cost |
|---|---|---|
| Skipping balance | Spindle bearings | $30 to $80 per spindle part, plus labor |
| Running an overheated blade | Constant re-sharpening, poor cut | Cost of new blades, $15 to $50 each |
| Tipping carb side down | Fouled plug, flooded intake, oil in filter | Under $30 in parts, hours of diagnosis |
| Over-torquing with an impact | Blade adapter, bolt | $10 to $40 in parts |
| Welding a cracked blade | Potential blade ejection | Not worth pricing |
| Running a bent blade | Spindle, crank seal, deck cracks | $80 to $300 depending on damage |
| Loose blade bolt | Blade strike on deck housing | Deck repair $50 to $150 |
The one mistake that isn't fixable
Welding or brazing a cracked blade never works. The heat destroys the temper around the repair, and the crack keeps growing under load.
Blades fail at the center hole and along the sail seam. Those are the two highest-stress points on the part. A repair there is a repair in the worst possible place.
How Often to Sharpen: Mowing Hours, Seasons, and Sandy Soil
Manufacturer guidance lands in the same place across brands. Sharpen every 20 to 25 hours of run time, and at least once a season.
Twenty-five hours is a full mowing year for a lot of homeowners. For anyone cutting an acre or more, it's six to eight weeks.
The working schedule
| Situation | Sharpening interval |
|---|---|
| Small suburban lawn, one mower, light use | Once per season, plus a mid-season touch-up |
| Quarter acre to half acre, weekly mowing | Every 20 to 25 engine hours |
| Acreage or multi-deck rider | Every 15 to 20 hours |
| Professional lawn care, daily use | Every 8 to 10 hours, often weekly |
| Sandy soil, new sod, or debris-heavy yards | Cut the interval by a third |
| Mulching dry leaves in fall | Check before and after the season |
Engine hours matter more than calendar time. Most riders have an hour meter, so use it. On a push mower, estimate by mowing sessions: a typical weekly cut on a quarter acre is roughly 45 minutes, so 20 hours is about 25 mowings.
What makes a blade dull faster
- Sand. Coastal lots, builder's sand around new construction, and topdressing all act like sandpaper on a steel edge.
- Grit from driveways and edging. Scalping along a gravel drive is a grinding session for your blade.
- Anthills and mole runs. Small dirt volcanoes dull an edge fast, and they hide rocks.
- Wet, thick grass. It doesn't dull the edge as much as it loads the deck and forces the engine harder.
- Tall grass mowed in one pass. More material per inch of travel means more load and more heat at the edge.
- Warm-season grasses. Zoysia and St. Augustine are dense and wiry. They're hard on edges compared with fine fescue.
Signs you waited too long
You don't need a calendar if you know what to look for:
- Grass tips look shredded or whitish a day after mowing.
- The lawn looks dull yellow-green instead of deep green.
- You're making two passes over the same strip.
- The engine note drops when you hit thick grass.
- The deck is throwing clumps instead of spraying clippings.
- The mower vibrates more than it used to.
Seasonal timing by region
In the northern US and the UK, the mowing season runs roughly April through October. Sharpen in early spring before the first cut, then again around midsummer when the edge is done.
Warm-climate regions in the Southeast mow nearly year-round. Two to three sharpenings a year is normal there, sometimes more on sandy ground.
Cool-season grasses in spring and fall grow fast and thick. That's when a sharp blade matters most, because the grass is actively healing and a clean cut pays you back.
Winter storage and the first cut of spring
Sharpen before you put the mower away, not after you drag it out. A sharp blade sitting in a dry shed doesn't degrade. A dull blade sitting all winter just means you start the season behind.
Store the mower with a clean deck underside. Caked grass holds moisture against the steel and starts rust pinholes through the shell. Scrape it, hose it, dry it, and leave the deck to air.
Then check the blade again in spring anyway. Rodents nest in decks, and a blade that sat through a wet winter may have picked up rust on the bevel that needs a light pass.
Costs: DIY Filing vs. Shop Sharpening vs. New Blades
The money question has three answers, and the right one depends on how many blades you're responsible for.
The upfront numbers
| Method | Upfront cost | Per-blade time | Best for |
|---|---|---|---|
| Hand file plus balancer | $20 to $35 | 15 to 25 min | One or two blades a season |
| Drill-mounted sharpener | $10 to $25 | 10 to 15 min | Quick touch-ups only |
| Angle grinder plus flap disc | $40 to $100 | 3 to 8 min | Multiple mowers, experienced hands |
| Bench grinder | $60 to $150 | 3 to 8 min | Shop use with a steady hand |
| Shop sharpening service | $5 to $20 per blade | Drop-off and pickup | Anyone without the tools or the time |
| New replacement blade | $15 to $50 each | 10 min to install | Bent, cracked, or worn-out blades |
A decent 10-inch mill bastard file costs $10 to $15 and lasts several seasons if you don't drag it backward. Add a $5 to $20 cone balancer and you have a complete kit for under $35.
The ten-year math
Take a homeowner with a three-blade, 48-inch deck who sharpens twice a season.
- Shop route. Six blade sharpenings a year at $10 each is $60. Over ten years that's $600, plus fuel and two trips per year.
- DIY route. $35 in tools, plus maybe $30 in replacement files and a new balancer over the decade. Call it $65 total.
- Replace-instead-of-sharpen route. Three blades every two seasons at $25 each is $375 over ten years, and it's a bad habit because it hides damage you should be inspecting for anyway.
The DIY saving is real, but it's not the main argument. The main argument is that you inspect the blade every time you sharpen it. Cracks, bends, and worn sails get caught because you're the one holding the part.
When the shop is the smarter buy
- You don't own a vise or a torque wrench. Buying both costs more than a decade of sharpening fees.
- The deck has to come off and you'd rather not. Deck removal and reinstall is where the labor hours live.
- You suspect a bent spindle or a damaged deck shell. That's diagnosis, not sharpening.
- You run a business. Downtime costs more than the fee. Many lawn care operators keep a spare set of blades and swap them, sending the dull set out.
What to ask a sharpening shop
Two questions matter. Ask whether they balance after grinding, and ask what angle they grind to.
A shop that skips balancing is doing half the job. A shop that grinds everything to one universal angle is ignoring the factory bevel on your blade.
Also ask about turnaround and whether they magnaflux or dye-check for cracks. Not every shop does. The good ones will tell you straight.
OEM blades versus cheap aftermarket
Hardened OEM blades cost more and hold an edge longer. Cheap stamped blades are softer, dull faster, and often arrive with a rough grind that needs work out of the box.
Aggregate buyer feedback on aftermarket blades is mixed for exactly this reason. Fitment is usually fine. Steel quality is where the difference shows up, and it shows up as more filing time every few weeks.
If you're replacing rather than sharpening, price the OEM part against the aftermarket equivalent and factor in how often you'll be back at the bench. That's the same reasoning that applies when you're weighing whether premium suspension parts justify the price on a vehicle. The cheap part isn't cheap if you replace it twice.
Frequently Asked Questions
How often should you sharpen lawn mower blades?
Sharpen every 20 to 25 hours of engine run time, and at least once a season. Sandy soil, new sod, and yards with lots of debris shorten that to every 15 hours or so. Professionals sharpening weekly are working to the same logic, just at a higher mowing volume.
Can you sharpen a mower blade without removing it?
Yes, on some mowers with the deck raised, working by feel with a file. Don't. You can't inspect for cracks, can't see the bevel, and can't check balance properly.
Balance is the step that protects your spindle bearings, and it requires the blade off the machine.
What angle should a lawn mower blade be sharpened at?
Match the factory bevel, which usually falls between 30 and 45 degrees. Standard discharge blades tend to sit near 30 to 35 degrees. High-lift blades often run steeper.
Color the existing bevel with a marker, make one stroke, and check that you're removing ink across the whole band.
Do you have to balance a mower blade after sharpening?
Yes, every time. A few grams of difference at 19,000 feet per minute of tip speed becomes a vibration that wears spindle bearings, works crank seals, and cracks deck mounts. A cone balancer costs under $20.
A nail through the center hole works in a pinch.
How long does it take to sharpen a mower blade?
Plan 20 to 30 minutes for a single walk-behind blade, including removal, filing, balancing, and reinstall. A three-blade rider deck takes 45 to 60 minutes, mostly because of access. With an angle grinder and a lift, an experienced hand can cut that in half.
Can a bent or cracked blade be repaired?
No. A bent blade has already yielded and won't hold its shape at speed. A cracked blade can't be welded or brazed safely, because the heat destroys the temper around the repair.
Both get replaced. A new blade costs far less than a deck repair or an injury.
