
Your mower fired on the second pull all summer. Then April arrives, and it cranks, coughs, and dies, and the repair quote comes back bigger than you'd like. Learning how to winterize a lawn mower is mostly about preventing that exact morning, and the whole job takes about an hour once you know which steps apply to your machine.
Per ASTM D4814, the standard that governs gasoline volatility and ethanol content, pump fuel is blended to be burned within weeks, not stored for months. Ethanol blends can begin separating in a vented tank in two to three months. Service manuals from Briggs & Stratton and Honda Engines both point at the same culprit behind most spring no-starts: fuel left sitting in the carburetor.
The good news is that the fix comes down to five decisions, not one universal checklist.
How to Winterize a Lawn Mower
Winterizing a lawn mower protects the fuel system, oil, and battery during storage. Change the oil while the engine is still warm. Treat the fuel, or run the carburetor dry.
Pull the spark plug boot before touching the blade. Store the machine dry, covered, and off the ground.
Why Mowers Fail After Winter (And What Actually Causes It)
Every spring, small-engine shops fill up with the same three machines. Mowers that won't start at all. Mowers that start and immediately die.
Mowers that run, but surge and hunt for an idle. The common thread isn't brand, age, or how much you paid. It's what sat inside the fuel system and crankcase for four to six months.
Here's the part most people miss. "It ran fine when I put it away" tells you nothing about the fuel still inside it. Gasoline starts degrading the moment it leaves the pump, and the carburetor keeps a small pool of it trapped in the float bowl all winter.
That pool is where spring problems are born.
The failures break down into a handful of predictable categories:
- Varnished carburetor jets. As the light ends of gasoline evaporate, they leave a gum behind. That gum hardens in the tiny metering passages and chokes off fuel flow.
- Ethanol phase separation. Ethanol absorbs moisture from the air. Once saturated, it separates from the gasoline and sinks to the bottom with the water, right where the pickup lives.
- Stale fuel that won't light. Fuel left untreated for 60 to 90 days gets noticeably harder to ignite, which is why a mower can crank forever on old gas.
- Contaminated crankcase oil. Combustion byproducts and moisture accumulate in used oil. Left sitting all winter, they turn acidic against bearings and cylinder walls.
- Battery self-discharge. A lead-acid starting battery loses roughly 3 to 5 percent of its charge per month, and cold accelerates the loss.
- Rodent and insect nesting. Mice love an air box, an exhaust outlet, or the space under a shroud. Blocked intake means a rich, choking engine in spring.
- Rust in steel tanks and decks. Temperature swings in an unheated shed pull condensation into the tank and onto bare metal.
None of these are dramatic. That's exactly why they get ignored. A mower doesn't fail in October.
It fails quietly over the winter and announces itself in April.
The economic side matters too. A carburetor teardown and rebuild at a shop commonly lands in the low-to-mid hundreds of dollars once parts and labor are added. A replacement carburetor of decent quality isn't cheap either, and the off-brand ones are a coin flip.
Set that against an hour of your own time and a few dollars of stabilizer, and the math isn't close.
The Five Decisions That Change Your Whole Winterizing Routine
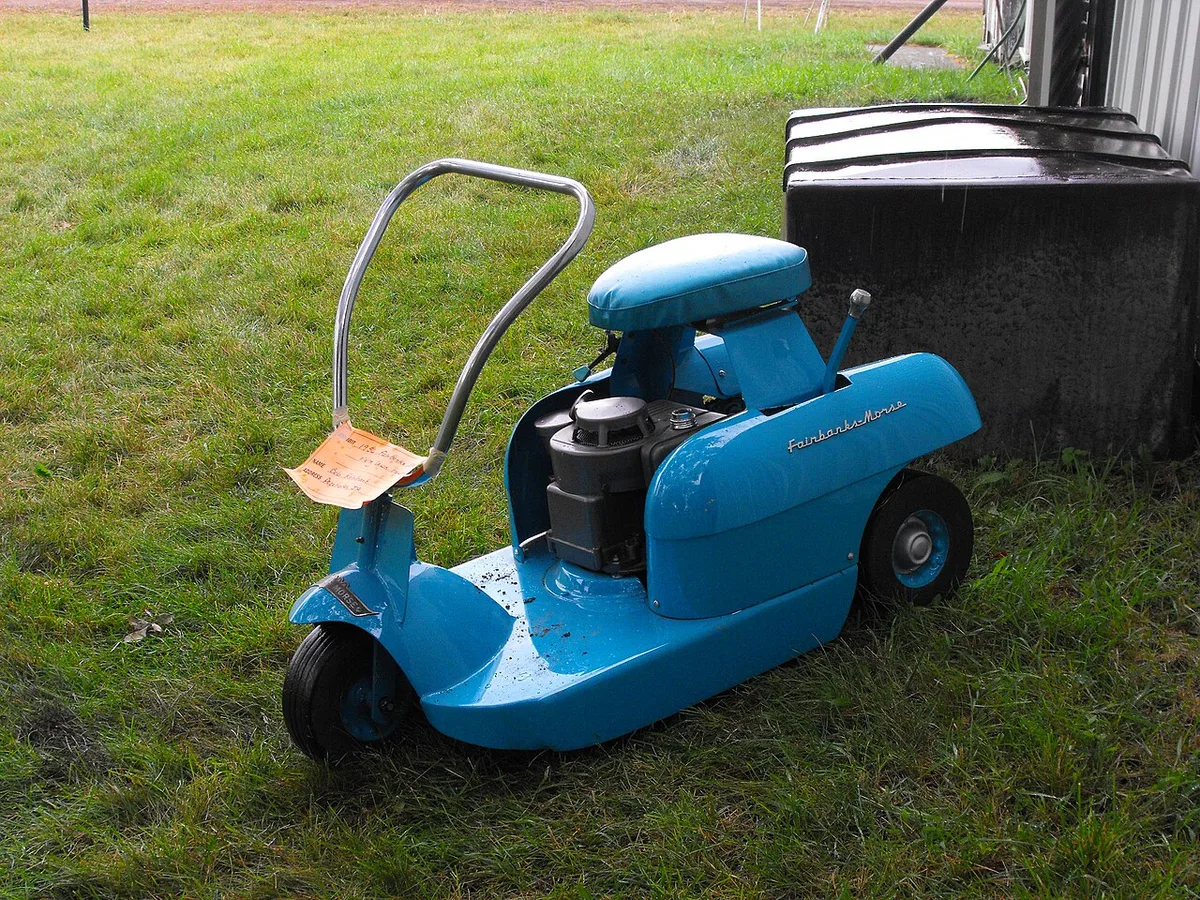
Image source: Wikimedia Commons / Jim417 (CC BY-SA)
Most winterizing guides hand you a single numbered list and call it done. That's why so many people follow the steps correctly and still end up with a gummed carburetor. The right routine depends on what you own.
Five variables carry almost all the weight.
| Decision | Your situation | What changes |
|---|---|---|
| Power source | Gas engine | Fuel system work is the priority |
| Power source | Battery-electric | Battery storage and charge level are the priority |
| Fuel valve | Shutoff valve present | Close it and run the carb dry |
| Fuel valve | No valve, drainable bowl | Drain the bowl by hand |
| Fuel valve | Sealed bowl | Stabilizer is your only lever |
| Storage length | Three to six months | Full treatment, fogging, battery removal |
| Storage length | Four to eight weeks | Fuel treatment and a quick clean is enough |
| Storage spot | Heated, sealed garage | Rodent and moisture risk is low |
| Storage spot | Unheated shed or tarp outdoors | Condensation and rodents become the main threats |
Read that table as a set of forks, not a menu. A gas push mower with a shutoff valve, stored in a cold shed for five months, gets the full treatment. A battery mower kept in a heated garage for six weeks gets almost none of it, and doing the gas-engine steps to a battery machine is wasted effort.
Two more variables sit underneath those five. The first is fuel type. Regular E10 behaves differently from ethanol-free E0, and both behave differently from canned pre-mixed fuel.
The second is deck material. Stamped steel rusts, aluminum oxidizes, and composite decks mostly just need cleaning.
Get those seven inputs straight and the rest of this becomes a lookup. Guess at them, and you'll spend a Saturday doing work your machine didn't need while missing the step that actually mattered.
What Happens Inside the Tank and Carburetor When a Mower Sits
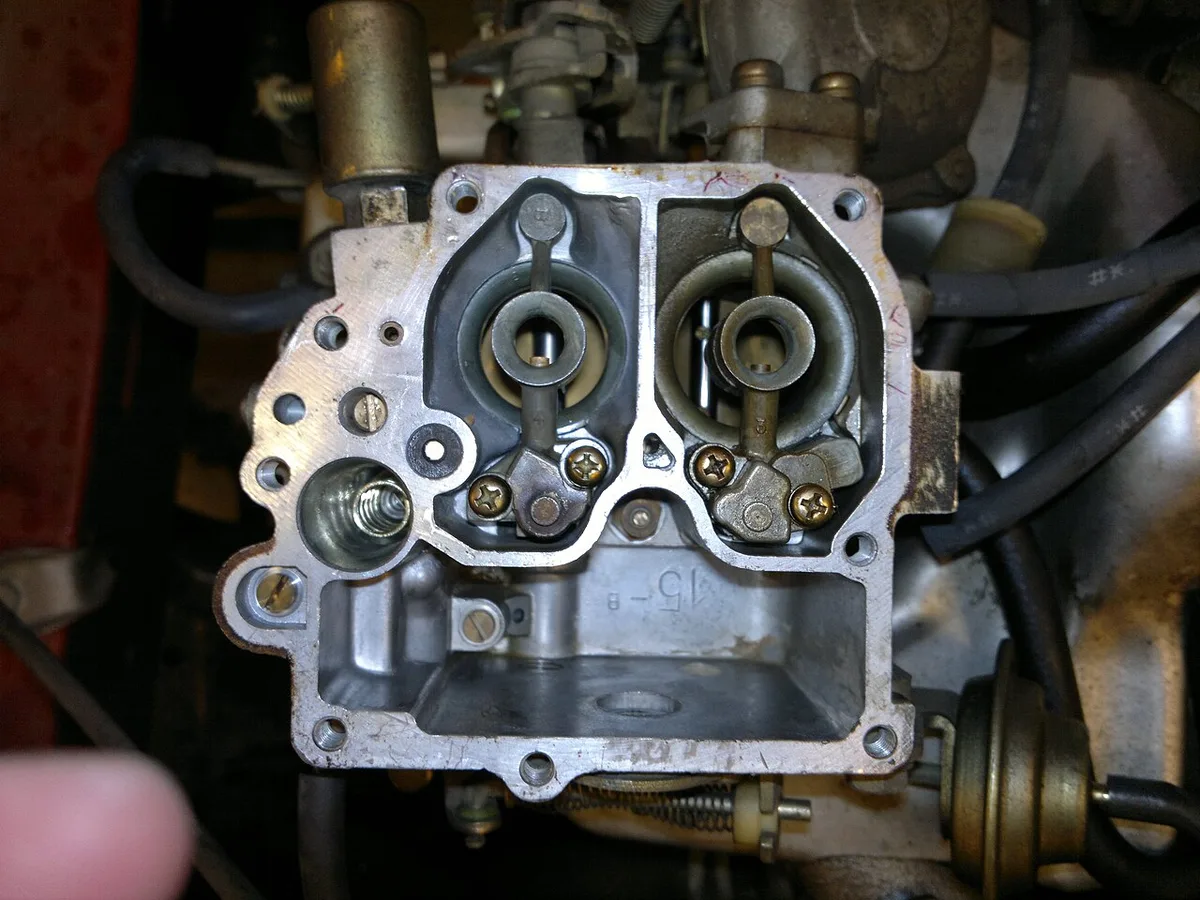
Image source: Wikimedia Commons / Hoikka1 (CC BY-SA)
A carburetor is a small, precise device with passages measured in fractions of a millimeter. The float bowl holds a reservoir of fuel at a constant level. The main jet and emulsion tube meter that fuel into the air stream.
A needle valve opens and closes to keep the level steady.
When you shut the engine off, a small amount of fuel stays in that bowl. Over weeks, the volatile compounds evaporate through the bowl vent. What's left behind is a sticky film that slowly hardens into varnish.
This is the single most common reason a mower won't start after storage, and it has nothing to do with how well the machine was built.
Ethanol adds a second problem on top of that. It's hygroscopic, meaning it pulls moisture out of the air. A vented tank breathes with every temperature swing, so a cold shed that warms in the afternoon is effectively pumping moist air in and out all winter.
Once the ethanol reaches its saturation point, it separates from the gasoline and drops to the bottom of the tank or bowl as a water-rich layer.
That layer is corrosive to aluminum, which is what most carburetor bodies and bowls are made of. It also won't burn. So you get a machine that cranks, catches for a second on the good fuel, then starves.
| Time in storage | What's happening | Spring symptom |
|---|---|---|
| 2 to 4 weeks | Light ends evaporating, minor gum forming | Usually starts fine, may idle rough |
| 30 to 60 days | Untreated fuel noticeably degraded | Hard starting, needs choke longer |
| 2 to 3 months | Ethanol approaching saturation in a vented tank | Surging, stalling, lean running |
| 3 to 6 months | Varnish hardened in jets, possible phase separation | No start, or start and immediate die |
| 6 months or more | Corrosion risk in aluminum bowls, rust in steel tanks | Carb rebuild, sometimes replacement |
Now the practical part. If your mower has a fuel shutoff valve, closing it and letting the engine run until it dies empties the bowl. That's the cleanest possible outcome, because there's nothing left to evaporate and nothing left to varnish.
If you don't have a valve but the bowl has a drain screw, you can empty it by hand.
If the bowl is sealed with no drain, your only real option is treated fuel that stays fresh. Run stabilized gasoline through the system for three to five minutes so it reaches the carburetor, then leave it. Treated fuel holds for six to twelve months according to stabilizer manufacturers' labels, which covers a normal off-season.
One more thing worth knowing. If spring arrives and the engine won't fire at all, resist the urge to reach for starting fluid down the intake as a permanent workaround. It can confirm a fuel delivery problem, but it doesn't fix varnished jets and repeated use washes oil off the cylinder wall.
Similarly, if the plug comes out wet and black after storage, that's a wet, oily plug telling you about flooding or a rich condition, not a bad plug.
Decision 1: Gas, Battery, or Both, and How to Match the Routine to Your Power Source
The first fork is the biggest one. Gas and battery mowers share almost nothing in their winterizing routine beyond "clean it and store it dry."
A gas mower's winter enemy is fuel. A battery mower's winter enemy is the pack itself. Getting that backwards wastes your afternoon.
| Task | Gas mower | Battery mower |
|---|---|---|
| Fuel system | Stabilize, run, or drain | Not applicable |
| Engine oil | Change while warm | Not applicable |
| Spark plug | Remove, fog, inspect | Not applicable |
| Air filter | Clean or replace | Check for debris, clear vents |
| Battery pack | 12V starter battery on a maintainer | Store at 50 to 60 percent charge |
| Blade and deck | Sharpen, clean, touch up | Sharpen, clean, touch up |
| Storage | Dry, covered, off concrete | Dry, covered, pack stored indoors |
For gas machines, the sequence is fuel first, then oil, then ignition, then deck. Do the oil change while the engine is still warm from a final mow, because warm oil carries suspended contaminants out with it. Fill with the weight listed in your manual, typically SAE 30 or 10W-30 for small engines, and never overfill past the dipstick mark.
For battery machines, the entire job compresses into three things. Clean the deck, sharpen the blade, and get the pack's charge level right. Lithium-ion packs don't like sitting at 100 percent for months, and they absolutely don't like being charged while frozen.
Store them around half charge in a spot that stays above freezing, and check them once mid-winter.
Electric start on a gas mower sits in a gray zone. It's a convenience feature bolted onto a normal engine, so you still do every fuel and oil step. Think of it the way you'd think about keyless entry versus a fob: the starting method changes, the machine underneath doesn't.
If you run both types, winterize the gas machine first while the weather still cooperates. Battery work is indoor work and can wait for a rainy weekend.
As of 2026, California's small off-road engine rules require new mowers sold in the state to be zero-emission, which is pushing more buyers toward battery platforms. The federal small-engine emissions framework still governs most of the country, and it's the reason modern carbs run leaner and tolerate stale fuel worse than older ones did.
Decision 2: Fuel Shutoff Valve, Drainable Bowl, or Sealed Carburetor
This is the fork that separates a clean spring start from a carburetor rebuild, and it takes about thirty seconds to check.
Look under the fuel tank, near where the fuel line meets the carburetor. A small lever or a quarter-turn valve with ON and OFF markings means you have a shutoff. No lever?
Follow the fuel line to the carburetor and look at the bottom of the bowl. A brass or plastic screw head at the lowest point is a drain screw. Neither one means you're running a sealed bowl.
Here's how each branch plays out:
If you have a shutoff valve: Add stabilizer to a nearly full tank, run the engine three to five minutes so treated fuel circulates, then close the valve and let the engine run until it dies on its own. That burns the bowl dry. Top the tank off afterward with treated fuel to limit condensation space, or leave it low and accept a little moisture.
Either way, the carburetor is empty and safe.
If you have a drain screw but no valve: Run treated fuel through the engine the same way, then shut it off and place a shallow pan under the bowl. Open the drain screw and let it empty. Expect a few ounces, not a flood.
Snug the screw back down gently. It seals on a soft seat and it's easy to overtighten.
If the bowl is sealed: Stabilizer is your only move, so use it properly. Dose it for the full tank volume, not the amount of fuel actually in there. Fill the tank close to full to leave less air space for condensation.
Run the engine long enough that you're certain treated fuel reached the carburetor, then park it.
A few practical notes that save people real grief.
If the drain screw or bowl bolt is frozen, don't lean on it with a cheap wrench. Aluminum bowls strip and crack, and then you're ordering parts. Treat it like a seized, rusted bolt and use the right tool and a little patience instead of brute force.
If your mower has no shutoff valve at all, adding an inline valve is a cheap upgrade. It costs less than a carburetor gasket set and turns the hardest branch into the easiest one every single year.
And if you decide to drain the bowl, drain it into a container, not onto the shed floor. Fuel on concrete near a water heater pilot light is a genuine hazard, not a hypothetical one.
Working under the deck to reach a bowl or a blade means the machine has to be raised. Use lifting the machine safely as your rule: solid support under the deck, never the lift lever alone, and the spark plug boot pulled before your hands go anywhere near the blade.
One last branch point worth flagging. Running a carburetor dry works beautifully for a few months of storage. It works less well if the machine then sits for a year or more, because gaskets and seals can dry out and shrink.
For long-term storage beyond a single off-season, treated fuel left in the system is often the safer call.
Decision 3: How Long and How Cold, and How to Size the Job to Your Storage Season
Two owners can follow the same guide and need completely different amounts of work. A homeowner in Minnesota parks the mower from early November through late April, roughly six months of hard freeze. A homeowner in Georgia might mow eleven months a year and only skip a few weeks in January.
That difference decides how much effort is worth spending. It also decides which risks actually matter. Cold storage is brutal on fuel and batteries.
Long storage is brutal on seals, gaskets, and anything with a gasket surface that can dry out and shrink.
| Storage window | The real risk | Work required |
|---|---|---|
| Under 4 weeks | Almost nothing | Park it clean and dry |
| 4 to 8 weeks | Fuel starting to degrade | Stabilizer, run it through, clean the deck |
| 2 to 3 months | Ethanol moisture, rough idle | Stabilizer plus carb run dry if you have a valve |
| 3 to 6 months | Varnish, phase separation, battery drain | Full routine, oil change, fogging, battery out |
| Over 6 months | Seals drying, rust in steel tanks | Full routine plus treated fuel left in the system |
Be honest about the window. Most people underestimate it by a month, because the last mow happens earlier than they remember and the first spring mow happens later.
Temperature swings do more damage than cold alone. An unheated shed can swing 30 degrees between a sunny afternoon and a clear night. Every swing makes the tank breathe, pulling moist air in through the vent and pushing it back out.
That cycle repeats hundreds of times over a winter.
If you store in a heated, sealed garage, condensation risk drops hard. The tradeoff is that a warm garage is also a comfortable place for mice, so rodent proofing becomes the main job instead.
A few climate-specific branches worth knowing:
- Hard freeze, unheated shed. Full winterization. Pull the battery, drain or stabilize the fuel, fog the cylinder, and cover with something breathable.
- Mild winter, mowing continues. Skip the deep storage routine. Keep fuel treated year round, check oil monthly, and clean the deck when it cakes up.
- Damp maritime climates like the UK, Ireland, and the Pacific Northwest. Freezing isn't the issue. Condensation and mold are. Ventilation matters more than insulation, and a tarp that traps moisture is worse than no cover.
- Coastal salt air. Fastener and deck corrosion accelerates. Touch up bare metal before storage and rinse the deck with fresh water after the last mow, then dry it.
- Long-term storage beyond one season. Running the carb bone dry starts working against you here, because gaskets and seals can shrink. Treated fuel left in a full tank is the safer call.
Storage surface matters more than people expect. Park the mower on a pallet, a sheet of plywood, or cardboard rather than bare concrete. Concrete stays cold and damp, and a steel deck sitting directly on it holds moisture against the paint.
One timing note. Do the last cut slightly shorter than usual, but don't scalp the lawn going into winter. Scalping exposes crowns to frost damage and invites weeds into the bare patches come spring.
Run It Dry or Fill It With Stabilized Fuel? Picking Your Fuel Strategy
Both approaches work. The right one depends on your carburetor and how long the machine will sit. Neither is universally correct, and the people who insist otherwise usually own one type of mower.
The core argument for running dry is simple. No fuel in the bowl means nothing to evaporate, nothing to varnish, and nothing to absorb water. The core argument for treated fuel is equally simple.
Dry carburetors can dry out gaskets and accelerator pump diaphragms over long storage, and an empty steel tank rusts inside.
| Strategy | Best for | Watch out for |
|---|---|---|
| Run the carb dry | Shutoff valve present, storage under 6 months | Dried seals over really long storage |
| Stabilized fuel, tank full | Sealed bowl, no valve, storage over 6 months | Ethanol still absorbing moisture |
| Both (treat, run, then drain the bowl) | Any mower you want to start easily in spring | Slight extra hassle |
| Canned pre-mixed fuel | Small tanks, occasional use | Cost per gallon is steep |
If you go the stabilized route, dose for the tank volume, not the fuel level. Half a tank still gets a full-tank dose. Add stabilizer to fresh fuel, not to fuel that's already been sitting since August, because no additive reverses fuel that's already breaking down.
Then run the engine for three to five minutes. That's not a suggestion. The point is to get treated fuel all the way into the carburetor bowl, and the only way fuel moves is if the engine is running.
Manufacturer guidance from Briggs & Stratton makes the same point about treating before storage rather than after.
Fuel choice matters as much as the additive. Here's the honest breakdown:
- E10 pump gas. Fine for regular use, riskiest for storage. Ethanol pulls moisture from the air and can separate within two to three months in a vented tank.
- Ethanol-free E0. Worth the extra cost if you can find it near you. Behaves far better over a long off-season.
- Canned pre-mixed fuel. Ethanol-free and formulated for long shelf life. Expensive per gallon, but small engines use so little that the cost is trivial across a season.
- Old gas from last year. Don't. Diluting stale fuel into fresh is a false economy that gums up more carburetors than it saves.
If your machine has a fuel shutoff valve, the ideal sequence is treat, run, close the valve, and let the engine run until it dies. That gets treated fuel through the system first, then leaves the bowl empty. You get the protection of both approaches with about two extra minutes of work.
Storage of the leftover fuel deserves its own attention. Use an approved, labeled, spill-proof container and keep it somewhere ventilated, away from pilot lights, water heaters, and anything with a spark. Local fire codes cap how much gasoline you can store in a garage or shed, and NFPA 30 sets the framework most of them follow.
Date the can with a marker. Fuel that's been in a can since last fall is a spring problem waiting to happen, and a date costs nothing. Take genuinely stale fuel to a municipal household hazardous waste site rather than dumping it in a drain or pouring it on gravel.
Step-by-Step: Winterizing a Gas Push or Self-Propelled Mower
This is the main sequence for the most common machine on the block. Work through it in order. Fuel first, then oil while the engine is warm, then ignition, then the deck, then storage.
Gather everything before you start so you're not walking back to the garage with oily hands.
| Tool or material | What it's for |
|---|---|
| Fuel stabilizer | Keeping treated fuel fresh through storage |
| Fresh engine oil (SAE 30 or 10W-30) | Refilling the crankcase per your manual |
| Socket set and torque wrench | Blade bolt, plug, drain plug |
| Spark plug socket | Removing and reinstalling the plug |
| Fogging oil | Protecting the cylinder bore |
| Scraper and stiff brush | Deck underside cleaning |
| Block of wood or jack stands | Safe access under the deck |
| Battery maintainer | Keeping a 12V starter battery healthy |
| Breathable cover | Storage without trapping moisture |
Fuel: Stabilize, Run, Then Shut the Valve
Start with a nearly full tank if you're storing treated fuel. Air space is where condensation forms, so less air means less moisture. Add stabilizer at the label rate and swirl the tank gently to mix.
Run the engine for three to five minutes. Let it get properly warm, not just idling for thirty seconds. This pushes treated fuel through the filter, the line, and into the bowl.
Now check for a shutoff valve. If you have one, close it while the engine is running and let the engine die on its own. That burns the bowl dry without you touching a wrench.
If you don't have a valve but the bowl has a drain screw, shut the engine off, slide a shallow pan under the bowl, and open the screw. Expect a few ounces. Snug it back gently, because aluminum threads strip easily.
If the bowl is sealed with no drain, stop here. Treated fuel is your protection, so make sure the dose was right and the run time was long enough.
Oil, Air Filter, and Spark Plug
Change the oil while the engine is still warm from that run. Warm oil flows better and carries more suspended grit out with it. Set the mower on a level surface, pull the dipstick, and tip the deck toward the drain plug or the fill neck depending on your model.
Here's the mistake to avoid. Tip the mower with the air filter side up, never down. Tipping it filter-side down sends oil into the intake, past the rings, and into the cylinder, and that's how people hydrolock an engine or foul a plug before storage even starts.
Refill with the weight your manual specifies and check the dipstick twice. Overfilling causes foaming and blown seals, and it's an easy thing to do when you're rushing.
Next, the air filter. Tap the paper element out against a hard surface and hold it up to a light. If you can't see light through it, replace it.
Wash a foam pre-cleaner in warm soapy water, let it dry completely, then re-oil it lightly.
Then the spark plug. Pull the boot, unscrew the plug, and look at the electrode. A tan or light gray tip is healthy.
Black and sooty means rich running. Wet and oily points to flooding or worn rings.
Spray fogging oil into the cylinder, or use a few drops of motor oil if that's what you have. Turn the engine over slowly by hand a couple of times to spread it on the bore. Reinstall the plug finger tight, leave the boot off, and tape the boot to the handle so nobody cranks it by accident.
Deck, Blade, and Undercarriage
Get the machine up safely first. Solid blocks or jack stands under the deck, never the lift lever alone. Pull the spark plug boot before your hands go anywhere near the blade.
That's not caution theater, it's the step that prevents amputations.
Scrape the underside of the deck with a putty knife or a stiff scraper. Caked grass holds moisture against bare steel, and that's where rust starts. A cheap deck spray afterward helps next season's cleanup go faster.
Inspect the blade while you're under there. Look for bent tips, deep nicks, and cracks near the center hole. A badly bent blade causes vibration that hammers the spindle bearing, so replace rather than straighten.
Sharpen the cutting edge at the original angle, keeping the blade balanced. An unbalanced blade vibrates just as badly as a bent one. Reinstall with a new or clean bolt and torque to the spec in your manual, which usually lands somewhere between 35 and 50 ft-lb depending on the model.
Wash the top of the deck and let it dry completely before covering anything. Touch up chips and bare metal with matching paint or a rust converter.
Battery, Cables, and Rodent Proofing
If your mower has a 12V starter battery, you have two good options. Remove it and store it indoors on a maintainer, or leave it in place connected to a maintainer. What you shouldn't do is leave it sitting connected and unattended for five months.
Clean the terminals with a wire brush and a baking soda solution if there's crust. A thin coat of dielectric grease slows the corrosion that comes back every year.
Then look for rodent entry points. Mice nest in air boxes, exhaust outlets, and under the shroud, and they chew wire insulation while they're there. Stuff steel wool into obvious gaps, and skip the foam because rodents tunnel straight through it.
Finally, cover the machine with something breathable. A tarp traps moisture underneath and creates a condensation chamber, which is worse than leaving it open in a dry shed. Store it off the concrete on a pallet or a sheet of plywood, and you're done.
| Step | Time |
|---|---|
| Fuel treatment and run | 10 minutes |
| Oil change | 15 minutes |
| Air filter and spark plug | 10 minutes |
| Deck scrape and blade | 20 minutes |
| Battery and storage | 10 minutes |
Winterizing a Riding Mower or Zero-Turn: What's Different
A rider does everything a push mower does, at three times the scale. Bigger tank, bigger battery, more blades, more grease points, and several components a push mower simply doesn't have.
| Task | Push mower | Riding mower or ZTR |
|---|---|---|
| Fuel volume | Roughly 1 quart to 1 gallon | 3 to 6 gallons |
| Oil change | Drain and refill | Drain, refill, replace oil filter |
| Blades | One | Two or three, plus spindles |
| Battery | Small 12V or none | Full-size 12V starting battery |
| Transmission | Sealed, no service | Hydrostatic, fluid check on some models |
| Grease points | None | Spindle and pivot zerks |
| Tire pressure | Not applicable | 12 to 14 psi, check the sidewall |
Fuel volume is the first practical difference. Treating five gallons costs several times what treating a push mower's tank costs, and you'll want to buy stabilizer in a larger bottle. Do the math on the tank size before you pour.
Most riders and zero-turns have a fuel shutoff valve, so use it. On a gravity-fed system, closing the valve and running the engine dry is genuinely the best protection available. Some riders use a fuel pump instead, and those need treated fuel circulating rather than a dry run, so check the manual.
The oil change adds a filter on most twin-cylinder engines. Change the filter with the oil, not separately, and wipe a smear of fresh oil on the new gasket before spinning it on. Hand tight is the spec for most of them.
Deck service is the big job. Grease the spindle fittings until fresh grease pushes out, check the belt for glazing and cracks, and remove each blade for sharpening. Torque every blade bolt to spec and check them again after the first spring mow.
Zero-turns deserve one specific note. Lower the deck before storage rather than leaving it raised. Holding the deck up for months keeps the lift springs and hydraulic lift under tension, which shortens their life.
Hydrostatic transmissions vary. Some have a serviceable reservoir with a fill cap and a level check. Others are sealed for life.
Know which one you own before you go looking for a dipstick that isn't there.
Tire pressure gets ignored and shouldn't. Low tires sit flat over winter and take a set. Pump them to the manual spec, usually 12 to 14 psi on riding mower rears, and check them again in spring.
Riders also have more wiring, more plastic trim, and more places for mice to hide. Rodent damage to a wiring harness is one of the most expensive repairs in this whole category, and soy-based wire insulation on newer machines makes it worse. Steel wool, traps, and a clean shed are cheap insurance.
Log the hour meter reading before you park it. It tells you when the next service is due and it makes spring planning a lot easier.
Storing a Battery-Electric Mower and Its Lithium Packs
Battery mowers remove the entire fuel and oil routine and replace it with one thing that costs more than a carburetor. The pack. On a 56V or 80V platform, a single battery can run well into the hundreds of dollars, and packs die from bad storage habits more often than from wear.
The charge level is the whole game. Lithium-ion cells age fastest at the extremes, so storing at 100 percent for months is genuinely harmful, and storing at 0 percent is worse. Something in the middle is where they want to live.
| Storage state of charge | What happens over a winter |
|---|---|
| 100 percent | Accelerated capacity loss, permanent |
| 80 percent | Acceptable, mild degradation |
| 50 to 60 percent | Ideal for months of storage |
| 20 percent | Safe short term, watch for drain |
| 0 percent, deeply discharged | Cells may never recover |
Temperature is the second rule. Never charge a pack that's below freezing, because lithium plating during a cold charge damages the cells permanently. Store packs somewhere that stays above freezing and below about 80 degrees Fahrenheit if you can manage it.
An unheated shed in a hard-freeze climate is a poor home for a battery pack. Bring it inside. A closet, a shelf in the garage that stays above freezing, or a utility room all work better than a shed that hits zero.
Don't leave the pack on the charger for five months. Most chargers stop when the pack is full, but leaving it docked invites a slow trickle and unnecessary heat. Charge it to roughly half, unplug it, and set a reminder to check it once midwinter.
Lithium self-discharge is modest, so a midwinter top-up is usually enough.
Before storage, pull the pack and inspect it. Look for swelling, cracks, or a damaged casing. Clean the contacts with a dry cloth.
A pack that's visibly swollen should be recycled, not stored and not charged.
The rest of the machine still needs attention. Clean the deck underside and sharpen the blade, exactly as you would on a gas mower. Check the self-propelled drive belt and clear any grass wrapped around the axle.
Keep water out of the electronics. Rinse the deck with a damp cloth or a gentle hose, never a pressure washer aimed at the motor housing or the battery compartment. Water intrusion into a control board is a common and avoidable failure.
For machines that use a sealed lead-acid pack instead of lithium, treat it like a car battery. Keep it charged, store it above freezing, and expect it to lose capacity over a few seasons no matter what you do.
Come spring, charge the pack to full indoors, let it reach room temperature first, then install it and run the mower under light load for a few minutes. Check the blade bolt torque before the first cut, since vibration over a season can loosen it.
Mistakes That Turn Winterizing Into a Spring Repair Bill
Most winterizing failures are quiet. Nobody notices them in October, and everybody notices them in April when the engine coughs and quits. These are the ones that fill repair queues every spring.
The Tipping Mistake That Hydrolocks an Engine
Tipping a mower the wrong way can cost you an engine. Tip it air filter side down and oil runs out of the crankcase, through the breather, into the intake tract, and down into the cylinder.
Two bad things happen at once. The paper air filter soaks up oil and starts choking airflow, and the cylinder collects liquid oil that cannot compress. Turn that engine over and you are asking a connecting rod to squeeze a liquid.
Rods bend. Sometimes they snap clean through.
The fix takes five seconds once you know it. Always tip with the air filter and carburetor side facing up. Better still, do not tip the machine at all.
Use the oil drain plug, or a cheap suction pump down the dipstick tube.
If your manual says never tip this model, believe it. Some carburetor designs dump fuel into the intake even when you tip the right way.
If it has already happened, do not hit the starter. Pull the plug, ground the boot, and turn the engine over slowly by hand to push the oil out. Clean or replace the plug and the air filter before you try to start it.
Fuel and Battery Errors That Quietly Kill Equipment
None of these announce themselves. They just make spring expensive.
- Dosing stabilizer by fuel level. Stabilizer treats the tank volume. Half a tank still needs a full dose.
- Adding stabilizer to old gas. Additives slow degradation. They do not reverse it.
- Running the engine for thirty seconds. Treated fuel has to actually reach the bowl. Give it three to five minutes.
- Leaving the battery connected and ignored. Parasitic drain plus cold plus normal self-discharge equals a sulfated battery by March.
- Charging a frozen lithium pack. Cold charging causes permanent plating damage. Let the pack reach room temperature first.
- Storing a lithium pack at full charge. Months at 100 percent is the fastest way to lose capacity.
- Leaving the pack docked on the charger all winter. Charge it to about half, then unplug.
- Pouring last year's gas into a fresh tank. Diluting stale fuel spreads the problem instead of solving it.
Storage Mistakes That Rust a Deck or Crack a Hose
- Wrapping the machine in a plastic tarp. It traps moisture and lets condensation form on cold metal.
- Parking on bare concrete. Concrete wicks dampness upward and holds it against the deck.
- Covering it wet. Wash the deck, then let it dry fully before anything touches it.
- Pressure washing near the engine. Water in a control board or a spindle bearing ends the season early.
- Leaving caked grass under the deck. Grass holds water against bare steel. That is where rust starts.
- Skipping the blade torque spec. Under-torque loosens, over-torque strips threads. Both ruin your spring.
| Mistake | What it costs you |
|---|---|
| Tipped filter-side down | Hydrolock, bent rod, fouled plug |
| Untreated E10 in a sealed bowl | Varnished jets, no start |
| Battery left connected all winter | Sulfated battery, full replacement |
| Lithium stored at 100 percent | Permanent capacity loss |
| Plastic tarp over a damp deck | Rust bloom and mold |
| Mice in the air box | Chewed wiring, blocked intake |
Safety Rules: Carbon Monoxide, Fuel Storage, and Blade Contact
Three hazards cause almost every serious winterizing injury. None of them are exotic, and all three are easy to eliminate with a habit or two.
Carbon monoxide is the one that kills without warning. It has no smell, no color, and no taste. A small engine produces it in volume, and an attached garage leaks that gas straight into the house through gaps around the door and the ceiling.
Never run a mower indoors, even with the garage door open. "Just for a minute to burn off the fuel" is how people end up in an emergency room. Do the run-dry step outside, on the driveway.
If your garage shares a wall or a floor with living space, put a CO alarm in the room above it. OSHA treats engine exhaust in enclosed spaces as an immediate hazard for good reason.
Fuel handling is the second hazard. Gasoline vapor is heavier than air, so it settles along the floor and finds ignition sources you forgot existed.
- Fill containers and tanks outdoors, never in a closed garage.
- Let the engine cool completely before refueling or draining the bowl.
- Use only approved, labeled, spill-proof containers with the cap seated.
- Keep fuel away from water heaters, furnaces, pilot lights, and anything with a spark.
- Bond the container to the machine when fueling in dry weather, because static is a real ignition source.
- Follow local fire code limits on how much fuel you can store. NFPA 30 is the framework most jurisdictions build on.
The blade is the third hazard, and it is the one people get complacent about. A mower blade holds enough stored energy to sever fingers, and it does not care that the engine is off.
Pull the spark plug boot before your hands go anywhere near the deck. Even a shut-down mower can fire if the blade spins and the magneto happens to be in the right position.
Support the machine on solid blocks or jack stands. Never trust the lift lever or a hydraulic hold to keep a deck up while you work under it. Wear gloves and eye protection, keep the discharge chute and all shields in place per ANSI/OPEI B71.1, and clear the chute with a stick rather than a hand.
Batteries add a quieter set of risks. Lead-acid cells vent hydrogen, so never lean a metal tool across the terminals or smoke near a charging battery. Disconnect the negative cable first and reconnect it last.
Lithium packs with swelling, cracks, or a hot casing get recycled, not stored.
Finally, treat used oil and stale fuel as hazardous waste. Neither belongs in a drain, a storm sewer, or on gravel. Municipal collection sites take both, and most auto parts stores accept used oil year round.
What It Costs: DIY vs Shop Winterization and the Real Price of a Gummed Carb
Here is the honest arithmetic. Winterizing a mower yourself runs a few dollars in materials if you already own basic tools. Paying a shop runs a lot more, and skipping the job entirely runs the most.
| Service or item | Typical cost range |
|---|---|
| DIY materials (stabilizer, oil, plug, filter, fogging oil) | $30 to $60 |
| Shop winterization service | $75 to $150 |
| Carburetor clean or rebuild | $150 to $300 |
| Carburetor replacement, parts and labor | $200 to $450 |
| Fuel line and primer bulb kit | $20 to $60 |
| 12V starting battery | $40 to $120 |
| Replacement lithium pack (56V to 80V) | $100 to $350 |
Shop labor is what moves those numbers. Dealer and independent small-engine rates have climbed steadily, and as of 2026 many shops bill $90 to $140 an hour. Diagnostic time, parts markup, and pickup and delivery all get layered on top.
Spring also brings a backlog. Late April and early May are the busiest weeks of the year for small-engine service, and a two-week wait is normal. That delay is its own cost if you have grass that will not wait.
A few things drive most of the bill:
- Ethanol damage. A carburetor sitting with untreated E10 in the bowl needs a teardown, not a tune-up.
- Parts availability. Off-brand carburetors often cost half as much and arrive with jets drilled to the wrong size.
- Rust in steel tanks. Flaking scale clogs the fuel filter repeatedly, which turns a one-visit repair into three.
- Wiring damage. Rodent chewed harnesses are among the priciest small-engine repairs, and they are almost always preventable.
Where should you spend and where should you save? Save on fogging oil substitutes and generic oil. Spend on OEM carburetor parts, a battery maintainer, ethanol-free fuel if you can get it, and a torque wrench for the blade bolt.
The same logic applies to any mechanical repair, whether it's premium suspension components or a carburetor kit. Cheap parts usually cost more the second time.
Spring Start-Up: The De-Winterization Checklist
The first warm Saturday is not the moment to improvise. Work through this in order and you will catch most problems before the engine ever fires.
- Inspect before you touch anything. Look for mouse nests in the air box, chewed wiring, cracked fuel lines, and oil spots under the machine.
- Deal with the old fuel first. If the tank held untreated fuel all winter, drain it into an approved container and start fresh. If it was treated, top it off with new fuel.
- Check the oil level. Pull the dipstick and look at the color. Milky oil means moisture or a blown head gasket, and that is a repair, not a top-off.
- Reinstall the battery. Clean the terminals, charge it fully indoors first, and connect the negative cable last.
- Look at the spark plug. Clean or replace it, and set the gap to your manual's spec, commonly around 0.030 inches.
- Confirm the air filter is clear. This is the step where stored mowers surprise people. A nesting mouse can fill an air box in a few weeks.
- Refit the boot and start it. Prime it per the manual, set the choke, and give it a few pulls.
- Let it idle for two or three minutes. Listen for surging or misfires before you add load.
- Re-torque the blade bolt and check tire pressure. Vibration over a season loosens fasteners, and stored tires take a set.
- Make the first cut a little high. Taller grass recovers better, and it gives you a margin if the deck is set wrong.
| Symptom | Likely cause | First move |
|---|---|---|
| Cranks but never fires | No spark or no fuel | Check plug and fuel flow |
| Fires then dies | Clogged jet or empty bowl | Clean the carburetor |
| Surges at idle | Lean mixture or vacuum leak | Check gaskets and fuel lines |
| Blue smoke for a minute | Fogging oil burning off | Nothing, it clears |
| Engine won't turn over | Hydrolock or dead battery | Pull the plug, check the battery |
| Black sooty plug | Rich running, choked intake | Clean the air filter, check the choke |
Frequently Asked Questions
Can I winterize a mower without changing the oil?
You can skip it, but you shouldn't. Used oil carries moisture and acidic combustion byproducts that sit against bearings and cylinder walls all winter. Change it while the engine is warm from a final run, and the fresh oil protects the internals until spring.
It takes fifteen minutes and costs a few dollars.
Do I really need to run the carburetor dry?
Only if your mower has a fuel shutoff valve or a bowl drain screw. With a valve, closing it and letting the engine die is the cleanest protection available. If your carburetor is sealed, treated fuel is your only option.
Run stabilized gas through it for three to five minutes and leave it.
Is it safe to store a mower in an unheated shed?
Yes, with preparation. Unheated sheds swing in temperature, which drives condensation inside the tank and under covers. Treat the fuel, pull the battery, store the machine off the concrete, and cover it with something breathable.
Never use a plastic tarp, because it traps moisture against cold metal.
What happens if I skip winterizing for one season?
Often nothing visible, and sometimes a no-start in April. Untreated fuel left in a bowl can varnish metering jets within two to three months. Skipping one year raises your odds of a carburetor repair.
Skipping several years usually guarantees one, plus rust and a tired battery.
Should I store a mower with a full tank or an empty one?
Fill it nearly full if you are storing treated fuel. Air space is where condensation forms, so less air means less moisture. Empty and dry is the better choice only when you can genuinely run the carburetor dry through a shutoff valve or drain screw.
Half measures rarely work.
How long does the whole job take?
Plan about an hour for a gas push mower, including the oil change and blade work. A riding mower or zero-turn runs closer to two hours because of the extra blades, grease points, and larger fuel volume. Battery mowers take about twenty minutes if the deck is already clean.
