
The grass is knee-high, the sun's out, and the mower just stares back at you. If you're asking why wont my lawn mower start, here's the short version: nearly every no-start traces back to fuel, spark, air, or compression. Add a safety interlock that isn't being held and a battery that sat through winter, and you've covered most of what actually happens in real yards.
One number explains a lot of it. Gasoline starts going stale in roughly 30 days untreated, and the ethanol in E10 pulls in moisture and separates out over time, according to U.S. EPA fuel guidance.
That's why a mower that ran perfectly in October so often refuses to fire in April. Let's walk the diagnosis in the order a shop would, starting with the checks that cost nothing and take under a minute.
Why Wont My Lawn Mower Start
Most no-starts trace to stale fuel, a fouled plug, or a safety switch. Old gas gums up the carburetor within weeks. A wet or wrong-gap plug kills spark.
The blade brake bar must be held down. Check those three things before you buy any parts.
Why Your Mower Won't Start: The 60-Second Triage Before You Touch Anything
Before you pull a single tool out of the shed, run the free checks. Roughly half the mowers brought into small-engine shops for a no-start need nothing more than fresh gas or a bar that wasn't gripped properly. That's not a knock on the owner.
It's just where the odds sit.
Start with the five things that cost nothing.
| Check | What "good" looks like | Fast fix |
|---|---|---|
| Fuel level and shut-off valve | Tank at least a quarter full, valve open | Add fresh gas, open the valve |
| Engine oil | Reading between ADD and FULL | Top up to the right fill level before cranking |
| Safety bar, key, or fob | Bar pinned to the handle, key fully seated | Grip it hard, reseat the key |
| Choke or primer | Choke closed on a cold engine | Three primes, then stop |
| Air filter | Clean, dry, and seated in its housing | Tap out the dust, replace if soaked |
Now run the if/then logic.
If the tank is dry or the gas smells like varnish, stop here and jump to the fuel branch. If the oil is below ADD, top it up first, because many riders cut spark when the level drops. If the engine is cold and the choke isn't set, fix that before anything else.
If the air filter is packed with grass clippings, clean it, since a clogged intake chokes the engine before it ever fires.
One rule before you go further: don't crank for two minutes straight. You'll flood the cylinder, wash oil off the bore, and turn a five-minute fix into a fouled plug and a carburetor full of raw gas. Ten pulls, then diagnose.
Why the cheapest checks come first
Spark plugs cost under ten dollars and take five minutes. A carburetor rebuild takes an afternoon. Diagnostic order matters because it protects your wallet.
Test the free stuff, then the cheap stuff, then the parts that require disassembly.
What to have on the bench
You don't need a rolling toolbox for this. A plug wrench, a gap gauge or feeler set, an inline spark tester, a screwdriver, and a clean rag handle most no-starts. Add a compression gauge if you get past the obvious causes.
A fuel-safe catch can helps when you drain a tank.
Read the Symptom First: Dead Silence, Click-No-Crank, Cranks But Won't Fire, or Fires Then Dies
The noise your mower makes is a diagnostic clue, and it's the fastest one you'll get. Four symptom buckets cover almost every failure. Match yours and you can skip straight to the right system.
| Symptom | What it usually means | Start with |
|---|---|---|
| Nothing at all on the pull, or a pull that feels locked | Safety interlock, grounded kill wire, or a hydro-locked cylinder | Bar, key, then pull the plug |
| A single click, no crank | Weak battery, bad solenoid, or corroded terminals | Battery load test |
| Cranks hard but never catches | No spark or no fuel reaching the cylinder | Spark test, then fuel flow |
| Fires for a second or two, then dies | Fuel starvation, choked vent, or a dirty carb jet | Cap vent, filter, fuel line |
| Starts, surges, then shuts down | Lean mixture or a failing coil once hot | Carburetor, then coil |
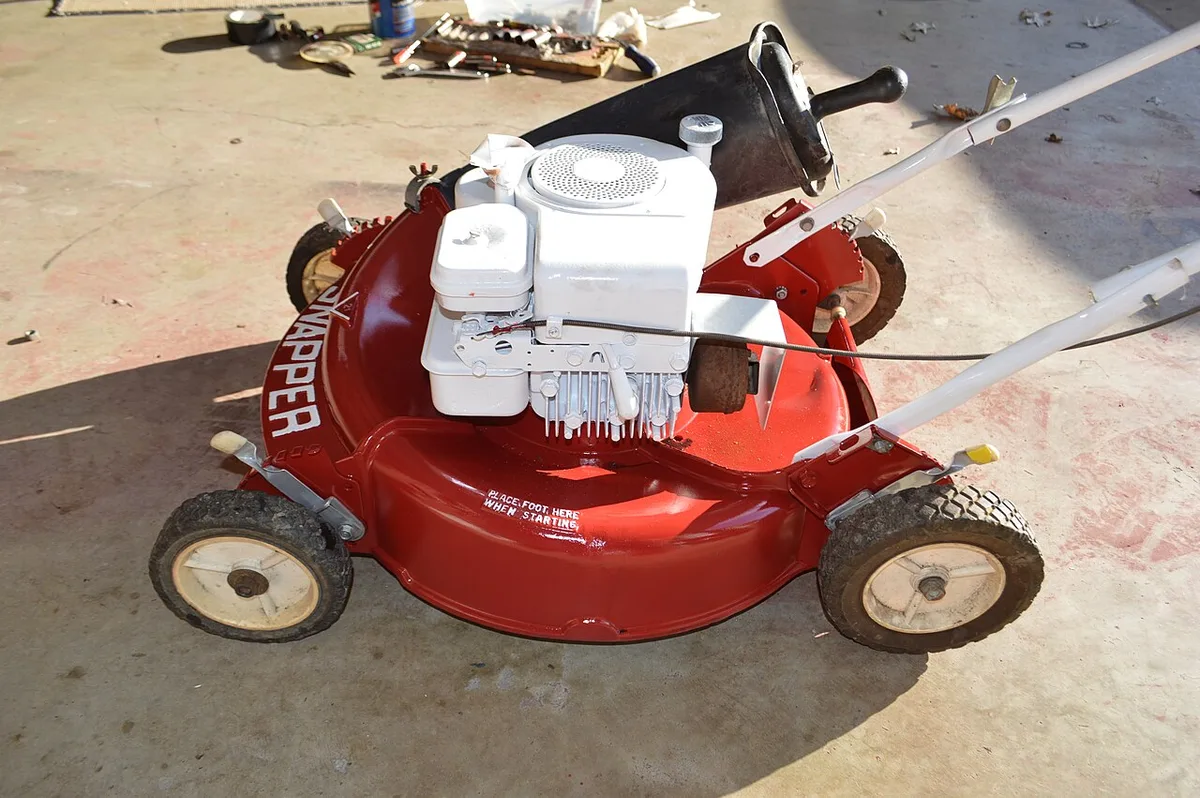
Image source: Wikimedia Commons / The 0utsider1 (CC BY)
What a sputter tells you that silence doesn't
A sputter means the engine got fuel and spark at least once. Something cut one of them off, or the mixture is wrong. Silence means the engine never got both at the same moment.
That single distinction cuts your search in half before you've opened the hood.
If you get a cough and a puff of smoke, think fuel delivery first. A gummed jet, a clogged filter, or a cap vent that won't let air in will all do it. If you get nothing, think spark and interlock.
Why "cranks fine but never catches" narrows it to two systems
Air and compression rarely fail suddenly. Filters clog slowly, and rings wear over years. A mower that ran last week and now cranks cleanly without firing almost always lost spark or fuel.
That's why the ignition and fuel systems get tested first in every shop.
There's one common exception. A plug that comes out black and wet points to oil fouling or flooding, and both can kill ignition on their own. Pull the plug early and read it.
Backfire or kickback on the pull cord
If the cord yanks back hard or the engine barks through the muffler, suspect ignition timing. The usual cause is a sheared flywheel key after the blade hits a root or a stump. That's a cheap part and a real repair, not a fuel issue.
Stop pulling at that point, because kickback can hurt your hand and shoulder.
The Four Things That Stop a Small Engine: Fuel, Spark, Air, Compression
Every gasoline engine needs the same four things in the same order. A four-stroke cycle pulls in air and fuel, squeezes it, ignites it, then pushes out exhaust. Break any one link and the engine doesn't run.
That's the entire logic tree.
| System | What it needs | Quick test | Usual culprit |
|---|---|---|---|
| Fuel | Fresh gas reaching the jet in the right mix | Pull the fuel line, check flow | Stale gas, clogged jet, blocked cap vent |
| Spark | A hot spark at the right moment | Inline spark tester or grounded plug | Fouled plug, bad coil, grounded kill wire |
| Air | Clean, unrestricted intake | Visual check of the filter and intake | Clogged filter, insect nest in the intake |
| Compression | Sealed combustion chamber | Compression gauge, 90 to 120 psi typical | Worn rings, burned valve, blown head gasket |
Fuel failures account for the largest share of no-starts in our review of manufacturer troubleshooting guides and shop write-ups. Spark is second. Air is third.
Compression is the rarest and the most expensive, which is exactly why you test it last.
Manufacturer specifications list the correct plug gap for most walk-behind engines between 0.020 and 0.030 inches. Set it with a gauge rather than eyeballing it. A plug gapped wide can misfire under compression even though it sparks fine in open air.
Testing spark without guessing
Pull the plug, reconnect the boot, and rest the threaded body against bare engine metal. Have someone pull the cord while you watch the electrode. A crisp blue snap is good.
A weak orange trickle, or nothing, is a fail. An inline tester makes this safer because the plug stays in the boot and away from the cylinder opening.
Don't hold the plug in your hand. Don't test near an open fuel container. And wear gloves.
The compression check most people skip
Spin the engine with a gauge threaded into the plug hole and the throttle wide open. Healthy small engines typically land between 90 and 120 psi. Under 60 psi, you're looking at valves, rings, or a head gasket, and that's a shop job on most mowers.
A word on starting fluid
A one-second whiff of spraying starter fluid can confirm a fuel problem fast. It is not a fix, and it is not a habit. Ether washes oil off the cylinder wall and can raise compression enough to damage a marginal engine.
Use it once to confirm, then find the real fault.
Branch 1: It Sat Since Last Fall, and Old Ethanol Gas Is the Prime Suspect
A mower that slept through winter is a fuel problem until proven otherwise. Ethanol-blended gas absorbs water from the air and, once saturated, separates into a watery layer at the bottom of the tank. That layer goes straight into the carburetor.
Meanwhile the lighter fractions evaporate and leave a varnish film inside the float bowl and main jet.
This gets worse in humid climates and in sheds that swing between freezing nights and warm days. Condensation forms in a partly empty tank, and the ethanol pulls it in. A tank left half full all winter is the classic setup for a spring no-start.
E15 is a separate trap. Most small-engine manufacturers approve E10 at most, and many owner's manuals state that anything above that voids the warranty. As of 2026, that language is still standard across the major engine brands, including Briggs & Stratton.
Read your manual before you fill from a pump labeled E15.
Fuel options, ranked for small engines
| Fuel type | Ethanol content | Storage life | Verdict for a mower |
|---|---|---|---|
| Ethanol-free (E0) | 0% | Longest, 6 months or more | Best choice if you can get it |
| E10 with stabilizer | Up to 10% | 1 to 3 months | Workable for regular use |
| E10 untreated | Up to 10% | Around 30 days | The usual cause of spring no-starts |
| E15 or higher | 15%+ | Not rated for small engines | Avoid, warranty risk |
How to clear stale fuel properly
- Disconnect the spark plug boot so the engine can't fire.
- Siphon or drain the tank into an approved container.
- Open the carburetor bowl drain, if your model has one, and catch the old fuel.
- Add a cup of fresh gas, swirl, and drain again to flush the varnish.
- Fit a new fuel filter if the old one looks dark or restricted.
- Fill with fresh fuel, prime, and start with the choke on a cold engine.
If the mower still won't fire after fresh fuel, the carburetor is gummed. Pull the bowl and look at the main jet. A jet plugged with green or brown film won't pass fuel no matter how good the gas in the tank is.
A primer bulb that never fills is another strong signal. It means fuel isn't reaching the carburetor at all. Check the filter, the line, and the cap vent before you blame the carb.
Preventing the repeat next spring
Run the tank dry before storage, or fill it to the brim with stabilized ethanol-free fuel. Full tanks leave no room for condensation. Start the engine one last time after adding stabilizer so treated fuel reaches the carburetor, not just the tank.
Then store the mower level, covered, and out of the weather.
Branch 2: It Died Mid-Cut After Running Fine, Now It Won't Refire
A mower that quit while hot and won't restart is a different animal from a spring wake-up. Heat, vibration, and debris are the suspects here. The engine was getting fuel and spark minutes ago, so something changed during the run.
Start with the fuel cap. A vented cap lets air in as fuel leaves the tank. When that vent clogs with grass dust or gets plugged by a swollen gasket, the tank pulls a vacuum and fuel flow stops.
Loosen the cap and listen for a hiss, then try starting. If it fires with the cap loose, replace the cap.
Next, look at the fuel filter and line. A filter full of rust and grit will pass enough fuel for a cold start but starve the engine once demand rises. A cracked or softened line can suck air instead of fuel.
Squeeze the line gently. If it feels spongy or shows cracks, swap it.
Symptom timing points to the culprit
| When it quits | Likely cause | Check |
|---|---|---|
| After 10 to 20 minutes of mowing | Failing ignition coil once hot | Spark test while hot |
| On slopes or rough ground | Debris in the float bowl, sticking needle | Bowl and needle valve |
| After hitting tall, thick grass | Overload, clogged filter, dull blade | Filter, blade sharpness |
| Right after refueling | Contaminated fuel, water in the tank | Drain and inspect |
| When the engine is hot and idling | Lean mixture, tight valve clearance | Carburetor adjustment, valve lash |
Coils fail when hot, and it fools people
An ignition coil can pass every cold test and still quit once it reaches operating temperature. That's why a mower "runs for fifteen minutes then dies" and starts fine the next morning. Test for spark immediately after it stalls, while the engine is still hot.
If the spark disappears when warm and returns when cold, the coil is the problem.
The low-oil shutdown on riders
Many riding mowers and zero-turns cut ignition when the oil level drops, and the sensor is doing its job. If your tractor cranks and won't fire after a long hot run, check the dipstick before you check anything electrical. Some models need the key cycled off and back on to reset the circuit.
Air and fuel both matter at full load
Tall, wet grass puts the engine under heavy load. A filter that's half clogged can feed the engine at idle and starve it under load. So can a deck packed with clippings, because it drags on the engine through the belt.
Clean the deck, clear a clogged intake, and sharpen the blade before you assume a mechanical failure.
When the plug tells the story
Pull the plug after a stall and read the electrode. Black and sooty means rich mixture or a restricted air path. Blistered white means lean and hot.
Wet with fuel means flooding or no spark. If it's wet with oil, you're dealing with a black, oily electrode and a worn engine rather than a fuel fault. That reading takes thirty seconds and saves hours.
Branch 3: You Just Tipped It or Swapped the Blade, So Think Flooded, Oil-Fouled, or Hydro-Locked
Tipping a mower is the second most common self-inflicted no-start after stale gas. Owner's manuals are blunt about it. If you must tilt the deck to scrape grass or reach the blade, keep the air filter side up and the carburetor side down.
Do it the other way and gravity sends engine oil where it doesn't belong. Oil creeps past the rings, through the breather, and into the intake, then pools in the cylinder and soaks the air filter. The result ranges from a smoky start to an engine that won't turn at all.
What each mistake actually causes
| What you did | What it caused | How it shows up |
|---|---|---|
| Tipped it carburetor-side up | Oil flooded the cylinder and filter | Hard pull, blue smoke, wet plug |
| Overfilled the crankcase | Oil pushed through the breather | Smoking, fouled plug, oil in the air box |
| Primed or choked it ten times | Raw fuel pooled in the cylinder | Wet plug, strong gas smell, no fire |
| Left it on its side overnight | Slow oil migration past the rings | Hydro-lock or a very hard pull |
| Reinstalled the blade upside down | Extra load and vibration | Starts but strains, poor cut |
A pull cord that won't move means stop
If the cord pulls out an inch and stops dead, don't yank harder. Liquid in the cylinder doesn't compress, and forcing the recoil can bend a connecting rod or snap the rope. That's hydro-lock, and it's a mechanical condition, not a fuel one.
Pull the spark plug first. If oil or gas runs out of the plug hole, you've confirmed it.
How to clear a flooded or hydro-locked engine
- Disconnect the spark plug boot and tuck it away from the plug hole.
- Remove the plug with a plug wrench.
- Pull the cord five or six times with the plug out to blow the cylinder clear. Cover the hole with a rag, because oil will spit.
- Dry or replace the plug. Clean the electrode with a rag and check the gap.
- Pull the air filter and inspect it. A filter soaked in oil won't pass air, so replace it.
- Check the oil level and drain any excess down to the FULL mark.
- Refit everything, set the choke, and try again with the throttle wide open and no priming.
Expect blue smoke for the first minute or two. That's residual oil burning off, and it's normal. If the smoking never stops, the crankcase is overfilled or the breather is routed wrong.
The flooded-engine reset most people miss
A flooded engine wants air, not more fuel. Hold the throttle wide open, leave the choke off, and pull. Many mowers fire within three or four pulls once the excess fuel clears.
Adding more prime at that point just repeats the problem.
If your plugs keep coming out wet and black, it's worth understanding what oil on the electrode is telling you before you replace another one.
Blade swap mistakes that turn into starting problems
A blade bolted on upside down still spins, but it cuts badly and loads the engine hard enough to feel like a power problem. The sharpened edge goes toward the grass, and the sail (the turned-up wing) goes up toward the deck.
Torque matters too. Most walk-behind blade bolts call for roughly 35 to 50 ft-lb, and riding decks often want more. Check your manual, because over-tightening crushes the blade adapter and under-tightening lets the blade spin on the shaft.
If the bolt won't budge after a season of wet grass, there's a right way to spin a stuck bolt free without rounding the head. Block the blade with a scrap of wood first. Never wedge your hand near it.
Branch 4: It Won't Even Crank, So Check the Interlocks, Battery, Solenoid, and Pull Cord
If the engine doesn't turn over, fuel and spark are irrelevant. Something is stopping the starter circuit, and on modern equipment that's usually a switch you haven't satisfied.
Manufacturers build in a chain of operator presence controls. The ANSI/OPEI B71.1 safety standard for consumer turf equipment covers these systems, and they exist because a spinning blade near a hand is a life-changing event. They also cause a huge share of "dead mower" calls.
| Interlock | What it does | How to satisfy it |
|---|---|---|
| Blade brake control bar | Cuts spark or brakes the blade when released | Grip it firmly against the handle |
| Seat switch | Kills the engine if you leave the seat with the blade on | Sit down, or set the brake and disengage the deck |
| PTO or deck switch | Blocks starting with blades engaged | Push the blade lever to off |
| Parking brake or neutral switch | Requires the brake set or transmission in neutral | Set the brake, shift to neutral |
| Low-oil sensor | Cuts ignition when oil is low | Check the dipstick, top up |
| Key, safety key, or fob | Main power plus a physical interlock | Seat it fully, check the pack is latched |
The bar, the seat, and the PTO people forget
The blade brake bar is the number one culprit on walk-behinds. It has to be pinned tight to the handle, not just touched. Cables stretch over a season, so a bar that used to engage now barely moves the switch.
On riders, the sequence is brake, neutral, PTO off, then crank. Skip one and you get a click or nothing at all. Start the tractor with the deck disengaged every time and you'll never fight this.
There's also a switch under the seat that fails from compressed foam and grass dust. If your tractor dies the moment you shift your weight, that switch is the reason.
Click but no crank: battery, solenoid, or corroded terminals
A single loud click with no turnover points at the starter circuit. Work through it in order, cheapest first.
- Terminals. Pull the cables and look for white-green corrosion. Clean both posts and the ground strap at the frame.
- Battery voltage. A healthy 12V lawn battery rests near 12.6V. At 12.4V it's about half charged, and below 12.2V it may not crank.
- Load test. Voltage that reads 12.6V at rest but drops under 10V while cranking means a dead cell. Replace the battery.
- Solenoid. If the battery is strong and you still get one click, the solenoid is suspect. A careful jump across its two large terminals with an insulated tool will spin the starter if the solenoid is the failure. Keep the brake set, the deck off, and your hands clear.
- Starter motor. A worn starter draws hard and cranks slowly, or nothing at all. Bench testing it takes ten minutes.
Most riding batteries run 200 to 350 cold cranking amps. If yours has soldiered through four or five winters, it owes you nothing.
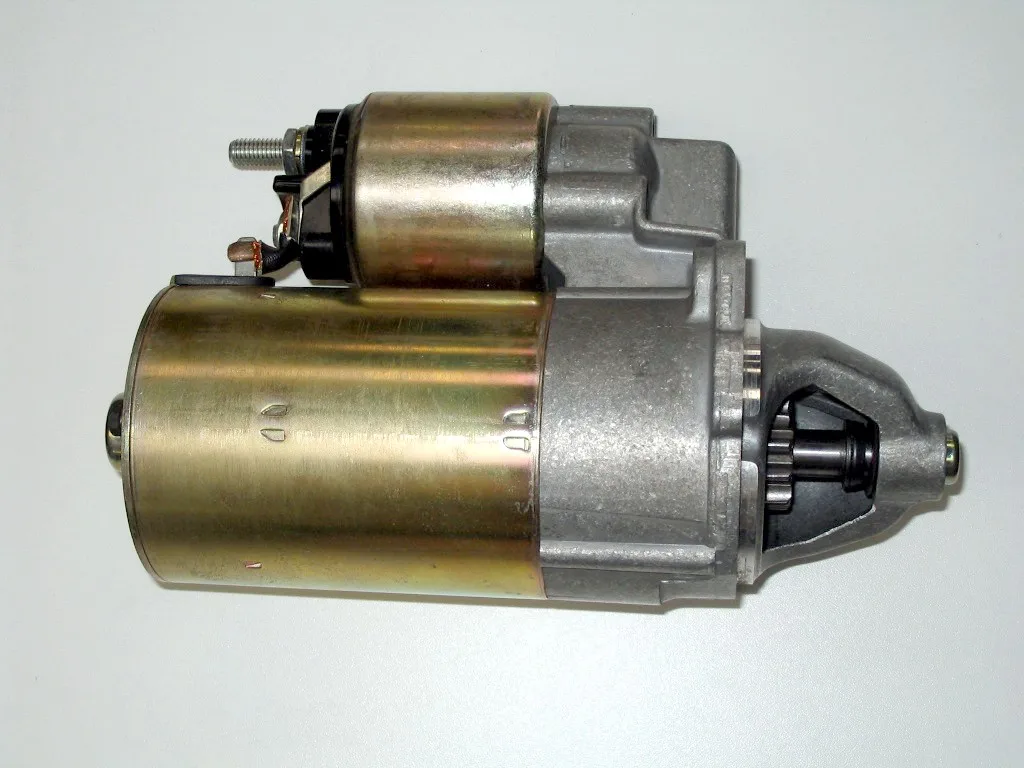
Image source: Wikimedia Commons / Willdre 00:20, 8 February 2007 (UTC) (CC BY-SA)
A pull cord that pulls too easy or not at all
A cord that comes out freely with no resistance means the rope has snapped inside the recoil housing, or the recoil pawls aren't engaging the flywheel cup. A cord that won't return has a broken recoil spring.
Both are cheap fixes, but they're fiddly. The spring is under tension and will bite. If you've never opened a recoil assembly, a replacement unit often costs less than the frustration.
One more possibility: the flywheel brake. Some engines use a brake pad that clamps the flywheel when the bar is released. If that pad sticks, the engine drags and won't spin.
Testing Spark Without Lighting Yourself Up
Spark testing has one real hazard. A plug lying loose near spilled fuel or an open tank is an ignition source, and gasoline vapor travels. Work outside, let the engine cool, and wipe up any fuel before you start.
Here's the safe sequence.
- Pull the boot off the plug and clean around the plug hole so dirt doesn't drop into the cylinder.
- Remove the plug with the correct plug wrench.
- Inspect the electrode and the insulator. Read the color before you clean anything.
- Check the gap with a gauge or feeler set. Most small engines spec 0.020 to 0.030 inches.
- Refit the plug into the boot and rest the metal body against a bare bolt on the engine block.
- Pull the cord and watch the gap. You want a bright blue snap.
An inline spark tester does this better. The plug stays threaded in the head, the tester sits between boot and plug, and you watch a window flash while the engine turns. No loose plug, no exposed high voltage, no guessing.
What the plug is telling you
| Plug appearance | What it means | Next step |
|---|---|---|
| Light tan or gray-brown | Healthy combustion | Refit or replace on schedule |
| Dry black soot | Rich mixture, clogged filter, choke stuck on | Clean the air path, check the choke |
| Wet with fuel | Flooding or no spark | Dry it, test for spark |
| Wet with oil | Worn rings, overfilled sump, tipped mower | Check oil level, run a compression test |
| Blistered white or gray | Lean and running hot, wrong heat range | Check the jet and the plug spec |
| Crusty deposits | Long service life, oil additives | Replace the plug |
No spark with a known-good plug
Now you're chasing the ignition circuit, and the order matters.
- The boot. Corrosion inside the boot or a broken spring clip kills spark quietly. Twist it, look inside, and check that it snaps back onto the plug.
- The kill wire. This is the small wire running from the coil. Disconnect it at the coil and retest. If spark returns, something in the wire, the switch, or a safety switch is grounding the coil. That's a diagnosis, not a part.
- The coil air gap. The magneto has to sit close to the flywheel. Most specs land around 0.008 to 0.012 inches, and a business card makes a decent field gauge. Too wide and the spark gets weak or disappears.
- The flywheel key. A sheared key throws off timing, which shows up as backfire, kickback, or a mower that pops but never runs. Pull the flywheel nut and look.
Coils fail in a frustrating way. They work cold and quit hot, which is why a mower can run twenty minutes and then refuse to restart. Test for spark the moment it dies, before it cools.
Fuel Delivery Checks: Cap Vent, Filter, Lines, and a Carb That's Gummed Shut
Spark confirmed? Move to fuel. The goal is simple: prove fuel gets from the tank to the carburetor in a steady flow, then prove the carburetor can turn that fuel into a mist.
Start with the flow test. Pull the fuel line off the carburetor inlet, point it into a jar, and open the shut-off valve. You should see a steady stream, not a drip.
Weak or no flow narrows the problem to the tank side, and the carburetor gets a pass for now.
The five tank-side checks
- Cap vent. Loosen the fuel cap and try again. A hiss or a sudden improvement means the vent is plugged. Replace the cap rather than poking at it.
- Shut-off valve. Half-open valves are common after winter storage. Open it fully.
- Fuel filter. Most inline filters have a flow arrow. Fit them backward and flow suffers, and a filter full of rust dust starves the engine under load.
- Fuel line. Ethanol hardens and cracks older rubber. Squeeze the line. Spongy, cracked, or collapsing lines suck air instead of fuel.
- Tank debris. Grass, rust, and water sit at the bottom. A flashlight into the filler neck tells you plenty.
If flow is strong at the carburetor inlet but the engine still won't fire, the problem is inside the carburetor.
Inside a gummed carburetor
Ethanol leaves a film that plugs the smallest passages first. The main jet and the emulsion tube are usually the first to go, then the idle circuit, then the needle valve.
Drop the float bowl using the bolt on the bottom. What you find tells the story. Clear fuel with a little dirt means a partial blockage.
Brown or green varnish, or a bowl full of jelly, means a rebuild.
From there, the sequence is straightforward.
- Remove the bowl and the float pin.
- Take out the needle valve and inspect the tip for a wear ring.
- Unscrew the main jet and hold it up to the light. You should see a clean circle.
- Spray carburetor cleaner through every passage, then chase them with compressed air.
- Never drill or poke a jet with wire. It's sized to a fraction of a millimeter and you'll richen the mixture permanently.
- Reassemble with a fresh bowl gasket and set the float height to spec.
A rebuild kit usually runs $10 to $20. A complete replacement carburetor runs $20 to $60 and takes less time. On a ten-year-old push mower, swapping the whole carburetor is often the smarter call.
Primer bulb and choke plate checks
A primer bulb that stays flat or never fills with fuel is telling you fuel isn't reaching the carburetor. Look upstream at the filter and line, and check the bulb itself for cracks.
On engines with a manual choke, watch the plate move as you move the lever. A cable that's stretched or a plate stuck open makes cold starts nearly impossible. Auto-choke models use a thermostatic element that can fail, and those engines often need the choke held by hand to confirm the diagnosis.
Air and Compression: The Two Checks Most People Skip
Air is the cheap one, and it gets ignored because it fails slowly. A filter that's half plugged still lets the engine idle. It starves the engine under load, which is why your mower starts fine and then bogs down in tall grass.
Pull the filter and hold it up to the light. If you can't see daylight through it, replace it. Don't blow it out with compressed air, because that drives dirt into the pleats and can tear the paper.
| Filter type | Where you see it | Care |
|---|---|---|
| Paper pleated | Most modern walk-behinds and riders | Tap gently, replace when dirty |
| Oiled foam | Older engines and pre-cleaners | Wash, dry, re-oil lightly |
| Dual element | Riders and commercial units | Foam pre-cleaner plus paper main |
| Washable synthetic | Some cordless and premium models | Rinse, dry fully, refit |
Foam filters need oil, but lightly. A foam filter wrung out wet with oil chokes the engine and can pull oil into the intake. A few drops worked through the foam, then squeezed until it's barely tacky, is right.
While the housing is open, look for mud dauber nests, mouse nests, and packed grass. Insects love an intake that sits all winter. Also check the blower housing and cooling fins, since a blocked cooling path overheats the engine and can warp a head.
Compression: the check that ends the argument
Compression testing tells you whether the engine can physically make power. Warm the engine if it will run, then pull the plug and thread in the gauge. Hold the throttle wide open and spin the engine five or six times.
Healthy small engines typically read 90 to 120 psi. A reading above that isn't a bonus. Carbon buildup raises it and causes detonation.
| Reading | What it suggests | What to do |
|---|---|---|
| 90 to 120 psi | Healthy | Move on to fuel and spark |
| 60 to 90 psi | Worn rings or a leaking valve | Run a leak-down or wet test |
| Under 60 psi | Valves, head gasket, or piston damage | Shop diagnosis |
| Wildly high | Heavy carbon deposits | Decarbon or replace the head |
The wet test is a useful trick. Squirt a teaspoon of clean oil into the cylinder and retest. If compression jumps, the rings are leaking.
If it barely changes, the valves or the head gasket are the problem.
One caveat that trips people up: many small engines have an automatic compression release that bleeds pressure during the pull. That can produce a low reading on a perfectly healthy engine. A leak-down test or a running engine is the tiebreaker, not a single number.
Low compression is where DIY usually ends. Valve lapping, ring replacement, and head gasket work need torque specs, a clean bench, and a machine shop for anything warped. Most homeowners are better off paying for a diagnosis than guessing at a teardown.
Rebuild the Carb or Replace It, Plus the Other Cheap-Fix-vs-Shop Calls
Once you've confirmed the carburetor is the problem, you hit a real fork in the road. A rebuild kit costs $10 to $20 and an afternoon. A new carburetor costs $20 to $60 and maybe forty minutes.
A shop rebuild runs $80 to $150 and a two-week wait in most metro areas.
Our read of the parts pricing across the major small-engine platforms is that replacement usually wins on modern walk-behinds. The carburetors on budget push mowers are often cheaper to swap than to clean properly. Rebuilding makes more sense on older, rebuildable castings and on multi-cylinder rider engines where a new unit costs real money.
| Option | Typical cost | Time | Best for |
|---|---|---|---|
| Rebuild kit | $10 to $20 | 1 to 3 hours | Older carbs with good castings, patient owners |
| New aftermarket carb | $20 to $60 | 30 to 45 minutes | Common push mowers and riders |
| New OEM carb | $60 to $150 | 30 to 45 minutes | Premium engines, warranty-sensitive units |
| Shop rebuild or replace | $80 to $150 plus parts | 1 to 2 weeks | Anyone who doesn't want the job |
When a rebuild is the right call
Rebuild if the throttle shaft feels tight, the casting is clean, and the carburetor has serviceable mixture screws. Older Briggs & Stratton and Kohler units often fall here. They're built to come apart and go back together with a kit and a gasket.
Skip the rebuild if the throttle shaft wobbles or the body is corroded white. A worn shaft leaks air past the throttle plate and no kit fixes that. Corrosion inside the bowl means the passages are already gone.
When to just buy the carburetor
Buy new when the mower is under ten years old and the carburetor is a common pattern. The aftermarket supply for these is deep and cheap. Check the engine model and type numbers stamped on the blower housing before you order, because a "fits most" listing is how people end up with the wrong bolt spacing.
Watch the fuel solenoid on newer carbs. Many engines have an anti-backfire solenoid on the bowl, and it needs power to open. If the wire is disconnected or the solenoid fails, the engine gets no fuel at all and it looks exactly like a gummed carb.
The other DIY-versus-shop calls
Here's where the money actually goes. Some jobs pay you back in an hour. Others eat a weekend and end at the shop anyway.
| Job | DIY difficulty | Typical shop price | Our call |
|---|---|---|---|
| Spark plug | Very easy | $15 to $30 | Do it yourself |
| Air filter, fuel filter | Very easy | $20 to $40 | Do it yourself |
| Fresh fuel and carb clean | Moderate | $60 to $120 | Try it first |
| Carburetor swap | Moderate | $120 to $200 | Do it yourself |
| Ignition coil | Moderate | $100 to $180 | Do it yourself on a push mower |
| Starter solenoid | Easy | $80 to $150 | Do it yourself |
| Recoil starter assembly | Moderate | $70 to $130 | Do it yourself with a new unit |
| Battery and terminals | Very easy | $90 to $160 | Do it yourself |
| Valve adjustment | Hard | $150 to $250 | Shop, unless you've done lash work |
| Head gasket or rings | Hard | $250 to $450 | Shop on anything you plan to keep |
A word on the coil job. Setting the magneto air gap takes patience and a feeler gauge, not skill. Most people can do it in half an hour with a business card and a socket set.
The part is $15 to $40.
Deck and blade work is the one place where access matters more than talent. Getting a mower up to a comfortable working height makes the whole job safer, and a pair of timber ramps you build yourself solves that for the price of lumber. Block the wheels and never trust a jack alone.
Cordless Mower Won't Start: Safety Key, BMS Lockout, and Charger Faults
A battery mower that won't run has nothing to do with fuel, and that confuses people who've only owned gas machines. The failure points are the pack, the safety key, the controller, and the charger. Work through them in that order.
Start with the safety key. Most cordless mowers ship with a removable key or plug that has to be seated before the blade will spin. It's the electric version of the blade brake bar, and it's the single most common reason a cordless mower "dies" between seasons.
Pull it, look for corrosion or grass in the socket, and push it back in firmly.
The power-on sequence that catches everyone
Cordless mowers use a two-step start. You press a button, then squeeze the bar, or vice versa, within a couple of seconds. Do it out of order and nothing happens.
There's no sound, no click, no hint.
Check the manual for your model's exact sequence. Then check the blade bar switch itself, because the microswitch under it fails after a few seasons of dust and vibration.
| Symptom | Likely cause | What to check |
|---|---|---|
| Completely dead, no lights | Safety key out, pack not latched, fuse blown | Key, pack seating, fuse |
| Lights on, blade won't spin | Bar switch or start sequence | Two-step sequence, bar microswitch |
| Runs 5 to 10 minutes then stops | Thermal cutoff or pack overheating | Clean cooling vents, let it cool |
| Cuts out in tall grass | Overcurrent protection | Raise deck height, slow down |
| Charger shows a fault light | Pack fault or charger fault | Try a second pack or charger |
| Charges for a minute then stops | Cell imbalance, BMS lockout | Full discharge and recharge cycle |
What a BMS lockout actually is
The battery management system is the circuit board inside the pack. It watches cell voltage, temperature, and current, and it will shut the pack down to protect itself. Deep discharge is the usual trigger.
A pack left at zero percent all winter can drop below the BMS threshold and refuse to accept a charge.
Some packs recover with a slow overnight charge on the correct charger. Others need a reset, which varies by brand and often means holding the pack button for several seconds. If the charger flashes an error code, look that code up in the manufacturer's documentation rather than guessing.
Heat is the other trigger. Packs that sit in a hot shed or get left in direct sun derate hard. A mower that quits after ten minutes on a 95°F day is usually protecting the pack, not broken.
Clean the vents, work in the cooler part of the day, and let the pack cool before recharging.
Controller and motor faults
If the pack tests good and the key is seated, the motor controller becomes the suspect. Symptoms include a dead mower with a charged pack, a blade that stutters, or a machine that runs only at full throttle. Controllers aren't usually serviceable at home, and they're model-specific.
Check the obvious first. Look for a blown fuse in the battery compartment or under the housing. Inspect the wiring harness for rodent damage, which is common on equipment stored in sheds.
Then check that the blade isn't seized by a wrapped rope, wire, or thick vine, because a jammed blade trips the overcurrent protection instantly.
Diagnostic tools have gotten cheaper and smarter across the board, and the same thinking applies here as when you're choosing a scan tool for a car. Buy the tool that reads the system you actually own, not the one with the longest feature list.
Mistakes That Turn a Ten-Minute Fix Into a $150 Shop Bill
Most expensive no-start repairs start as cheap ones that went sideways. These are the ones we see repeated in shop write-ups and owner forums.
- Firing the parts cannon. Buying a coil, a carburetor, and a solenoid before testing anything. Test first, buy second.
- Poking a jet with wire. The main jet is sized to a fraction of a millimeter. Scratch it and the engine runs rich forever.
- Cranking for two minutes straight. This floods the cylinder, washes oil off the bore, and fouls the plug.
- Tipping it the wrong way. Carburetor side up sends oil into the intake and air filter.
- Testing spark next to an open fuel can. Vapor plus a spark is how garages catch fire.
- Holding the plug in your hand during a spark test. The ignition system will happily bite you.
- Using ether as a routine starting aid. It washes cylinders dry and can damage a marginal engine.
- Leaving E15 in the tank. Many manuals state it voids the warranty, and it degrades faster in small tanks.
- Skipping the stabilizer, then storing half full. A partly empty tank condenses water all winter.
- Bypassing a safety switch. It's tempting and it's how people lose fingers. Fix the switch instead.
- Wrong plug heat range. A cross-referenced plug that's one step off runs too hot or fouls constantly.
- Over-torquing the blade bolt. It crushes the adapter and makes the next removal a fight.
- Pressure-washing the engine. Water finds the coil, the connectors, and the air intake. Hose it, don't blast it.
- Ignoring the oil level. Many riders cut spark when the level drops. That's a feature, not a fault.
The one that costs the most
Running an engine indoors to "see if it fixed it" is the mistake with the worst outcome. Carbon monoxide is colorless and it kills people in garages every year. The OSHA guidance on portable equipment and CO is worth reading once.
Start it outside, every time, even for ten seconds.
What a $150 bill actually contains
Shop rates for small-engine work typically land between $80 and $120 an hour. A tune-up with a plug, filter, oil change, and carb clean runs $80 to $150. Add a pickup and delivery fee and you're near $200 before any parts.
That's fine money for a $1,500 zero-turn. It's hard to justify on a $250 push mower. Know the replacement cost of your machine before you authorize the work.
When to Stop Diagnosing and Load It in the Truck
There's a point where more testing stops being smart. Here's how to recognize it.
Stop if compression is under 60 psi and the wet test barely moves the needle. That's valves, rings, or a head gasket, and it means a teardown. On a walk-behind, the math rarely works.
Stop if the engine kicked back hard and the flywheel key is sheared, but the crank snout is scored or the keyway is wallowed. A fresh key in a damaged keyway will shear again within a season.
Stop if you find metal in the oil, a hole in the block, or oil weeping from the crankcase seam. Those are terminal on air-cooled engines.
Stop if the deck is rusted through at the spindle mounts. The engine might be fine and the machine still isn't safe.
| Finding | Fix or replace | Why |
|---|---|---|
| Fouled plug, stale fuel | Fix | Cheap and quick |
| Gummed carburetor | Fix | Under $60 in parts |
| Bad coil or solenoid | Fix | Under $40 in parts |
| Sheared flywheel key, clean keyway | Fix | A few dollars |
| Compression under 60 psi | Usually replace on push mowers | Teardown cost exceeds value |
| Bent connecting rod from hydro-lock | Replace | Crank and rod both damaged |
| Cracked block or crankcase | Replace | Not economically repairable |
| Deck rusted through | Replace | Structural safety issue |
The 50 percent rule
A useful shortcut: if the repair quote is more than half the price of a comparable new machine, replace it. That's not a hard rule, but it keeps you honest when a shop calls with a number.
Add age and hours to the decision. A mower with 500 hours on a well-maintained engine still has life in it. A ten-year-old unit with a rusted deck, a leaking seal, and a tired coil is a money pit with a handle.
What to check before you pay for a diagnosis
Ask the shop for a compression number and a spark confirmation before they start replacing parts. Any decent tech will give you both. If they won't, find another shop.
Also ask about turnaround. In peak spring, dealer service queues can run three to four weeks. If your grass is already tall, a $60 carburetor and an afternoon might beat a month of waiting.
Frequently Asked Questions
Why does my mower start on starter fluid and then die?
That's proof of a fuel delivery problem. The engine has spark and compression, but no fuel is reaching the cylinder. Look at the carburetor jet, the fuel filter, the line, and the cap vent.
Starter fluid is a diagnostic, not a repair, so don't keep using it as one.
Can I use E15 or leftover gas from my car?
No. Most small-engine manuals approve E10 at most, and many state that higher ethanol blends void the warranty. Leftover car gas is often months old and already degraded.
Use fresh fuel at the correct octane, and ethanol-free if you can find it.
My mower ran fine last week, so what changed?
Something failed suddenly, which points to spark or fuel delivery rather than wear. The usual suspects are a fouled plug, a coil that quits when hot, a plugged cap vent, or debris in the float bowl. Test spark first, then fuel flow at the carburetor inlet.
Why does my mower only start when I loosen the gas cap?
Your cap vent is plugged. The vent lets air into the tank as fuel leaves. When it clogs, the tank pulls a vacuum and fuel flow stops.
Replace the cap rather than trying to clear it, because a swollen gasket usually won't seal again.
Is it worth fixing a ten-year-old mower?
It depends on compression and the deck. A healthy engine with a solid deck is worth a $60 carburetor and a $25 coil. Low compression, a cracked block, or rust through the spindle mounts means replace it.
Use the 50 percent rule as your guide.
How long can gas sit in a mower before it causes problems?
Untreated E10 starts degrading in about 30 days. Stabilizer stretches that to one to three months. Ethanol-free fuel lasts considerably longer.
Anything older than a season should be drained and replaced before you chase other causes, because stale fuel mimics every other fault.
