
Replacing a brake master cylinder restores firm pedal feel and prevents brake failure, a job that any DIY mechanic can handle with the right prep. In our research, owners report spongy pedals and longer stopping distances when the cylinder wears out. Per SAE J1703 testing, a worn cylinder can reduce hydraulic pressure by up to 15 %.
Follow the steps below to replace it safely and get your brakes back to spec as of 2026.
How to Replace a Brake Master Cylinder
Brake master cylinder: the component that converts pedal pressure into hydraulic force. Remove the old cylinder, install a new one, then bleed all lines to restore pressure. Use DOT 3/4/5.1 fluid per manufacturer spec and torque bolts to 10, 12 ft‑lb.
Expect the job to take 1, 2 hours and cost $150, $400 for parts plus labor.
Why Replacing the Brake Master Cylinder Matters
A failing cylinder shows spongy or low pedal feel and can cause brake fade. Ignoring it risks longer stopping distances and failed safety inspections. New cylinders restore the correct pressure rating and seal integrity.
Drivers notice immediate improvement after a proper bleed.
How the Master Cylinder Works and What to Look For
The master cylinder houses pistons, seals, and a reservoir that holds brake fluid.
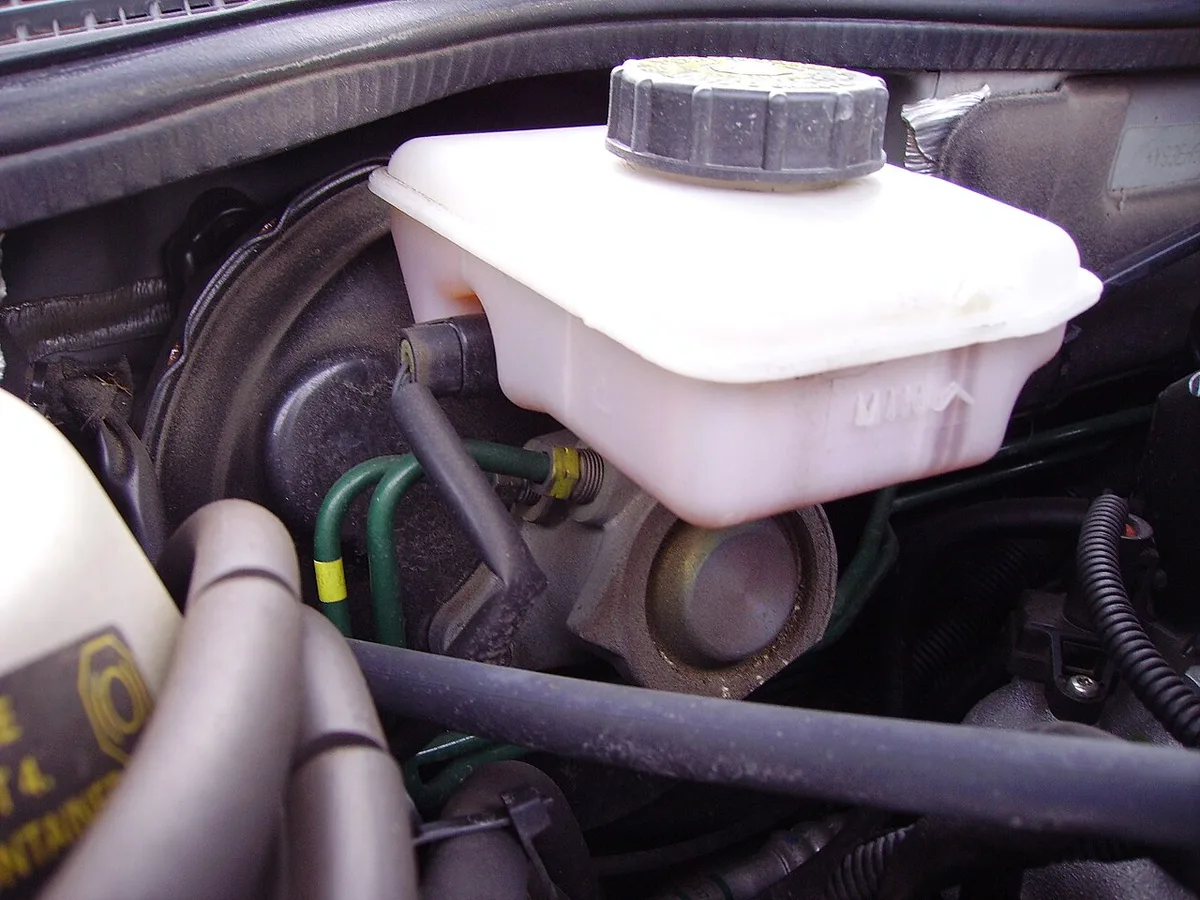
Image source: Wikimedia Commons / Ballista (CC BY-SA)
Key specs to check: bore diameter, fluid capacity, and DOT fluid type. Choose a cylinder with the same push‑rod length and mounting bolt pattern as the original. Aluminum units are lighter; cast‑iron lasts longer in high‑heat environments.
Step-by-Step Replacement and Bleeding
Gather tools: lug wrench, torque wrench, brake bleeder kit, catch pan, and fresh fluid.
| Item | Quantity | Note |
|---|---|---|
| Brake fluid (DOT 4) | 1 L | Match original spec |
| Master cylinder (OEM) | 1 | Verify part number |
| Bleeder kit | 1 set | One‑man or two‑man |
| Safety gear | Gloves, glasses | Required for all work |
Disconnect the brake lines, then remove the mounting bolts. Install the new cylinder, reconnect lines, and tighten bolts to 10, 12 ft‑lb. Bleed each wheel until clear fluid flows, then test pedal firmness before a short drive.
If you need guidance on fluid disposal, check local EPA rules.
Safety, Legal, and Common Mistakes
Always wear gloves and eye protection; brake fluid is hazardous to skin and eyes.
Avoid mixing DOT 3 and DOT 4 fluid, seal damage can occur.
Bleed the system completely; air bubbles cause brake fade and pedal sponginess.
Verify the correct push‑rod length; an incorrect rod changes pedal travel.
For legal compliance, follow FMVSS 116 fluid specifications and state inspection standards.
If you’re unsure about any step, consult a certified technician before proceeding.
Check recovery point location for added safety during the job.
Read about proper fluid disposal to stay compliant.
Frequently Asked Questions
What fluid type should I use after replacement?
Use the fluid type specified in your vehicle’s service manual; DOT 4 is common for modern cars and offers higher boiling point than DOT 3.
How long does bleeding take per wheel?
Expect 10, 15 minutes per wheel; continue until clear fluid exits the bleeder screw.
What are typical replacement costs?
OEM cylinders range $150, $400; remanufactured units are $80, $200. Labor adds $100, $150 per hour.
When should I call a professional?
If you lack a clean workspace, proper bleeder kit, or confidence in torque specs, a shop ensures safety and compliance.
