
Your headlights go out while driving and the road ahead disappears in about a second. Knowing what to do if your headlights go out while driving starts with one rule: don't slam the brakes. A panic stop in a live lane is how a lighting failure turns into a multi-car pileup.
Hold your lane, bleed off speed, and steer toward a safe stop instead.
Federal crash data puts the nighttime fatality rate per mile traveled at roughly three times the daytime rate. Headlamps are regulated hardware under FMVSS 108, and a burned-out lamp is a legal defect, not just a nuisance. The first ten seconds after the lights die matter more than anything you do afterward.
So let's start there, then work through the diagnosis.
What to Do If Your Headlights Go Out While Driving
If your headlights go out while driving, hold your lane and coast. Flip on your hazard flashers right away. Slow down gently and aim for a lit lot.
Keep both hands on the wheel and dim the dash. Never stop in a travel lane unless the car cannot move.
Why Just Pull Over Can Be the Most Dangerous Thing You Do
Every driver's manual says the same thing. Pull over, turn on your hazards, wait for help. That advice is right about the destination and dangerously loose about the timing.
An unlit shoulder is one of the worst places on a highway. Traffic passes at 60 mph or more with inches to spare. Drivers drift.
Someone half asleep at 2 a.m. aims at the one thing standing still in their lane.
AAA Foundation for Traffic Safety analysis of federal crash data counts roughly 1,700 people killed each year while outside a disabled vehicle. A large share of those deaths happen in the first few minutes after the car stops. The stop itself creates the exposure.
Every US state has a Move Over law on the books as of 2026. Those laws protect police, tow operators, and roadside crews. They also hint at the reality: standing next to a stopped car on a highway is a genuinely dangerous place to be.
So the trained response is not "stop now." It's "get somewhere safe." That usually means a lit parking lot, an exit ramp, a rest area, or a wide shoulder with guardrail, in that order. Sometimes it means a few hundred more yards of careful driving with hazards flashing.
Here's the honest split between reflex and trained response:
| Situation | Reflex | Trained response |
|---|---|---|
| One lamp out, city street, streetlights on | Stop dead in the lane | Keep rolling to the next lit lot or side street |
| Both lamps out, freeway, 65 mph | Brake hard on the shoulder | Hold lane, hazards on, ease to the next exit |
| Both lamps out, two-lane rural road, no moon | Stop in the lane and sit there | Coast as far right as possible, get clear of the car |
| Smoke or burning smell from the dash | Keep driving to a shop | Stop immediately and shut off the battery |
Stop right now if the car is undrivable, if you smell burning, or if you truly cannot see the road at all. In every other case, you buy safety with distance, not with braking.
One more thing worth knowing before you're in this spot: your grip on the wheel matters more than your speed when the view goes black. You can read about the correct hand position in our steering wheel placement guide before you ever need it.
What's Actually Happening When Your Lights Die, and Why Both Bulbs at Once Is a Different Problem
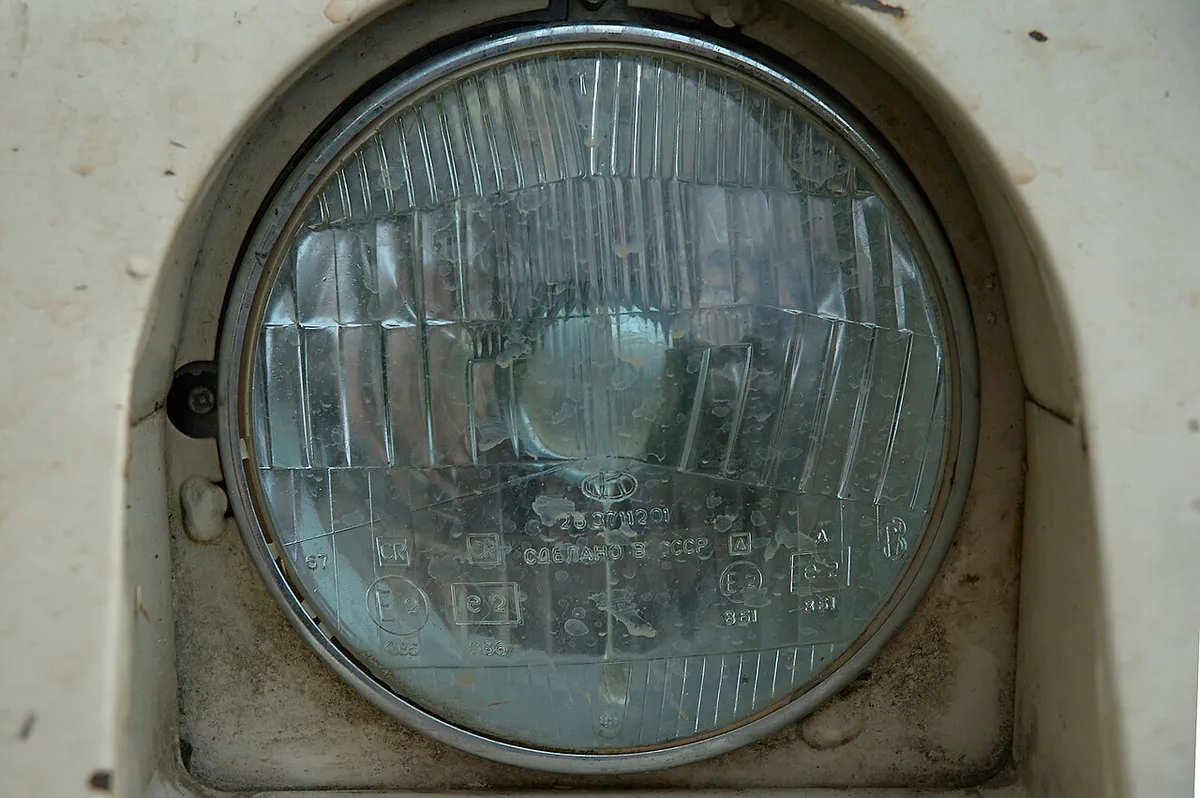
Image source: Wikimedia Commons / Dmitry Makeev (CC BY-SA)
A headlamp circuit is a chain, and every link has to hold. Power leaves the battery, passes through a fuse, then a relay, then the headlamp switch or multifunction stalk, then the wiring and connector, then the bulb filament, and returns through a ground. Break any link and the lamp goes dark.
That chain structure is the single most useful diagnostic fact you can carry. It tells you what a failure pattern means.
One lamp out is almost always local. The bulb filament has burned through, or the socket and pigtail have corroded. Halogen filaments fatigue from vibration and heat cycles.
A bulb rated for 500 to 1,000 hours can let go on a Tuesday night with no warning at all.
Both lamps out at the same instant is almost never two coincidental bulb failures. It points upstream at something shared: a fuse, a relay, the switch, a common ground, or the charging system. Two filaments dying in the same second by chance is vanishingly rare.
That distinction should change what you do. A single dead lamp means you still have light, so you can drive to a parts store. A total blackout means you need a safe stop and a proper diagnosis.
| What you see | Most likely cause | First thing to check |
|---|---|---|
| One low beam dead, high beam works | Burned low-beam filament | Bulb, then socket |
| Both low beams dead, high beams fine | Shared low-beam circuit, relay, or fuse | Fuse and relay |
| Everything dead, dash lights dim | Charging system or main ground | Battery voltage with engine running |
| Lights flicker, then die | Loose ground, chafed harness, failing switch | Ground strap and stalk connector |
| One HID lamp out, occasional flicker | Ballast or igniter, not the bulb | Swap bulb side to side first |
| New LED bulbs flicker or hyperflash | PWM dimming and CANbus monitoring | Anti-flicker module, correct bulb type |
The charging system angle most people miss
A voltage spike kills filaments fast. If the voltage regulator inside the alternator fails, system voltage can climb past 15V and cook both headlamp filaments within seconds. That's the textbook explanation for two lamps dying at once.
Normal charging output runs about 13.5V to 14.7V with the engine running. A resting battery sits near 12.6V. Anything sustained above 15V is a fault, and it will take lamps, modules, and bulbs with it.
You can catch this early with a cheap voltmeter that plugs into the cigarette lighter. If the reading creeps north of 15V, stop driving and get the alternator tested. That one habit prevents a lot of dark nights.
DRL confusion and the phantom vehicle problem
Daytime Running Lights are not headlights. They run at reduced intensity, often on the high-beam filament at low power, and on a huge number of vehicles they do not turn on the tail lamps.
That combination creates the classic "phantom vehicle" at dusk: bright light coming at you, nothing visible from behind. Canada mandated DRLs decades ago and still fights this exact problem. If your dash lights are on but your tail lamps aren't, you're driving a car that's invisible from the rear.
Turn the switch to the actual headlamp position once the sun drops. Automatic lamp sensors are also slow to react in rain, fog, and tunnel exits.
HID, LED, and the retrofit reality
HID systems (high-intensity discharge, often sold as xenon) use a ballast to fire the bulb at high voltage. When one side goes dark, the ballast is as likely a culprit as the bulb. Swapping bulbs side to side tells you which in about ten minutes.
LED headlamps last far longer, often 15,000 to 30,000 hours, but they fail at the driver and connector level more than the emitter. Drop-in LED bulbs in a halogen reflector housing are a separate mess. As of 2026, most still fail federal photometry requirements because the housing was never designed for that light source.
If you're weighing an upgrade after a failure, it helps to know what a replacement bulb costs before you walk into a store. And if you're considering adding auxiliary lighting for rural driving, plan the wiring properly. A light bar hanging off a cigarette plug is not a lighting system.
A note on scan tools
Modern cars route lighting through a body control module. That module stores codes when a lamp circuit misbehaves, and a generic engine-only reader won't show them. A body-code scan tool pays for itself the first time a "lamp out" warning appears with every bulb intact.
The First Ten Seconds: Holding Your Lane When the Road Goes Black
The instant the light dies, your hands do the work. Everything else follows.
- Keep the wheel steady. No sudden inputs. A swerve at highway speed with no forward view is worse than the darkness.
- Ease off the throttle. Let engine braking and rolling resistance do the work before you touch the pedal.
- Find the hazard button by feel. It's usually the red triangle in the center stack. You should be able to hit it without looking, so learn where it is now.
- Tap the brakes lightly. Two short taps warn the driver behind you without scrubbing off speed fast. Then hold steady pressure.
- Pick your target early. Decide where you're going while you still have momentum and options.
- Signal before you move. Even with no one to see it, the habit keeps you deliberate.
Short version: don't brake hard, don't swerve, don't open the door to look. The car is still moving and you are still in control. Act like it.
If the high beams still work
Dual-filament bulbs and separate high-beam circuits mean you can sometimes keep partial lighting. If your low beams die but the high beams fire, use them. It beats driving dark.
Dim them for oncoming traffic within about 500 feet, and for a car you're following within 200 to 300 feet. That's the standard rule in most state driver manuals. Blinding the person coming at you creates a second emergency.
If the road goes completely black
This is the worst case, and it does happen on rural two-lane roads with no ambient light. No streetlights, no moon, no reflectors, nothing.
Your reference points are still there. The fog line on the right, the raised pavement markers, the tail lamps of a car ahead. Aim your eyes at the right edge line and hold a shallow, gentle line along it.
Keep your speed low enough that your stopping distance stays inside what you can see. At 60 mph, total stopping distance including reaction time runs about 270 to 300 feet. With no headlights, you have maybe 50 feet of usable view.
That math says slow down hard.
If the road curves and you can't see the curve, stop. Get as far right as you can, hazards on, and get out of the car on the passenger side if there's a barrier to stand behind. Do not sit in a live lane.
Dim the Dash, Aim Right: The Night-Vision Technique That Keeps You Between the Lines
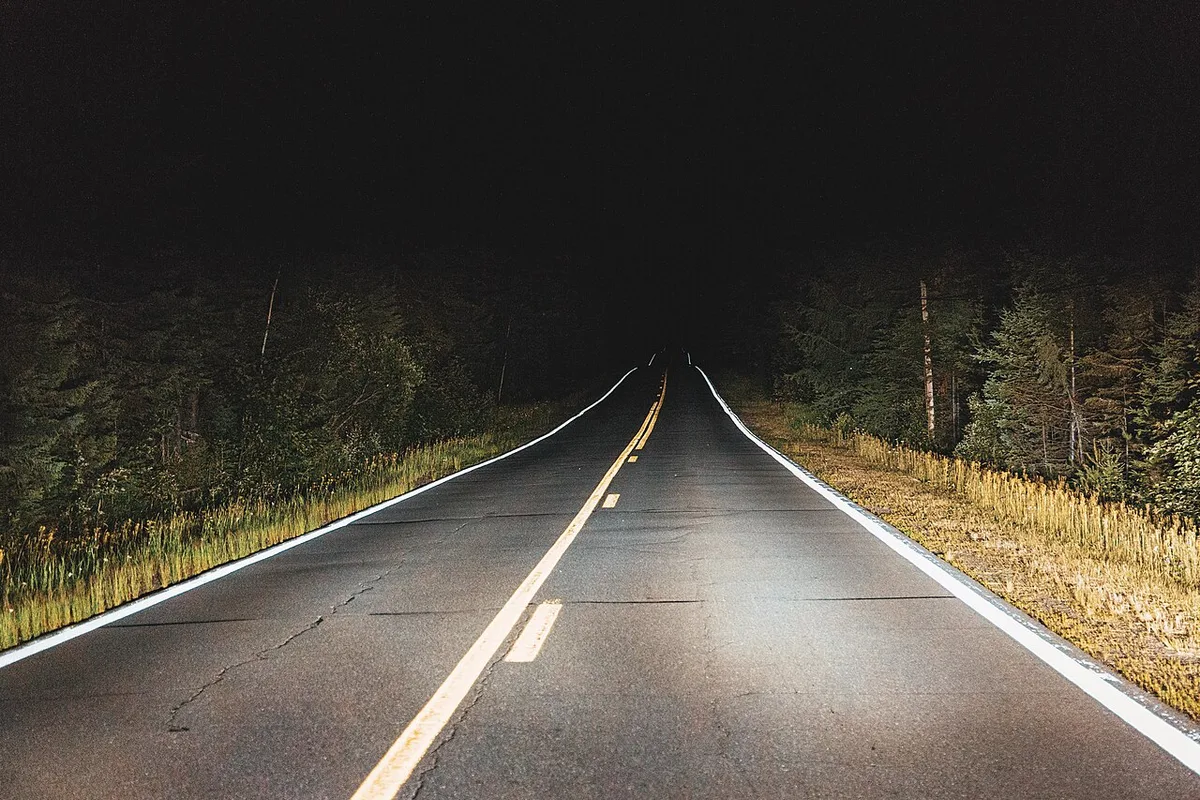
Image source: Wikimedia Commons / Tony Webster from Minneapolis, Minnesota, United States (CC BY)
Your eyes are not designed for this. They adapt, but slowly, and the adaptation is fragile.
Vision research on dark adaptation shows rod sensitivity climbing for 20 to 30 minutes in full darkness. Rhodopsin, the photopigment rods use, rebuilds gradually. A single flash of bright light can bleach a meaningful chunk of it in seconds.
That's why the interior of your car is the enemy. A bright dashboard, a lit phone screen, an overhead dome light, the glow of a navigation display. Each one resets the clock.
Turn the dash dimmer down as far as you can still read the speedometer. Kill the dome light. Flip the phone face down.
If your car has a "night" or "dim" display mode, use it.
Why you shouldn't stare straight ahead
The center of your retina, the fovea, is packed with cones. Cones need light to work. In near darkness, looking directly at a faint object can make it disappear.
Rod cells handle low light and they sit mostly in the periphery. That's why you spot a shape at the edge of your vision and lose it the moment you look straight at it. It's a real physiological effect, not imagination.
Use it deliberately. Scan the road left to right in short sweeps. Don't lock your gaze on one point.
Let your peripheral vision pick up the shape of the lane, the curve, the deer at the treeline.
Aim at the right edge line
The right edge line is your anchor. It's painted with retroreflective material, so it gives back whatever light you have left, even from streetlights or the car behind you.
Hug it, don't cross it. The center line is a worse reference because oncoming traffic lives there. Aiming right also biases you away from the oncoming lane if you drift.
When an oncoming car approaches, look at the right edge line, not at its headlights. Glare destroys dark adaptation in a fraction of a second, and looking away preserves more of it.
Borrow depth perception from the car ahead
Following another vehicle is a legitimate technique here. Its tail lamps give you two fixed points that move with the road, which restores your sense of speed and distance.
Keep a real gap. The three-second rule is a minimum in good conditions. With degraded lighting, stretch it to five or six seconds.
You need the room, and the car ahead is effectively your headlights.
Keep the glass clean
A dirty windshield scatters light in every direction. In a low-light situation, that scatter turns into a haze you can't see through. It's the same reason fog and a smeared windscreen are a terrible combination.
Clean the inside of the glass, not just the outside. And if your blades that clear the glass are streaking, replace them before the rainy season, not during it. Visibility is a system, and the lamps are only one part.
Choosing Your Stop: Exit Ramp vs. Lit Parking Lot vs. Wide Shoulder vs. Nowhere
Where you stop is a judgment call, and the hierarchy is fairly consistent across highway safety guidance. Ranked from best to worst:
| Stop location | Best when | Main risk |
|---|---|---|
| Lit parking lot or gas station | You're within a mile or two on any road | Almost none |
| Exit ramp shoulder, past the gore area | Freeway, next exit is close | Merging traffic on the ramp |
| Rest area or weigh station | You can reach one | None, just slower |
| Wide shoulder with guardrail | No exit within reach | Passing traffic, no barrier between you and it |
| Narrow shoulder, no guardrail | Only if the car cannot move | High. Traffic passes inches away |
| Live travel lane | Never, unless the car is immobile | Fatal |
| Bridge, tunnel, or blind curve crest | Never | No escape path, no sight line |
The order matters because each step down adds real risk. A lit lot has slow-moving traffic and people around. A narrow shoulder has 70 mph steel two feet from your door.
How far can you actually go?
People underestimate this. At 40 mph with hazards flashing, two minutes of driving covers about 1.3 miles. On most urban interstates, exits come every one to three miles.
Even in rural country, spacing is typically five to twenty miles.
That means "get to the next exit" is realistic far more often than drivers assume. It only fails when you're on a road with genuinely no shoulder and no exit, or when you can't see well enough to keep moving safely.
If you can see the road well enough to hold 30 to 40 mph, and hazards are working, rolling to a better spot usually beats stopping in a bad one.
The if/then version
- If one lamp is out and streetlights exist, keep driving to a lit lot or a side street. No drama needed.
- If both lamps are out on a freeway, stay in your lane, hazards on, and take the next exit. Do not stop on the shoulder before it.
- If both lamps are out on a rural two-lane road with traffic behind you, slow early, signal, and pull as far right as the surface allows. Then get clear of the car.
- If the car is smoking or smells electrical, stop immediately, shut it down, and get everyone out and away. A shorted harness can become a fire.
- If you're in a tunnel or on a bridge, keep moving. There is no safe place to stand, and stopping creates a chain-reaction hazard.
What to do the moment you're stopped
Hazards on. Wheels turned away from traffic, so a nudge pushes the car off the road instead of into a lane. Dome light on so you're visible.
Reflective vest if you have one.
Exit on the passenger side, away from traffic. Walk behind the barrier if there is one, and stand well upstream so you're not behind the car if it gets hit.
Then call for help. Know in advance where a tow strap attaches on your vehicle, because a driver hooking to the wrong place can bend a control arm or tear a bumper cover. Roadside assistance operators ask for your mile marker and direction of travel, so look for the nearest marker post before you call.
One last thing on hazards: a handful of states restrict their use while the vehicle is moving. Most allow it for a genuine emergency, and a total lighting failure is exactly that. If a trooper pulls up behind you, keep your hands visible and stay in the car unless told otherwise.
Setting Up Once You're Off the Road: Wheels, Hazards, Vest, and the Passenger-Side Exit
Picking the spot is half the job. The other half is what you do in the ninety seconds after the wheels stop turning, and the order matters more than the speed.
Do these in sequence. Skipping ahead is how people end up standing in a live lane.
- Hazards on before the door opens. The switch is reachable from the driver's seat. Use it there.
- Set the parking brake and shift to Park. A car that rolls is a second emergency.
- Turn the front wheels hard away from the traffic lane. If someone clips your rear end, the car gets pushed forward and off the road instead of into the next lane.
- Dome light on. It costs almost nothing and makes your silhouette readable to approaching drivers.
- Vest on before you exit. Not after. Not once you're at the trunk.
- Exit on the passenger side. Always. It puts a steel shell between you and traffic.
- Move behind the barrier or well upstream. Never stand between your car and the traffic flow.
Why turned wheels actually matter
It looks like a driving-test detail. It isn't.
A car with straight wheels that gets rear-ended at speed travels straight ahead. On a shoulder, straight ahead is usually the lane you just left. Angled wheels convert that impact into a diagonal push toward the verge.
The difference is a few feet. At highway speed, a few feet is the gap between a bent bumper and a person standing where the car lands.
The vest is not optional kit
Retroreflective material bounces light back toward its source, which is why a driver sees it long before they see you. Our research puts the contrast at roughly 500 feet of visibility for a proper vest versus 100 to 150 feet for dark clothing in low beam.
Look for ANSI/ISEA 107 in the US or EN ISO 20471 in the UK and EU. Both set minimum reflective area and performance classes.
Keep it in the cabin, not the trunk. The trunk is often on the traffic side, and after a rear-end hit it may not open at all.
Warning triangles, mile markers, and who to call
A warning triangle is legally required in much of Europe and recommended in the UK, where guidance says to place it at least 45 metres behind the vehicle on a normal road. It also says not to use one on a motorway, because walking into a live lane to set it down is worse than the risk it addresses. The full wording sits in the UK Highway Code.
Most US states don't require a triangle, and the same caution applies. If setting it up means stepping into traffic, leave it in the trunk.
Before you call anyone, find your location. Mile marker posts, exit numbers, and bridge names are what dispatchers work from. Give them direction of travel, vehicle description, and whether you're blocking a lane.
Dial 911 in the US and Canada, 999 in the UK, 112 across the EU. Say plainly if the car is in a travel lane, because that changes the response priority.
When a stranger pulls over
Most people who stop are trying to help. Some aren't, and you can't tell from thirty feet away.
Stay in the car with the doors locked and the window down an inch. Ask them to call roadside assistance for you. You don't owe anyone an explanation, and you definitely don't need to accept a ride.
| Task | Do it when | Why it matters |
|---|---|---|
| Hazard flashers | Before opening the door | Earliest possible warning to traffic behind |
| Wheels turned right | Before leaving the driver's seat | Redirects a rear impact off the road |
| Reflective vest | Before stepping out | 3 to 5 times the visible distance of dark clothing |
| Passenger-side exit | Every time | Keeps sheet metal between you and traffic |
| Call with mile marker | Within the first minute | Cuts response time significantly |
A full hazard cycle pulls roughly 6 to 8 amps with the engine off. A healthy battery will run them for hours, so don't switch them off to save power. Do switch the engine off if you smelled anything electrical on the way down.
And if you also have a flat tire, leave it alone. A wheel swap on a live shoulder is a tow-truck job, and what replacement nuts cost is the least of your problems out there.
What to Switch On and What's Actually Illegal: Hazards, Parking Lamps, and High Beams
Once the car is stopped, your job shifts from seeing to being seen. That means stacking every legal light you have.
Hazard flashers are the first layer. Parking lamps are the second, and they're underrated. They put a low-wattage light at all four corners, front and rear, which covers the 360-degree visibility that hazards alone don't handle well.
High beams are the third, but only if they still work. If your low beams died and the high-beam filament is fine, run the high beams and dim them properly. That's about 500 feet for oncoming traffic and 200 to 300 feet when you're following someone.
Are hazard lights while driving legal?
In most US states, yes, for a genuine emergency, and a headlamp failure qualifies. A handful of states restrict or prohibit driving with flashers on, so check your own vehicle code rather than assuming.
The practical detail nobody mentions: on most vehicles, the hazard switch overrides the turn signals. Once flashers are on, your indicator stops working.
If you need to change lanes, signal first, make the move, then hit the hazards. Doing it the other way around leaves you with no way to announce an intention.
Parking lamps, fog lamps, and the 30-foot rule
Parking lamps, called sidelights in the UK, draw about 5 watts per corner. They won't light the road, but they make the car's outline readable from a long way off.
Front fog lamps are the useful trick here. Many cars let you run them with parking lamps alone, and their beam is low, wide, and aimed at the road edges. That gives you maybe 30 to 50 feet of usable view along the shoulder and the edge line.
Legality varies. UK rules restrict fog lamps to seriously reduced visibility, generally under 100 metres. Several US states have similar restrictions.
A lighting failure is a defensible reason, but know the rule where you're driving.
| Light | What it gives you | When to use it | Legal note |
|---|---|---|---|
| Hazard flashers | 360-degree attention signal | Immediately, and while parked | Some states restrict while moving |
| Parking lamps / sidelights | Vehicle outline at all four corners | Any time lighting is degraded | Legal everywhere |
| High beams | 350 to 500 feet of forward view | Only if low beams are dead | Dim within 500 ft oncoming |
| Front fog lamps | 30 to 50 feet at the road edges | To follow the shoulder line | Restricted in some jurisdictions |
| Dome light | Interior visibility | Once stopped | No restriction |
What not to do
Don't hold a phone flashlight out the window. It destroys your own night vision, blinds oncoming drivers, and lights almost nothing past the hood.
Don't tape a light to the hood or hang one off the mirror. Same problem, plus it becomes a projectile in a sudden stop.
Don't flash your high beams at oncoming traffic as a warning that you're there. They'll read it as "your brights are on" and flash back.
Federal rules cover what manufacturers must fit to a new car, and the National Highway Traffic Safety Administration publishes those standards. They don't cover improvisation on the shoulder. Your job is to be visible, not creative.
Diagnosing It Yourself in Five Minutes: Bulb, Fuse, Relay, Stalk Switch, Ground, Charging System
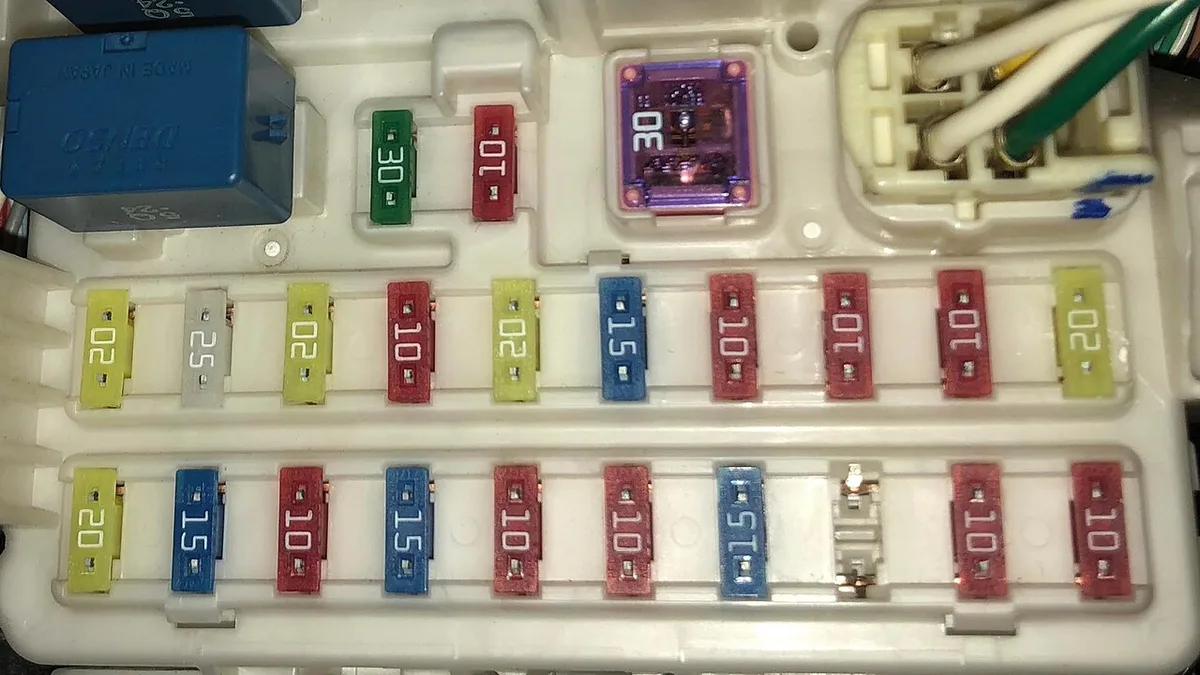
Image source: Wikimedia Commons / project Kei (CC BY-SA)
Work the chain in order, cheapest and most likely first. That's bulb, fuse, relay, switch, connector and ground, then charging system.
Roughly four out of five single-lamp failures end at step one. Skipping straight to the fuse box wastes time you could spend driving to a parts store.
| Tool | What it's for | Cost |
|---|---|---|
| Test light | Confirming power at a fuse or socket | $5 to $15 |
| Digital multimeter | Voltage, continuity, voltage drop | $20 to $60 |
| Fuse puller and assortment | Pulling and replacing blade fuses | $10 to $20 |
| Nitrile gloves | Keeping skin oils off halogen glass | $8 |
| Dielectric grease | Sealing connectors against moisture | $6 |
How do you test a bulb without any tools?
Swap it side to side. Move the working bulb into the dead housing and see whether the light comes on.
If the known-good bulb lights up, the old bulb was the problem. If the socket stays dark with a good bulb in it, the fault is upstream in the wiring or the circuit. That one test splits the whole diagnosis in half.
Where is the headlamp fuse?
There are usually two fuse locations: an interior box under the dash and an underhood power distribution center near the battery. The lid has a chart, and the owner's manual has a better one.
Headlamp fuses typically run 10 to 20 amps per circuit. Pull the fuse and hold it up to the light. A blown element is obvious, and a hairline crack across the strip counts as blown too.
If the replacement blows the moment you switch the lights on, stop. That's a short to ground, and the fuse is doing its job. Never fit a bigger fuse to "fix" it.
How do you know a relay has failed?
Relays are the small cubes in the underhood box. Most cars use several identical ones.
Find a relay with the same part number that runs something non-essential, like the horn or the rear defroster. Swap them. If the headlamps come back and the horn dies, you've found it.
Relays cost $10 to $25. It's the cheapest part of the whole system to rule out.
What about the switch and the stalk?
Wiggle the multifunction stalk while the lights are on. A flicker or a brief flash means a worn contact inside the switch assembly.
Pull the connector off the back of the headlamp switch and look for brown discoloration or a melted plastic body. Heat damage there means the switch has been carrying more current than it should, often from a higher-wattage bulb someone fitted years ago.
Grounds and the voltage drop test
Bad grounds cause the weird stuff. Lights that glow dim, lamps that come on when you hit the brakes, flickers that come and go with bumps.
Set your multimeter to DC volts and measure from the lamp's ground pin to the battery negative post while the light is on. Anything above about 0.5V means resistance in that path. Clean the connection, apply dielectric grease, and retest.
When it's none of the above
Modern cars run lighting through a body control module, and that module logs codes when a circuit misbehaves. A lamp-out warning with every bulb intact usually means the module sees a resistance value it doesn't like.
That's where a scan tool that reads body codes earns its keep. Generic engine-only readers won't show those.
The Charging-System Tell: Voltage Readings That Explain Two Dead Headlamps
Two lamps dying in the same second is the signature of a voltage event. A healthy charging system doesn't produce one.
Normal output with the engine running sits between 13.5V and 14.7V. A resting battery reads about 12.6V. A spike that pushes past 15V will cook filament after filament.
The numbers worth memorising
| Reading (engine running) | What it means | What to do |
|---|---|---|
| 13.5V to 14.7V | Healthy charging system | Nothing |
| 12.8V to 13.2V | Possibly normal on smart-charging vehicles, or a weak alternator | Test under electrical load |
| Below 12.6V | Not charging, or a failing alternator | Get it tested before dark |
| Above 15V | Failed voltage regulator | Stop driving, replace the alternator |
| Above 16V | Severe overvoltage, risk of module damage | Shut it down now |
How do you measure it properly?
Put a multimeter across the battery posts with the engine idling. Then load it up: headlights on, blower on high, rear defroster on. A weak alternator holds voltage fine with no load and sags under a real one.
Many modern vehicles use computer-controlled charging, which deliberately drops output to 12.8V or so when the battery is full. That's normal. What isn't normal is a reading that climbs as you rev the engine.
The ripple test that catches a bad diode
Set the meter to AC volts and measure across the battery with the engine running. A healthy alternator should show well under 0.5V AC.
More than that points to a failed diode in the rectifier. A bad diode produces a pulsing output that flickers your lights and slowly cooks every bulb and module in the car.
What overvoltage does beyond killing bulbs
Bulbs are the first casualty because filaments are the most fragile thing on the circuit. They're not the only one.
Sustained high voltage damages the battery, the body control module, and any electronics with a voltage-sensitive supply. A $200 alternator problem left alone becomes a four-figure repair.
Watch for bulbs that brighten noticeably when you rev the engine. Watch for a rotten-egg smell from the battery, which means it's boiling. Watch for a cluster of bulb failures across different circuits in a few months.
What a repair actually costs
A remanufactured alternator runs $150 to $300. Installed at a shop, expect $400 to $900 depending on the engine and how buried the unit is.
Some alternators have an external or separately serviceable regulator for $50 to $150. Most modern units are integrated and computer-controlled, which means the fix is the whole unit.
Check the serpentine belt, tensioner, and battery terminals while you're in there. A corroded terminal produces the same symptoms as a dying alternator for a fraction of the cost.
Halogen, HID, or LED: Matching the Failure to the Fix and the Real Cost
The right repair depends entirely on what's in the housing. Three lighting technologies, three different failure modes, three different price brackets.
| Type | Typical cost per side | Rated life | Failure mode | DIY friendly |
|---|---|---|---|---|
| Halogen | $10 to $40 bulb | 500 to 1,000 hours | Filament burns through | Yes, 15 minutes |
| HID / xenon | $60 to $200 bulb, $150 to $400 ballast | 2,000 to 3,000 hours | Ballast, igniter, or bulb shift | Partly, high voltage risk |
| LED | $300 to $1,500 assembly | 15,000 to 30,000+ hours | Driver board, connector, or solder joint | Rarely |
Halogen: cheap, hot, and predictable
Halogen bulbs use part numbers like H4, H7, H11, 9005, 9006, and 9012. A standard low beam puts out roughly 1,000 to 1,500 lumens at 55 watts and a colour temperature around 3,000K to 3,200K.
They fail by design. The filament evaporates slowly onto the glass envelope, thinning until it snaps. Vibration and heat cycles accelerate it.
One rule matters more than any other: never touch the glass with bare fingers. Skin oils create a hot spot, and the bulb fails within weeks. Hold it with a glove or a clean cloth.
HID: the high-voltage trap
HID systems fire an arc through xenon gas, and the ballast generates a strike voltage in the thousands of volts to make that happen. The ballast, igniter, and bulb form a system, and any one of them can fail.
Never handle HID components with the lights on. Wait several minutes after switching off before unplugging anything, because the capacitor holds a charge.
Diagnosis is simple: swap the bulb to the other side. If the fault follows the bulb, replace the bulb. If it stays with the housing, it's the ballast or igniter.
LED: sealed, long-lived, and often not a bulb
Most factory LED headlamps aren't serviceable at the bulb level. The emitters are soldered to a board inside a sealed housing, and repair means replacing the assembly.
That's why the bill jumps. Assemblies run $300 to $1,500 per side, and some require removing the bumper cover to access the mounting bolts.
The good news is that LED failures are rare before 100,000 miles. When they happen, it's usually the driver board or a corroded connector, not the emitter itself.
Matching the failure to the fix
- One lamp out, all else fine: bulb. Buy a matched pair and replace both, because the second one is on the same clock.
- Both lamps out at once: circuit or charging system. Work through the fuse, relay, and voltage checks before buying anything.
- Flicker before failure: ground, connector, or ballast. Not the bulb.
- Moisture inside the lens: housing seal. A new bulb will fog up and fail again.
- Hazy, yellowed lens: oxidation, not a lighting fault. A $15 to $30 restoration kit recovers most of the lost output.
The retrofit question
Drop-in LED bulbs in a halogen reflector housing are the most common upgrade and the most common mistake. The reflector was shaped for a filament at one precise point in space, and an LED chip array sits somewhere else.
The result is scattered light, glare for oncoming drivers, and a beam pattern that fails inspection in states and countries that test photometry. As of 2026, most of these kits still carry off-road-use labelling for exactly that reason.
If you want more light, a quality halogen bulb from a major manufacturer, a clean lens, and correct aim will beat a cheap retrofit every time.
A Roadside or Parking-Lot Bulb Swap Without Making It Worse
A halogen bulb swap takes ten to fifteen minutes on most cars. The part that goes wrong is rarely the bulb. It's where you do the job, how hot the glass is, and whether you remember the tabs.
The first rule is firm. No repairs on a live shoulder.
Crouching at the front of a parked car with traffic closing behind you is one of the classic roadside fatality scenarios. Roll to a lit lot first, hazards on, and work there. If the failure left you truly lightless, that's a tow, not a repair.
| Glovebox kit item | Why it's there | Typical cost |
|---|---|---|
| Spare bulb pair, correct part number | The whole point | $10 to $40 |
| Fuse assortment with puller | Circuit faults masquerade as dead bulbs | $10 to $20 |
| Nitrile gloves | Keeps skin oil off halogen glass | $8 |
| Alcohol wipes | Fixes the fingerprint you're about to leave | $5 |
| Clip-on LED headlamp | Hands-free light at the housing | $15 to $30 |
| Dielectric grease | Seals the connector against moisture | $6 |
Access reality: three tiers
Not every car lets you open the hood and pull a cap.
| Access type | Time | What you need | Common on |
|---|---|---|---|
| Engine-bay dust cap | 10 to 15 min | Gloves | Older sedans, many hatchbacks |
| Wheel-well liner removal | 20 to 40 min | Screwdriver or trim tool | Trucks, crossovers, newer compacts |
| Bumper cover removal | An hour plus | A second pair of hands | Some LED-equipped cars |
If your car is in the third row, change bulbs at home on a weekend. Not at night in a lot.
The swap, step by step
- Park on level ground. Engine off, ignition off, headlamp switch off.
- Wait a few minutes if the lights were running. Halogen glass runs hot enough to burn.
- Pull the round rubber dust cap off the back of the housing.
- Unplug the connector by its body. Never tug the wires.
- Release the wire retainer. It's a spring clip that unhooks at one end.
- Slide the bulb straight out.
- Install the new bulb by its plastic base only. The three tabs fit one way.
- Rehook the retainer, reconnect, and press the dust cap fully home.
- Test before closing the hood. A dead bulb is easier to diagnose with everything open.
If you touch the glass
Don't panic. Wipe it with isopropyl alcohol on a clean cloth and let it air dry completely.
Skin oil etches a hot spot into halogen glass, and an oily bulb can fail in days or shatter at temperature. Grease from connector fingers counts the same. Clean gloves, no exceptions.
Mistakes that create the next failure
- Dust cap half-seated: moisture gets in, the reflector fogs, and bulbs die early.
- Connector not clicked home: the classic flicker that gets misdiagnosed as a bad ballast.
- One new bulb, one old: mismatched output and color. Always buy the pair.
- An over-wattage "upgrade" bulb: melts the pigtail and the socket, and those repairs cost more than any bulb.
- Dielectric grease on the glass: it's for the terminals only.
HID and factory LED: hands off at the roadside
HID ballasts hold a charge after shutdown and fire at strike voltage in the thousands of volts. Let the system sit, and honestly, don't service it on a roadside at all.
Factory LED headlamps aren't bulbs. They're circuit boards inside sealed units, and replacement means the whole assembly.
Many parts chains will fit a purchased bulb in their lot for free. That's a genuinely good deal at 9 p.m. with a cold wind blowing.
Beam Pattern, Aim, and Why Cheap LED Retrofits Fail Inspection
A fresh bulb aimed badly can put less usable light on the road than a tired one aimed right. Aim is the cheapest visibility upgrade you'll ever do, and it takes ten minutes.
The cutoff line is the concept that ties it all together. Park facing a wall at night and switch on low beams, and the light ends in a line, bright below and dark above. Everything above that line is glare aimed at other drivers' eyes.
The 25-foot wall test
- Park square to a flat wall or garage door, tires at correct pressure, normal fuel load.
- Rock the car side to side to settle the suspension.
- Mark the vertical center of each headlamp on the wall with masking tape.
- Roll straight back exactly 25 feet on level ground.
- Switch on the low beams.
- The top of the bright zone should sit about 2 inches below your tape marks. That's the common factory target, roughly a 2.1 inch drop over 25 feet.
- If it's high, turn the vertical adjuster until it drops.
Where the adjusters live
Look for screws or hex heads near the back of the housing, reached from the engine bay. Many cars want a long socket or a Phillips screwdriver.
Small inputs. A quarter turn moves the beam several inches at 25 feet. Adjust, walk back, and look again.
Horizontal adjusters exist too, but leave them alone unless the pattern is visibly skewed. Vertical is where the safety lives.
What scatter looks like from the driver's seat
A retrofit problem looks like a blob. No line, no cutoff, light splashing into the trees and into oncoming windshields.
The cause is geometry. A reflector housing is shaped around a filament burning at one precise point in space. An LED chip sits somewhere else entirely, and it's usually two sources instead of one.
The reflector simply can't focus what isn't where it expects.
Inspections that actually test this
The UK MOT uses a beam tester that projects your pattern onto a screen and checks the cutoff height against a spec. German TÜV inspections are stricter still, and several US states check aim in inspection lanes.
Photometric performance requirements trace back to FMVSS 108, which is exactly why off-road LED kits carry the labels they carry.
Moisture kills patterns quietly
Condensation inside the housing scatters light before it ever leaves the lens. If you see fogging after a swap, the dust cap or the housing seal is the problem, not the bulb. Replace the seal or the housing, because a new bulb in a wet housing is a very short-lived bulb.
Your Legal Exposure: FMVSS 108, State Hazard-Flashing Rules, and Move Over Laws
FMVSS 108 is the federal standard defining how lamps and reflective devices must perform on every vehicle sold in the US. It binds manufacturers rather than drivers directly, but state vehicle codes borrow its requirements heavily. The full text is published on the eCFR if you ever want the primary source.
For you in practice, a dead headlamp is an equipment violation in every state. How each state handles it differs.
Equipment tickets: the fix-it reality
Most states issue a repair order rather than a moving violation. Fines typically run about $25 to $150 once fees land.
Show up with proof of repair inside the window, usually 10 to 30 days, and most jurisdictions dismiss it or reduce it to a small administrative fee. Keep the receipt in the glovebox, not at home.
Hazard flashers while moving
Most states allow hazard use while driving for a genuine hazard, and a total lighting failure qualifies. A dozen or so states restrict or prohibit flashers in motion, generally aimed at people who abuse them in rain.
The honest summary: rolling to the next exit with flashers on after a blackout is defensible nearly everywhere. Standing still with them on is legal everywhere.
Move Over laws cut both ways
Every US state has one. You must move over a lane, or slow down if you can't, for any stopped vehicle showing flashing lights, flares, or a vest.
That law exists to protect you while you're standing behind a guardrail. It also means other drivers owe you the same courtesy. A driver who hits your stopped car because they didn't move over is in a very bad liability position, and that's exactly what the statutes were written for.
The UK and EU picture
The UK governs lamps under the Road Vehicles Lighting Regulations 1989, and the MOT includes a dedicated headlamp aim test on a beam tester. EU rules on carrying spare bulb kits vary by country and have loosened over the years. A compact kit costs very little and satisfies the strictest version of any of them.
Insurance and the known defect
Here's the quiet risk. If you crash with a headlamp you already knew was dead, an insurer can argue contributory negligence and reduce your payout.
Documentation is the counter. A dated photo of a sudden double failure, a roadside call log, and a repair receipt tell a very different story from driving a month on one lamp.
If a trooper stops you
Stay in the car, hands visible, interior light on. Explain that the failure was sudden and that you were rolling to a lit lot or exit. In our research, officers overwhelmingly treat this as a repair-order situation when the story checks out.
Preventing the Next Blackout: Monthly Walk-Arounds, Lens Care, and Smart Upgrades
Almost every double failure telegraphs itself. Bulbs dim before they die, housings haze over years, and connectors corrode through seasons. Ten minutes a month catches all of it.
The two-minute lamp check
Park facing a wall or a shop window at night and use the reflection, or bring a helper.
- Low beams, both sides
- High beams, both sides
- Tail lamps lit along with the headlamps, not just DRLs
- Brake lights, both sides, including the high mount
- Reverse lights, in gear, foot on the brake, door shut
- Turn signals, all four corners
- License plate lamp, a legal requirement nearly everywhere
Watch for color shifts too. A bulb going pink or brown at the ends is a filament on borrowed time.
Lens care that actually restores output
An oxidized polycarbonate lens cuts usable light badly, and restoration kits run $15 to $30.
- Tape off the paint around the housing.
- Wet-sand with the coarsest pad in the kit, in one direction.
- Step up through the finer pads, rinsing as you go.
- Finish with the UV sealant, because bare polished plastic re-yellows within months.
Never buff a dry lens. The grit that comes off is the enemy.
Wiring and charging upkeep
- Dielectric grease on every connector you touch.
- Battery terminals clean and tight, because green fuzz on a clamp is resistance.
- Charging output tested once a year, free at most parts chains.
- Bulbs replaced in pairs, always.
The dusk habit that prevents phantom vehicles
Switch to the ON position manually at dusk, in rain, and in fog. Automatic sensors lag in exactly those conditions.
If your dash lights up but the rear of the car stays dark, that's the DRL trap, and it's invisible from the driver's seat. Keep the windshield clean too, inside and out, because film on the glass scatters what light you have left. Fresh blades matter here, so keep a sharp pair on it and know your correct blade size.
What to keep in the car
| Item | Why | Cost |
|---|---|---|
| Spare bulb pair | The most likely failure | $10 to $40 |
| Fuse assortment | The second most likely | $10 to $20 |
| Class 2 reflective vest | Being seen if you stop | $10 to $15 |
| LED headlamp | Hands-free diagnosis | $15 to $30 |
| Warning triangle | EU-required, US-recommended | $10 to $20 |
Total kit cost runs roughly $60 to $120. That's less than one tow call.
Age, salt, and rodents
Cars past eight years old carry brittle connectors and tired grounds. In the salt belt, inspect harness connectors every spring.
In fall and winter, rodents nest under hoods and chew harnesses. Chewed insulation becomes a short, and shorts blow headlamp fuses at 60 mph. A monthly look under the hood catches it before the road does.
Frequently Asked Questions
Can you legally drive with one headlight out?
Yes, but briefly and for a purpose. Nearly every state treats it as an equipment violation, and driving directly to a repair shop is the accepted defense. Fix it within days, because fix-it tickets are usually dismissed with proof of repair.
Keep the receipt in the glovebox.
Why did both headlights go out at the same time?
Two bulbs rarely die in the same second. Look upstream at the fuse, the headlamp relay, the switch or stalk, a shared ground, or the charging system. A failed voltage regulator pushing past 15V cooks both filaments quickly.
Check charging output before buying any bulbs.
Is it illegal to drive with hazard lights on?
It depends on the state. Most allow flashers in motion for a genuine emergency, and a lighting blackout qualifies. Roughly a dozen states restrict or ban them while moving, so know your local rule.
Once you're stopped, hazards are legal everywhere.
How long does it take to change a headlight bulb?
About 10 to 15 minutes with engine-bay access. Twenty to 40 minutes if the wheel-well liner has to come out. Modern LED housings can't be serviced bulb by bulb at all.
Many parts stores will fit a purchased bulb in their lot for free.
Will high beams still work if my low beams fail?
Often, yes. Most halogen lamps use dual-filament bulbs with separate low and high elements, so one can die and leave the other working. Use them, and dim within about 500 feet of oncoming traffic.
High beams plus hazards is a workable limp-home combination.
Can a bad alternator kill both headlights?
Yes, in two ways. Overvoltage above 15V from a failed regulator burns out filaments within seconds. Undervoltage from a dying alternator dims the lamps and drains the battery until everything goes dark.
Test charging voltage after any double failure.
