
You can't tell a worn strut from a tired tire by pushing down on a fender. Learning how to check suspension for wear is mostly about knowing which symptom points to which part, then testing in the right order. Do it properly and you catch a $30 sway bar end link before it becomes a $700 control arm job.
Dampers typically lose their edge somewhere between 50,000 and 100,000 miles, according to manufacturer service intervals, and they rarely fail loudly. Federal stability control rules under FMVSS 126 make a tired damper a handling problem, not just a comfort complaint. So let's start with why the old bounce test lies to you.
How to Check Suspension for Wear
Check suspension for wear by driving over bumps at low speed first. Then measure ride height at all four corners. Inspect dampers, boots, and springs for leaks or cracks.
Pry each joint for play with the wheels loaded. Any ball joint slop or broken spring means stop driving.
Why the Bounce Test Fails on Modern Struts, and What Replaces It
Push down hard on a front fender, let go, and count the rebounds. That trick worked on 1970s sedans with tired hydraulic shocks. It tells you almost nothing about a modern gas-charged damper.
Shock vs. strut: what you're actually checking
A shock absorber is a damper, nothing more. A strut is a structural member that also locates the wheel, carries the spring, and sets alignment geometry. Manufacturer specifications confirm most struts are pressurized with nitrogen.
That charge pushes the rod back out, so a worn strut can still feel firm by hand.
The four wear patterns that matter (dampers, joints, bushings, springs)
Wear doesn't happen everywhere at once. In our research, four failure families cover nearly every complaint:
- Dampers that weep oil or lose their gas charge
- Ball joints and tie rod ends with radial play
- Bushings that crack, separate, or deflect under load
- Springs that crack at the bottom coil or sag
Gas charge loss is the sneaky one. A damper with half its nitrogen gone still controls small bumps around town. It fades on a highway ramp or with a loaded trailer, which is exactly where you need it.
In the UK, the annual MOT inspection flags fractured springs as dangerous defects, per DVSA standards.
If the bounce test says "fine" but the car floats, bottoms out, or cups its tires, trust the symptoms. Then run the checks below.
The Five Checks, in the Right Order
Order matters more than tools. Each check narrows the suspect list before you crawl underneath.
Road test first: speed bumps, brake torque, dry-park steering
Drive over a speed bump at 10 to 15 mph with the window down. A single sharp clunk usually means a sway bar link or a worn bushing. Then brake firmly from 30 mph.
If the nose dives and bobs twice, the front dampers are done. Finally, turn the wheel lock to lock while parked and listen for a spring pop.
Ride height and tire wear map across all four corners
Measure from the fender arch to the wheel center on level ground. A corner sitting half an inch lower than its opposite points to a sagging spring or a collapsed mount. Run your hand across each tire and compare inner and outer edges.
Visual pass: oil film, boots, bump stops, spring corrosion
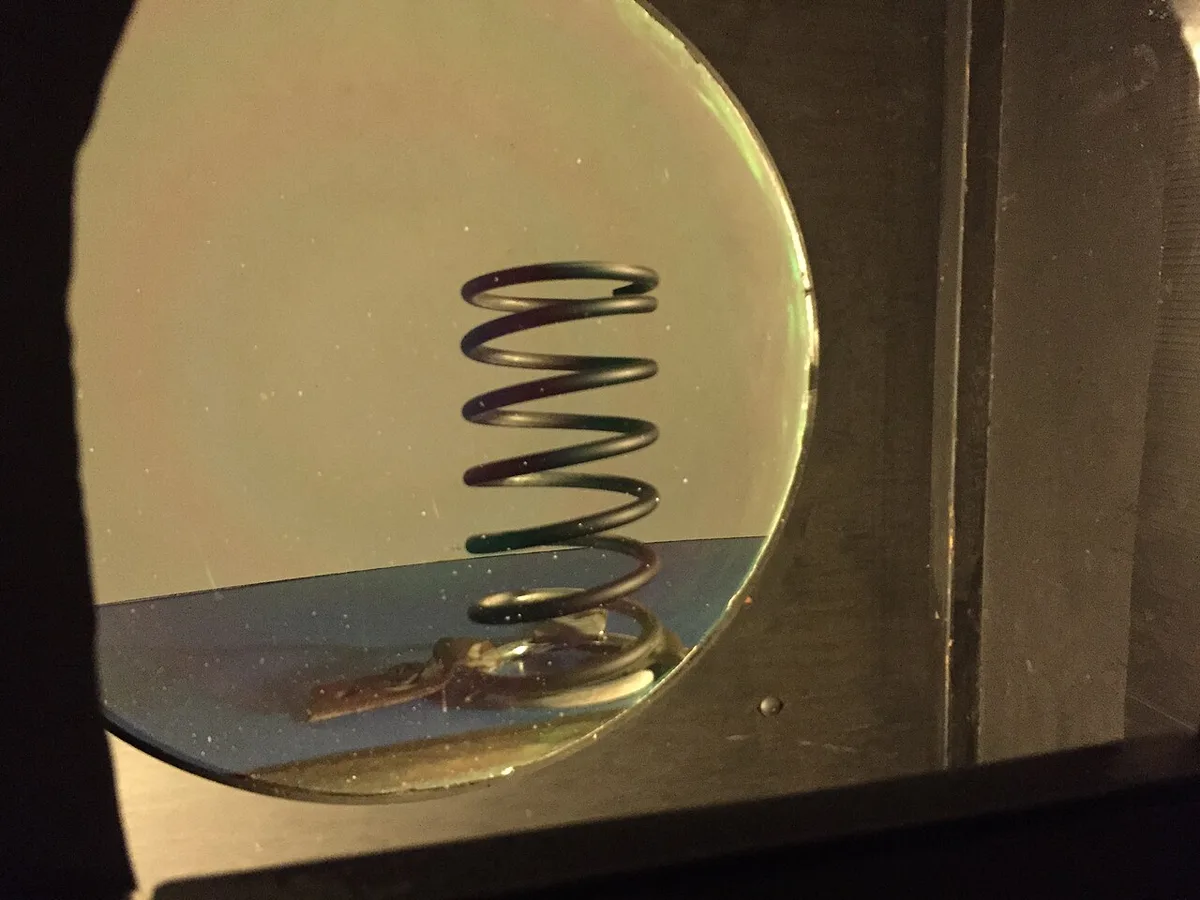
Image source: Wikimedia Commons / FASTILY (CC BY-SA)
Look for a wet dust line on the shock body. Light misting is normal. Dripping oil is not.
Check that boots and bump stops are intact, then inspect the bottom coil of each spring for rust flakes and cracks.
Pry bar test at ball joints, tie rods, and control arms
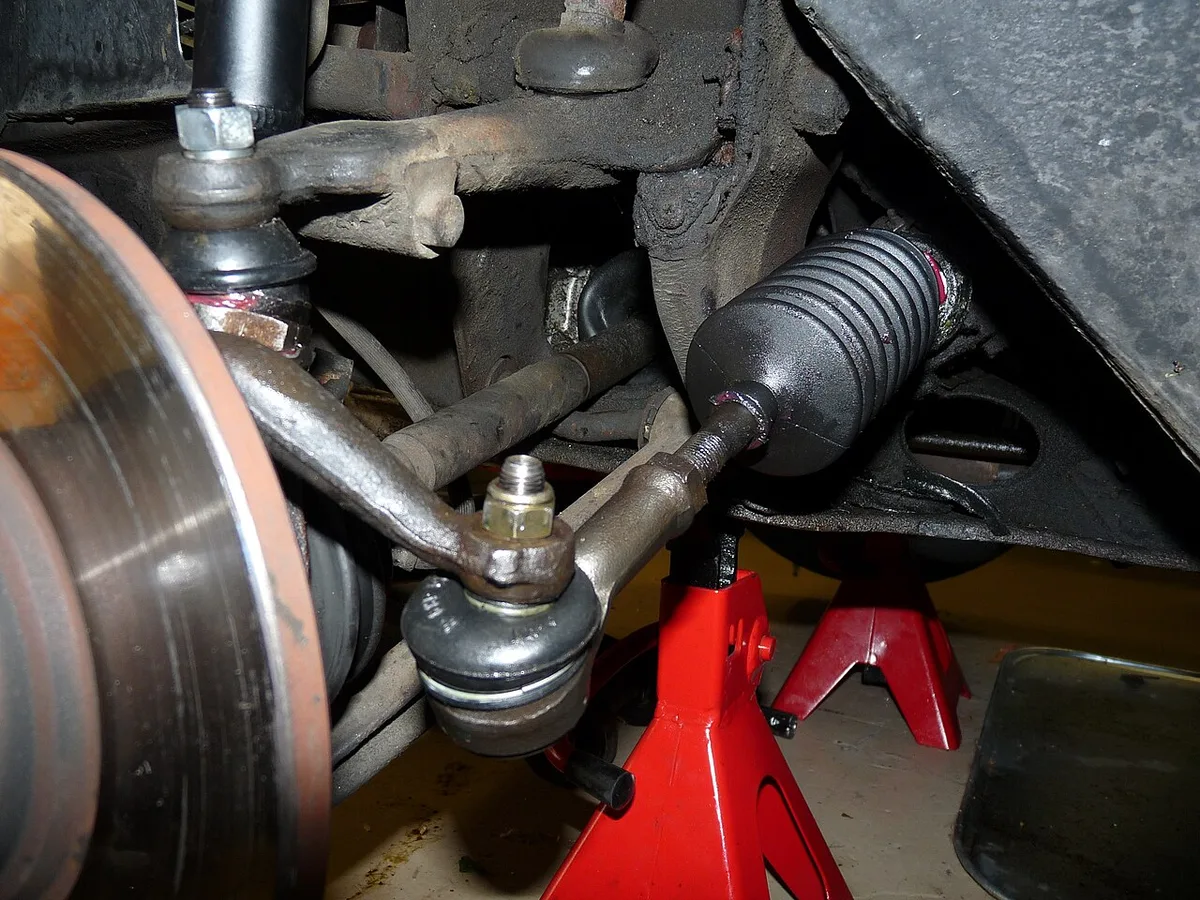
Image source: Wikimedia Commons / Craig Howell (CC BY)
Pry gently between the control arm and the knuckle, then watch the joint stud for movement. On aluminum arms, lever against the steel knuckle instead. Never pry against a brake hose or an ABS wire.
Loaded vs. unloaded checks, and why the order changes the answer
Hanging suspension hides play. A ball joint that feels tight at full droop can knock under load. Do the pry test at ride height, on building a sturdy pair of ramps, whenever the layout allows.
Reading the Results: What Each Finding Actually Means
Clunk over bumps, hum at speed, wander on-center: matching noise to part
Half the battle is refusing to guess. Match the symptom to the system before you buy anything.
| What you notice | Most likely cause |
|---|---|
| Single clunk over bumps | Sway bar end link or worn bushing |
| Rhythmic hum that rises with speed | Wheel bearing, not suspension |
| Wander and a dead spot on center | Tie rod ends or rack play |
| Nose dive and float after dips | Worn dampers |
Light oil mist vs. a blown damper
A thin film of dust stuck to oil is normal seepage. A shiny, wet body with oil running to the lower mount is a failed seal. If the shaft shows pitting or a bright wear ring, replace the pair.
Play at 12 and 6 o'clock vs. 3 and 9 o'clock
Grab the tire at 12 and 6 and rock it. Movement there points to a ball joint or a wheel bearing. Rock at 3 and 9 and any click is usually a tie rod end.
Have a helper watch each joint while you do it.
Cupping, feathering, and edge wear as suspension evidence
Cupped or scalloped tread means the tire is bouncing, so the damper isn't controlling it. Feathering across the tread blocks points to toe error from worn tie rods. Both patterns come back on new tires unless you fix the cause.
One caveat. Suspension wear rarely sets a code, so choosing a scan tool won't diagnose a clunk. It will flag a wheel speed sensor you damaged while prying.
The Decision Branches: Fix Now, Book It Soon, or Park the Car
Safe to drive, monitor at next oil change
Light misting on a damper, a slightly worn link, or a small bushing crack is a watch item. Note the mileage and recheck in 5,000 miles.
Drive gently, repair within weeks
If the car floats over dips, cups a tire, or clunks on every bump, book it. Keep speeds down and skip towing or heavy loads until then.
Stop driving and tow it: the hard failure criteria
Park the car if you find any of these:
- Visible play in a ball joint stud
- A cracked or broken coil spring
- A bent or cracked control arm
- A seized damper or a mount torn through
- Steering with more than an inch of free play
A separated ball joint drops a corner of the car. At speed that's a crash, not a repair bill. Before anyone hooks a strap on, make sure you know a solid hook point.
NHTSA keeps a VIN-based recall lookup at nhtsa.gov worth checking for suspension campaigns.
When an alignment is wasted money (and when it isn't)
Skip the alignment until worn parts are replaced. New tie rod ends change toe, so get a four-wheel alignment after the repair. Doing it first is money burned.
What the Repair Actually Costs, Corner by Corner
Prices move with region and vehicle, but the spread between a link and a control arm is enormous.
| Part (one corner) | Part cost | Typical installed |
|---|---|---|
| Sway bar end link | $15 to $40 | $50 to $150 a pair |
| Outer tie rod end | $25 to $60 | $150 to $300 |
| Ball joint | $30 to $100 | $200 to $400 |
| Control arm (loaded) | $80 to $300 | $400 to $800 |
| Bare strut | $80 to $200 | $400 to $900 per axle |
| Loaded strut assembly | $150 to $450 | $600 to $1,200 per axle |
| Four-wheel alignment | Not applicable | $100 to $200 |
Sway bar links, tie rod ends, and ball joints
These are the cheap wins. A link is a 20-minute job with two wrenches. Whether spending up on steering parts pays off comes down to sealed versus greaseable designs and how long you plan to keep the car.
Brand reputation matters too, and one common GM-brand option draws mixed owner feedback.
Bare strut vs. loaded quick strut assembly
A bare strut is cheaper, but you need a spring compressor and you reuse the old spring. A loaded assembly costs more and swaps in under an hour a side. If the springs are rusty, buy loaded.
Control arm replacement vs. pressing in bushings
Pressing bushings saves money on parts and costs more in labor. A loaded arm with fresh bushings and a ball joint is usually the faster, more predictable route.
DIY vs. shop labor and the alignment follow-up
Shop rates run roughly $100 to $200 an hour as of 2026. Book time for struts is often 1 to 2 hours a corner. Doing it yourself means budgeting for rattling rusted bolts loose and a torque wrench for the final pull.
Mistakes That Turn a Cheap Fix Into a $700 Job
Most big suspension bills start with a small mistake made during the check itself. Four of them come up again and again.
Prying on aluminum arms, ABS wires, and brake hoses
Never lever off a brake hose, a hard line, or a wheel speed sensor wire. Cast aluminum control arms can crack under a pry bar. Push the bar against the steel knuckle instead, and lean on it slowly rather than shoving.
Tightening bushings at full droop instead of ride height
Bushings have to be torqued with the suspension loaded at normal ride height. Tighten them at full droop and the rubber sits twisted from day one. It tears within a few thousand miles, and you pay for the same job twice.
Reusing torque-to-yield bolts and replacing only one side
Torque-to-yield fasteners stretch once and that's it. Reusing them risks a snapped bolt stuck in a blind hole. Fit both sides at the same time as well.
One fresh damper next to a tired one makes the car feel odd and wears the new part out faster. Forcing rusted hardware has its own price, so check what replacement fasteners run before you lean on a breaker bar.
Springs, air suspension, and jack stand hazards
A compressed coil spring stores enough energy to kill you. Use a rated compressor, and never heat a spring to free it. On air suspension, depressurize the system per the OEM procedure first.
And keep every part of you out from under a car held only by a jack.
Frequently Asked Questions
How often should I check suspension parts?
Inspect the suspension once a year or every 12,000 miles, whichever comes first. If your roads get salted or potholes are common, shorten that to every 6,000 miles. Cars past 100,000 miles deserve a look at every oil change.
Can I check suspension wear without a lift?
Yes, within limits. Ramps and jack stands get you most of the way there. Do the visual pass and the road test at ground level, then raise the car so the wheels hang free for the rock test.
A lift only makes loaded pry tests easier.
How do I tell a bad strut from a bad tire?
Swap the suspect tire to another corner and drive the same road. If the noise or vibration moves with the wheel, it's the tire or a wheel bearing. If it stays put, the damper or a joint is the problem.
Cupped tread usually points at the damper.
How much ball joint play is too much?
Any visible up and down movement at the stud is too much on most passenger cars. Manufacturer specs often cap radial play near 0.050 inch, about 1.3 mm. Measure with a dial indicator when you can, and replace the joint if it clicks or the boot is torn.
Should suspension parts be replaced in pairs?
Yes for dampers, springs, and most wear joints. A new strut paired with a tired one gives uneven damping and can pull under braking. Sway bar links and bushings are cheap enough that pairs make sense too.
Replace one side alone only if the other was done recently.
