
Most trailer hookup failures don't happen on the road. They happen in a driveway, in the ninety seconds after you think "that looks good" and climb back in the truck. Learning how to hook up a trailer properly is really about slowing down for those ninety seconds.
The stakes are easy to underrate. Federal rules in 49 CFR 393.48 require safety chains strong enough to hold the trailer if the coupling lets go, and FMVSS No. 404 requires breakaway brakes on trailers over 3,000 pounds GVWR. Those parts only work when they're attached right.
Here's how to get every connection correct, starting with why the routine matters more than the hardware.
How to Hook up a Trailer
Learning how to hook up a trailer takes six steps. Chock the trailer wheels first. Lower the coupler fully onto a matching ball.
Latch it, then insert the safety pin. Cross the safety chains under the tongue. Connect the breakaway cable and the lights.
Finish with a tug test.
Why a Thirty-Second Habit Decides Whether You Make It Home
Picture the scene. You've backed up, dropped the coupler onto the ball, flipped the latch, and given the tongue a shake. Everything feels right.
So you drive off.
That's the exact moment most hookup failures get locked in. A coupler can close its latch on top of the ball instead of over it. The handle still snaps down.
The lever still feels tight.
Nothing on the outside of the coupler tells you it's wrong. The trailer will follow you out of the driveway. It may even survive a mile of smooth asphalt.
Then a pothole, a hard stop, or a railroad crossing jolts the tongue off the ball. The trailer goes wherever physics sends it. At that point the safety chains are the only thing standing between a loose trailer and oncoming traffic.
Why your eyes are the wrong tool
From standing height, a seated coupler and a coupler resting on top of the ball look almost identical. The gap is often a quarter inch or less. You will not see it in the shadow under a fender.
A hand on the tongue tells you more. Lift up hard after latching. A properly seated coupler won't move.
If the tongue rocks upward even slightly, the ball isn't inside the jaws.
Then there's the size problem. A 2-5/16-inch coupler will swallow a 2-inch ball far enough to latch. It feels solid in the driveway.
It comes apart at highway speed, because the ball is too small for the jaws to clamp.
The ten-second test that catches both
The tug test is the answer, and it costs almost nothing. Chock the trailer wheels. Latch the coupler.
Then pull forward gently against the chocks.
If the coupler isn't seated, the tongue lifts and the ball pops out in front of you, at walking pace, with nobody around. If it's seated, the truck strains and the trailer stays planted. That's the whole test.
Run it every time, even for a two-mile run to the dump. Short trips are where people skip steps, and a dropped tongue at 25 mph still ruins your afternoon.
The legal and financial side of a bad latch
Federal rules assume the coupling can fail. Safety chain requirements under the federal standard exist because trailers do come off balls. Chains are a backup for a known failure mode, not a substitute for a proper latch.
If a tongue does hit the pavement, don't drag it with a chain hooked to a bumper. You need tow-rated attachment points and a strap built for the load, or you'll tear something expensive off the truck.
There's a liability angle too. A trailer that separates and damages another vehicle usually lands on your insurance as an at-fault claim. Some policies get difficult when the cause is an uncoupled hitch.
Ten seconds of tugging is cheap protection.
The Four Parts That Actually Keep a Trailer Attached
Four connections do all the work. Get all four right and the rig is as safe as the hardware allows. Miss one and the other three have to cover for it.
| Part | What it does | How it fails |
|---|---|---|
| Coupler and latch | Holds the tongue to the ball at rated capacity | Latched on top of the ball, worn jaws, wrong ball size |
| Safety chains | Catch the tongue if the coupling lets go | Not crossed, too long, too short, wrong attachment point |
| Breakaway system | Applies trailer brakes if the trailer separates | Dead battery, pin never set, lanyard clipped to the chain |
| Lights and wiring | Signals, brake lights, grounds, trailer brakes | Corroded pins, wrong connector, bad ground |

Image source: Wikimedia Commons / Asurnipal (CC BY-SA)
The coupler is the only load-bearing part
Everything else on this list is a backup. The coupler carries the tongue weight and pulls the trailer, and it's rated for a specific ball size and gross trailer weight.
Look under the coupler body for a stamp. It tells you the ball size and the capacity. If the stamp says 2-5/16 inch and your ball says 2 inch, you have a problem no amount of latching will fix.
Worn jaws are the quiet version of the same failure. A coupler that's been dragged over the ball for years can develop slop that lets it chatter and eventually walk off. If the latch closes with no resistance at all, that's your clue.
Safety chains are a cradle, not a leash
Cross the chains under the tongue in an X. If the coupler lets go, the crossed chains form a cradle that catches the tongue instead of letting it plow into the pavement.
Attach them to the dedicated loops on the ball mount or hitch, never to the ball itself or a random hole in the bumper. Length matters both ways. Too long and they drag, wear through, and snag.
Too short and they bind in a tight turn and can snap.
Working load limit is the number most people never check. The combined rating of both chains should meet or exceed the trailer's gross weight. Chain that came with a used trailer is often undersized or rusted past its rating.
The breakaway system is the last line of defense
A breakaway switch is a small box on the tongue with a plastic pin and a coiled lanyard. If the trailer separates, the lanyard pulls the pin and the trailer's battery applies the brakes.
Clip the lanyard to the tow vehicle's hitch or bumper, not to the safety chain and not to the ball mount pin. If it's clipped to something that travels with the trailer, it never pulls and the system never fires.
The battery is the part that quietly dies. It trickle-charges while the trailer is plugged in, which means a trailer that sat all winter may have nothing stored. Charge it before the season and check it monthly.
Do a live test each spring. Chock the wheels, pull the pin by hand, and listen for the brake magnets to hum. Then push the pin back in fully.
A breakaway that doesn't work is worse than none, because you're counting on it.
Lights don't stop the trailer, but they prevent the crash
Trailer lights don't slow anything down. What they do is tell the driver behind you that you're braking, turning, or sitting still at a light with a load of landscaping rock.
The most common failure isn't a burnt bulb. It's a bad ground, usually at a corroded connector or a rusty mounting stud. That's why a trailer can show perfect lights in the driveway and go dark two miles later.
Ball Size and Coupler Stamping: Where "Almost Fits" Turns Deadly
Ball diameter is the single most consequential measurement in the whole hookup. Not because the numbers are complicated, but because two of them look nearly the same and behave completely differently.
There are three sizes you'll meet in the real world. Each one has a job, and the job is decided by the coupler, not by the ball you happen to own.
| Ball size | Typical capacity range | What it usually tows |
|---|---|---|
| 1-7/8 inch | Up to about 2,000 lb | Small utility trailers, light boat trailers, folding campers |
| 2 inch | 3,500 to 10,000 lb depending on shank | Most utility, cargo, boat, and small equipment trailers |
| 2-5/16 inch | 10,000 lb and up | Travel trailers, car haulers, heavy equipment, deckover trailers |
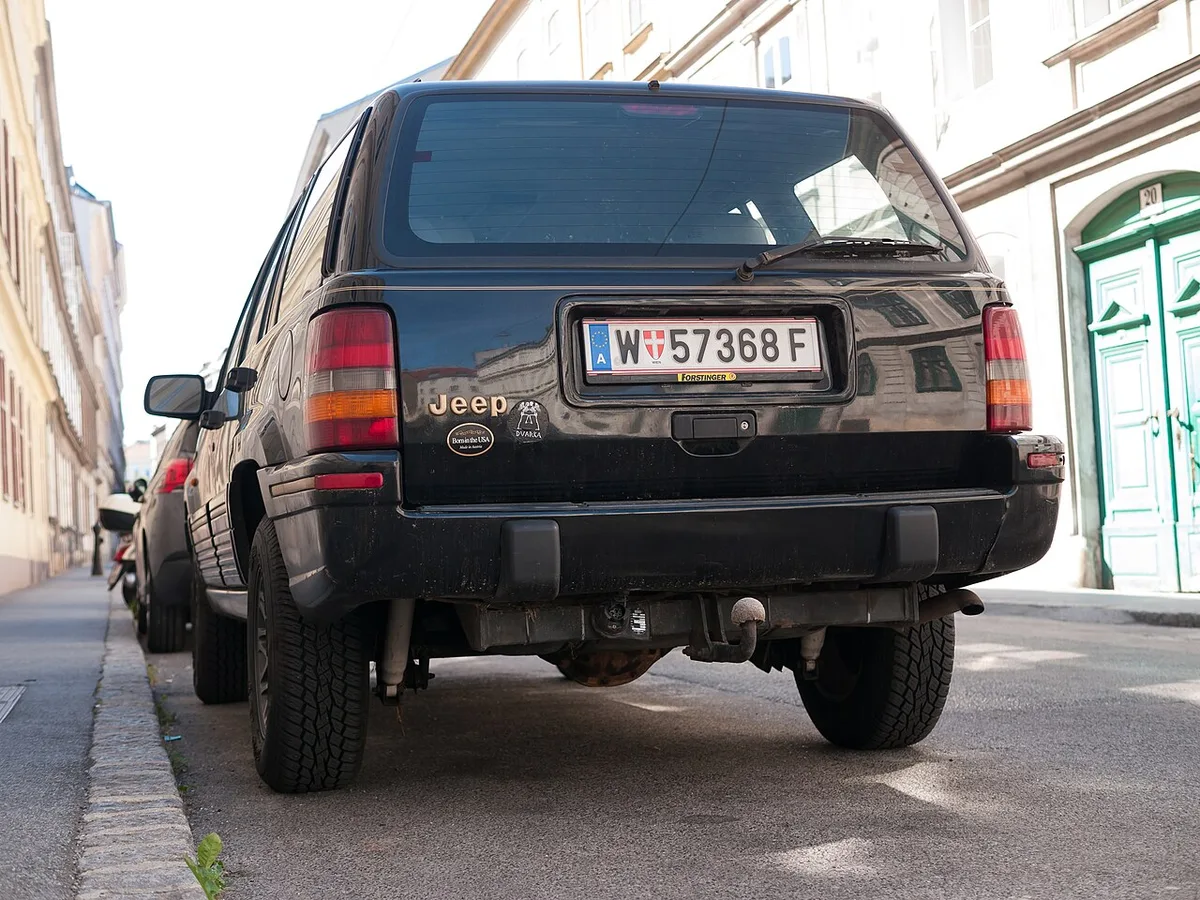
Image source: Wikimedia Commons / Matti Blume (CC BY-SA)
Why a 2-inch ball in a 2-5/16-inch coupler is the classic killer
The 2-5/16 coupler opening is about 5/16 inch wider than the ball. That's enough for the latch to close and feel normal. It's not enough for the jaws to grip.
Under load the ball rattles inside the coupler. Every bump works it a little looser. On a hard brake or a rough expansion joint, the tongue lifts and clears the ball entirely.
This is why you check the stamp before you drop the coupler, not after. Reading a stamp takes five seconds. Recovering from a separation takes a police report.
How to verify ball size without guessing
Start with the stamp on the coupler. It's usually on the top or side of the coupler body, sometimes under a layer of paint.
If the stamp is gone or unreadable, measure the ball with calipers, not a tape measure. Calipers catch the difference between 2.000 and 2.0625 inches. A tape measure does not.
Then check the ball's own rating, which is stamped into the top or side of the ball. The ball must meet or exceed the trailer's gross weight. A 2-inch ball rated at 3,500 lb on a 7,000 lb trailer is a failure waiting for a downhill grade.
Ball rating, shank size, and torque
Ball capacity is tied to shank diameter, not just ball diameter. A 2-inch ball with a 3/4-inch shank is typically rated lower than the same ball with a 1-inch shank.
The shank also has to fit your ball mount. Too short a shank and you can't get a full nut engagement. Too long and the nut bottoms out before the ball seats.
Torque values vary by manufacturer, so check the paperwork that came with the ball. Common figures run around 160 lb-ft for 3/4-inch shanks, 250 lb-ft for 1-inch shanks, and 450 lb-ft for 1-1/4-inch shanks.
That last number is beyond most hand tools. Running an impact gun gets you there, but verify the final torque with a real wrench. Over-torquing stretches threads just as badly as under-torquing.
Wear, grease, and the balls people forget about
A chrome ball holds up better against rust. A zinc ball is fine but will pit in salt air, and pitted chrome will chew up coupler jaws over time.
A light film of grease on the ball cuts wear and noise. Wipe it on before the trip, then wipe the ball clean afterward so grit doesn't turn into grinding paste.
Replace a ball that's visibly worn flat on top. A flattened ball sits lower in the coupler, which lets the latch close without full engagement underneath. That's the same failure as a size mismatch, just slower.
Hitch Class, Ball Mount Rise and Drop, and Getting the Trailer Level
Your hitch class sets the ceiling on everything else. It's rated for a gross trailer weight and a tongue weight, and both numbers have to clear your loaded trailer, not the empty one.
| Class | Receiver size | Typical GTW | Typical tongue weight | Common use |
|---|---|---|---|---|
| I | 1-1/4 inch | 2,000 lb | 200 lb | Light utility trailers, bike racks |
| II | 1-1/4 inch | 3,500 lb | 350 lb | Small boats, pop-ups, light cargo |
| III | 2 inch | 6,000 to 8,000 lb | 600 to 800 lb | Most half-ton towing, utility and boat trailers |
| IV | 2 inch | 10,000 lb | 1,000 lb | Enclosed cargo, car haulers, larger travel trailers |
| V | 2-1/2 inch | 12,000 to 20,000 lb | 1,200 lb and up | Heavy equipment, large travel trailers |
Those numbers are typical ranges, and weight-distributing setups push them higher. Class III hitches often jump to 10,000 lb GTW and 1,000 lb tongue weight with a weight-distributing head.
The numbers that actually limit you
The hitch isn't usually the weak link. Payload is. Tongue weight, passengers, cargo, and the hitch itself all come out of your truck's payload rating, which is printed on the door jamb sticker.
Gross combined weight rating matters too. As of 2026, most half-ton pickups publish maximum tow figures that assume a weight-distributing hitch and a stripped-down truck. Your real truck, with real people in it, tows less.
Pull three numbers from the owner's manual before you hook anything up. Max tow rating, GCWR, and payload. Then weigh the loaded trailer once at a scale.
Guessing here is how people end up white-knuckled on a bridge.
Rise and drop: getting the trailer frame level
Park the trailer on level ground, tongue jack down, and measure the height of the coupler opening. Then measure the height of the top of your ball with the truck loaded.
The difference is the rise or drop you need. Ball mounts come in steps, usually 2, 4, 6, and 8 inches in either direction. Pick the closest one that gets the trailer frame level, within an inch or two.
A trailer that sits nose-high tends to feel light and wander. It also unloads the front axle slightly, which changes how the truck answers your steering grip and how the headlights aim.
Nose-low is the opposite problem. It adds tongue weight and can overload the ball mount. If you're fighting to get an adjustable mount level, you probably need a taller ball mount, not a bigger hammer.
Weight carrying versus weight distributing
A weight-carrying setup is the simple version. The ball mount slides into the receiver, the trailer hangs off the back, and the rear axle takes the load.
A weight-distributing hitch adds spring bars that push load back onto the front axle and the trailer axles. It's the right call when tongue weight approaches your truck's payload limit or the trailer is long and heavy.
You'll know it's time by feel. If the steering feels vague and the headlights point at the treetops, the rear is squatting and the front is unloaded. Spring bars fix that geometry.
Worn front-end parts amplify every one of these symptoms. Ball joints and tie rod ends with play make a properly hitched trailer feel unstable. Worth a look at worn front-end parts before you blame the hitch.
Hitch pins, clips, and locking hardware
The hitch pin holds the ball mount in the receiver. A plain pin with a clip is fine. A locking pin costs a few dollars more and stops someone from walking off with your mount at a trailhead.
Check the clip every stop. Clips vibrate off, and a ball mount sliding out of a receiver at speed is a genuinely bad day for everyone behind you.
The Hookup Walkthrough, Start to Finish
Here's the full sequence, in the order that keeps you out of trouble. The whole thing runs five to ten minutes once it's habit.
| Step | Action | What you're confirming |
|---|---|---|
| 1 | Chock trailer wheels | Trailer can't roll while you work |
| 2 | Raise tongue jack, align ball under coupler | Straight approach, no side load |
| 3 | Lower coupler fully onto ball | Ball is seated inside the jaws |
| 4 | Latch and insert secondary pin or lock | Coupler can't open in transit |
| 5 | Cross and attach safety chains | Tongue is cradled if it separates |
| 6 | Clip breakaway lanyard to the tow vehicle | Brakes fire if the trailer leaves |
| 7 | Plug in wiring, check every light function | Signals and brakes reach the trailer |
| 8 | Raise jack fully, stow the foot | Nothing drags or catches |
| 9 | Tug test against the chocks | Coupling holds under real load |
Chock, Align, Lower, Latch, Lock
- Chock both sides of at least one trailer wheel. Use real chocks, not a brick. Before you start, glance at tire condition and wheel fastener torque, since a trailer that's been sitting all winter is where loose hardware shows up.
- Crank the tongue jack up so the coupler clears the ball by a couple of inches. Swing the jack foot out of the way or leave it down, but know where it is.
- Back up until the ball sits directly under the coupler. A rear camera makes this a one-shot job. Without one, get out and look, then get out and look again. Depth perception through a mirror is worse than you think.
- Lower the jack slowly until the coupler drops onto the ball. Listen for the clunk. If it never clunks, the coupler may be resting on top of the ball.
- Look at the coupler from the side, then lift the tongue hard. No movement means it's seated. Movement means start over.
- Close the latch and push the secondary safety pin or lock through. Many couplers have a second hole specifically to stop the latch from bouncing open. Use it.
That last part is easy to skip. A latch alone can vibrate open over washboard gravel. The pin is what makes it stay shut.
Chain Crossing, Breakaway Lanyard, and the Tug Test
- Cross the chains under the tongue and hook them to the hitch loops. Leave enough slack to turn hard without binding, and not so much that they drag on a dip.
- Clip the breakaway lanyard to a fixed point on the tow vehicle. The hitch or a bumper loop works. The chain does not.
- Plug in the wiring. Seven-way blade connectors carry tail lights, both turn signals, electric brakes, 12V charging, reverse, and ground. Four-way flat does lights only, no brakes.
- Check the lights with a helper or walk around the rig yourself. Running lights, left turn, right turn, brake, and hazards. Don't forget the license plate light.
- Fix dead circuits before you move. Nine times out of ten it's corrosion or a bad ground at the plug. On a newer truck, a diagnostic scan tool can pull trailer module codes that tell you which circuit is dead.
- Raise the jack fully and stow the foot, handle, and any loose pins. A jack foot left down will find the first speed bump.
- Run the tug test. Chocks still in place, transmission in drive, gentle throttle. Watch the coupler. Then set the parking brake, pull the chocks, and do one final walk around the whole rig, including a glance at the glass and your wiper blades because you'll want visibility in the rain.
The walk around isn't superstition. It's the only point in the process where you see the whole rig from outside and notice the thing you forgot.
A word on solo hookups
Most people hook up alone, and that's where alignment goes wrong. The trick is to stop once, get out, and look, rather than nudging the truck forward and back five times.
A magnetic hitch alignment system or a backup camera aimed at the ball turns a three-person job into a one-person job. Failing that, put a piece of tape on the ground under the coupler and another under the ball, then line them up from the driver's seat.
Take your time backing. A trailer that's two inches off center still drops onto the ball if the coupler is wide enough, so don't chase perfection. Chase alignment you can see.
Wiring and Lights: Matching the Connector and Testing Every Pin
Trailer wiring fails in two ways. Sometimes it dies completely. More often it works perfectly while parked and quits somewhere around mile three.
Both trace back to the same short list of causes: the wrong connector, a mismatched adapter, or a ground that only holds up when the truck isn't moving.
Your truck's connector has to match the trailer's, and the pin count has to cover everything the trailer actually needs. A four-way flat carries lights only. If the trailer has electric brakes, it needs more pins than that, and no adapter changes the physics.
| Connector | What it carries | Typical trailers |
|---|---|---|
| 4-way flat | Tail, left turn/brake, right turn/brake, ground | Light utility, small boat, folding camper |
| 5-way flat | The four above plus reverse or a brake feed | Boat trailers with surge lockout, small braked utility |
| 6-way round | Six circuits, often aux power | Older campers, utility trailers |
| 7-way blade (RV) | Lights, electric brakes, 12V charge, reverse, ground | Travel trailers, car haulers, heavy utility |
| 7-way pin (commercial) | Similar circuits, heavier housing | Commercial and equipment trailers |
The 7-way blade is the one you'll meet most often on anything with brakes. It's worth knowing what each pin does, because when a circuit dies you need to test one wire, not the whole harness.
| Pin | Function | Common wire color |
|---|---|---|
| 1 | Ground | White |
| 2 | Tail and running lights | Brown |
| 3 | Left turn and brake | Yellow |
| 4 | Right turn and brake | Green |
| 5 | Electric brakes | Blue |
| 6 | 12V auxiliary charge | Black |
| 7 | Reverse lights | Purple |
Color codes vary by manufacturer. Trust the pin position and a meter, not the wire color, especially on a used trailer someone re-wired in a hurry.
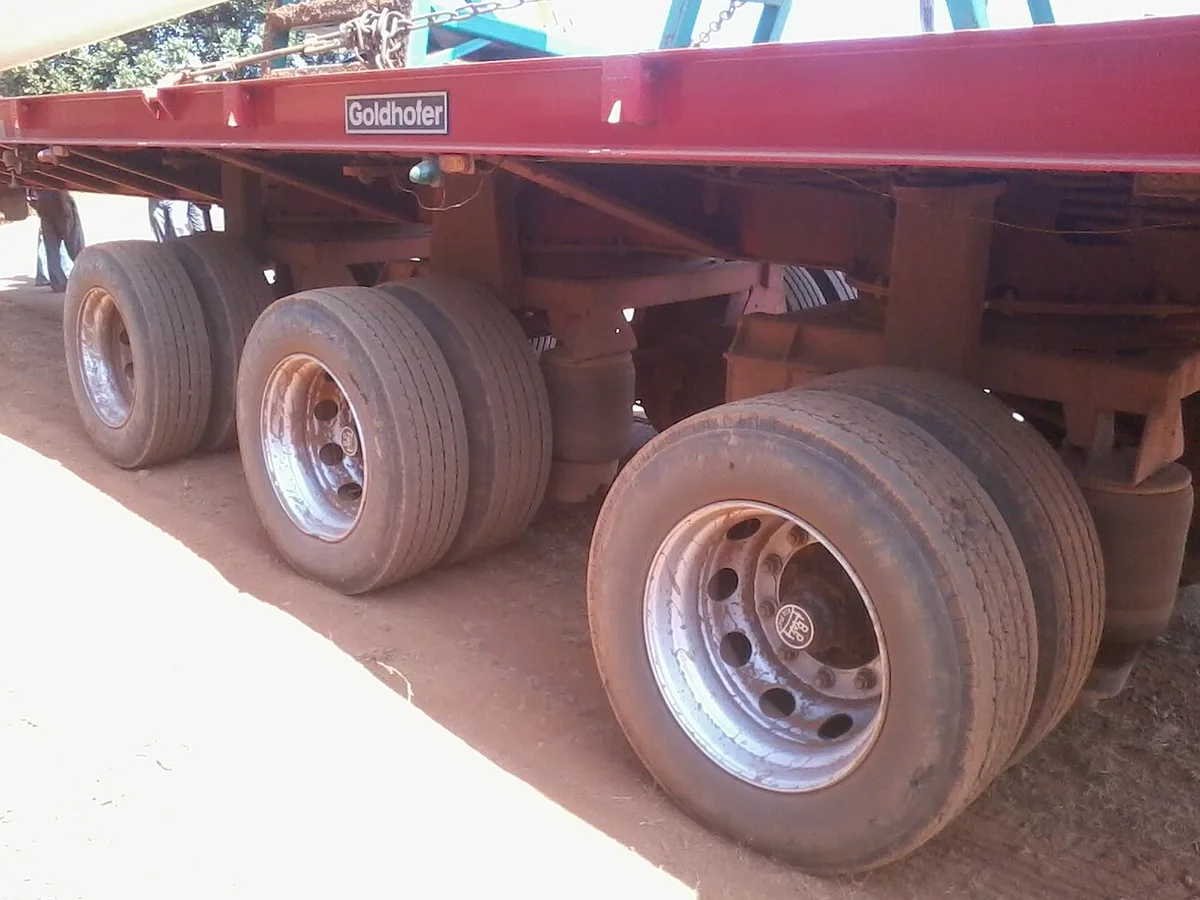
Image source: Wikimedia Commons / Photohelp13 (CC BY-SA)
How to test every function before you drive
Chock the wheels, plug in, and walk the rig with the truck's lights on. Check running lights first, then left turn, right turn, brake, hazards, and reverse. Don't forget the license plate light, which is a favorite for roadside stops.
Do it alone and you'll be walking back and forth to the cab. A cheap trailer light tester plugs into the truck side and confirms the truck's circuits in seconds. From there, any dead function is on the trailer.
Why do my trailer lights work in the driveway and quit on the road?
A bad ground is usually the answer. The trailer frame is the return path for every circuit, and it only conducts well when the connection is clean and tight.
Corroded connector pins, a rusty mounting stud, or a ground wire bolted to painted steel all work fine sitting still. Add vibration and moisture from a wet road and the circuit opens.
Clean the pins with contact cleaner, add dielectric grease, and check that the white ground wire goes to bare metal. If the trailer has a ground screw on the frame, back it out and look at it. A rust-colored thread tells you everything.
Adapters: what they cost you
A 7-to-4 adapter is fine for a light utility trailer with no brakes. It passes the light circuits and nothing else.
Put that same adapter on a trailer with electric brakes and you've just disabled the brakes and the 12V charging line. The trailer rolls. The battery goes flat.
Nobody notices until the breakaway needs power it doesn't have.
Adapters also add a connection point, and every connection point is a future corrosion site. Use the right connector when you can, and treat adapters as a temporary fix.
Securing the harness
Leave enough slack for a full-lock turn without stretching the cable. Too much slack and the harness drags, wears through the insulation, and shorts against the frame.
Loop the excess and secure it with a zip tie to the trailer tongue, not to the safety chains. Tape the plug connection if it sits low, or use a weatherproof boot. Road spray finds every exposed pin eventually.
Brake Controllers and Breakaway Systems: The Last Line of Defense
Trailer brakes are the difference between stopping in a straight line and being pushed through an intersection. Federal rules require them on trailers over 3,000 pounds GVWR, and most states set similar thresholds for their own roads. The trailer safety guidance published by NHTSA treats working trailer brakes as a baseline requirement, not an upgrade.
The type of brake on the trailer decides what you need in the cab. Get that pairing wrong and the trailer either drags or shoves.
| Brake type | How it works | What you need in the cab |
|---|---|---|
| Electric drum | Magnet energized by the controller applies the shoes | A brake controller |
| Electric over hydraulic | Electric signal drives a hydraulic pump | A controller rated for electric-over-hydraulic |
| Surge (over-run) | Trailer's own momentum pushes a hydraulic master cylinder | Nothing, self-contained |
| Air | Compressed air, commercial trailers | Tractor air system, not a light-duty setup |
Surge brakes are common on boat trailers because there's no wiring to drown at the ramp. They work, but they can't be applied manually from the cab, and they don't play well with backing up a steep incline unless the trailer has a reverse lockout.
Time-delayed versus proportional controllers
A time-delayed controller ramps brake voltage at a rate you set. It's cheap, simple, and it applies the same ramp no matter how hard you're stopping.
A proportional controller reads deceleration and scales braking to match. Hard stop, full trailer braking. Gentle coast to a light, light trailer braking.
Most drivers find it smoother in traffic and on grades.
Factory-integrated controllers on newer trucks fall into the proportional camp and usually include a manual override slider. That slider matters more than people realize.
Setting gain without guessing
Gain is how much brake force the controller sends. Too low and the trailer pushes you. Too high and the trailer locks its wheels on wet pavement and tries to pass you.
Find an empty lot or a quiet road. Set gain low, then drive 20 mph and squeeze the manual override. Increase gain until the trailer brakes just short of locking.
Back it off a notch.
Then test on the surface you'll actually drive on. Gravel and rain need lower gain than dry asphalt. Mountain descents usually want a bit more, plus a lower gear so the truck's engine does its share.
Testing the breakaway system properly
FMVSS No. 404 exists because a separated trailer with no brakes is a missile. The breakaway switch pulls a pin, the onboard battery energizes the brake magnets, and the trailer stops itself.
Test it once a season at minimum. Chock the wheels, pull the pin straight out, and listen. You should hear a low hum or click from each wheel with electric brakes.
No sound means no power, a dead battery, or a broken wire.
Push the pin back in fully afterward. A pin left half-seated can fall out on the road and burn the battery flat, which leaves you with a dead system the next time it matters.
Check battery voltage with a meter. A healthy charged unit reads around 12.6 volts. Anything under 12 is suspect, and a battery that won't hold a charge past a day is done.
Most breakaway batteries are sealed lead acid in the 4 to 5 amp-hour range, and they typically last three to five years. They charge off the truck's 12V aux pin, so a trailer that sits unplugged all winter arrives in spring with nothing stored.
Water, salt, and the slow death of a brake system
Electric drum brakes live inside a hub that gets splashed, dunked, and sprayed. Water intrusion rusts the magnet face and glazes the shoes.
Boat trailers feel this first, but winter road salt does the same job on utility trailers. Pull a hub once a year and look. Rust dust and a scored drum mean the brake is doing less than you think.
Tongue Weight, Cargo Placement, and the Sway That Follows
Tongue weight is the downward force the trailer puts on the ball. Get it right and the trailer tracks like it's on rails. Get it wrong and you'll spend the drive chasing the wheel.
The conventional target is 10 to 15 percent of gross trailer weight. A 5,000-pound loaded trailer wants roughly 500 to 750 pounds on the tongue.
Gooseneck and fifth-wheel trailers run higher, typically 15 to 25 percent, because the load sits over the rear axle instead of behind it.
| Loaded trailer weight | Target tongue weight (10 to 15%) |
|---|---|
| 2,000 lb | 200 to 300 lb |
| 3,500 lb | 350 to 525 lb |
| 5,000 lb | 500 to 750 lb |
| 7,000 lb | 700 to 1,050 lb |
| 10,000 lb | 1,000 to 1,500 lb |
How to measure tongue weight at home
Three methods work, and they cost wildly different amounts.
- Tongue weight scale. A dedicated hydraulic or electronic scale sits under the coupler. Fastest and most accurate. Typical cost runs $130 to $200.
- Bathroom scale and a beam. Put a piece of pipe under a sturdy beam, set the coupler on one end at a known distance, and set the scale under the other. Multiply by the leverage ratio. Cheap, fiddly, and accurate enough if you measure carefully.
- Certified scale, three passes. Weigh the truck alone, the truck with the trailer axles off the scale, and the whole rig. The math gives you tongue weight, trailer weight, and whether you're over on either axle.
The bathroom scale method has a hard limit. Most household scales top out around 400 pounds, so the leverage ratio has to do the work for anything heavy.
Cargo placement that keeps the tongue loaded
Load the heavy stuff over or slightly ahead of the trailer axles. That puts weight where the trailer is designed to carry it and keeps a healthy share on the tongue.
Load too far back and you get negative or near-zero tongue weight. The trailer unloads the ball, the rear of the trailer steers the rig, and sway starts at a speed you didn't choose.
Load too far forward and you overload the tongue, the truck squats, and the front axle goes light. Steering gets vague and the headlights climb. If the beams are pointing at the treetops, aim them before you spend money on a replacement bulb.
Secure everything. A generator that shifts six inches mid-turn changes your tongue weight in real time. Straps, not hope.
What actually causes sway, and what fixes it
Sway is a trailer oscillating side to side while the truck tries to follow. It builds. It doesn't settle on its own.
- Too little tongue weight. The number one cause. Fix the load before you buy hardware.
- Trailer sitting nose-high. Raises the center of gravity and lightens the tongue. Fix it with ball mount drop.
- Too much trailer for the tow vehicle. A long, heavy trailer behind a short wheelbase truck amplifies every input.
- Crosswinds and passing semis. A trigger, not a root cause. A well-loaded rig shrugs them off.
- Worn tow vehicle suspension or tires. Soft rear springs let the whole rig squat and wander.
Fixes scale with the problem. A friction sway bar helps a marginal setup. A weight-distributing hitch with integrated sway control is the real answer for heavy travel trailers.
Nothing fixes a trailer loaded tail-heavy except reloading it.
If sway starts, ease off the throttle smoothly and hold the wheel steady. Braking hard mid-sway can start a jackknife. Where your hands sit on the wheel matters here, and a steady two-handed grip gives you the small corrections sway actually needs.
The Mistakes That Actually Cause Wrecks
Most of these take under a minute to prevent. All of them show up in crash reports.
- Latching on top of the ball. The latch closes, the handle feels tight, and the coupler is riding on the ball instead of gripping it. Always lift the tongue after latching.
- Running a 2-inch ball in a 2-5/16-inch coupler. It latches. It feels fine. It separates at highway speed. Read the stamp on the coupler every single time.
- Skipping the tug test. Ten seconds against chocked wheels catches the two failures above before you leave the driveway.
- Chains not crossed. Straight chains let the tongue dive into the pavement on a separation. Crossed chains cradle it.
- Chains hooked to the ball or bumper. Neither is rated for the load. Use the dedicated loops on the ball mount or hitch.
- Breakaway lanyard clipped to the safety chain. It travels with the trailer, so it never pulls. Clip it to the tow vehicle.
- Driving with the jack foot down. It catches on the first dip, bends the jack, and can pole-vault the tongue.
- Ignoring the hitch pin clip. Clips vibrate off. A ball mount sliding out of a receiver at 60 mph is a lethal projectile.
- Overloading payload, not just tow rating. Tongue weight, passengers, tools, and the hitch itself all eat payload. The door jamb sticker is the real limit.
- Not knowing where the rated attachment points are. If you ever need to pull a stuck rig, hook to a rated recovery point, not a bumper bracket or a tie-down loop.
- Leaving loose gear in the bed. A cooler sliding into the tailgate at a hard stop is a bad surprise. A hard or soft bed cover keeps straps and tools contained.
- Towing with a trailer that sat all winter. Seized brake shoes, cracked tires, dead breakaway battery. Do a spring inspection before the first trip.
Hooking Up Alone: Backing, Cameras, and Depth Perception
Most hookups happen without a spotter. That's where alignment goes wrong, and where people spend ten minutes nudging forward and back instead of one clean approach.
Backing to a trailer is a geometry problem, not a talent. Line the truck up straight, get the ball roughly centered in the mirror, and move slowly. Correct with small steering inputs and stop the moment you feel lost.
The technique that saves the most time
Pull forward past the trailer more than you think you need to. A wide starting angle straightens out into a clean approach.
Watch the ball in the lower part of the mirror, where the perspective is less distorted. Aim the ball at a fixed point on the coupler, like a corner of the latch, rather than the whole coupler.
Then get out and look. Get out as many times as you need. Nobody is scoring you.
Magnetic alignment and camera aids
Magnetic hitch alignment kits use a ball on a rod on the coupler and a guide on the truck. Line up the two and you're centered. They cost $20 to $40 and turn a two-person job into a solo one.
A tailgate or bumper camera aimed at the hitch works even better on newer trucks. Some models include a hitch assist view that overlays a target line.
Neither replaces the final walk around. Both just cut the number of attempts from five to one.
Hand signals if you do have a helper
If someone's guiding you, agree on signals before you start. Shouting through glass doesn't work.
| Signal | Meaning |
|---|---|
| Both palms pushed toward you | Keep coming back |
| Palms held up, still | Stop |
| One hand waved in a circle, then pointed | Steer that direction |
| Fist held up | Stop now, something's wrong |
| Hand chopping downward repeatedly | Slow down |
The last one matters most. A helper who yells "whoa" is less useful than one who holds up a fist.
Unhitching alone without drama
Chock the wheels before you touch the latch. Then lower the jack until it carries the tongue weight, pull the pin, open the latch, and crank up.
Never unload the jack fully on a slope. Never unhook the chains until the jack is carrying the trailer. And never leave a trailer standing on a jack foot on soft ground, because it will sink and lean within a day.
Boat Ramps, Road Salt, and Mountain Grades: Hookup in Real Conditions
The driveway is the easy version. Real hookups happen at a steep concrete ramp, in a February slush storm, or at the bottom of a six-mile grade with the trailer loaded heavier than you planned. Each of those conditions bends the routine a little.
Hooking up at a launch ramp
Ramps are the hardest surface you'll ever couple on. The trailer sits at an angle, the ground is slick, and the tow vehicle is usually nose-up.
Keep the truck and trailer in a straight line before you back down. Angled approaches on a slope put side load on the coupler jaws and make the latch feel tight when it isn't seated correctly.
Set the tongue jack on a block of wood or a plastic jack pad. A jack foot on wet sand or gravel sinks an inch or two under load, and that drops your coupler height mid-hookup.
Never unhitch a boat trailer on the ramp itself. Chock the wheels, set the parking brake, and if the ramp is steep, tie the trailer to the dock or leave it coupled. Boats have rolled into lakes from a forgotten chock more than once.
If your trailer has incandescent bulbs, unplug the harness before the wheels go in the water. Hot glass hitting cold water cracks. LED assemblies tolerate dunking better, but the plug pins still corrode, so unplug anyway.
The catch is that an unplugged trailer has no breakaway protection. Reconnect the moment you pull out of the water, before you drive across the lot.
Salt, brine, and the corrosion clock
Saltwater and winter road brine both attack the same parts. The coupler latch pivot, the chain links, the 7-way pins, and the ball itself.
A latch that sticks halfway open is a corrosion symptom. So is a chain that won't flex at the link. Rinse the whole tongue with fresh water after a salt exposure, then spray a light oil into the latch pivot and the chain.
Zinc-plated hardware typically lasts a season or two in coastal use. Stainless and chrome hold up far longer. If you launch in salt water regularly, that upgrade pays for itself.
Pack the connector pins with dielectric grease before every season. It keeps water out of the terminals and stops the green crust that kills circuits.
Mountain grades change your settings
Trailer brake gain that feels right at sea level is often too low for a long descent. The trailer needs to do its share of the slowing, not just follow along.
Before you drop off a summit, pull over and test the trailer brakes at low speed with the manual override. If they don't grab firmly, you're about to find out on the way down instead.
Use a lower gear and let engine braking carry the load. Riding the truck's brakes for miles overheats them, and a soft pedal halfway down a grade is a genuinely bad feeling.
Watch for fade signals. A hot brake smell, a pedal that travels further than normal, or a truck that won't hold a steady speed all mean pull over and let things cool.
Crosswinds, ridge lines, and passing semis
A loaded travel trailer is a sail. Ridge lines, bridge decks, and the bow wave from a passing semi all push it sideways.
Keep both hands on the wheel and make small corrections. Overcorrecting a sway event is what turns it into a loss of control.
If the wind is bad enough that you're fighting the wheel constantly, slow down or stop. No schedule is worth a rollover.
| Condition | What changes in the routine | Why it matters |
|---|---|---|
| Steep launch ramp | Straight-line approach, jack on a pad, keep coupled | Angled load on jaws, sinking jack foot |
| Salt water or winter brine | Rinse, grease pins, oil the latch pivot | Corrosion kills latches and circuits |
| Long descent | Higher gain, lower gear, low-speed brake test | Prevents fade and trailer push |
| Strong crosswind | Reduce speed, keep load balanced | Sway control depends on tongue weight |
| Freezing temperatures | Check breakaway battery capacity, flex the chains | Cold cuts battery output and stiffens hardware |
What the Law Actually Requires
There are two layers of rules, and people mix them up constantly. Federal motor vehicle safety standards govern what manufacturers build. State traffic law governs what you're allowed to drive down the road.
Federal Standards and the State Rules That Vary
FMVSS No. 404 is the breakaway rule. Trailers with a GVWR over 3,000 pounds must have a breakaway system that applies the brakes if the trailer separates. That's why the little battery box exists on your tongue.
FMVSS No. 108 covers lighting. Your trailer needs functioning stop lamps, turn signals, tail lamps, and a lamp illuminating the rear plate.
On the commercial side, 49 CFR 393.70 requires a secure coupling and 49 CFR 393.48 requires safety chains or an equivalent. Most states write their own versions of those rules for everyone else, and the wording is often close to the federal text.
SAE J684 is the engineering standard behind hitch ratings. When a hitch box says Class III, 6,000 pounds GTW, that number traces back to standardized test procedures rather than marketing math.
Where state law actually bites
Brake thresholds vary. Many states require trailer brakes at 3,000 pounds GVWR, some set the line lower, and a few push it higher. Crossing a state line can change what's legal behind you.
Running lights, plate lamps, and mirror requirements are enforced at the state level too. So are width and height limits, typically 8 feet 6 inches wide and 13 feet 6 inches tall without a permit.
Towing speed limits differ as well. Some states cap trailer speeds below the general limit, and a few restrict which lanes you can use.
| Requirement | Typical threshold | Where to confirm |
|---|---|---|
| Trailer brakes | 3,000 lb GVWR in many states, varies | State DMV or DOT towing page |
| Breakaway system | Over 3,000 lb GVWR under FMVSS 404 | NHTSA / eCFR |
| Safety chains | Required, rated to trailer weight | State vehicle code, 49 CFR 393.48 |
| Width without permit | 8 ft 6 in | State DOT oversize rules |
| Height without permit | 13 ft 6 in in most states | State DOT oversize rules |
| Plate lamp | Required | State vehicle code |
The limit nobody legislates
Your tow vehicle's ratings are manufacturer numbers, not statutes. Exceeding them usually isn't a ticket on its own. It becomes a problem after a crash, when an investigator compares your loaded trailer weight to the door sticker.
Insurance companies notice. So do plaintiff attorneys. A rig that's 1,500 pounds over GCWR is a gift to the other side of a claim.
Uncoupling, Storage, and Post-Trip Inspection
Uncoupling is the hookup in reverse, and it deserves the same attention. Most tongue-drop incidents and most rolled-away trailers happen during the ten seconds after someone opens the latch.
The uncoupling order that keeps you out of trouble
- Park on level ground and chock both sides of at least one wheel.
- Lower the tongue jack until it touches the ground and starts carrying weight.
- Unplug the wiring and detach the breakaway lanyard.
- Unhook the safety chains.
- Pull the latch pin, open the latch, and crank the jack up until the coupler clears the ball.
- Pull the tow vehicle forward slowly while watching the coupler.
- Level the trailer, block the tongue, and cover the coupler.
Never open the latch while the jack is still up. The tongue will drop the moment the coupler releases, and a tongue hitting pavement can bend the jack, crack concrete, or take a finger.
Storage that prevents spring surprises
- Tires. Park on concrete, plywood, or gravel rather than bare soil. Inflate to the sidewall maximum, cover them, and expect flat spots after months of sitting.
- Bearings. Repack annually or every 12,000 miles. Spin each wheel and listen for grinding before the first trip of the season.
- Brakes. Rust welds brake shoes to drums. Pull the trailer forward a few feet every month or two if it's stored long term.
- Breakaway battery. Put it on a maintainer or charge it monthly. A sealed lead acid unit in the 4 to 5 amp-hour range typically lasts three to five years.
- Connectors. Cap the plug or bag it. Pack pins with dielectric grease.
- Latch and chains. Oil the latch pivot, flex the links, and replace anything that won't move freely.
- Tongue jack. Block the foot so it doesn't sink, and grease the screw.
The post-trip walk that catches problems early
Feel each hub with your hand after a long run. Warm is normal. Too hot to hold means a bearing or brake problem that needs attention before the next trip.
Look at the tire sidewalls for cracking and check pressure cold the next morning. Squeeze the chains and check for seized links. Wiggle the coupler on the ball to feel for slop.
Then wipe the ball and give it a thin film of grease. Grit left on a greased ball turns into lapping compound.
| Interval | Task |
|---|---|
| Every trip | Hub temperature, light check, chain condition, latch security |
| Monthly | Breakaway battery voltage, tire pressure, jack operation |
| Every season | Bearing inspection, brake adjustment, connector cleaning |
| Annually or 12,000 miles | Bearing repack, brake hardware inspection, tire age check |
Towing also works the tow vehicle harder than solo driving. Heat builds in the transmission on grades and in traffic, and fluid that's been in there too long stops protecting anything. Routine transmission servicing is cheap insurance on a truck that pulls.
When to Stop, Get Help, or Get a Bigger Truck
There's a point where technique stops helping and the equipment is simply wrong for the job. Here's how to recognize it.
If this is true, don't tow it
- You're over payload on the door sticker. Tongue weight, passengers, tools, and the hitch all count. No hitch or airbag fixes a payload number.
- Loaded tongue weight exceeds the hitch's tongue rating. A weight-distributing hitch buys back some capacity, but only up to the rating stamped on the hardware.
- The loaded trailer is more than about half the tow vehicle's weight. That's a rule of thumb, not a law, but it's a good one for long trailers.
- The trailer is longer than roughly 25 feet behind a short-wheelbase SUV. Length plus a short wheelbase equals sway you can't tune out.
- Combined gross weight hits 26,001 pounds or more. That's CDL territory in most cases, and the rules change entirely.
- The trailer's frontal area exceeds what the manual allows. Travel trailers catch wind in a way a flatbed doesn't, and manuals often specify a square-foot limit.
If sway continues after you've fixed the load
Correct tongue weight first. Then check ride height and add a weight-distributing hitch with integrated sway control if the trailer is heavy.
If it still walks around at 55 mph on a calm day, the trailer and truck are mismatched. That's a vehicle problem, not a driver problem, and no amount of friction sway bar hardware will make it comfortable.
When to call a professional
Hitch fabrication, frame reinforcement, and welding belong to a certified installer. So does brake controller wiring on newer vehicles with complex body control modules, where a generic splice can trigger fault codes.
Suspension helpers like airbags and add-a-leaves improve how a truck carries load. They don't raise any published rating, and it's worth saying out loud before you spend the money.
One last check before you pull out. If you can't answer "what's my loaded tongue weight" and "what's my payload left over" with real numbers, you're guessing. A trip to a certified scale costs about twelve dollars and settles it.
Frequently Asked Questions
How long does it take to hook up a trailer?
Five to ten minutes once the routine is habit. First-timers usually need twenty to thirty, mostly spent backing up. The physical connections take under two minutes.
Alignment and the light check eat the rest.
Do safety chains have to be crossed?
Yes, cross them in an X under the tongue. If the coupler separates, the crossed chains form a cradle that catches the tongue instead of letting it dig into the road. Straight chains let the tongue drop and can pole-vault the trailer.
How do I know the trailer is actually hooked up?
Lift the tongue hard after latching, then run a tug test with the wheels chocked. A seated coupler won't move when you lift. A properly coupled trailer holds the truck back when you ease forward.
Can I use a 7-to-4 adapter on a trailer with brakes?
No. A 4-way adapter carries lights only, so it disables electric brakes and the 12V charging line. The trailer rolls without its own brakes and the breakaway battery stops charging.
Use the correct connector instead.
What size ball do I need?
Read the stamp on the coupler body. It lists the ball size and the trailer's capacity. Common sizes are 1-7/8 inch, 2 inch, and 2-5/16 inch.
If the stamp is gone, measure the old ball with calipers, not a tape.
How often should I test the breakaway system?
Once a season at minimum, and before any long trip. Chock the wheels, pull the pin by hand, and listen for the brake magnets to hum. Push the pin back in fully afterward and check battery voltage, which should read near 12.6 volts when charged.
