
The battery light just came on, you're doing 70 in the middle lane, and your brain is already pricing a new battery. Here's what to do if the battery light comes on: treat it as a charging-system warning, not a battery warning, and get yourself somewhere safe to check it. That little red icon almost always means the alternator has stopped topping up the 12V system.
The car is now running on borrowed power.
Per manufacturer specifications, a healthy charging system holds roughly 13.5 to 14.7 volts across the battery terminals with the engine running. At rest, a fully charged battery should sit near 12.6 volts. Those two numbers crack most of these cases wide open, and we'll come back to them.
First, though, you need to handle the next few minutes.
What to Do If the Battery Light Comes On
If the battery light comes on, cut the electrical load first. Keep driving to a safe spot like an exit or parking lot. Do not shut the engine off in a live lane.
Check the serpentine belt and battery terminals. Then test charging voltage with a multimeter.
What That Red Battery Light Is Actually Telling You
That red icon is not a battery gauge. It's a charging-system warning, and it has been wired that way for decades.
On a traditional setup, the bulb sits in the exciter circuit. The cluster feeds it power when you turn the key, and the alternator's voltage regulator supplies the ground path. Start the engine.
Once the alternator produces voltage, that ground disappears and the light goes out.
A voltage regulator is the control unit, usually built into the alternator, that keeps charging output inside a safe range. Think of it as a thermostat for your electrical system.
So a light that stays on with the engine running means the regulator is reporting no charge. The alternator may have failed. The belt may not be spinning it.
A fuse or fusible link may have opened. In every one of those cases, the battery is doing all the work and nothing is refilling it.
Modern cars add a layer of software on top. As of 2026, most new vehicles run a battery management system that tracks current in and out of the battery, and the cluster message usually comes from the engine control module rather than a simple bulb circuit. The conclusion is identical.
No charge going in means a countdown has started.
The Parts Behind the Light
| Component | Job | Failure symptom |
|---|---|---|
| Alternator | Turns engine rotation into 12V DC power | Light on, bearing whine, burnt electrical smell |
| Rectifier diodes | Convert AC inside the alternator to DC | Flickering light, radio whine, AC ripple |
| Voltage regulator | Caps output around 14 volts | Undercharge or overcharge, boiled battery |
| Serpentine belt | Spins the alternator pulley | Squeal, missing ribs, light plus rising temperature gauge |
| Tensioner and idler pulley | Hold the belt tight and aligned | Chirp at idle, glazed or shiny belt |
| Battery and terminals | Store power and carry current | Slow crank, green crust, voltage sag under load |
| Engine ground strap | Completes the return path to the chassis | Dim lights, multiple odd faults, no-crank |
| Fusible link or main fuse | Protects the charging circuit | Dead alternator circuit, no light at key-on |
Old Labels, Same Warning
Some older domestic vehicles label this lamp GEN or ALT, and plenty of owners never connected it to a failing alternator. Newer clusters skip the icon and flash text like "Service Charging System" or "Battery Saver Active." The message is the same in all three cases.
One more thing worth knowing. The warning only exists if the bulb works. Turn the key to ON without starting the engine and confirm the light appears.
If it never illuminates, the bulb or its circuit is dead, and you've lost your early warning system entirely.
Codes and What They Add
A scan tool can confirm what your eyes already suspect. The usual suspects are P0562 for system voltage low, P0563 for system voltage high, and P0560 for a general voltage malfunction. On newer cars you'll also see U-codes when modules start dropping off the network because voltage dipped too far.
If you don't own a reader yet, our breakdown of what to look for in a code reader covers the cheap options that still pull charging codes. Codes narrow the search. They don't replace a multimeter reading.
Charging-system faults also generate technical service bulletins and, occasionally, full safety recalls. Run your VIN through the NHTSA recall lookup before you spend money on parts, because a known alternator or belt tensioner defect might be covered. Testing procedures themselves follow published SAE standards for automotive electrical systems, which is why a shop's charging-system test is more than a guy holding a voltmeter.
The First 60 Seconds: Drive On or Pull Over?

Image source: Wikimedia Commons / The Car Spy (CC BY)
Short answer: you almost always keep driving. A car with a dead alternator still runs on battery reserve, and that reserve is the most valuable thing you own right now. Wasting it on the shoulder of a highway is how a minor repair turns into a dangerous hour.
The exception is a genuine emergency. If you're in a tunnel, on a bridge, or in a construction chute with no shoulder, do not stop. Keep rolling to the next safe exit even if the lights are dimming.
Here's the reasoning. In our research and in the testing data published by battery manufacturers, a healthy 12V battery with a light electrical load typically carries a car for roughly 20 to 40 minutes after charging stops. Heavier loads and an older battery shorten that window fast.
You're not deciding whether to stop. You're deciding where.
If you're two miles from an exit, take it. If you're thirty miles from the next town on a rural highway, keep going toward that town at a steady, modest speed. Rolling to a well-lit gas station beats freezing on a gravel shoulder.
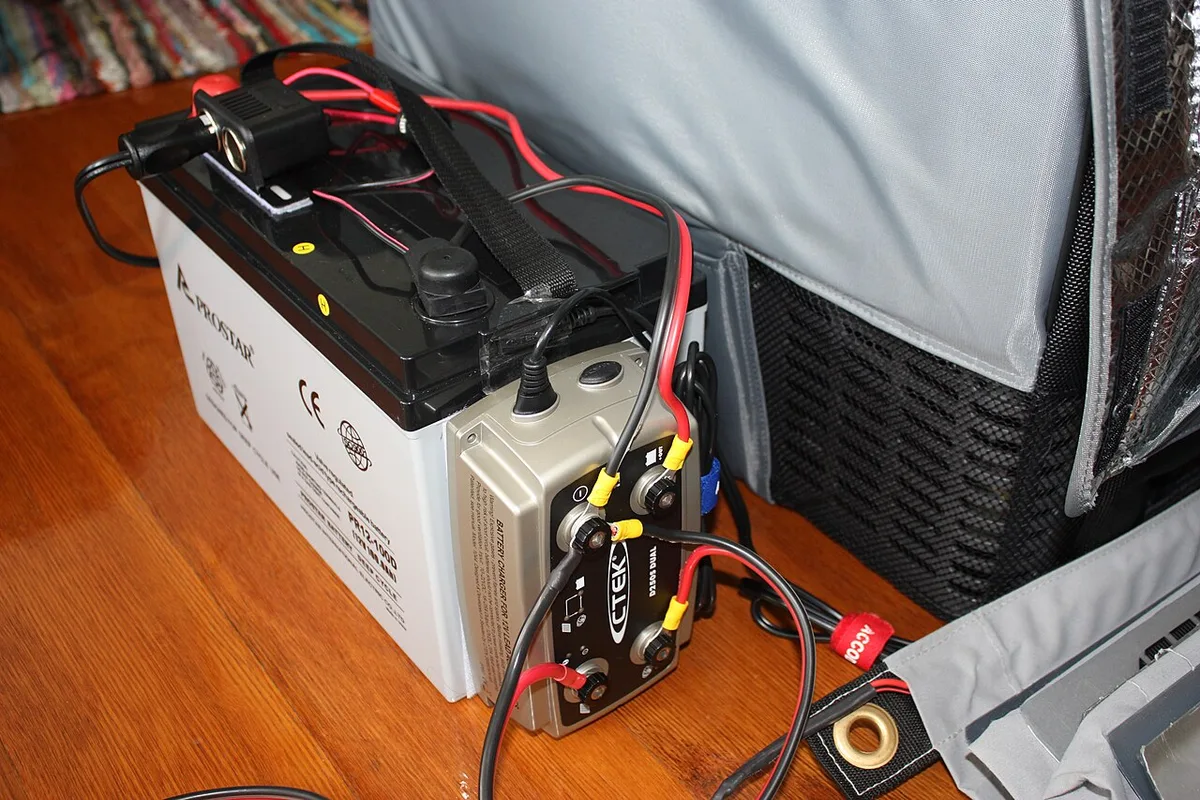
Image source: Wikimedia Commons / Stephan Ridgway from Brisbane, Australia (CC BY)
Pull Over Now If Any of These Are True
- The engine starts misfiring, bucking, or losing power.
- Headlights drop to a dull orange glow and the dash fades.
- The temperature gauge climbs alongside the battery light.
- Steering goes heavy or the wheel fights you.
- Smoke, burning rubber, or a hot metal smell appears.
- You're in a live travel lane with traffic closing fast.
Pull Over Safely: The Sequence That Matters
- Signal early and pick a target with room, ideally a parking lot or a wide shoulder.
- Get fully off the travel lane, wheels straight, parking brake set.
- Switch on hazards before you open the door.
- Leave the engine running if you can. It keeps the heater, hazards, and lights alive.
- Stay in the car with your seatbelt on if traffic is heavy, and call for help.
That last point isn't paranoia. Shoulder stops are genuinely hazardous, and roadside safety guidance from motoring organizations is consistent: stay belted inside the vehicle, keep hazards on, and raise the hood only when it's safe to step out.
The Mistake That Strands People
Shutting the engine off "just to check something" is the single most common way this goes wrong. Once that engine stops, the battery has to crank it again. A battery that has been draining for fifteen minutes may not have the juice.
So don't kill it at a red light to "let it rest." Don't shut down at a drive-thru. Don't park and pop the hood on a busy road and assume it'll fire back up. If you must stop, stop somewhere a tow truck can reach you and point the driver to a proper recovery point rather than a plastic bumper.
Reading the Light: Solid, Flickering, or Key-On Only
The behavior of the lamp is diagnostic. A steady glow, a flicker at idle, and a light that only shows at key-on are three different stories.
Solid Light With the Engine Running
This is the classic no-charge signal. The alternator is not producing enough voltage to satisfy the regulator. Belt slip, a failed alternator, a blown fusible link, or a broken wire in the field circuit all produce the same steady glow.
Urgency is high but not instant. Start planning your stop now.
Flickering or Pulsing at Idle
A flicker that smooths out when you rev the engine usually points to a weak alternator at low RPM, a slipping belt, or a loose connection. It can also mean failing diodes inside the alternator, which leak AC ripple into the system.
Don't ignore a flicker because it "goes away." It's the cheapest stage to fix and the easiest to diagnose at home.
On at Key-On Only
That's normal. Every car performs a bulb check when you turn the ignition on with the engine off. If the light appears there and vanishes after startup, your charging system is doing its job.
The useful test is the opposite one. If the light never appears at key-on, the bulb or circuit has failed and you should get it fixed for the warning alone.
Back Again After a Jump Start
If the car fires up with a jump and the light returns within a minute or two, the alternator isn't charging. The jump gave you a surface charge, nothing more.
If the light stays off after a jump and the car runs normally for days, the problem was likely the battery's state of charge, a loose terminal, or a one-off drain. Watch it for a week.
On With a Brand New Battery
A fresh battery doesn't fix a charging fault. In fact, a new battery paired with a dying alternator just gives you a shorter, more expensive version of the same problem. If the light is on with new hardware, the alternator or its wiring is the suspect.
Paired With Other Warnings
Modern clusters light up like a Christmas tree when voltage sags. ABS, airbag, traction control, and power steering warnings can all appear alongside the battery light because those modules need stable voltage to communicate.
Don't chase the extra lights. Fix the voltage and they usually vanish on their own.
| Light behavior | Most likely cause | How urgent |
|---|---|---|
| Solid while driving | Alternator not charging, belt slip, open circuit | Plan a stop within minutes |
| Flicker at idle only | Weak alternator, slipping or glazed belt, loose cable | Diagnose within days |
| Brief flash on startup, then off | Normal bulb check | No action |
| Never lights at key-on | Burnt bulb or failed cluster circuit | Fix the warning circuit |
| Returns after a jump | Alternator output too low to sustain the system | Diagnose immediately |
| On with new battery | Charging fault, wiring, or bad ground | Diagnose immediately |
| On with ABS, airbag, or traction lights | System-wide low voltage | Treat as charging fault |
Branch 1: Light On, Car Running Fine: How Long You've Got and Where to Aim
This is the most common situation, and it's the one where good decisions pay off. The engine sounds normal, the car drives fine, and only that little red lamp is complaining. You have time, but not unlimited time.
The Real Reserve Window
A typical car draws somewhere between 20 and 40 amps with lights, wipers, and the blower running. A fully charged 60 to 80 amp-hour battery can't sustain that for long. In practice, drivers report 20 to 40 minutes of running time before the engine quits, and a tired battery can cut that to ten.
Cold weather makes it worse. So does stop-and-go traffic, where the engine idles and the alternator contributes nothing at all.
Shed Load Immediately
Every electrical accessory you've added, from adding a light bar to a dash cam, eats into that reserve. Turn off what you can, right now, in this order.
- Air conditioning and blower fan (the biggest single draw on most cars)
- Rear window defroster and heated seats
- Stereo, phone chargers, and USB accessories
- Fog lights, high beams, and interior lighting
- Any inverter, cooler, or dash camera you've plugged in
Keep your headlights on if it's dark or raining. Safety beats range every time.
| Load you switch off | Rough current draw | Extra minutes gained |
|---|---|---|
| Blower on high | 15 to 20 amps | Meaningful, often several minutes |
| Rear defroster | 10 to 20 amps | Moderate |
| Halogen headlights (pair) | Around 9 amps | Small, but keep them on at night |
| Phone charger and dash cam | 1 to 3 amps | Small |
| Amplifier or inverter | 10 to 30 amps | Large, switch these off first |
Where to Aim
Pick a destination with a purpose. A parts store is the best target in most towns, because most of them will test your battery and alternator for free while you wait. A repair shop is the second-best choice, though you may have to leave the car.
Home only works if you have a charger, a second vehicle, or tools waiting. Otherwise you've just moved the problem to your driveway.
Driving Technique That Buys Minutes
- Keep the engine running once you've arrived. Idling burns fuel and charges nothing, but it keeps the car mobile.
- Drive at a steady, moderate speed. Hard acceleration and repeated stop-starts waste energy.
- Avoid shutting down at lights if you can roll through legally and safely.
- Skip the drive-thru and the car wash. Both invite a shutdown you can't undo.
- Park facing out, on a slope, or anywhere a jump start or tow is easy.
What to Do the Moment You Arrive
Leave it running. Ask for a charging-system test, which takes about two minutes with a proper tester. If the alternator is dead, you're already in the right parking lot.
If it's just a loose belt or a corroded terminal, you may be back on the road in twenty minutes.
One practical note. If your headlights look yellow even when voltage tests fine, the lamps themselves may be aged, and it's worth checking what bulbs cost before you blame the charging system.
Branch 2: Light On With Dim Headlights, Heavy Steering, or a Squealing Belt
Now the situation changes. When the battery light arrives with physical symptoms, you're no longer managing a slow drain. You're managing a failure that's already in progress.
Dim Lights Mean the End Is Close
Headlights that drop to a dull glow, a dash that fades, and a blower that slows to a whisper are all signs that system voltage has fallen below roughly 11 volts. At that point the engine computer is next. Modern cars will stall when voltage drops too far, and they won't restart.
Get off the road now. Not at the next exit. Now, at the first safe place.
Heavy Steering and a Firm Brake Pedal
If the engine dies while you're moving, two things happen at once. The power steering assist disappears, and the brake pedal goes hard after one or two applications because you've used up the vacuum reserve. Neither means the car is broken further.
Both mean you're working harder.
Keep your speed down and be deliberate about your grip position, because a heavy wheel at speed punishes sloppy hands. Brake early, brake once, and steer with both hands planted.
A Squealing Belt Is a Countdown
A sharp squeal on startup that fades is usually a slipping belt. A squeal that stays, plus a battery light, means the belt is glazed, loose, or about to let go.
Check it visually as soon as you stop. Look for missing ribs, cracks, a shiny glazed surface, or a belt sitting off the edge of a pulley. If the belt is gone entirely, do not drive.
A serpentine belt drives the alternator, the water pump, and often the power steering pump on a single loop.
That's the part most drivers miss. Losing the belt doesn't just stop charging. It stops coolant circulation, and an engine can overheat badly within a couple of miles.
The Overcharge Case
Occasionally the light comes with the opposite problem. A failed regulator can push 16 volts or more into the system. Signs include a sulfur or rotten-egg smell, a battery case that looks swollen, and acid weeping around the posts.
If you smell that, shut it down and get away from the car. Overcharging batteries vent hydrogen, and a spark near one is genuinely dangerous. Don't jump it.
Don't test it in a closed garage. Call for a tow.
| Symptom alongside the light | Likely cause | What to do |
|---|---|---|
| Dim headlights, fading dash | Voltage below 11V, alternator dead | Exit immediately, park in a lot |
| Squeal that won't stop | Glazed, loose, or failing belt | Stop and inspect the belt |
| Belt missing or shredded | Belt failure, no charging, no water pump | Do not drive, call a tow |
| Temperature gauge climbing | Water pump not turning | Shut down quickly, let it cool |
| Heavy steering, hard brake pedal | Engine has stalled | Coast to a safe spot, both hands on the wheel |
| Rotten egg smell, swollen battery | Regulator failed, overcharging | Shut off, move away, call a tow |
| Grinding or whining from the alternator | Bearing failure | Limit driving, replace soon |
What You Can Fix at the Roadside
A surprising number of these cases are simple. A battery terminal that's loose enough to wiggle, or covered in green crust, will cause a flickering light and hard starts. Cleaning and tightening the clamp takes five minutes and costs nothing.
A belt that's intact but loose, with an accessible tensioner, can sometimes be re-seated. Anything involving a shredded belt, a seized pulley, or a failed alternator is a tow. Knowing the difference is what keeps a bad afternoon from becoming an expensive one.
Branch 3: No Crank, No Start With the Light On
Not every charging-system story starts on the road. Plenty of them start in a driveway, with a dash that lights up normally and an engine that refuses to respond. You turn the key, the battery light glows during the bulb check like it always does, and then you get silence.
Or a click. Or a slow, dragging crank that gives up halfway.
The sound the engine makes at key-turn is the most useful clue you'll get. It tells you roughly how much current is actually reaching the starter, and that narrows everything down fast.
What the Silence Is Telling You
| What you hear at key-turn | What it usually means | Where to look first |
|---|---|---|
| Nothing, and the dash goes dark | Connection lost right at the battery or ground | Terminal clamps and cables |
| Nothing, but the dash stays bright | Starter circuit, ignition switch, or safety switch | Starter, switch, or brake-clutch interlock |
| One solid click | Solenoid engaged but the starter isn't spinning | Low voltage or a failing starter |
| Rapid clicking with a dimming dash | Deeply discharged battery | Charge or jump, then test charging |
| Slow, labored crank | Battery nearly empty, or thick cold oil in winter | Charge state and battery age |
The dark-dash case is secretly your lucky day. A connection that's loose enough to kill the crank is usually just a dirty or loose terminal, and that's a five-minute fix that costs nothing.
The Checks Before You Reach for Cables
- Wiggle each terminal clamp by hand. It shouldn't rotate or slide at all.
- Look for white or blue-green fluff on the posts. That crust is an insulator, not a cosmetic issue.
- Confirm you're in park or neutral, and that you're firmly on the brake if it's a push-button car.
- Check the battery hold-down. A battery that rattles around loosens its own connections over time.
If your car has push-button start, a weak fob battery can fake a no-crank too. It helps to know how keyless ignition differs from a traditional key before you panic, because the fix is sometimes holding the fob against the start button.
Why Starting Fluid Won't Help Here
If it doesn't crank, fuel was never the problem. Starting fluid only matters once an engine is spinning but won't fire. Spraying it into a no-crank situation does nothing except add fire risk near a battery that may be venting hydrogen.
Even the starting fluid shortcuts people swap stories about have no role in this branch. Keep the can capped and put your energy into the cables instead.
Jump Starting in the Right Order
The connection sequence protects the electronics on both cars. Reverse polarity can fry modules and ECUs, and that repair makes an alternator look cheap.
- Red clamp to the dead battery's positive post.
- Red clamp to the donor battery's positive post.
- Black clamp to the donor battery's negative post.
- Black clamp to an unpainted engine ground on the dead car, never its negative post.
- Run the donor for a few minutes, then start the disabled car.
- Remove clamps in reverse order.
Grounding that last clamp away from the dead battery keeps any spark away from hydrogen gas. Many modern cars also hide the battery in the trunk or under a seat, so check for designated jump posts under the hood and use those instead.
If a Wiggle Fixed It
Nice work. Clean and tighten the terminals properly, drive home, then verify charging voltage before you call it solved. A bad connection can cause the flickering-light pattern from earlier, and you want proof the system is actually healthy.
The multimeter routine below takes ten minutes.
If It Started and Runs
Go straight to Branch 4. The next ten minutes of driving will tell you whether you had a battery problem or a charging problem.
Branch 4: The Light That Comes Back After a Jump Start (or Quietly Vanishes)
The car is running again thanks to jumper cables or a booster pack. What the battery light does next settles the whole diagnosis, and you can usually read it within two minutes of driving away.
There are only two outcomes. The light comes back, which means the system isn't charging. Or the light stays off, which means the battery was simply drained.
Each one sends you down a different path.
If the Light Comes Back Within a Few Minutes
That's your answer. The alternator isn't charging, and the jump only handed you a surface charge. Picture a bucket with a hole in the bottom.
You just poured water in, and the level is already dropping.
Don't fall into the trap of re-jumping and continuing. Every restart burns reserve you don't have, and the second stall usually happens somewhere worse than the first. Cut your electrical load, drive to the nearest shop or parts store, and expect an alternator, belt, or wiring diagnosis.
You can confirm it on the spot with headlights. Bright for the first minute, then fading to yellow as the surface charge burns off, is the classic dead-alternator signature.
If the Light Stays Off and Everything Runs Fine
Then the battery got discharged, and the charging system is probably innocent. The usual suspects:
- Dome light, headlights, or a phone charger left on overnight
- A car that sat unused for weeks
- A parasitic draw from a module that won't sleep
- A battery at the end of its three-to-five-year life
Here's the part people rush. One short drive does not recharge a flattened battery. You need thirty-plus minutes at road speed, or better, an overnight session on a proper charger.
A battery that stays half-charged slowly sulfates, meaning lead sulfate crystals harden on the plates, and capacity walks away for good.
Why You Should Fully Charge Before Blaming the Alternator
This is where DIYers and plenty of shops get it backwards. A deeply discharged battery pulls huge current the moment charging resumes, and system voltage can read low while a perfectly good alternator works flat out to refill it. Test at that moment and you'll condemn healthy parts.
Battery manufacturers' service guidance is consistent on this point: fully charge, then test. There's a self-preservation angle too. A chronically flat battery keeps the alternator pinned at maximum output, running hot, and heat is what kills bearings and diodes early.
So the charge-first rule protects both the diagnosis and your wallet.
The Repeat Offender Pattern
| Pattern | What it points to |
|---|---|
| Dead every Monday after sitting all weekend | Parasitic draw, or a weak battery that can't hold a week |
| Starts fine all week, light flickers at idle | Weak alternator or slipping belt |
| Fine for months, then dead on the first coldsnap | Aging battery short on cold cranking amps |
| Light flickered once weeks ago and never came back | Loose terminal or an intermittent ground |
| New battery, still going flat overnight | Parasitic draw, or the charging fault never got fixed |
| Jumped fine, then half the dash lit up at once | Surface charge too weak to feed the modules |
Keep a simple log for two weeks. Jot down the hard-start mornings, the flicker days, and anything left plugged in overnight. That pattern hands you the diagnosis before anyone opens a hood.
The AGM Wrinkle on Stop-Start Cars
If your car shuts the engine off at red lights, it almost certainly runs an AGM battery. That's an absorbent glass mat design, tougher than a flooded battery, and it charges to a different profile.
The battery management system learns that profile. Fit a new battery without registering it and the car keeps charging the old strategy, which shortens the new battery's life and can trip phantom warnings. Most shops and plenty of scan tools handle registration in ten minutes.
Cheap insurance for a $200 battery.
Five-Minute Under-the-Hood Checks: Belt, Terminals, and Grounds
You're somewhere safe with the engine off. Before any money changes hands, run these checks in order. They catch a big share of battery-light cases and cost nothing.
Safety takes ten seconds. Engine off, keys out, and for push-button cars, the fob out of the car so nothing can restart itself. No loose sleeves or jewelry near pulleys.
Give hot parts a minute to cool.
Is the Belt Intact and Gripping?
Here's the check that settles it fastest. Find the serpentine belt, the single ribbed loop wound around the pulleys on the front of the engine. Most cars show it the moment the hood opens.
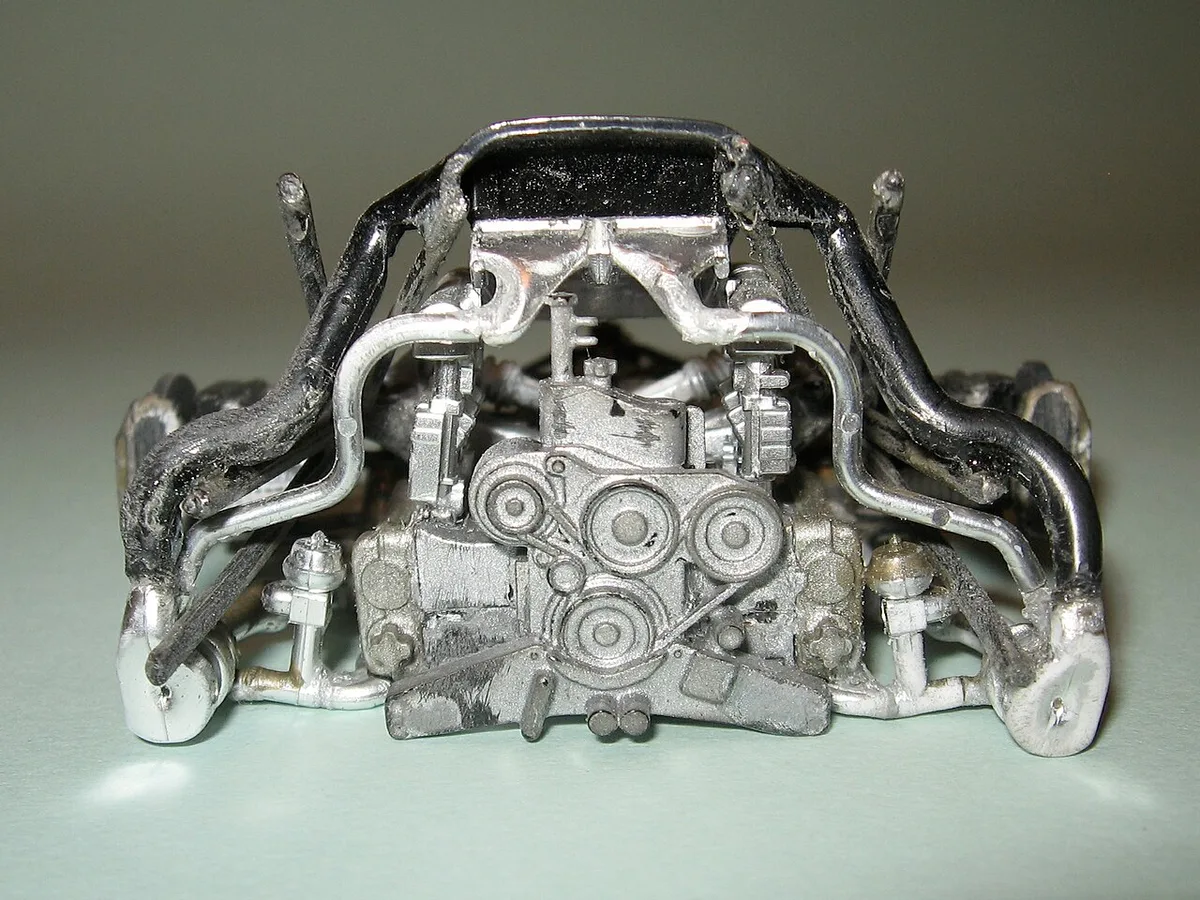
Image source: Wikimedia Commons / Bill Abbott (CC BY-SA)
Run your eyes along every visible span and look for:
- Cracks across the ribs. Three cracks on adjacent ribs within one inch means replace, per common belt-maker service guidance.
- Missing chunks, or entire ribs worn away.
- A shiny, glazed rib face, which is the mark of slipping.
- Frayed edges or separated cords.
- The belt riding off the edge of any pulley.
Check grip the low-tech way. Press midway between the two longest pulley spans. Roughly half an inch of give is normal on older spring-tensioner setups.
A tensioner arm that rattles or feels loose can't hold the belt under load.
Are the Terminals Tight and Clean?
Grab each clamp and try to twist it on the post. Zero movement is the goal. Any wiggle at all explains an intermittent light all by itself.
White, green, or blue-green fuzz on the posts is corrosion, and it's an insulator sitting exactly where current needs to flow. The fix costs about a dollar:
- Mix two tablespoons of baking soda into a cup of warm water.
- Scrub the posts and clamps with an old toothbrush.
- Rinse, dry, reconnect, and snug the clamps down.
Wear gloves and keep it out of your eyes. That fuzz is sulfuric acid from inside the battery. Skip the cola trick.
Sugar water cleans worse than it sounds.
What About the Grounds?
The one that matters is the braided engine ground strap running to the chassis or firewall. A frayed or corroded ground causes flickering lights, stacked cluster errors, and charging readings that make no sense.
Follow the negative cable to its mount. Tug the strap. Look for green crust at the ring terminals and rust under the bolt head.
Anything rough comes off, gets wire-brushed to bare metal, and goes back snug.
The positive side hides one more suspect. Follow that cable toward the starter or fuse box and feel for a fusible link, a short thinner section of wire built to burn through like a fuse. A blown link feels stretched or bubbly under the insulation.
That opens the alternator's output circuit and lights the lamp even with a belt that's perfect.
The Sniff and Listen Test
Two senses finish the job. A burnt, acrid electrical smell strongest near the alternator means cooked windings or diodes. A whine that changes pitch with engine RPM in the same spot means a dying bearing.
Either finding ends the inspection. That's a replacement, not a cleaning.
The Multimeter Test That Settles Battery vs. Alternator
This ten-minute routine replaces guesswork, and any basic digital multimeter works. Set the dial to DC volts. On a manual-range meter, choose the 20-volt scale.
Keep fingers and leads clear of the belt and pulleys whenever the engine runs. Probe the battery posts, not the clamp hardware, for accurate numbers.
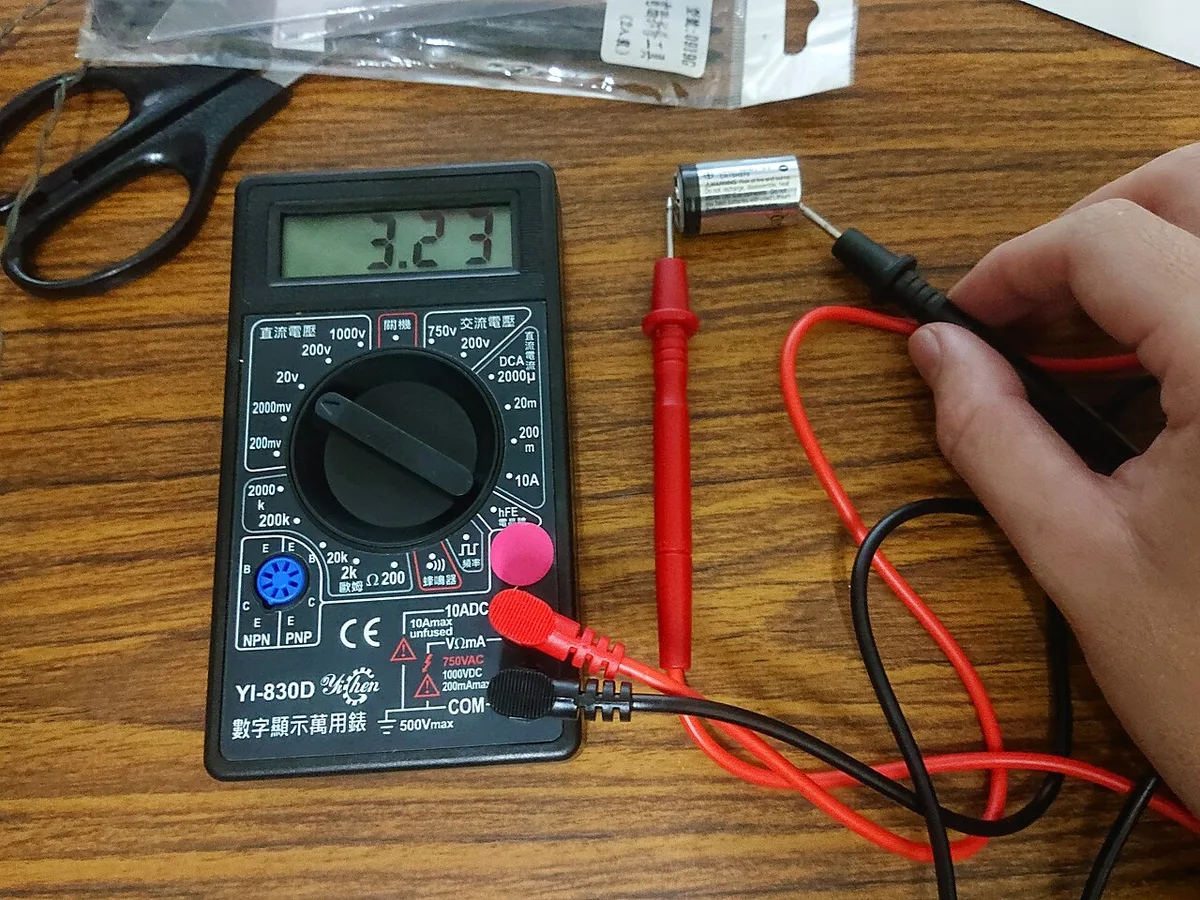
Image source: Wikimedia Commons / Jiazheng0609 (CC BY-SA)
Test 1: Resting Voltage With the Engine Off
Resting means at least an hour parked, ideally overnight. Kill the surface charge first by running the headlights for two minutes with the engine off. Then read across the posts.
| Resting voltage | Charge state | Meaning |
|---|---|---|
| 12.6V or above | Full | Battery itself is healthy |
| 12.4V | About 75% | Fine, top it up |
| 12.2V | About 50% | Charge soon |
| 12.0V | About 25% | Sulfation risk |
| Below 11.9V | Effectively empty | Deeply discharged or dead |
If this test comes back low, charge the battery fully and retest before judging the alternator. A half-empty battery drags system voltage down and imitates a failed charging system.
Test 2: Charging Voltage With the Engine Running
Start it, let the idle settle, and probe the posts again. Red on positive, black on negative.
| Running voltage | Verdict |
|---|---|
| 13.8V to 14.7V | Charging system healthy |
| 13.0V to 13.7V | Marginal, test under load |
| 12.6V or below | Alternator not charging |
| Above 15.0V | Regulator overcharging, stop driving |
Test 3: Loaded Voltage
Hold the engine near 2,000 RPM with headlights and the blower on high. A healthy system holds above roughly 13.5 volts under that load. Voltage that sags toward 12 at idle and only partly recovers at speed means a weak alternator or a slipping belt.
Test 4: The Diode Check
Flip the meter to AC volts and read across the posts with the engine running. A healthy rectifier leaves almost nothing behind, so the AC number should be tiny. More than about half a volt AC points to failed diodes.
That explains flicker and radio whine even when the DC reading looks passable.
No Meter? Read the Headlights
Bright at speed and yellow at idle is the classic weak-charging signature. Same test, zero equipment, less precision. It's enough to decide whether you're driving to a shop today or calling a tow.
Belt, Alternator, Voltage Regulator, or Battery: Matching the Symptom to the Part
Here's the payoff. Every clue so far, from the light's behavior to the noises to the meter numbers, funnels into one table.
| Your evidence | Most likely part | Confirm with | DIY difficulty |
|---|---|---|---|
| Slow cranking, no light while running, resting voltage low | Battery | Resting voltage test | Easy |
| Light on while running, charging voltage below 13V | Alternator | Tests 2 and 3 | Moderate |
| Whine tracking engine RPM, burnt smell at the alternator | Alternator bearing or diodes | AC ripple check, bench test | Moderate |
| Flicker at idle, squeal on first start | Belt, tensioner, or idler pulley | Belt inspection and deflection test | Easy to moderate |
| Charging voltage above 15V, sulfur smell, swollen case | Voltage regulator | Test 2 with a meter | Moderate, usually inside the alternator |
| Dim lights plus random module faults, no blown parts | Engine ground strap | Voltage drop test | Easy |
| Light on, belt perfect, zero output | Fusible link, main fuse, or field wire | Check for voltage at the alternator output stud | Moderate |
| Light returns right after a new alternator | Charge cable resistance, wrong part, or unregistered battery | Voltage drop test | Moderate |
| Light on with the temperature gauge climbing | Belt or water pump | Visual belt check | Do not drive, call a tow |
Why the Belt and the Alternator Get Confused
Both produce the same lamp, and both sound similar from inside the car. Here's the split. A belt problem usually announces itself with noise, and it often gets worse as the engine gets hot or when you switch on the AC.
An alternator problem usually shows up as a voltage number that sags under load, with no noise at all.
Do the free check first. If the belt is intact, correctly seated, and properly tensioned, stop blaming it. Plenty of drivers replace a belt that was fine and then pay for an alternator anyway.
The Voltage Drop Test Nobody Runs
A cable can pass a continuity check and still strangle the charging circuit. Resistance hides under clean-looking insulation, and it shows up only when real current flows.
Set your meter to DC volts and put one probe on the alternator's output stud, the other on the battery positive post. With the engine running and a few accessories on, you want less than about 0.3 volts. More than half a volt means a corroded cable, a tired fusible link, or a bad connection is eating your charge.
Repeat it on the negative side, alternator case to battery negative post. Same threshold. This test finds the faults that make people replace a healthy alternator twice.
When It Really Is the Battery
A battery can be the villain with a perfect-looking install. The usual signs are a resting voltage that drops below 12.4 within a day of charging, a case that bulges or weeps at the posts, and a battery over four or five years old.
Load testing matters here. A parts store tester applies a heavy load and reads how far the voltage falls, which is a far better test than a resting number alone. A battery that reads 12.6 at rest and collapses to 9 volts under load is finished.
Cold cranking amps, or CCA, is the rating that tells you how much punch a battery has at 0°F. Buying a battery with fewer CCA than your owner's manual specifies is a common winter no-start cause, and it can trigger a low-voltage lamp on the first freezing morning.
New, Remanufactured, or Used: Who Each One Fits
Once the alternator is confirmed dead, you get a choice. They're not equal, and the right pick depends on how long you plan to keep the car.
| Option | Best for | What to know |
|---|---|---|
| New OEM or new aftermarket | Cars you plan to keep, or anything with heavy electrical load | Full warranty, known output rating |
| Remanufactured | Older vehicles, budget repairs, common models | Rebuilt with new bearings, brushes, and diodes, warranty varies widely |
| Used from a salvage yard | A beater you need running this week | No history, no warranty, sometimes already tired |
Match the amperage rating when you buy. Fitting a smaller alternator than the factory spec works fine until you add accessories or hit winter, then the lamp comes back under load.
The Regulator Is Usually Inside
On most cars built since the 1980s, the voltage regulator lives inside the alternator, so a regulator fault means an alternator replacement. Some older and heavy-duty applications use an external regulator bolted to the firewall, and those are cheap and easy to swap.
If your meter shows a healthy 14.2 volts at idle and then 15.5 or more with revs, the regulator is the suspect. Stop driving at that point. Overcharging boils the electrolyte, vents hydrogen, and can cook the battery and the modules in one afternoon.
What Genuinely Needs a Shop
You can handle belts, terminals, grounds, and meter tests in a driveway. These jobs genuinely need a lift, a scan tool, or a torque spec you'll only get from a service manual: alternator replacement on a transverse V6 tucked against the frame rail, anything requiring the front bumper or subframe to come off, and battery registration on a car with a battery management system.
If you own the right meter, the diagnosis itself stays free. Even a borderline tool works for a voltage check, though our guide to choosing a capable reader explains why the cheapest ones struggle with live data. The point is simple.
Diagnose before you buy, then buy once.
Mistakes That Turn a $30 Belt Into a $900 Alternator Bill
Most of the expensive outcomes we see in owner forums didn't start with a failed part. They started with a decision made in the first ten minutes.
Replacing the Battery Because the Light Says Battery
The lamp is a charging warning, not a battery warning. Swap the battery on a dead alternator and you've spent $150 to $250 and bought yourself a shorter countdown, because the fresh battery starts flat and stays that way.
Test voltage first. Two minutes with a meter beats a guess and a receipt.
Re-Jumping and Driving On
Each jump hands you a surface charge and a false sense of progress. If the light returns, the system isn't charging, and every restart burns reserve you can't replace.
We've seen this pattern end badly. A driver jumps the car, drives ten minutes, stalls at a junction, jumps again, then stalls somewhere with no shoulder at all. Stop the loop after the second return of the light.
Ignoring a Squeal Because the Car Still Drives
A belt squeal is the cheapest warning you'll ever get. Ignore it for a month and the belt glazes, slips under load, then shreds. A shredded belt takes the water pump with it, and an engine that overheats badly can warp a head.
That's how a $30 belt becomes a $900 alternator job, or worse, a $3,000 engine repair.
Overtightening the Belt to Stop the Noise
Cranking a tensioner past spec feels like a fix. It isn't. Excess tension hammers the alternator bearings, the water pump bearing, and the tensioner itself.
Manufacturer specs usually call for about half an inch of deflection on the longest span with light thumb pressure. Use a gauge if you have one, and never lever a belt on with a screwdriver.
Testing a Battery That Isn't Charged
A deeply discharged battery drags system voltage down while a healthy alternator works flat out to refill it. Test at that moment and you'll condemn a good alternator.
Charge it fully, then test. Battery service guidance is unanimous on this, and it saves you from buying the same part twice.
Buying an Alternator With the Wrong Amp Rating
A 90-amp unit in a car spec'd for 150 amps works fine in July. Add winter headlights, a rear defroster, and a blower on high, and the lamp comes back under load.
Match the factory rating, especially on vehicles with heated seats, towing packages, or factory inverters.
Skipping the Fusible Link Check
You can bolt on a brand-new alternator and still have a dead charging circuit. A blown fusible link or main fuse sits between the alternator output and the battery, and it costs a few dollars.
Check for voltage at the alternator's output stud before you unbolt anything. If there's no voltage there with the engine running, the wiring is the problem, not the part.
Forgetting Battery Registration
Fit a new AGM battery to a car with a battery management system and skip the registration step. The charging strategy stays tuned to the old battery's age and resistance, so the new one gets undercharged or overcharged.
Ten minutes with a scan tool protects a $200 part. Plenty of shops do it for the price of a coffee.
The Cola Trick and Other Cleaning Myths
Pouring a fizzy drink on a terminal looks like it works because the acid dissolves the crust. Then it leaves sticky residue that attracts more dirt and holds moisture against the metal.
Baking soda and warm water, a toothbrush, then a rinse and a dry. That's the whole method.
Jump-Start Polarity Slips
Cross the cables and you can take out the ECU, the alternator diodes, and a handful of modules in one spark. Positive to positive first, ground last, and ground to bare engine metal on the dead car.
| Mistake | Typical cost | Smarter move |
|---|---|---|
| New battery on a dead alternator | $150 to $250 wasted | Test charging voltage first |
| Ignoring a belt squeal until it shreds | $300 to $900 plus a tow | Replace the belt at the first squeal |
| Over-tightening the belt | $200 to $500 in bearings | Set deflection to spec |
| Testing a flat battery | A wrongly condemned alternator | Charge fully, then test |
| Undersized alternator | A repeat failure next winter | Match the factory amp rating |
| Skipping the fusible link check | A new alternator that fixes nothing | Check voltage at the output stud |
| No battery registration | A short-lived AGM battery | Register with a scan tool |
| Repeated jump starts | A stall in a worse place | Stop after the second return |
Costs, Timelines, and the 20-40 Minute Reserve Window
Numbers calm people down. Here's what each outcome actually costs and how long it takes, based on aggregate pricing from parts retailers and independent shop labor rates as of 2026.
What the Parts Run
| Part or service | Typical cost | Notes |
|---|---|---|
| Serpentine belt | $20 to $80 | Part only, most four-cylinder cars |
| Belt plus tensioner | $80 to $200 | Do both together, labor overlaps |
| Alternator, rebuilt | $150 to $350 | Common models, exchange unit |
| Alternator, new | $250 to $600 | Higher for high-output units |
| Alternator installed | $300 to $900 total | Labor is often the bigger half |
| 12V battery, flooded | $100 to $200 | Group size drives the price |
| 12V battery, AGM | $160 to $300 | Plus registration on some cars |
| Multimeter | $20 to $40 | A basic DC voltmeter is enough |
| Portable jump starter | $60 to $150 | Check the peak amp rating |
| Battery charger | $40 to $120 | A maintainer pays for itself |
| Charging-system test | Free to $50 | Free at many parts stores |
| Tow, local | $75 to $150 plus mileage | Higher at night or on a highway |
Two things stand out in that table. The diagnosis is nearly free. The parts get expensive only when a small failure is allowed to spread.
What Each Job Takes
| Job | Time | DIY friendly |
|---|---|---|
| Terminal clean and tighten | 10 minutes | Yes |
| Belt inspection | 5 minutes | Yes |
| Voltage tests | 10 minutes | Yes |
| Serpentine belt replacement | 30 to 90 minutes | Usually yes |
| Battery swap | 20 minutes | Yes, plus registration on some cars |
| Alternator replacement, four-cylinder | 1 to 3 hours | Sometimes |
| Alternator replacement, transverse V6 | 3 to 5 hours | Rarely, tight access |
| Shop diagnosis | 30 to 60 minutes | Not applicable |
If you're planning to spend an afternoon under the car, sort out safe access first. Rolling a jacked car onto a set of sturdy wooden ramps is safer than working on stands in gravel, and it gives you room to reach a low-mounted alternator.
The Reserve Window Math
Here's the arithmetic behind that 20 to 40 minute figure. A typical mid-size car pulls roughly 25 to 40 amps with lights, wipers, and the blower running.
A healthy 70 amp-hour battery can't deliver its full rating at that draw, and it shouldn't be run flat anyway. Realistically you get a usable fraction of capacity before voltage sags below the point where the engine computer drops out, usually somewhere near 9 to 10 volts.
Cut the load in half and you roughly double the time. That's why switching off the blower, the defroster, and the stereo is the single best thing you can do in the first minute.
Why the Window Shrinks
- Battery age. A four-year-old battery may hold half its original capacity.
- Cold. Capacity drops sharply at freezing temperatures, sometimes by a third.
- Heat. Summer heat ages batteries faster, so a hot-climate car starts the winter weaker.
- Traffic. Idling contributes nothing, and stop-start systems cycle the battery constantly.
- Accessory load. Amplifiers, inverters, and dash cameras all eat into the reserve.
The Payoff Math
A $30 belt replaced on time avoids a $400 alternator, a $120 tow, and a missed day of work. That's the whole argument for acting on the first squeal.
The same logic applies to a $25 terminal cleaning. Ten minutes of scrubbing prevents the intermittent fault that sends people to a shop for a $150 diagnostic.
Staying Safe: Shoulder Stops, Night Driving, and Belt-Driven Overheating
Safety decisions here aren't abstract. Every year, people are struck while standing behind a disabled car on a highway shoulder, and the risk climbs at night and in poor visibility.
Should You Get Out of the Car?
If traffic is moving fast and close, stay inside with your seatbelt on. Call for help and keep the hazards flashing.
If you're well off the travel lane, in daylight, with a wide shoulder or a lot, then stepping out to inspect the belt and terminals is reasonable. Wear something bright. Open the hood so other drivers read the situation at a glance.
Put out a warning triangle or flares only if you can do it without turning your back on traffic. On a busy interstate, that answer is usually no.
Night Driving Changes the Equation
Headlights, tail lights, and dash lighting together pull a meaningful load, so your reserve burns faster after dark. The instinct to switch the headlights off and stretch the range is the wrong call. You'll trade safety for ten minutes.
Keep the lights on. Cut the blower, the defroster, and the stereo instead. If the dash starts to fade, you're minutes from a stall, so pick the nearest lit place and stop there.
Rain adds a second problem. Wipers, lights, and the blower all run at once, and visibility drops right when you need it most. Keep the screen clear and the blades in decent shape.
If yours are near the end of their life, it's worth knowing whether a hybrid blade suits your car before the weather turns.
The Belt-Driven Overheating Trap
This is the risk most drivers never connect to the battery light. On a single-belt engine, that one loop drives the alternator, the water pump, the power steering pump, and the AC compressor.
Lose the belt and coolant stops moving. The temperature gauge climbs within a couple of miles, and the cylinder head takes the damage. If the battery light and the temperature gauge rise together, shut down as soon as it's safe.
Don't limp home with the needle in the red. A tow costs less than a head gasket.
Cold, Heat, and Where You Live
Cold climates hit batteries hardest at startup, when cranking amps peak and capacity bottoms out. A battery that's fine in October can fail on the first hard freeze.
Hot climates are quieter about it. Heat cooks electrolyte and shortens battery life, so a car in Arizona or Texas often needs a battery at three years while a cool-climate car lasts five.
Rural drivers face a different problem. Long gaps between exits mean the reserve window matters more than the repair cost. In that situation, drive toward the nearest town at a steady speed rather than stopping on a gravel verge with no phone signal.
A Safety Checklist for the Stop
- Hazards on before you open the door.
- Wheels straight, parking brake set, fully off the travel lane.
- Seatbelt on if you stay inside.
- Bright clothing if you step out.
- Hood up when parked, down when moving.
- Keys with you, not in the ignition, if you leave the car.
- Water and a warm layer in the car in winter.
Decision Guide: Drive, Charge, Jump, Tow, or Fix It Yourself
Every branch above funnels into five outcomes. Find your situation, take the action, and stop second-guessing it in the moment.
| Your situation | Action | Why |
|---|---|---|
| Light on, car driving normally, exit within a few miles | Drive to a parts store or shop | Free charging test, minimal risk |
| Light on, dim lights, engine stumbling | Pull off at the first safe spot | A stall is minutes away |
| Light on, temperature gauge climbing | Stop and shut down | Belt likely gone, overheating risk |
| Light on, belt shredded or missing | Tow | No charging and no coolant flow |
| Smell of rotten eggs, swollen battery case | Shut off, move away, tow | Overcharging, hydrogen venting |
| No crank, dash stays bright, one click | Charge or jump, then test | Likely a flat battery |
| No crank, dash goes dark | Clean and tighten terminals | Connection fault |
| Jumped, light back within two minutes | Drive to a shop, expect an alternator | Not charging |
| Jumped, light stays off for days | Charge fully, watch for a draw | Battery was drained |
| Resting voltage under 12.4V after charging | Replace the battery | It won't hold a charge |
| Running voltage under 13V | Diagnose alternator, belt, wiring | No meaningful output |
| Running voltage over 15V | Stop driving | Regulator failure |
The Two-Minute Version
If you remember nothing else, remember this order. Get safe, cut the load, check the belt, check the terminals, test the voltage.
That sequence resolves most cases without a shop visit. When it doesn't, it tells you exactly what to say when you call one.
Fix It Yourself or Hand It Over?
Do it yourself if the fault is a terminal, a ground, a belt on an accessible engine, or a battery swap. Those jobs need basic tools and a little patience.
Hand it over if the alternator is buried, if the car needs a lift, or if the battery needs registration on a management system. Our research suggests most owners save real money on the first group and lose time on the second.
Frequently Asked Questions
Can I drive with the battery light on?
Yes, usually, but only to reach a safe place or a repair shop. A car with a dead alternator runs on battery reserve for roughly 20 to 40 minutes with a light electrical load. Cut the blower, defroster, and stereo to stretch that window, and keep the headlights on after dark.
How long will a car run once the battery light comes on?
Expect 20 to 40 minutes on a healthy, fully charged battery with modest electrical load. An old battery, winter temperatures, night driving, or heavy accessory use can cut that to ten minutes or less. Treat every minute as borrowed and head for the nearest safe stop.
What does it mean if the battery light comes on and then goes off?
A brief flash at key-on is the normal bulb check. A light that appears while driving and then fades usually points to an intermittent fault: a loose terminal, a corroded ground, or a slipping belt. Get it checked before it becomes a permanent glow.
Is it the battery or the alternator?
Test the voltage with the engine running. Around 13.8 to 14.7 volts across the terminals means the alternator is charging and the battery is suspect. Below 13 volts with the engine running means the charging system is at fault, whatever the battery's age.
Can a weak battery cause the battery light to come on?
Yes, in a roundabout way. A battery that can't hold a charge drags system voltage down, and a heavily discharged battery pulls so much current that voltage sags while the alternator works flat out. Charge it fully and retest before blaming any part.
Why does the battery light flicker at idle?
A flicker at idle that clears when you rev the engine usually means a weak alternator at low RPM, a glazed or slipping belt, or a loose connection. Failed rectifier diodes cause the same pattern, often with a whine through the radio. Check the belt and terminals first, then test AC ripple.
