
Your bike cranks slowly, the dash dims, and the solenoid gives a tired click. Learning how to charge a motorcycle battery properly starts with two facts, not a trip to the parts store. One is the chemistry printed on the label.
The other is resting voltage.
Here's the number to grab first. A healthy 12V lead-acid battery rests at 12.6 to 12.8 volts, and anything at 12.4 is already down about a quarter. Charge current should sit near 10 percent of the amp-hour rating, the ceiling that SAE J537 testing and most manufacturer manuals endorse.
Read the label, read the voltage, then let those two facts pick your path.
How to Charge a Motorcycle Battery
Charging a motorcycle battery takes five steps. Read the chemistry printed on the battery label. Check resting voltage with a multimeter.
Set the charger to the right profile and a 10 percent rate. Charge in open air until the unit reads full.
Why Your Bike Won't Start: Read the Battery Before You Grab a Charger
A flat battery is the most common reason a bike refuses to start. It's also the most misdiagnosed fault on two wheels. Every spring, riders swap out a perfectly good battery when the real culprit was a loose terminal, a crusty ground strap, or a regulator-rectifier that quietly stopped charging.
Start with what the bike is doing, not what you suspect. The symptom narrows the branch faster than any test you can run.
| What you see | What it usually means | First check |
|---|---|---|
| Slow, laboured crank, dim dash | Low state of charge | Resting voltage |
| One hard click, lights dead | Deeply discharged battery or bad connection | Terminal tightness, then voltage |
| Strong crank, no fire | Fuel, spark, or air, not charge | Spark and fuel delivery |
| Fine cold, won't restart hot | Worn battery or a hot starter draw | Load test while warm |
| Flat again after 2 to 3 weeks parked | Parasitic draw or an ageing battery | Key-off current draw |
| Dim lights at idle, bright at revs | Weak charging output | Voltage at 2,500 rpm |
Notice what isn't on that list: "the battery is dead." Very few batteries die overnight. Most fade across weeks, and that fade shows up as a slow crank long before it shows up as a click.
Then read the voltage. A multimeter across the terminals costs less than a tank of fuel and tells you more than any dash warning. Key off, lights off, and at least an hour after the last ride or charge.
That reading is the number the rest of this guide runs on.
One caution before anything gets clipped on. Charging with the ignition on, or pushing high current through a modern bike's loom, can upset the ECU, the dash, or an alarm. Most manuals are happy with a low-amp tender lead.
Far fewer are happy with a 10A blast through the harness.
Two shortcuts save time here. If the motor spins briskly and never catches, the battery is fine and chasing a no-start fault through fuel and spark is the smarter move. If the bike is newer and stores codes, a basic fault-code reader can point at a charging or sensor fault before you touch a charger at all.
Read the symptom, read the voltage, then charge. In that order.
The Three Variables That Decide Everything: Chemistry, Voltage, and Temperature
Every charging decision comes down to three things. What the battery is made of, what it's holding right now, and how warm it is. Change any one of those and the correct procedure changes with it.
Flooded, AGM, gel, and LiFePO4: how each one wants to be charged
Chemistry sets the voltage ceiling, and the ceiling is not negotiable. Push a gel battery to AGM voltages for a few hours and you'll cook it. Push a lithium pack onto a lead-acid profile and the BMS may shut the whole thing down.
- Flooded (wet-cell): vented case, removable caps, liquid electrolyte. You can check cells with a hydrometer and top up with distilled water. Cheapest, toughest, thirstiest.
- AGM (absorbent glass mat): electrolyte soaked into a glass mat, sealed for life. Now the default OEM fitment on most modern bikes. No water top-up, and it hates overvoltage.
- Gel: electrolyte thickened with silica. Found on some touring bikes and older machines. Lower voltage cap than AGM and the easiest of the four to ruin.
- LiFePO4 (lithium iron phosphate): light, expensive, holds charge for months. Needs a lithium-capable charger, a wake-up routine if the BMS has tripped, and above-freezing temperatures.
| Chemistry | Absorption target | Float | Watch out for |
|---|---|---|---|
| Flooded lead-acid | 14.4 to 14.7V | 13.2 to 13.4V | Water loss, gassing, corrosion |
| AGM | 14.4 to 14.7V | 13.2 to 13.4V | Overvoltage, swelling, no top-up possible |
| Gel | 14.0 to 14.1V | 13.2 to 13.4V | Cooking at AGM voltages |
| LiFePO4 | 14.2 to 14.6V | None | Charging below 0°C, wrong charger mode |
Read the label before anything else. If the sticker is gone, check the owner's manual or the seller's listing, then look at the case. A sealed flat-top with no caps is almost certainly AGM.
A 6V unit on an older classic needs its own profile too, since the voltages above are all 12V figures.
Resting voltage vs. surface charge: getting a number you can trust
Right off the charger, a lead-acid battery will show 13.2 to 13.5 volts. That isn't state of charge. It's surface charge, a temporary voltage sitting on the plates that fades within an hour or two.
Leave the battery disconnected and load-free for one to two hours, ideally overnight, then read it. That open-circuit figure is the one worth trusting.
| Resting voltage (lead-acid, 25°C) | State of charge | What to do |
|---|---|---|
| 12.6 to 12.8V | 100% | Nothing needed |
| 12.4V | About 75% | Top up soon |
| 12.2V | About 50% | Charge before it sulfates |
| 12.0V | About 25% | Charge now |
| 11.9V or lower | Effectively empty | Suspect damage, load test |
Below roughly 12.4V, lead sulfate starts hardening on the plates. Leave it sitting there for weeks and some of that capacity never comes back. That single fact is the entire reason battery maintainers exist.
Temperature: the variable most riders ignore
- Cold kills cranking power. A lead-acid battery can lose around half its punch near 0°F (-18°C), even at full charge.
- Frozen batteries can't be charged. Let one thaw indoors first, then test it. Charging ice into a case cracks it.
- Lithium can't be charged below 0°C. Current plates onto the anode instead of storing, and that damage is permanent.
- Heat speeds self-discharge. Expect 3 to 5 percent a month on lead-acid, faster in a hot garage, and faster water loss in flooded cells.
- Hot climates shorten service life. A battery that lasts five years in a mild climate may last three in a desert state.
As of 2026, plenty of premium adventure and sport bikes leave the showroom with lithium fitted from the factory. If yours did, the temperature rules matter more than anything else on this page.
Match the Charger to the Battery: Profiles, Rates, and the 10% Rule
The wrong charger does more damage than no charger. A 15A car unit on a 10Ah bike battery is like filling an espresso cup with a fire hose. The battery might survive it.
It won't enjoy it.
What a smart charger does that a taper charger can't
A taper charger pushes current and never stops. A smart charger watches voltage, steps through stages, and stops when the job is done. That difference is the whole ballgame on a small battery.
| Charger type | How it behaves | Where it fits |
|---|---|---|
| Dumb taper charger | Fixed output, current falls as the battery fills, never shuts off | Old flooded batteries, supervised only |
| Trickle charger | Fixed low current, no stages | Topping up a healthy battery |
| Maintainer / tender | Charges, then floats at 13.2 to 13.4V indefinitely | Winter storage |
| Smart multi-stage | Profile-matched, staged bulk and absorption, then float or shutoff | Almost everything |
| Car charger (10 to 15A) | Far too much current for small bike batteries | Not for motorcycles |
What the good ones add on top of staging:
- Reverse-polarity protection and spark-free clamps, so a fumbled connection doesn't blow a fuse.
- Lithium mode, which stops at the right voltage and skips the float hold entirely.
- Desulfation or repair mode, useful on lightly neglected lead-acid.
- Temperature compensation, so a cold battery gets slightly higher voltage and a hot one gets less.
- Small current steps, usually 0.75A, 1A, 1.25A, and 2A, because a 20Ah touring battery and an 8Ah track battery don't want the same rate.
The distinction riders miss is charger versus maintainer. A maintainer is built to sit connected for months. A charger is built to finish a job and stop.
Using a maintainer to revive a deeply flat battery works, it just takes a day and a half.
The 10 percent rule, in real numbers
Target charge current near 10 percent of the amp-hour rating. Under that is slow but safe. Over it, the battery heats up, gasses, and sheds active material.
| Battery capacity | 10% target | Sensible charger output |
|---|---|---|
| 8Ah | 0.8A | 0.75 to 1A |
| 10Ah | 1.0A | 1A |
| 12Ah | 1.2A | 1 to 1.25A |
| 14Ah | 1.4A | 1.25 to 1.5A |
| 18 to 20Ah | 1.8 to 2A | 2A |
Then do the time math. A 12Ah battery at 50 percent needs about 6Ah back. At 1A that's six hours of perfect charging, and no charger is perfect.
Add 20 to 40 percent for losses and you land at 7 to 9 hours.
| Battery | Start point | Charger rate | Realistic time to full |
|---|---|---|---|
| 8Ah | 50% | 1A | 5 to 6 hours |
| 12Ah | 50% | 1A | 7 to 9 hours |
| 12Ah | 25% | 1A | 11 to 13 hours |
| 20Ah | 50% | 2A | 6 to 8 hours |
Two things not to do. Don't use the car charger just because it's already on the bench. And don't treat a jump pack as a charger, since it dumps current in seconds and has no absorption stage at all.
It'll get you home. It won't fill the battery.
Branch 1: The Battery Is Still in the Bike and Reads 12.4V or Better
You're in the easy branch. Nothing is broken, the battery is just low. Charge it in place and you're finished.
- Ignition off, key out, every accessory switched off.
- Inspect the terminals. White or blue crust means acid creep, so clean it with a baking soda and water paste, rinse, and dry.
- Confirm the chemistry and the voltage on the label, then set the matching profile.
- Clip red to positive, black to negative. On a bike with easy frame access, black to a clean unpainted frame bolt is even safer.
- Ventilate. Garage door up, no smoking, nothing that sparks nearby. Hydrogen builds fast in a closed shed, and OSHA treats battery charging areas as eye-hazard zones for good reason.
- Set the rate near 10 percent of the Ah rating and start it.
- Watch the stage lights. Bulk first, then absorption, then float or shutoff.
- Disconnect the charger before pulling the clamps, black off first.
- Fit a permanent SAE pigtail while you're in there, so next winter takes thirty seconds.
If your bike already has a factory tender lead, use it. It saves pulling the seat every time and keeps the clamps off the terminals.
When the terminal bolts come out, snug them and stop. They're small fasteners threaded into soft lead posts, so skip the rattle gun and treat them like any other delicate bolt. Overkill here strips a post and turns a five minute job into a battery replacement.
If the battery goes flat again inside a week, charge isn't the problem. Something is draining it. A healthy parked bike draws single-digit to low tens of milliamps.
Alarms, GPS trackers, and heated grips all push that up, and adding accessory lighting without a switched relay turns into a constant load. The push-button starting hardware on newer bikes draws a trickle too, so a machine that sits for a month can flatten a good battery with nothing actually wrong. Measure key-off current with the meter in series and you'll find the culprit in an afternoon.
Last check while you're here. Across the battery at 2,500 to 3,000 rpm you want 13.5 to 14.5 volts. Under 13V and the charging system is suspect.
Over 15V and the regulator is overcharging, which quietly boils a battery dry over a few hundred miles.
Branch 2: Deeply Discharged Below 12.2V. Charge, Desulfate, or Replace It
Below 12.2V the decision stops being obvious. The battery might recover with a slow charge, might need a repair cycle, or might be scrap. The exact reading narrows it down.
| Reading | Likely condition | What to do |
|---|---|---|
| 12.0 to 12.2V | Half discharged, mild sulfation | Slow 1A charge, then retest |
| 10.5 to 12.0V | Deeply discharged | Slow charge for 12 to 24 hours, retest |
| Below 10.5V | Suspect a shorted cell | Load test before charging further |
| Near 0V | Dead cell, open circuit, or a sleeping BMS | Load test or replace |
| Swollen, cracked, leaking | Failed case | Replace, never charge |
| Frozen solid | Ice in the electrolyte | Thaw fully, test, never charge frozen |
Never charge a frozen battery. Ice expands inside the case, the plates are already distorted, and charging pushes gas into a cracked housing full of acid. Thaw it indoors overnight, then test it like any other battery.
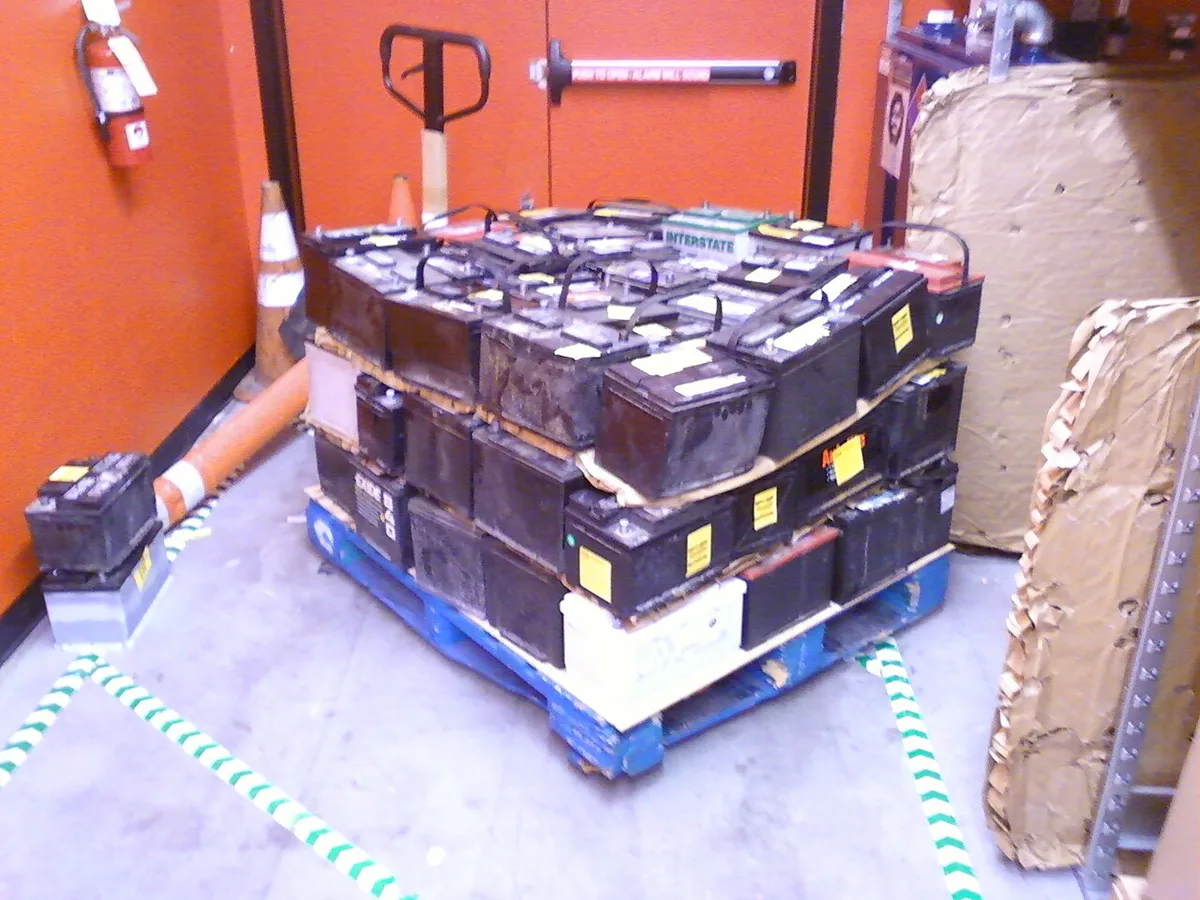
Image source: Wikimedia Commons / Lack Thereof at English Wikipedia
The load test that separates a flat battery from a dead one
Voltage at rest tells you charge. It doesn't tell you capacity. A battery can read a healthy 12.6 volts and still fold the moment you ask it for 200 cranking amps, because one weak cell leaves the other five doing all the work.
A load test answers that in about fifteen seconds. You can use a carbon pile tester with a real resistive load, or a conductance tester that estimates cold cranking amps electronically without heating anything up. Both work.
The carbon pile is the older, cheaper, more brutal option.
How to run one properly:
- Charge the battery fully first. A load test on a half-charged battery proves nothing except that it was half charged.
- Rest it an hour, then confirm open-circuit voltage sits at 12.6V or better.
- Read the CCA rating off the label and halve it. A 240 CCA battery gets tested at 120 amps.
- Connect the tester, apply the load, and hold for 15 seconds while watching the needle or display.
- At 70°F (21°C), a healthy 12V battery stays above 9.6 volts for the whole 15 seconds. Anything below that is a fail.
| Load test result (15 seconds, half CCA, 70°F) | What it means | What to do |
|---|---|---|
| Holds 10V or better | Real capacity still there | Refit it and look elsewhere |
| Sags to 9.6 to 10V | Marginal, usually age related | Refit, retest in a month |
| Falls below 9.6V | Fails the standard test | Replace |
| Collapses toward zero | Shorted or open cell | Replace, don't charge it again |
Cold weather shifts every number in that table. Test indoors where you can, or expect a good battery to read lower on a freezing bench. Manufacturer spec sheets publish temperature correction figures for exactly this reason.
Wear glasses and gloves. A battery under heavy load can vent, spit electrolyte, or split a case, and the eye protection rules published by workplace safety regulators exist because this job sends people to hospital every year.
If the battery passes but the bike still won't fire, you've eliminated the power supply. Now it's fuel, spark, or air. Pull a plug and read it, because an oil-fouled plug will crank all day and never ignite.
Chasing that fault is its own job, and the quick fixes riders try often cause more trouble than the original problem.
Desulfation and recovery mode: what it can and can't fix
Sulfation is what kills most motorcycle batteries. It's also the most oversold cure in the charger aisle. Lead sulfate forms on the plates every time the battery discharges, and a prompt recharge dissolves it again.
Leave the battery parked at 12.0V for a few months and those crystals harden into a crust that no charger shifts completely.
A repair or desulfation mode attacks that crust with high-frequency pulses or a raised voltage ceiling. It can hand back a useful slice of capacity on a battery that sat too long. It cannot rebuild plates that have shed their active material, and it cannot rescue a shorted cell.
What to expect, by condition:
- Mild neglect: parked at 12.0 to 12.2V for a couple of months. A repair cycle plus a slow charge often recovers 80 to 90 percent of original capacity.
- Deeper discharge: sat near 10.5V for weeks. Maybe 60 to 70 percent comes back, and you'll feel the difference on the first frosty morning.
- Hopeless: a cell that won't hold above 10.5V after a full charge, or cells that read wildly different specific gravities on a hydrometer. No charger fixes that.
- Dangerous: swelling, weeping acid, or a case that's warm to the touch mid-charge. Stop, disconnect, and replace it.
The time cost is real. Repair cycles typically run 12 to 48 hours with the charger powered the whole way through. Plan a weekend, not an evening.
One more thing worth knowing. A repair mode on a battery with a shorted cell will happily keep pumping current into a fault, and that's how cases get hot and vent. If voltage refuses to climb past 10.5V after a few hours, shut it down and load test it.
When to stop trying and replace it
The economics are simple enough. A smart charger that handles both lead-acid and lithium runs roughly $50 to $90. A replacement AGM in a common group size lands somewhere between $70 and $180, and lithium replacements start near $150 and climb well past $400.
If the battery is four or five years old and fails a load test, replace it. Recovery attempts on an end-of-life battery just delay the inevitable and leave you guessing whether the bike will start next Sunday.
Age lives on the date code, usually stamped or burned into the case near the top. The common format is four digits, two for year and two for month, though brands vary enough that a quick manual check is worth the two minutes. If the code says four years or more and the load test failed, you're finished deliberating.
Two supporting habits are worth building now. Fit the new battery with clean, snug terminals and a smear of dielectric grease, and put it on a maintainer any time the bike will sit for more than a couple of weeks. If a fresh battery still goes flat within days of standing, the bike is drawing current with the ignition off, and keyless systems are a frequent culprit on newer machines.
Sorting that out with a meter in series beats replacing another battery next spring.
If you already own a diagnostic reader, plug it in before you spend anything. Modern ECUs store charging and sensor faults that point straight at the problem, and picking a scan tool that reads live voltage saves a lot of guessing on later jobs.
Branch 3: Lithium Packs That Won't Wake, BMS Shutdown and Cold Charging
A lithium pack that reads 0.0V is usually not dead. It's asleep. LiFePO4 batteries carry a battery management system (BMS), a small circuit board that cuts the output when cell voltage drops too low.
That protects the cells from damage. It also makes a perfectly healthy battery look like scrap on your multimeter.
Here's the diagnostic that saves people a few hundred dollars. Check voltage, then check voltage again with the ignition on and the headlight drawing a load. A lead-acid battery sags under load.
A sleeping lithium pack often stays flat at zero and then wakes once current is applied from a charger.
If you're seeing zero volts on a lithium pack, work through this order:
- Confirm the charger has a lithium mode. Lead-acid profiles push the voltage too high and can trip the BMS again.
- Try the wake or force mode. Some units, including several NOCO Genius and OptiMate models, have a specific reset sequence for a BMS that's latched off.
- Apply a brief load. Key on for a few seconds, or connect a lead-acid jump pack for under a minute. This nudges the BMS out of protection mode.
- Start a low current charge, ideally 1A or less, and watch for voltage to climb above 10V.
- If nothing moves after 20 minutes, measure at the battery terminals and at the charger leads. A blown inline fuse in the pigtail mimics a dead battery perfectly.
Never use desulfation or repair mode on lithium. That program exists for lead plates, and the raised voltage it applies is exactly what the BMS is trying to protect against.
Cold charging and the 0°C line
Lithium hates the cold on the way in. Below 0°C (32°F), charging forces lithium ions to plate onto the anode surface instead of sliding into the structure. That plating is permanent, and it eats capacity a little more with every cold charge.
Most BMS boards block charging below freezing automatically. Some cheaper packs don't. If your bike lives in an unheated garage through a hard winter, either pull the pack and bring it inside or leave it alone until spring.
Discharge is a different story. A cold lithium battery still cranks, though with less punch. The charts published by Shorai and Antigravity show usable output down to around -20°C, with a noticeable dip below freezing.
Many riders do a couple of key-on cycles to warm the pack internally before a cold start.
How lithium charging differs from lead-acid
| Behaviour | Lead-acid (flooded, AGM, gel) | LiFePO4 |
|---|---|---|
| Float stage | Yes, 13.2 to 13.4V | No, hold at full or stop |
| Self-discharge | 3 to 5% a month | 1 to 3% a month |
| Cold charging | Fine above freezing | Blocked below 0°C |
| Winter storage | Maintainer connected | Charge to about 70%, disconnect |
| Charger mode | Lead-acid or AGM | Lithium, always |
| Recovery from flat | Slow charge and desulfate | Wake the BMS |
Storage is where lithium wins back its price. A pack charged to roughly 70 percent and left in a cool garage will hold most of that for a year, no maintainer needed. Buying from a brand that publishes UN 38.3 test summaries is worth the extra twenty dollars, since lithium shipping requirements apply to air freight and warranty returns alike.
One safety note that isn't theoretical. A damaged or cheaply built lithium pack can go into thermal runaway, which means a fast, self-feeding fire that water struggles to stop. Charge it on concrete or metal, not on a bench covered in rags.
Don't leave it filling overnight in a bedroom or a hallway.
Flooded Batteries Only: Electrolyte Levels, Distilled Water, and Hydrometer Readings
Skip this section if your battery is AGM, gel, or lithium. Those are sealed, and prying the cap off ruins them. Everything below applies to a flooded, wet-cell battery with removable filler caps, the type still found on plenty of older machines, off-road bikes, and cheap replacements.
Flooded batteries lose water. Charging splits the electrolyte and vents hydrogen and oxygen, and the liquid level drops over months. Let it drop below the tops of the plates and the exposed lead sulfates hard.
Check the level with the battery sitting level, caps off, and a flashlight. The electrolyte should just cover the plates and reach the split ring in the filler neck. That's the fill line, not the top of the case.
- Use distilled or deionized water only. Tap water carries minerals that coat the plates and shorten life.
- Never top up with acid. You don't lose acid to evaporation, only water. Adding electrolyte concentrates the mix and burns plates.
- Never overfill. Leave headroom for expansion, or the battery will weep acid out of the vents and corrode everything near it.
- Top up before charging only to plate level. Then charge, then finish the fill to the line. Water expands as it absorbs into the electrolyte.
- Vent tube connected. Route it away from paint, chain, and tyre, and keep the frame clip in place.
Clean up any spill with a baking soda and water paste. It neutralises the acid, then rinse with plenty of water. Keep the paste recipe in mind for terminal crust too.
Reading a hydrometer properly
A hydrometer measures specific gravity, which is the actual strength of the electrolyte. It's a better window into health than voltage, because it looks at each cell individually.
Charge the battery fully, then draw a sample from each cell with the bulb, one at a time. Read the float at eye level and write the number down.
| Specific gravity (25°C) | State of charge |
|---|---|
| 1.265 | Fully charged |
| 1.225 | About 75% |
| 1.190 | About 50% |
| 1.155 | About 25% |
| 1.120 or lower | Discharged |
Temperature matters. Specific gravity drops roughly 0.004 for every 10°F below 80°F, so correct your numbers or work in a warm space.
The more useful reading is the spread between cells. A variation of 0.050 or more across cells means one cell is failing, and no amount of charging will bring it back in line. A single cell reading far lower than the rest is a shorted cell.
Replace the battery.
Flooded batteries with a hydrometer and a bit of attention can genuinely run six or seven years. The catch is the maintenance. Sealed AGM trades that routine away for a shorter, fuss-free life, which is why almost every modern bike ships with one.
Bench Charging Step by Step: Disconnect, Inspect, Connect, Monitor
Bench charging is the thorough version. It costs fifteen extra minutes and it lets you inspect a battery you can't really see while it's buried under a seat.
Work on a bench you don't mind staining, with the battery out of the bike and the charger off. Ventilation is not optional here. Hydrogen is explosive at surprisingly low concentrations, and a sealed cupboard is the worst possible charging spot.
Step 1: Disconnect in the right order
Ignition off, key out, and the negative terminal first. That's the ground side, and taking it off first means a dropped wrench can't bridge positive to frame. Positive comes off second.
Then release the hold-down strap or bracket and lift the battery out. Note how the vent tube was routed before it disappears into the frame. Photograph it if you're unsure.
On tight bikes, the positive cable run and any accessory wiring are worth a photo too.
While the battery is loose, slide it into a tray and check the case all round. Swelling, cracks, weeping fluid, or a warped lid means you stop here and replace it.
Step 2: Inspect, clean, and check the water
Look at the terminals first. White, powdery crust is dried acid residue, and blue-green fuzz is corroded copper. Both add resistance that mimics a flat battery.
Scrub with a baking soda paste, rinse, and dry thoroughly before anything gets clipped on.
If it's flooded, check electrolyte level now, then bring it to the plate line. Don't fill to the top before charging.
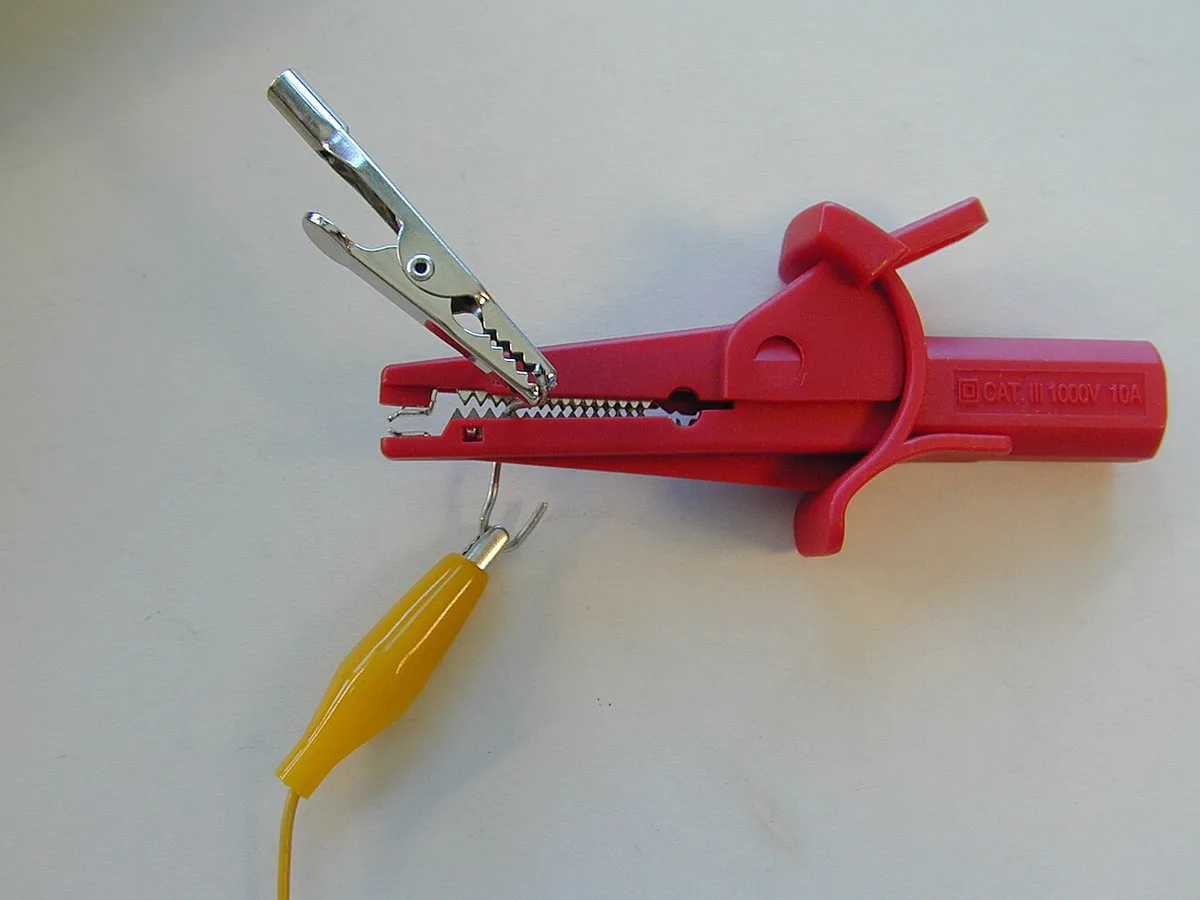
Image source: Wikimedia Commons / No machine-readable author provided. Atlant assumed (based on copyright claims). (CC BY)
Now look at the clamps and leads. Frayed insulation, rusty jaws, or a cracked clip body are a fire waiting to happen. The alligator clips above are typical: spring loaded jaws with copper teeth, and insulation that cracks after a few seasons outdoors.
Step 3: Connect, then set the mode
Red clip to positive, black clip to negative. Rock each clamp to bite through any surface film. Set the profile to match the label: flooded, AGM, gel, or lithium.
Set the rate near 10 percent of the amp-hour rating.
Mount the charger above the battery on a shelf or hook, not on the floor where it can get kicked or soaked.
Step 4: Watch the stages, not the clock
| Stage | What you'll see | Roughly how long |
|---|---|---|
| Bulk | Voltage climbing, current steady at the set rate | The majority of the charge |
| Absorption | Voltage pinned near 14.4V, current tapering | 1 to 3 hours |
| Float or shutoff | Voltage settles at 13.2 to 13.4V | Ongoing or done |
Read the charger display rather than your watch. The absorption tail is not wasted time, it's the part that actually pushes the last 20 percent of capacity in.
Step 5: Disconnect and refit
Turn the charger off before touching the clips. Remove black, then red. Let the battery rest an hour, then read open-circuit voltage. 12.6V or better means you're finished.
Refit positive first, negative last. Snug the terminal bolts by hand with a small wrench, because the same wheel fastener mistakes that snap studs will strip a soft lead post in one squeeze. A smear of dielectric grease or petroleum jelly over the assembled terminals keeps corrosion away.
Reconnect the vent tube, refit the hold-down, and label the install month on the case so future-you knows the age.
On-Bike Charging With a Pigtail: The Setup You'll Use Every Winter
A permanently fitted SAE pigtail turns a twenty minute job into thirty seconds. Fit one, and the bike gets topped up every few weeks without removing the seat.
The part itself is cheap. A fused SAE harness with ring terminals costs around $10 to $15, and most smart chargers either ship with one or sell it as an accessory.
Installation goes like this:
- Disconnect the negative terminal first.
- Bolt the ring terminal with the fuse holder to the positive post, and the plain ring to the negative.
- Route the lead away from the exhaust, the shock, and anything that moves with the swingarm.
- Zip tie it every few inches, leaving a small loop of slack so vibration doesn't fatigue the wire.
- Terminate the connector somewhere accessible but protected, ideally under the seat edge or behind a side panel.
- Refit the negative terminal, then check the fuse is seated.
That last point trips people up. Push the fuse properly home and test charger output at the connector with a meter before you trust it.
Pigtail options compared
| Connector type | Best for | Watch out for |
|---|---|---|
| SAE two-pin | Most maintainers, cheap and universal | Polarity isn't standard across brands, so meter it before mixing brands |
| Coax (OptiMate, CTEK) | Keeping one charger ecosystem | Adapters needed for other brands |
| Fused SAE with cap | Wet climates and dusty bikes | Replace the rubber cap when it perishes |
| 12V socket adapter | Bikes with a factory power socket | Often switched off with the ignition, so it won't charge when parked |
That polarity point is the one that costs people a charger. Two SAE plugs can look identical and be wired opposite ways. Before you plug an unfamiliar charger into an unfamiliar lead, check which pin carries positive on each side.
Routing deserves real care on adventure and touring bikes, where accessory wiring already fills the gap behind the panels. If you're wiring auxiliary lights, run everything on its own fused, switched circuit and keep the tender lead clear of the bundle.
While the panel is off, cap any exposed connector and check the lead hasn't rubbed through its insulation on a frame edge. A dead short on an unfused lead is how bikes catch fire in garages.
How Long It Really Takes: Charge Rates, Inefficiency Losses, and Real Timelines
The honest answer is longer than the maths suggests. Charging is not linear. The first 80 percent comes quickly, then absorption takes its time to drive the last 20 percent in.
Here's the working formula. Take the missing capacity in amp-hours, divide by charger output in amps, then multiply by 1.2 to 1.4 to cover losses. A 12Ah battery at 50 percent needs about 6Ah back.
At 1A that's six hours of theory, or 7 to 9 hours in reality.
| Battery | State of charge | Missing Ah | Charger rate | Realistic total |
|---|---|---|---|---|
| 8Ah | 50% | 4Ah | 1A | 5 to 6 hours |
| 10Ah | 50% | 5Ah | 1A | 6 to 7 hours |
| 12Ah | 50% | 6Ah | 1A | 7 to 9 hours |
| 12Ah | 20% | 9.6Ah | 1A | 12 to 14 hours |
| 18Ah | 50% | 9Ah | 2A | 6 to 8 hours |
| 18Ah | 20% | 14.4Ah | 2A | 9 to 11 hours |
| 20Ah | 50% | 10Ah | 0.75A | 16 to 18 hours |
Two lessons sit in that last row. A trickle charger is fine for maintenance and hopeless for recovery. And doubling the current doesn't halve the time, because absorption still takes hours regardless of the bulk rate.
Charger losses matter too. Small units waste more proportionally. Efficiency of roughly 70 to 85 percent is normal on a compact 1A charger, which is why the multiplier matters more at low output.
Temperature shifts the picture again. A cold battery accepts current more slowly and needs slightly higher voltage to reach the same state of charge. A hot battery accepts quickly and gasses more, which is why summer charging on a sun-baked driveway ages a battery faster than the same charge in October.
Lithium is different in a helpful way. LiFePO4 packs accept bulk current almost flat out until they hit their voltage ceiling, so a 12Ah lithium pack on a 2A charger can be close to full in about five hours. That's still no reason to use a car charger.
The BMS and the cell spec sheet both cap acceptance rate, and blowing past that cap is how packs get hot.
If you're charging in a hurry, resist the urge to push 5A through a 10Ah battery. The 10 percent ceiling exists because fast charging heats the plates, forces gassing, and sheds active material that never comes back. A battery charged at 5A every week will not last as long as the same battery charged at 1A.
Finally, timing yourself against a maintainer is unfair to both. A maintainer might take 18 hours to bring a flat 12Ah battery back. It'll also do it unattended, safely, and without you remembering to unplug anything.
For most riders that's the trade worth making.
Reading the Result: Resting Voltage, Absorption, Float, and Charging System Output
A number only means something when you know where and when to take it. A reading grabbed one minute after unplugging the charger tells you almost nothing. The same reading an hour later tells you whether the job actually worked.
So work through this sequence every time. It takes about ten minutes and catches most of the failures that send riders back to the charger a week later.
- Let the battery rest, disconnected, for one to two hours.
- Read open-circuit voltage across the posts.
- Compare it to the state-of-charge table.
- If it's still low, the charger never finished or the battery can't hold it.
- Start the bike and read voltage again at 2,500 to 3,000 rpm.
| Open-circuit reading after a full charge | What it tells you |
|---|---|
| 12.6 to 12.8V | Charged and holding, job done |
| 12.4 to 12.5V | Undercharged, or sitting with a small draw |
| 12.2V and falling over hours | Won't hold charge, suspect a cell or heavy draw |
| 13.0V or higher an hour after charging | Surface charge still fading, or the meter is on the wrong scale |
If the battery reads 12.6V or better and the bike still won't crank, the battery is not your problem. Move to the load test and the draw checks below.
Confirming the charger actually reached absorption
Watch the charger's voltage while it works, not just its lights. Mid-charge on a lead-acid battery, you should see it climb into the 14.4 to 14.7V band and hold there for an hour or more.
If it never gets past about 13.3V, one of three things is happening. The unit is a float-only maintainer. The battery is so large relative to the charger that bulk never completes.
Or the clamps are dropping voltage somewhere between the leads and the posts.
That last one is easy to check. Measure at the charger's output leads and again right on the battery posts. A gap of more than 0.3V means dirty clamps, corroded terminals, or a tired inline fuse in the pigtail.
Clean and retest before blaming the battery.
A gel battery behaves differently here. Its absorption ceiling sits near 14.1V, so a charger set to an AGM profile will push it past spec without ever showing a fault. That's why the mode menu matters more than the price tag.
Testing the bike's own charging system
Once the battery is known good, the next question is whether the bike can keep it that way. Start the engine, let it idle for a minute, then bring it to about 2,500 to 3,000 rpm with the headlight on.
- 13.5 to 14.5V: healthy. The regulator-rectifier is doing its job.
- Below 13.2V: undercharging. Expect a stator, wiring, or regulator fault, and expect to be back here next month.
- Above 15V: overcharging. The regulator is failing, and it will boil a battery dry over a few hundred miles.
- Erratic swings: a dying regulator, or a loose connection that's arcing under load.
There's one more test worth knowing. Switch the meter to AC volts, engine running, probes on the battery posts. More than about 0.5V AC across a DC battery points at a failing rectifier, because it's letting alternating current leak through.
It's a thirty second check that explains a lot of mysterious flat batteries on older machines.
You can also watch voltage while cranking. Below about 10V at the posts during a real crank means the battery is sagging under load, whatever it reads at rest.
Winter Lay-Up and Spring Recommissioning: What Changes in Cold, Hot, and Coastal Climates
Most motorcycle batteries don't die in summer. They die in a shed between November and March, quietly sulfating while nobody's looking. A parked battery self-discharges at 3 to 5 percent a month, so a full battery at 12.8V in October can sit around 12.2V by February.
That's the line where hardening sulfate starts taking capacity permanently. Which is why storage isn't about how long the bike sits. It's about what the voltage is doing while it sits.
Storage choices by chemistry
| Chemistry | Best storage approach | Notes |
|---|---|---|
| Flooded | Charge fully, top electrolyte to the line, leave on a maintainer or recharge monthly | Check water level again in spring |
| AGM | Charge fully, maintainer connected all winter | Never let it sit below 12.4V |
| Gel | Charge fully, maintainer with a gel-safe profile | Same voltage ceiling problem as charging |
| LiFePO4 | Charge to roughly 70%, disconnect, store cool | No float hold, no maintainer needed |
Two mistakes show up constantly here. The first is leaving a battery in an unheated garage with no attention at all. The second is trusting a cheap trickle charger that never shuts off, which slowly cooks a sealed battery over four months.
A proper maintainer floats at 13.2 to 13.4V and stops pushing when the battery is full. That's the difference between storage and slow destruction.
If you can't run a lead to the bike, pull the battery and bring it inside. Keep it off a concrete floor in a cool, dry spot, and check it every four to six weeks with a meter. Top it up when it drops toward 12.4V.
Lithium is the exception that keeps storage simple. Charge it to about 70 percent, disconnect it, and leave it. Cold storage actually suits LiFePO4, as long as you don't charge it below freezing when you bring it back out.
Cold, hot, and coastal climates
- Cold winters: freeze risk is the headline. A fully charged lead-acid battery freezes near -60°F, but a flat one can freeze close to 20°F. A discharged battery left in a freezing shed can crack its case.
- Hot climates: self-discharge runs faster, flooded cells lose water quicker, and service life drops. A five year battery in a mild climate can be done in three where summers hit 110°F.
- Coastal and humid areas: terminal corrosion accelerates fast. Grease the posts, check the ground strap, and expect more resistance at the connections than the inland rider ever sees.
- Year-round commuters: different problem entirely. Short trips never replace what the starter took out, so a monthly top-up charge matters even in July.
That short-hop pattern deserves its own warning. A rider doing six miles each way in traffic can drain a healthy battery over a few months, because the charging system spends most of the ride at low output.
The spring recommissioning checklist
- Read voltage before you connect anything.
- Charge fully at the correct profile and rate.
- Rest an hour, then read again. Under 12.4V after a full charge means the battery is suspect.
- Load test it.
- Clean and grease the terminals, then refit, positive first.
- Check the vent tube on flooded units.
- Start the bike and confirm 13.5 to 14.5V at 2,500 rpm.
- Note the install date if you fitted a new battery.
If the bike clicks instead of cranking in April, don't buy a battery on the spot. Charge and test first. Plenty of "dead" spring batteries come back with one slow charge and a clean set of terminals.
When the Battery Isn't the Problem: Parasitic Draw and a Tired Regulator-Rectifier
You can do everything right and still find a flat battery every few weeks. When that happens, stop charging and start measuring. A battery that's fine on Monday and flat by Friday is being drained, not failing.
Measuring key-off current without blowing a fuse
The standard test is a meter in series with the negative terminal.
- Key off, everything switched off, doors and seat closed.
- Disconnect the negative cable from the battery post.
- Set the meter to DC amps, 10A range to start.
- Bridge the gap between the cable and the post with the probes.
- Wait a full minute for modules to go to sleep, then read.
A healthy parked bike draws single-digit to low tens of milliamps. Anything over about 50mA will flatten a battery in weeks.
If the reading is higher, pull one fuse at a time and watch the number. When it drops, you've found the circuit. Alarms, GPS trackers, USB sockets, heated grips, and dash cams are the usual suspects, and aftermarket accessories wired straight to the battery without a switched relay are the most common of all.
Meter fuses blow easily if something wakes up mid-test, so keep spares. If you're not confident with a series test, a clamp meter around the negative cable does the same job without breaking the circuit.
Regulator-rectifier and stator failures
The regulator-rectifier is the part that converts stator AC output into something the battery can use. It lives behind a panel, gets hot, and fails more often than any other charging component.
| Symptom | Likely fault | Test |
|---|---|---|
| Battery flat after riding, lights dim at idle | Weak charging output | Voltage at 2,500 rpm |
| Bulbs blowing, battery hot and gassy | Regulator overcharging | Voltage above 15V |
| Voltage climbs with revs then drops out | Failing regulator | Watch voltage through the rev range |
| No charge at all, battery drains while riding | Stator or open circuit | AC output from stator phases |
| Charging fine cold, dies when hot | Heat-related regulator failure | Test cold, then after a hot run |
A stator test is straightforward with a meter. Unplug the stator from the regulator, measure resistance between the three phases, and compare to the service manual figure. Then check AC voltage across the phases with the engine running.
Big differences between phases mean a burnt winding.
Don't skip the simple stuff first. A corroded ground strap between engine and frame adds resistance that looks exactly like a failing regulator, and it costs nothing to clean. Same with the main fuse and its holder, which corrodes invisibly and drops voltage under load.
If a jump pack is the only thing getting you home, treat it as a warning, not a fix. Get the charging system tested before you rely on the bike again, and know which towing attachment point your bike actually has if you end up needing a lift rather than a boost.
Mistakes That Kill Batteries: Overcharging, Frozen Cells, and Hydrogen Gas
Most ruined motorcycle batteries aren't killed by age. They're killed by a handful of repeatable mistakes, and nearly all of them happen in the first ten minutes of a charge.
| Mistake | What goes wrong | Do this instead |
|---|---|---|
| Charging a frozen battery | Case cracks, acid escapes, plates already distorted | Thaw indoors overnight, then test |
| Using a 10 to 15A car charger | Overheating, gassing, plate shedding | Match current to about 10% of Ah |
| Wrong profile (AGM charge on gel or lithium) | Overvoltage, cooked electrolyte, tripped BMS | Check the label, select the mode |
| Charging with the ignition on | ECU, dash, or alarm damage from voltage spikes | Key out, loads off |
| Topping up with tap water | Mineral deposits coat plates, capacity drops | Distilled or deionized water only |
| Overfilling flooded cells | Electrolyte weeps from vents, corrodes the frame | Fill to the split ring, not the top |
| Prying caps off a sealed AGM | Destroys the seal, battery is scrap | Sealed means sealed |
| Running desulfation on lithium | Voltage pushes past the BMS limit | Lithium mode only, no repair cycle |
| Leaving a battery flat for months | Hard sulfate, permanent capacity loss | Recharge every 4 to 6 weeks |
| Reverse polarity | Blown charger fuse, damaged electronics | Red to positive, black to negative |
| Charging in a sealed cupboard | Hydrogen accumulates, explosion risk | Ventilated space, no sparks |
Hydrogen is the one that actually hurts people. A charging lead-acid battery vents hydrogen gas, and it's explosive at low concentrations in a closed space. No cigarettes, no grinding, no space heater with a pilot light.
Garage door up, or charge outside.
Wear eye protection. Sulfuric acid burns, and a battery under load or overcharge can spit electrolyte through a vent. Keep baking soda nearby to neutralise spills, and rinse any skin contact with plenty of water.
Never charge a swollen, cracked, or leaking case. Swelling on a sealed battery means internal pressure has already done damage, and no charger is going to undo it.
Two more habits worth breaking. Don't leave a charger clamped on for a week because it says "automatic" unless it's genuinely a maintainer with a float stage. And don't skip the disposal rules.
Lead-acid batteries are restricted from household waste, and EPA rules on lead-acid recycling mean every auto parts store that sells them takes them back. Lithium packs need a certified recycling route too, and shipping them can fall under dangerous goods rules.
Frequently Asked Questions
Can you charge a motorcycle battery while it's still in the bike?
Yes, for a top-up on a healthy battery using a low-amp smart charger or maintainer. Keep the ignition off and every accessory switched off. Pull the battery out if it's deeply discharged, damaged, flooded and needing water, or if you'll be charging above about 2A.
How long does it take to charge a flat motorcycle battery?
Plan on 7 to 9 hours for a 12Ah battery from half charge on a 1A charger. From near empty, expect 12 to 14 hours. Add 20 to 40 percent to the maths for charging losses.
A deeply discharged battery also needs a slower rate, which stretches the timeline further.
Can I use a car battery charger on a motorcycle battery?
Usually no. Most car chargers push 10 to 15 amps, which is far more than a small bike battery should take. That's ten times the 10 percent rule for an 8Ah unit.
Heat, gassing, and plate damage follow. Use a motorcycle-rated smart charger with a low current setting instead.
What voltage should a motorcycle battery read after charging?
A fully charged 12V lead-acid battery rests at 12.6 to 12.8 volts after sitting an hour or two off the charger. Anything at 12.4V or below is undercharged. Lithium packs settle around 13.2 to 13.4 volts, since they don't carry a surface charge the same way.
Do I need a special charger for a lithium motorcycle battery?
Yes. A lithium-capable charger stops at the right voltage and skips the float stage entirely. Lead-acid profiles push voltage too high and can trip the battery management system.
Never use desulfation mode on lithium, and never charge one below freezing.
Can a motorcycle battery be recharged after sitting for a year?
Sometimes. A battery left at 12.0V or above often recovers with a slow 1A charge plus a repair cycle. One that sat near 10.5V or below usually comes back with reduced capacity, and it will struggle in cold weather.
Load test it before trusting it.
