
Most drivers who struggle to parallel park aren't bad at steering. They're missing the picture, and nobody ever showed them how to build it. Learning how to parallel park is really about training your eyes, not your hands.
You read your rear axle, the curb in the curbside mirror, and the car behind you. Get those cues right and the wheel work almost handles itself.
The maneuver has hard numbers behind it too. Most US state handbooks want a final gap of roughly 6 to 12 inches (15 to 30 cm) between tire and curb. A space about one car length plus 4 to 6 feet (1.2 to 1.8 m) is comfortable for a mid-size sedan.
What follows is the geometry, the cues, and the exact order to do things in.
How to Parallel Park
Parallel parking works best in reverse, in a fixed sequence. Pull alongside the car ahead, rear axle level with its bumper. Reverse straight until your side mirror shows a 45-degree angle.
Turn the wheel fully toward the curb and keep reversing slowly. Counter-steer when the curb meets your door handle, then straighten up.
Why Parallel Parking Is a Sightline Skill, Not a Steering Skill
Ask ten drivers what makes parallel parking hard and most will blame the steering. That diagnosis is wrong. The wheel work is genuinely simple: full lock one way, full lock the other, straighten out.
What defeats people is that a car won't tell you where its back corners are.
Your rear bumper is invisible from the driver's seat. So is the curb line once you're angled in at 45 degrees. Everything you need to know arrives through three narrow windows: the curbside mirror, the rear glass, and the slice of road past your shoulder.
That's why a driver who reverses into a perpendicular bay without blinking can still freeze at a curb. A bay gives you painted lines and a wide target. Parallel parking gives you a moving picture that changes with every foot you travel.
A reference point is simply a fixed mark on your own car that lines up with something outside it. Your rear axle against the other car's rear bumper. The curb appearing beside your rear door handle.
The other car's headlight sliding out of your mirror just as your front corner clears. Instructors teach these because human depth perception at walking pace is genuinely poor. You can't judge a 6 inch gap by feel.
You judge it by comparing two things you can actually see.
The four cues that do most of the work:
- Rear axle alignment at the start, which sets your whole entry geometry.
- The 45 degree angle in the curbside mirror, which tells you when to add lock.
- The curb line at the door handle, which tells you when to counter-steer.
- The car ahead in the corner of your vision, which tells you how much swing-out room you have left.
Notice what isn't on that list: how fast you turn the wheel, how strong you are, how good your spatial memory is. None of it matters much. A decent grip helps, and your hand position on the rim decides how much wheel you can turn in one sweep without shuffling.
Past that, the eyes do the work.
This is also why cameras haven't made the skill obsolete. Since May 1, 2018, NHTSA has required rear visibility technology meeting FMVSS 111 on new US vehicles under 10,000 lb. As of 2026 that means a backup camera is standard equipment on virtually everything you'll drive.
It helps a lot. It also flattens depth and bends the edges of the frame, so the mirror cue still wins when the gap gets tight.
The Geometry of the Maneuver: Space, Entry Angle, and Pivot Point
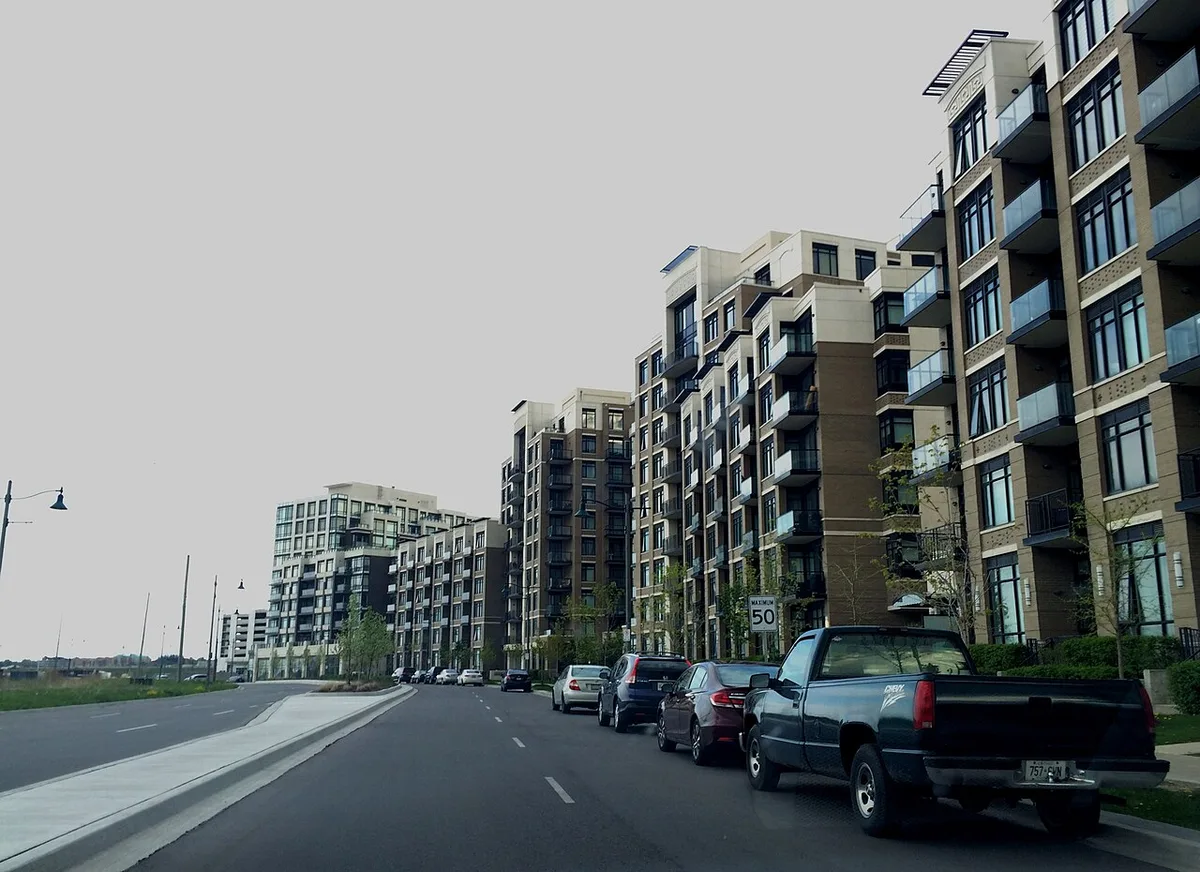
Image source: Wikimedia Commons / ChadPerez49 (CC BY-SA)
Picture the maneuver from above and it stops being mysterious. You're sliding a rectangle into a slightly longer rectangle, and the rear wheels are the hinge. Every mistake people make traces back to getting that hinge in the wrong place.
Why the Rear Axle Is the Pivot Point
Your rear wheels barely steer. They follow. So when you turn the wheel in reverse, the back of the car rotates around the rear axle while the front end swings out in a wide arc.
That's why the nose of your car cuts toward the car ahead on the way in, and why it swings toward traffic on the way out.
Two consequences follow. First, the closer your rear axle is to the car ahead at the start, the tighter the arc you can drive. Second, the longer your rear overhang, the more the tail swings past where your mirrors suggest.
A pickup with a long rear overhang needs more room behind than its length alone implies.
What the 45-Degree Entry Angle Actually Means
Forty-five degrees is shorthand for "the point where you can commit." At that angle, your rear bumper is aimed into the space and your front corner still clears the car ahead. Turn earlier and you'll overshoot the curb line. Turn later and you'll end up too far out, needing a shuffle to fix it.
The cue isn't a protractor. It's what your curbside mirror shows: the other car's rear corner and your own rear quarter panel forming roughly a diagonal, or the curb angling across the mirror at about halfway. If you can see the full flank of the car ahead in your mirror, you're not there yet.
Space Length and the Swing-Out Zone
Image source: Wikimedia Commons / Rikki Mitterer (CC BY-SA)
A parallel space isn't just a length, it's a length plus a swing zone. Your front corner needs a corridor to travel through while the rear comes in. That corridor is roughly the width of your car's front overhang plus a safety margin.
Long-wheelbase vehicles make this worse in a way that surprises people. A full-size SUV might be only 20 inches longer than a sedan, but its turning circle can be 4 to 6 feet wider. That extra radius is what clips bumpers.
| Measurement | Typical value | Why it decides the maneuver |
|---|---|---|
| Space length | Car length plus 4 to 6 ft (1.2 to 1.8 m) | Shorter spaces force extra correction moves |
| Entry angle | About 45 degrees | Sets how much of the rear swings in on the first arc |
| Final curb gap | 6 to 12 in (15 to 30 cm) | Too wide risks a ticket, too tight risks rim damage |
| Turning circle | 35 to 37 ft for a mid-size sedan | Predicts how far the front corner swings out |
| Reverse speed | Under 3 to 5 mph | Walking pace buys you reaction time |
The other number worth knowing is your own car's turning diameter, which is listed in the owner's manual. A compact hatchback around 32 feet and a full-size pickup around 48 feet are playing entirely different games in the same space.
Judging the Space Before You Commit, and Knowing When to Drive On
Most parking failures start before the car moves. Either the space was never big enough, or the driver committed to a marginal one out of embarrassment about the traffic behind them. Both are avoidable with a two second look.
The eye test is simple. As you roll past, compare the gap to your own car. If the gap looks like roughly one and a half car lengths, it's comfortable.
If it looks like one car length and a bit, it's tight but doable in a small car. If the gap looks like your car plus a door, drive on.
| Your vehicle | Length to expect | Space to look for |
|---|---|---|
| Compact hatchback | About 13 to 14 ft | 17 to 19 ft |
| Mid-size sedan | About 15 to 16 ft | 19 to 22 ft |
| Mid-size SUV | About 16 to 17 ft | 21 to 23 ft |
| Full-size pickup, crew cab | About 19 to 21 ft | 24 to 27 ft |
Those figures match what most municipal parking standards assume. A standard US on-street parallel space runs roughly 20 to 22 feet long by 7 to 8 feet wide, and a UK bay is typically around 4.8 m by 2.4 m. If you drive something longer than a standard space, you're relying on finding two adjacent gaps or a corner spot.
If This, Then That
- If the space is shorter than your car plus 4 feet, don't start. You'll need three or four correction cycles and you'll still finish crooked.
- If traffic is stacking up behind you, signal and wave them past before you begin. Rushing the entry angle is the single most common cause of a scraped bumper.
- If there's a driveway, hydrant, crosswalk, or bus stop at either end, check the local clearance rule before you bother. Some jurisdictions require 10 feet, others 15 or more.
- If the curb is a roll curb with a rounded face, you have less margin than you think. Roll curbs hide the tire's contact point, so the rim hits before the sidewall tells you anything.
- If the space is on a grade, remember the space is effectively shorter because your rollback eats into it.
- If snow has narrowed the gap, treat the visible curb line as fiction. Plowed banks hide the real edge and the parked cars are usually further out than they look.
When Driving Around the Block Is the Smarter Call
There's no prize for forcing a bad angle. If you've already pulled in and you're at 60 degrees with the front corner drifting toward the other car, the honest move is to pull forward, reset, and try again. One clean restart costs you eight seconds.
A bumper respray costs you several hundred dollars and an insurance conversation.
The same logic applies before you start. Circling once for a wider space on a side street usually beats a five minute wrestling match in a gap that was never going to work.
Setting Mirrors, Seat, and Reference Points Before You Move an Inch
Everything in this maneuver is measured from your eye position. Change the seat and every cue shifts. So the setup order matters: seat first, then mirrors, then reference points.
Seat Position Comes First
Slide the seat so your clutch leg (or brake leg) has a slight bend at full travel, and set the backrest upright enough that your shoulder blades touch it. A reclined seat pushes your eye point back and down, which makes the curb appear later in the mirror than it should.
Headrest height matters too, mostly for the shoulder check. If the headrest sits low, you'll tilt your head around it and lose the rear quarter view exactly when you need it.
Mirror Settings That Actually Help You Park
Standard mirror settings are built for driving, not parking. For this maneuver you want the curbside mirror angled lower than usual so you can see the rear wheel and the curb line together. Many modern cars do this automatically with a tilt-down-on-reverse feature, which is worth checking in your settings menu before you assume you don't have it.
- Driver's mirror: keep your normal setting, angled so a sliver of your own car is visible.
- Curbside mirror: drop it until the rear wheel arch and the ground behind it are both in frame.
- Rearview mirror: set it for the straight-line reverse, not for the diagonal.
- Convex outer edge: remember the outer third of the glass compresses distance. Objects there are closer than they appear, and the effect is strongest at the corner.
If your mirror glass has taken a knock and sits loose or cracked, fix it before you practice. A vibrating mirror turns a precise cue into guesswork, and sorting out loose or cracked mirror glass is a ten minute job on most cars. Clean glass matters just as much.
A grimy rear window at dusk destroys the one view you're relying on, and if your blades are smearing rather than clearing, getting the blade size right is a cheap fix.
Building Your Own Reference Points in Ten Minutes
Manufacturer specs don't publish reference points, because they depend on your height, your seat, and the shape of your car. You build them yourself. Find a quiet street with a straight curb, park beside it, and work through this drill.
| Cue to establish | What you do | What you're looking for |
|---|---|---|
| Rear axle position | Sit alongside a parked car | Where your rear wheel sits relative to their rear bumper |
| 45 degree mark | Reverse slowly at an angle | What the curbside mirror shows at roughly 45 degrees |
| Counter-steer point | Keep reversing with lock on | The moment the curb reaches your rear door handle |
| Curb gap | Finish a park and check on foot | What 8 inches looks like in the mirror |
| Front clearance | Watch the car ahead while swinging in | How much of their bumper stays visible |
Do this once in a new car and you'll never guess again. Do it once in a rental and you'll save yourself an insurance claim.
Step 1: Pulling Alongside the Car Ahead
This is the step people rush, and it's the one that decides everything downstream. Get the start right and the rest is a slow, low-drama arc. Get it wrong and you'll spend the next minute fighting geometry.
The Setup Sequence
- Signal early, well before the space, so the driver behind you knows something is happening.
- Pull past the space and stop alongside the car in front of it.
- Aim for 2 to 3 feet (0.6 to 1 m) between your car and theirs. Door-mirror distance is a reasonable proxy.
- Stop with your rear axle level with their rear bumper, or with your rear bumper level with theirs if your car has a long rear overhang.
- Hold the brake so your reverse lights and brake lights are both visible.
- Check the mirror, then the blind spot with a shoulder check before you select reverse.
If Your Car Is Longer, Shorter, or Shaped Differently
The mirror-to-mirror alignment that many instructors teach works well for sedans of similar size. It falls apart when the cars don't match.
- If you're in a long-wheelbase vehicle, pull forward a little more so your rear axle sits past their bumper. You need the extra arc.
- If you're in a very short car, you can start slightly earlier. The tighter turning circle gives you margin.
- If the car ahead is a van or truck with a flat back, your mirror cue will look different because there's no rear window to reference. Use the rear wheel and the body line instead.
- If the car ahead is parked badly, angled out from the curb, measure from its rearmost corner, not from the curb line.
Why Too Close Is Worse Than Too Far
Sitting 18 inches from the car ahead feels precise. It isn't. That gap disappears the moment you add steering lock, because your front corner sweeps toward them as the rear comes in.
Two to three feet gives you a corridor to work in.
Being slightly too far out is the safer error. You'll finish the park a little wide of the curb and need one small correction forward, which is a minor annoyance. Being too close ends with a scuffed bumper and a conversation with a stranger.
One more practical note. If the curb strike is hard enough to feel through the floor, don't just check the wheel face. A solid hit can knock your alignment out and, in bad cases, bend steering components, which is why the quality of the parts you replace them with actually matters after a curb incident.
Get the alignment checked if the steering wheel sits off-center afterward.
Step 2: Reversing to the 45-Degree Cue and Locking the Wheel
Select reverse. Keep your foot covering the brake, not on the accelerator. Let the car creep at walking pace while you hold the wheel dead straight for the first stretch.
That straight-line reverse is doing real work. It's pulling your rear axle back past the other car's bumper so the pivot point sits where you need it. Drivers who start turning immediately skip this step and then wonder why they end up 3 feet off the curb.
Then comes the commitment. Once the cue appears, you turn the wheel to full lock toward the curb in one smooth sweep and keep reversing.
What the Cue Actually Looks Like in Your Mirror
Forget the protractor. The 45 degree cue is a picture, and it looks slightly different in every car.
In the curbside mirror, you're watching the rear corner of the car ahead and your own rear quarter panel. When the space between them opens into a clean diagonal, you're close to 45 degrees. Another way to read it: the curb line should be cutting across the mirror glass at roughly halfway, angling away from you.
Two visuals tell you that you're not there yet. If you can still see the full side flank of the car ahead, you're too early. If the curb has vanished under your own rear bumper, you're already past the angle.
How Slow Is Slow Enough
Under 3 to 5 mph. That's the working speed, and it's slower than most people naturally drive in reverse.
Slow buys you reaction time. At walking pace, a half second of hesitation costs you a few inches. At 8 mph, the same hesitation costs you a bumper.
Brake modulation is the whole technique. Ride the pedal lightly and let the car idle backwards. If your car has one-pedal driving or a strong creep function, check how it behaves in reverse before you try a tight space, because the throttle mapping is often much sharper than you expect.
If You Turned Too Early
You'll know within about a foot. The rear of your car aims past the curb line and your front corner starts crowding the car ahead.
Stop. Pull forward until you're back alongside, then reset. Don't try to unwind the steering and salvage it, because the arc you'd need doesn't exist from that position.
If You Turned Too Late
This one is gentler. You add lock and the car simply doesn't come in far enough, so you finish wide of the curb with your rear bumper short of the space.
The fix is easier than the early-turn problem. Straighten, reverse a little further, then add lock again. You'll end up needing one shuffle forward, which is a normal correction and not a failure.
| What you see | What happened | What to do |
|---|---|---|
| Rear aiming past the curb | Turned too early | Pull forward and restart |
| Car sitting wide of the curb | Turned too late | Reverse further, add lock |
| Front corner drifting toward the car ahead | Too close at the start | Restart with 2 to 3 ft gap |
| Rear wheel climbing the curb | Lock applied too soon | Stop, pull forward, re-approach |
Steering Without Losing the Cue
Keep both hands on the rim and turn in one continuous motion. Shuffling your grip mid-lock is where people lose track of how much lock they've applied.
If your car has a variable ratio steering rack, full lock may arrive with less wheel rotation than you're used to. That's not a problem, but it does mean "one and a half turns" is a rough guide, not a rule.
Never dry steer. Turning the wheel while the car is stationary loads the steering components and scrubs the tire. It also means you're not looking where the car is actually going.
Turn as you move.
Step 3: The Counter-Steer Cue in Your Nearside Mirror
The counter-steer is where the maneuver turns from an arc into a straight line. You're still reversing, still at full lock, and now you're watching for the moment to unwind.
The cue: the curb line appears in your curbside mirror right about at your rear door handle. The instant it reaches that point, you swing the wheel the other way to roughly full lock in the opposite direction.
Why that works comes down to geometry. At that moment, your rear axle is positioned so that unwinding the steering sends the front of the car swinging in toward the curb line without pushing the rear over it. Hold the lock too long and the rear wheel climbs the curb.
Unwind too early and the car stays out in the road.
If Your Mirror Doesn't Show the Curb
Some mirrors, some seat heights, and some curbs simply won't cooperate. A high seating position in an SUV can put the curb line below the mirror's field of view.
Three fixes, in order of preference. Drop the mirror glass lower before you start. Lean slightly toward the center of the car to shift your sightline.
Or use the backup camera's curb-side edge as your reference instead, accepting that the camera distorts distance at the frame edges.
If the curb is a low, flat roll curb, expect the cue to arrive later than usual because there's less vertical face to see.
How Much Counter-Steer Do You Actually Need
Roughly the same amount you applied going in. If you went to full lock, come back to full lock the other way.
The precise amount matters less than the smoothness. A gradual unwind over two or three seconds keeps the front corner tracking cleanly. Snapping the wheel produces a visible twitch and makes the front corner swing unpredictably.
Watch the front corner while you do it. The gap between your front bumper and the car ahead should widen as the front swings in toward the curb. If it's narrowing instead, you've unwound too early or too far.
If the Curb Disappears Under the Car
That means you're already past the counter-steer point and the rear wheel is heading for the curb face. Stop immediately.
From there, pull forward a couple of feet with the wheel turned out, then reverse again with a shallower angle. Forcing it further back is how rims get gouged.
If you do make contact, a light kiss on a tall curb usually scuffs the tire sidewall and nothing else. A hard strike can bend a rim, knock the alignment out, or in the worst case damage a steering component. That's the point where replacement wheel hardware and a proper alignment check stop being hypothetical costs.
The Nearside Terminology Trap
If you learned in the UK, Ireland, Australia, or Japan, "nearside" means the curb side. If you learned in the US or mainland Europe, the curb side is simply the passenger side in a left-hand-drive car and the driver's side in a right-hand-drive one.
It matters because the mirror you're watching flips with the market. Everything else about the maneuver is identical. The cues just move to the other glass.
Step 4: Straightening Up and Setting the Final Curb Gap
Once the car is parallel to the curb, straighten the wheel and reverse gently until you're positioned between the two parked cars. Then stop, and stop early rather than late.
You want roughly 18 to 24 inches of clearance from the car behind, enough to walk between them and enough that they can get out. Some state handbooks want you closer, others don't specify. The functional number is the one that lets both cars leave.
The Final Curb Gap
This is the number that gets measured on a test and ticketed on a street. Most US state manuals put the working range at 6 to 12 inches (15 to 30 cm) between tire and curb. Many cities set a legal maximum, commonly 12 to 18 inches, so check your local vehicle code rather than assuming.
Twelve inches is roughly the length of a standard ruler, or about the width of a shoe. If you can see daylight under the car and a clear strip of road between the tire and the curb, you're probably wider than you think.
A practical check that doesn't require getting out: look at the curbside mirror and compare the tire's contact patch to the curb face. The gap should be roughly the width of your tire sidewall. Anything wider than a hand span and you'll want to shuffle in.
The Finishing Sequence
- Straighten the wheel so the front tires sit parallel to the curb.
- Reverse until the gap behind you is about 2 feet.
- Select park, apply the parking brake.
- On a grade, turn the wheels per local rules before you shut down.
- Check the curb gap before you walk away, on foot if the street is quiet.
If You Finished Too Far From the Curb
Don't reverse-and-steer to fix it. That's how people clip the car behind.
Instead, pull forward slowly with the wheel turned toward the curb, then reverse straight back. Two or three small cycles of that will walk the car sideways without ever changing your fore-and-aft position much. It's the standard correction and it works in almost any vehicle.
If You Finished Too Close or Touching
Pull forward a foot with the wheel turned away from the curb, then reverse straight. Same principle, opposite direction.
Then check the sidewall. A tire that's been pinched against a curb can hold pressure fine and still have a weakened sidewall. If you see a bulge or a chunk of rubber missing, that tire needs replacing, not topping up.
Parking Brake, Gear, and the Hill Rule
Park is not a substitute for the parking brake on a grade. The parking pawl is a small metal tooth, and it's designed to hold a stationary car, not to absorb the full weight of one rolling against it.
On a hill with a curb, the standard rule in most US jurisdictions is wheels turned away from the curb facing uphill, and into the curb facing downhill. California spells this out in Vehicle Code §22509, and most other states have an equivalent. The idea is simple: if the brakes fail, the curb stops the car instead of the traffic lane.
Reading Mirrors, Cameras, and Sensors Together
Modern cars give you four or five separate views of the same 6 inches of road. The trick is knowing which one to trust at which moment, because they don't agree with each other.
Mirrors tell you true position. Cameras tell you proximity with distortion at the edges. Sensors tell you "something is close" without telling you what or exactly where.
Park assist tells you what it thinks you should do, and it's usually right in wide spaces and nervous in tight ones.
| Tool | Best at | Weak at |
|---|---|---|
| Curbside mirror | Curb line, rear wheel position, final gap | Low curbs, blind spots below the glass |
| Backup camera | Straight-line reverse, obstacle behind | Depth flattening, fisheye edges, dirt |
| Ultrasonic sensors | Rear obstacle warning, cross traffic behind | Corners, low planters, thin posts |
| 360 surround view | Overall position in the space | Stitching seams, distorted scale at edges |
| Park assist | Wide spaces, unfamiliar vehicles | Tight spaces, angled curbs, fast-moving traffic |
Where Sensors Genuinely Fail
Ultrasonic parking sensors typically work out to roughly 6 to 8 feet, and they're weakest at the corners. That's exactly where your front bumper swings when you're angled in at 45 degrees.
They also miss things below their beam. Low planters, curb ramps, bollard bases, and a child's scooter all sit under the detection cone. Sensors are a backstop, not a replacement for looking.
If your sensors start throwing false alerts or quit entirely, that's usually a dirty or failed sensor rather than something deeper. A basic fault-code reader of your own will tell you whether the parking module is reporting a fault before you pay someone to guess.
The Camera Trap
The backup camera's guidelines are a projection, not a measurement. They assume a flat road and a straight approach, and they bend noticeably at the edges of the frame.
Two habits keep you honest. First, use the camera for the straight-line reverse and the mirror for the angled part. Second, always finish with a visual check on foot if the gap looks marginal.
Camera lenses get dirty, and a smeared lens at dusk is worse than no camera at all. If your forward visibility is compromised at the same time, sorting out a dim or failing headlight is worth the ten minutes.
If the Car Has Park Assist
Use it, then verify it. Self-parking systems handle a clean, well-marked space well. They get cautious and sometimes abort in spaces a human would take confidently.
Keep your foot over the brake the entire time. Every manufacturer's manual carries the same disclaimer: the driver stays responsible. Read the section on system limits in your owner's manual, because the operating envelope varies wildly between brands.
Driving an Unfamiliar Car: Resetting Reference Points
A rental car, a car-share, a borrowed van, or the first week in a bigger vehicle. Every one of these resets the picture, and the cues you've built over years stop working.
The reason is straightforward. Your reference points are measured from your eye position, and your eye position changes with seat height, seat distance, and dashboard height. Change the car and you've changed the instrument.
What Actually Shifts
- Wheelbase. Longer wheelbase means a wider turning arc and a later 45 degree cue.
- Rear overhang. A long overhang swings further than your mirror suggests. Pickups and large estates are the worst offenders.
- Seat height. Sit higher and the curb appears later and lower in the mirror. Sit lower and it arrives sooner.
- Dashboard and hood length. A long hood hides more of the ground ahead, which changes your front-corner judgment.
- Mirror size and shape. Convex mirrors compress distance at the outer edge. Bigger glass isn't automatically more accurate.
- Turning circle. A full-size SUV can need 4 to 6 feet more diameter than a mid-size sedan. That difference is what clips bumpers.
| Vehicle change | What shifts | Adjustment |
|---|---|---|
| Small hatchback to mid-size SUV | Wider arc, later cue, higher eye point | Start further forward, drop the mirror lower |
| Sedan to crew-cab pickup | Long rear overhang, huge turning circle | Add 2 to 3 ft to your required space |
| Left-hand-drive to right-hand-drive | Curb side swaps mirrors | Rebuild cues in the other glass |
| Manual to automatic with creep | Reverse speed is faster than expected | Cover the brake from the first inch |
The Three-Park Calibration
If you have five minutes and an empty stretch of curb, you can rebuild your cues properly.
Park beside the curb three times. On the first attempt, use your instincts and note where the car ends up. On the second, deliberately turn later and see the difference.
On the third, adjust the mirror position and turn point until the car lands with a clean 8 inch gap.
That's enough to recalibrate. Three parks, no traffic, no pressure.
If You Have No Time to Calibrate
Use conservative defaults. Pull alongside with a slightly larger gap, around 3 feet. Turn a touch later than feels right.
Reverse slower than you think you need to. Accept finishing wide and correcting forward.
Wide and correctable beats tight and committed every single time.
The Visual Mistakes Behind Curb Rash, Scraped Bumpers, and Failed Tests
Scratch the surface of any parallel parking failure and you'll find a visual error underneath it. Not weak hands, and not a bad sense of space. The driver was looking at the right thing at the wrong moment, or at the wrong thing entirely.
Three errors account for most of the damage out there.
Losing the Entry Angle Mid-Maneuver
Angle creep is the quiet killer. It doesn't announce itself with a bang. You set a clean 45 degree entry, glance over your shoulder at the traffic behind, and when your eyes come back to the mirror the picture has changed.
What happened is simple. Every glance away is a moment for your hands to unwind a fraction of lock without you noticing. Ten seconds later the car is at 25 degrees and drifting wide, or you've held lock too long and the rear wheel is headed for the curb face.
The fix is grip discipline. Hold the wheel at full lock with a fixed two-handed grip and don't let it rest loosely between your palms. Build a glance cadence too: curbside mirror, road ahead, curbside mirror.
If the diagonal in the mirror is flattening between checks, add the lock back immediately.
Two conditions make angle creep worse:
- Roll curbs. The rounded face hides the true contact point, so the tire is climbing before the curb line looks close in the glass. Tall vertical curbs are far more honest.
- Dusk and rain. A wet curb loses its edge under glare from your own brake lights, and the line you're judging half-disappears.
When contact does happen, the repair bill depends entirely on how the tire met the curb.
| Contact type | Typical cost | What to check afterward |
|---|---|---|
| Light sidewall scuff | Nothing | Look for bulges over the next few days |
| Curb rash on the rim edge | Roughly $75 to $150 per wheel refurb | Bead seat for slow leaks |
| Pinched or chunked sidewall | New tire | Pressure loss within a week |
| Hard strike at speed | Alignment, possibly steering parts | Off-center wheel, pulling |
Clipping the Front Corner on the Swing-Out
Everyone watches the rear because that's where the curb is. The expensive damage usually happens at the front corner anyway. While you're locked in reverse, the front outside corner sweeps through a wider arc than anything at the back.
That 2 to 3 foot gap you left alongside the car ahead exists to pay for exactly this sweep. Spend it carefully.
The working cue is peripheral vision. Keep the other car's rear bumper or tail light in view over your hood line while your eyes stay on the mirror. If their bumper drops below your hood without you knowing your clearance, you're guessing rather than seeing.
Tall hoods make this genuinely harder. A pickup or a big SUV hides several feet of ground ahead of the driver, and the corner vanishes from view earlier than you expect. In an unfamiliar high- hood vehicle, add another foot to your starting gap.
The same sweep bites on the way out. When you pull forward to leave, your front corner swings past the car ahead and your rear inside corner drifts toward the curb. The 18 to 24 inches of exit clearance you left at both ends is what buys that swing.
Trusting the Screen Over the Mirrors
The behavioral trap here is subtle. Once a car has a big screen, drivers stop using the mirrors at all, and then the diagonal phase of the maneuver arrives with no visual anchor they've practiced. The screen freezes them because the projected path no longer matches the picture.
A few specific failure modes are worth knowing:
- Blocked rear glass. A pickup with a fitted hard bed cover gives you a rearview mirror full of your own cargo lid. Vans and fully loaded estates are the same. In those vehicles the camera and side mirrors carry everything.
- Tilt-down mirrors that overshoot. Some cars drop the curbside mirror so far on reverse that you see only your own tire and nothing behind it. Test the feature in a quiet spot before you depend on it.
- Lens glare. Low sun and rain droplets both wreck a backup camera image at exactly the moment you need it. A dirty lens at dusk was the single most common complaint in aggregate owner feedback we reviewed.
- Guideline drift. The projected path assumes you keep reversing straight. Once you're at an angle, the lines stop describing your real arc.
The rule of thumb that works: camera for the straight-line reverse, mirror for the diagonal, and your own eyes on the final gap. On test day that split matters too, because examiners score observation, and eyes glued to a screen don't read as observation.
Hills, One-Way Streets, and Left-Side Parking: How the Picture Changes
Everything so far assumed the textbook case: flat street, two-way traffic, curb on the passenger side. Change any one of those and the cues survive, but the geometry and the rules shift under you. Here's what actually moves.
Parking on a Hill
Gravity becomes a second steering input. Reverse downhill and the car gains speed on its own. Reverse uphill in a manual and you're balancing clutch against slope while trying to watch a mirror.
The space also behaves differently. Every pause costs you inches of rollback …Every pause costs you inches of rollback, so a space that measured fine from the street can end up too short once gravity starts eating the margin.
On a steep grade, add roughly a foot to your required space for every 5 percent of slope. On the kind of street you find in San Francisco, Lisbon, or Edinburgh, that can mean the difference between a comfortable gap and a space you should genuinely skip.
Why the Wheel Direction on a Hill Is Not Optional
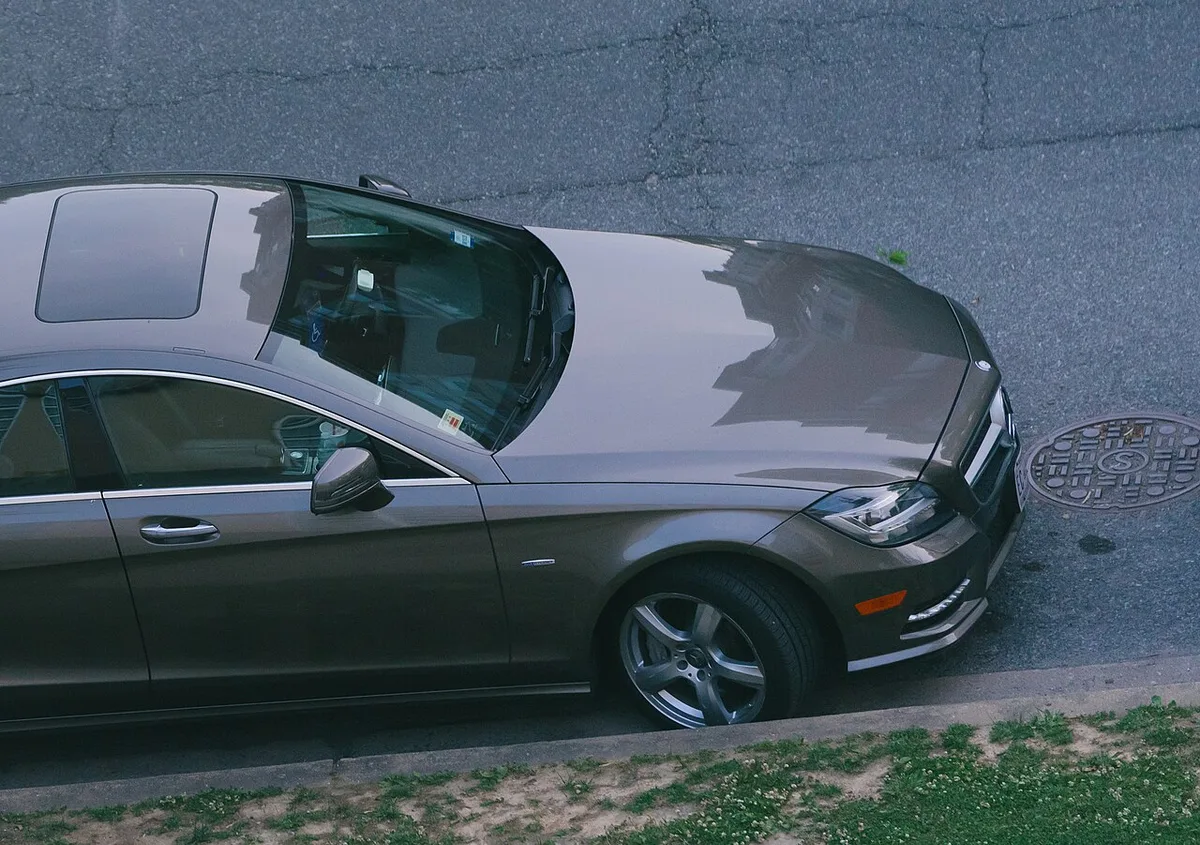
Image source: Wikimedia Commons / Tony Webster (CC BY)
Parking pawls and parking brakes both fail. It's rare, but it happens. The wheel-direction rule exists so that when they do, the curb becomes the backstop instead of the traffic lane.
| Situation | Wheels turned | What happens if the car rolls |
|---|---|---|
| Uphill, with a curb | Away from the curb | Rear of the tire rolls back into the curb face |
| Downhill, with a curb | Into the curb | Front of the tire rolls forward into the curb face |
| Either direction, no curb | Toward the edge of the road | Car rolls off the road instead of into traffic |
California spells this out in Vehicle Code §22509. Most other US states have an equivalent rule, and UK guidance covers the same principle. Turning the wheels costs you two seconds.
Not doing it can cost you the car.
One practical note for the maneuver itself: if the curb is on your left and you're parking on a one-way street on a grade, the wheel direction logic flips with the curb side. Set the wheels so the tire meets the curb, not the road.
What a One-Way Street Changes
Less than you'd think, and more than you'd expect. The maneuver is identical. What changes is your observation load, because traffic can now arrive from an angle you're not used to checking.
- Signal side. On a one-way street, your curbside signal may be on the "wrong" side for drivers approaching from behind. Use your hazards briefly if your car allows it and you're stationary.
- The check. You now need a proper shoulder check on the traffic side before you swing the front out, because oncoming vehicles come from behind-left rather than behind-right.
- Left-side parking. Many US cities permit parking on the left curb of a one-way street. If that's legal where you are, the whole maneuver mirrors, and your cues move to the other mirror.
Left-Side Parking and Right-Hand-Drive Markets
Park on the left curb in a left-hand-drive car and the picture inverts. Your curbside mirror is now the driver's mirror, which sits closer to you and shows a different slice of ground.
Two adjustments make it work. Drop that mirror lower than usual, and lean slightly away from it so you can see the rear wheel arch and the curb together. Everything else, the axle alignment, the 45 degree cue, the counter-steer point, all transfers without change.
Right-hand-drive markets such as the UK, Ireland, Australia, Japan, and India flip it permanently. The cues you build there live in the left mirror. If you drive in both kinds of market, expect a day or two of recalibration each time you switch.
Snow, Ice, and the Curb You Can't See
Winter parking is a separate skill. Plowed banks push the effective curb line out into the road, sometimes by two feet or more.
Treat the snowbank as the curb. Judge your gap to the visible bank, not to where you remember the curb being. And expect the space to be shorter than it looks, because the cars on either side are usually sitting further out than their owners think.
If you're parking in slush, add a fluid check to your routine afterward. Road salt and slush do quiet damage underneath, and it's worth knowing how the transmission fluid level is holding up before a hard winter turns a small leak into an expensive one.
Curb Distance Rules, Test Scoring, and the Legal Limits Worth Checking
The rules split into two very different things. There's the legal maximum distance from the curb, which is a ticket issue. And there's the test scoring standard, which is a license issue.
They aren't the same number, and they vary a lot by jurisdiction.
US: State Vehicle Codes and Road-Test Deductions
Most US state driver handbooks teach a working range of roughly 6 to 12 inches (15 to 30 cm) between tire and curb. The legal maximum in city ordinances is commonly 12 to 18 inches, and some municipalities go wider.
Road tests are stricter than the law. In most state formats, contact with the curb is either an automatic failure or a maximum-point deduction. Finishing more than 18 inches out commonly costs points even without contact.
What examiners actually score:
- Observation. Mirror checks and a visible shoulder check before reversing and before pulling out.
- Control. Walking pace, brake modulation, no dry steering, no stalling.
- Position. Final curb gap, and whether you're inside the space rather than blocking a driveway or crossing.
- Judgment. Whether you signal, whether you abort cleanly if you've misjudged it, whether you stay calm with traffic behind you.
The state-specific detail is in your own DMV or DPS handbook, and it's the only version that counts on the day. California's, New York's, Texas's, and Florida's handbooks all describe the same maneuver with slightly different scoring language.
UK: Highway Code Rules 239 to 248 and DVSA Manoeuvre Criteria
In the UK the maneuver is one of the set pieces in the DVSA practical test. The scoring is fault-based rather than point-based: a serious or dangerous fault fails you, and a driver fault is a mark against you.
The Highway Code's parking rules, which you can read in full on GOV.UK, cover night parking, direction of traffic, junction clearances, and yellow lines. Rules 239 to 248 are the relevant block, and they're worth reading before your test rather than after.
- Don't park facing against the flow of traffic at night on a two-way street.
- Don't park within 10 metres of a junction, or on a dropped kerb, or across a driveway.
- Do use parking lights on unlit roads where the limit applies.
- Do leave enough room for pedestrians, wheelchairs, and pushchairs to pass on the pavement.
Test-day nerves are the real variable here. The maneuver itself takes about 45 seconds in a clean run. Failing on a single wheel-on-curb error after 40 clean seconds is common, and it's almost always a glance timing issue rather than a control issue.
The Clearance Zones Nobody Measures Until They Get a Ticket
Curb distance gets all the attention. These get the fines.
| Restriction | Typical US buffer | Typical UK rule |
|---|---|---|
| Fire hydrant | 10 to 15 ft | Not covered by a fixed national figure |
| Crosswalk or intersection | 20 ft in many states | 10 m from a junction |
| Driveway or dropped kerb | 5 ft, varies widely | Keep dropped kerbs clear |
| Bus stop | 20 to 30 ft | Marked bay, keep clear |
| Stop sign | 30 ft in some states | Junction rule applies |
Those numbers vary enough that checking the local sign is faster than checking the code. A painted curb tells you more than any general rule: red means no stopping, yellow means loading restrictions, white or unmarked usually means normal limits.
Reference Card: Cues, Measurements, and Speeds at a Glance
Everything in this guide, compressed into one page you can screenshot before you drive.
| Stage | Cue | Number |
|---|---|---|
| Space check | Gap looks like car plus margin | Car length plus 4 to 6 ft |
| Start position | Rear axle level with car ahead's bumper | 2 to 3 ft out from it |
| Straight reverse | Full flank of the car ahead still visible in mirror | Not at angle yet |
| Turn-in point | Clean diagonal in curbside mirror | About 45 degrees |
| Counter-steer | Curb line reaches rear door handle | Full lock the other way |
| Reverse speed | Idle creep, brake covered | Under 3 to 5 mph |
| Finish gap | Tire sidewall width of daylight | 6 to 12 in (15 to 30 cm) |
| Clearance ahead and behind | Room for both cars to leave | 18 to 24 in each end |
Three habits carry most of the weight. Reverse slower than feels necessary. Turn later than your instinct says.
And accept a correction forward rather than forcing a bad angle backward.
If you take one thing from all of this, take the pivot point. Your rear axle is the hinge, and every cue in the maneuver is really just a way of watching that hinge travel. Get the hinge in the right place and the wheel work finishes itself.
Frequently Asked Questions
How far should you be from the curb after parallel parking?
Aim for 6 to 12 inches (15 to 30 cm) between your tire and the curb face. Most US state handbooks teach that range. Many city ordinances set a legal maximum somewhere between 12 and 18 inches, so check your local code.
Closer than about 4 inches risks rim damage on the way in.
Do you need to use your turn signal when parallel parking?
Yes. Signal before you slow down, and keep it on through the maneuver unless your car's hazard lights are permitted while stationary. Most road-test standards score signalling as an observation item, and skipping it is a common driver fault.
It also stops the driver behind from closing the gap you need.
Why does my car always end up too far from the curb?
You're turning in too late, or unwinding the steering too early. Both leave the rear axle short of where it needs to be. Try reversing a little further in a straight line before adding lock, and hold the lock a beat longer before counter-steering.
Finishing wide and correcting forward is the safe fix.
How big a space do you actually need to parallel park?
Roughly your car's length plus 4 to 6 feet (1.2 to 1.8 m) for a comfortable single-arc park. A compact hatchback can squeeze into about 17 feet. A crew-cab pickup needs 24 feet or more.
Anything shorter than your length plus 3 feet will need multiple correction cycles.
Is parallel parking easier with a backup camera?
It helps with the straight-line reverse and with obstacles directly behind you. It doesn't replace the mirror cue. Cameras flatten depth and distort the frame edges, so distance judgment at the corners is unreliable.
Use the camera going straight, the curbside mirror on the diagonal, and your own eyes for the final gap.
Can you get a ticket for parking too far from the curb?
Yes, in most cities. Common legal maximums run from 12 to 18 inches, and enforcement varies by neighbourhood and by how the space is marked. On a metered or permitted street you're more likely to be checked.
It's also a safety issue, since a car sitting wide narrows the traffic lane.
