
You turn the key on a cold morning and get a short, sharp chirp from under the hood. Knowing how to tell if a belt tensioner is bad starts with that one sound, because a chirp, a squeal, and a growl each point somewhere different. Thirty seconds later the noise fades, so you let it slide.
Then it shows up again the next morning, a little louder.
Most automatic tensioners are rated for roughly 60,000 to 100,000 miles, about the same window as the serpentine belt riding on them. Belt makers like Gates and Litens publish service guidance that puts the two on a shared replacement schedule for good reason. The spring and damper inside that little arm work every second the engine runs, and they wear out quietly.
Here's how to sort out what yours is telling you.
How to Tell If a Belt Tensioner Is Bad
A bad belt tensioner shows up as noise or movement, rarely both at once. Listen for a chirp on cold start or a squeal at idle. Watch the tensioner arm for bouncing while the engine runs.
Check whether the arm sits at the very end of its travel. Any of those three points to a worn tensioner.
What the Tensioner Actually Does, and Why It Wears Out
A serpentine belt tensioner is a spring-loaded arm that holds steady pressure on the accessory drive belt. The whole setup has a name: the FEAD, short for Front End Accessory Drive. That belt has to stay tight enough to spin the alternator, water pump, power steering pump, and A/C compressor without slipping.
It also has to give a little when engine speed changes fast.
That second job is the hard one. Engine RPM can jump from a 700-rpm idle to several thousand in well under a second when you blip the throttle. A belt with fixed tension would either slip or snap under that kind of shock.
The tensioner absorbs it, then pulls everything back to the right tension before the next event.
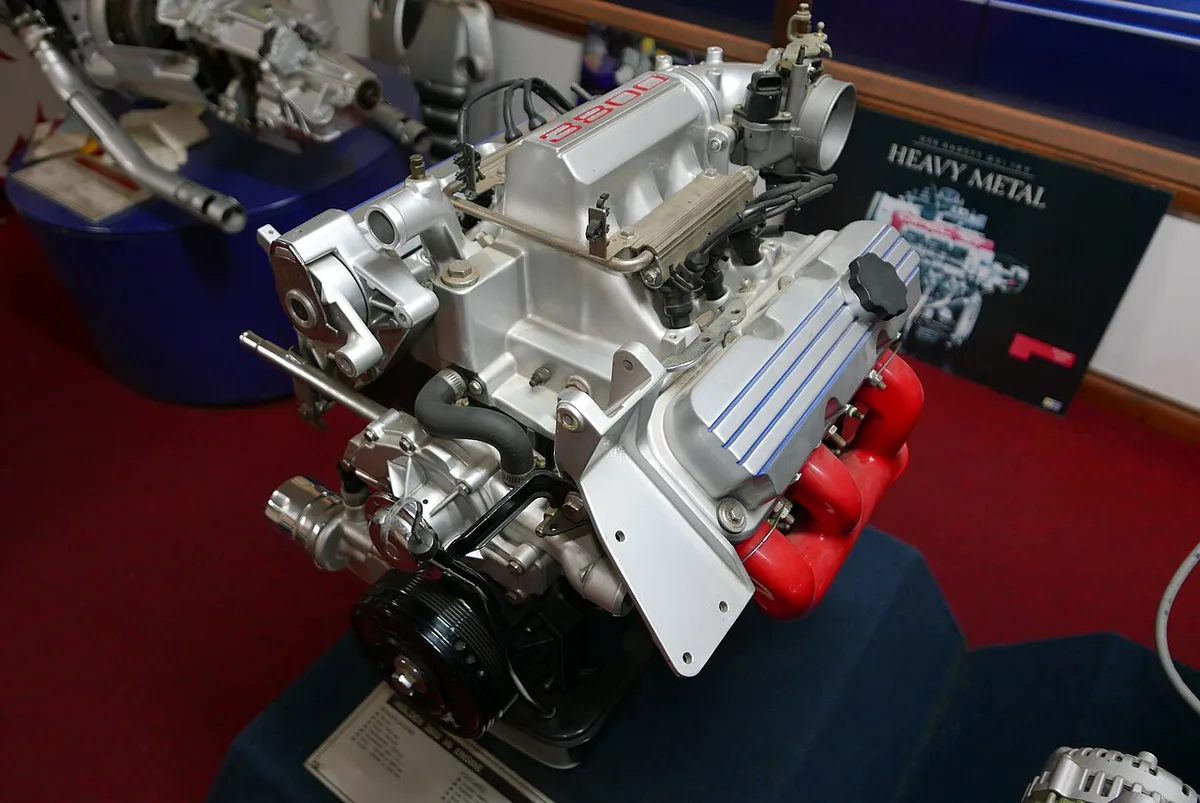
Image source: Wikimedia Commons / OSX
The arm, torsion spring, damper, and pulley
Four parts do all the work, and each one fails in its own way.
- The arm. A cast or stamped steel lever that pivots on a bushing or bearing. It swings through a short arc to take up belt slack.
- The torsion spring. A coiled spring that sets the base tension. It's preloaded hard, which is why you need a wrench to move the arm at all.
- The damper. A friction element inside the pivot that stops the arm from oscillating. Without it, the arm would flutter and the belt would slap.
- The pulley and bearing. A grooved or smooth wheel on a sealed ball bearing. It spins freely and should feel glassy smooth with the belt off.
| Component | What it does | How it fails | What you notice |
|---|---|---|---|
| Torsion spring | Sets belt tension | Fatigues, loses preload | Chirp on cold start, arm parked at end of travel |
| Friction damper | Kills arm flutter | Wears smooth, loses friction | Arm bounces at idle, belt flutter |
| Pulley bearing | Lets the pulley spin | Grease cooks out, grit enters | Growl, whine, or grinding that follows RPM |
| Pivot bushing | Lets the arm swing | Seizes or corrodes | Arm won't return, belt won't tension |
| Pulley face | Guides the ribs | Rust, nicks, belt residue | Belt walks off the edge, rib wear |
How tensioners fail: miles, heat cycles, and contamination
Spring fatigue is the classic death. The spring spends its whole life compressed and cycling, and after enough heat cycles it simply stops pushing as hard. Tension drops gradually, so the first symptom is usually a cold-start chirp rather than a sudden failure.
Damper wear comes next. The friction material that keeps the arm calm wears away, and the arm starts to oscillate. In our research, this is the failure that gets misread most often, because the belt still looks fine and the tension still feels close to normal by hand.
Bearing death is the loud one. The sealed bearing in the tensioner pulley loses its grease to heat, then takes on grit. What starts as a faint whine at 60,000 miles turns into a growl you can hear over the radio.
Contamination accelerates all three. A power steering or coolant drip lands right on the belt and pulley, softening rubber and washing grit into the bearing. Belt dust, that fine black powder coating the front of the engine, is a wear indicator you should never ignore.
One more thing worth knowing before you buy anything. The dimensional standards for V-ribbed belt drives and pulley geometry come from SAE International, which is why a belt and tensioner from different makers can still fit perfectly. That doesn't mean every cheap tensioner is built to the same durability standard.
Fit and lifespan are two different questions.
Decode the Noise First: Chirp, Squeal, Growl, or Tick
The noise is the diagnostic. Before you touch a wrench, pin down exactly when it happens, because the timing narrows the suspect list faster than any visual inspection. A generic fault code won't help here, and even a basic code reader only sees what the computer logs.
Belt noise doesn't set codes.
| What you hear | When it happens | Most likely cause | First test |
|---|---|---|---|
| Sharp chirp | First 30 to 60 seconds after a cold start | Low tension or a glazed belt | Chalk test, then arm check |
| Steady squeal | Constantly at idle | Weak spring or a polished belt | Watch the arm at idle |
| Squeal under load | A/C on, lights on, steering at lock | Belt slip under load | Load test with the hood up |
| Growl or whine | Follows RPM, hot or cold | Pulley bearing, tensioner or idler | Belt-off spin test |
| Rhythmic tick | Once per belt revolution | Missing belt chunk or a nicked pulley | Close visual on the belt ribs |
Cold-start chirp that fades in 60 seconds
A chirp that disappears within a minute is the sound of a belt slipping on a cold pulley. Rubber is stiffer when cold, and tension is at its lowest before heat expands the metal parts slightly. The belt loses grip for a fraction of a second on each rotation, and you hear it as a chirp.
That pattern points to the tensioner before anything else. A healthy spring keeps enough preload to cover the cold phase. A tired one doesn't, and the chirp arrives right on schedule every morning.
Cold weather makes it obvious. Most drivers first notice it below about 40°F, which is why complaints spike in the first cold snap of autumn. If your car is silent in July and chirps in November, that's a tension signal, not a belt quality problem.
Constant squeal at idle
A squeal that never stops is louder and more urgent than a chirp. It means the belt is slipping continuously, not just on the first rotation. Either tension is genuinely low, or the belt's backside has glazed to a shiny, hard surface that slides instead of gripping.
Here's the split. If the belt looks polished and the tensioner arm sits near the end of its travel, the tensioner is the problem. If the arm sits mid-travel and the belt is shiny but the tension hasn't dropped, someone probably ran belt dressing on it.
That stuff buys you a quiet week and costs you a belt and a pulley later.
Squeal only under load (A/C, full steering lock, headlights)
Load-dependent squeal is the most useful symptom you can get, because you can trigger it on demand. Every accessory you switch on adds drag to the belt. When the A/C clutch engages or you hold the wheel at full lock, the belt needs more grip, and a weak tensioner can't supply it.
Try this sequence with the hood up. Turn on the A/C, then the high beams, then the blower on max, then the rear defroster, then hold the wheel at full lock, checking hand position on the wheel so you don't fight the pump. If the squeal appears at any step, you've proven the belt is slipping under load.
The electrical version is worth separating out. If the noise only shows with lights and blower running, the alternator is loading the belt harder, which is the same reason dim lights at idle show up first on a tired charging system. It's a load test, not a bulb problem.
Growl or rhythmic tick that follows engine RPM
A growl, whine, or grinding noise that rises and falls with RPM is almost always a bearing. It won't change when you switch accessories on, because it isn't load-dependent. It's mechanical, and it gets worse with speed.
A rhythmic tick is different. If you hear one tick per belt revolution, something is physically wrong with the belt or a pulley face. Look for a missing rib chunk, a nick in a pulley groove, or a stone wedged in the belt.
That's a visual diagnosis, not an audio one.
One caution on the growl. A failed bearing can be the tensioner pulley, an idler pulley, or the alternator's overrunning decoupler. Those three sound nearly identical from the driver's seat.
You cannot separate them by ear, which is exactly why the belt-off tests come next.
The Free Driveway Tests You Can Run Right Now
You don't need tools for the first pass. Five checks, maybe ten minutes total, and they'll tell you whether to keep digging or start pricing parts. Do them in order, because each one narrows the field for the next.
Before any of this, check whether your model has an open recall or a manufacturer service bulletin covering belt noise or the tensioner. Searching NHTSA's recall database takes two minutes and can turn a diagnosis into a free repair. As of 2026, several popular engines still have active bulletins on tensioner and belt complaints.
Step 1: Cold-start listen. Park overnight, then start the engine with the hood up and stand beside the front fender. Listen for the first 60 seconds without touching anything. Note whether the noise is a chirp (short, sharp), a squeal (continuous), or a growl (low and grinding).
Step 2: Watch the arm at idle. With the engine running and everything off, look at the tensioner arm. A healthy arm sits still. A worn damper lets it bounce or vibrate visibly, sometimes only a millimeter or two.
That tiny movement is enough to unload the belt and make it chirp.
Step 3: Check the travel position. Find the indicator marks on the tensioner body, usually a pointer and a notch or a small window. If the pointer sits at the extreme end of its range, the spring has given up. Some designs print a "replace" band directly on the casting, which makes this a five-second check.
Step 4: Load it up. Engine running, A/C on, high beams on, blower on max, steering held at full lock for two seconds. Listen for any new squeal at each step. Noise that appears only under load confirms slip, but not yet the cause.
Step 5: The chalk and water tests. With the engine off, chalk a single rib of the belt across its width. Start the engine and watch that mark for a few seconds. If the chalk line smears or walks relative to the pulley, the belt is slipping on that pulley.
The water test is faster and messier. Mist a little water onto the belt ribs with a spray bottle while the engine idles. If the squeal stops for a few seconds, you're hearing belt slip, because water temporarily restores grip on a glazed surface.
If the noise doesn't change at all, the sound is mechanical, likely a bearing.
| Test | Time | What it proves | What it doesn't prove |
|---|---|---|---|
| Cold-start listen | 1 minute | That noise exists and when | Which part makes it |
| Arm watch at idle | 2 minutes | Whether the damper is worn | Whether the spring is weak |
| Travel indicator check | 1 minute | Whether the spring has collapsed | Whether the bearing is dry |
| Load test | 3 minutes | That the belt slips under drag | Which pulley is slipping |
| Chalk test | 5 minutes | Slip on a specific pulley | Internal tensioner wear |
| Water mist | 2 minutes | Belt glazing versus bearing noise | Spring rate |
If none of that produces a clear answer, and the car is undrivable or the belt has already thrown, don't improvise a roadside fix. A proper tow point and a flatbed beat a shredded belt wrapped around the crank pulley.
Belt-Off Tests: Spin, Wiggle, and Snap-Back
This is where the diagnosis gets definitive. With the belt off, every suspect is isolated and you can feel exactly what's wrong. Budget 30 to 45 minutes for a first-timer, plus time to get the front end up safely.
Relieve tension the correct way (check the routing diagram first)
Find the belt routing sticker under the hood or in the service manual, then identify which way the tensioner releases. Most rotate one way to slacken, but a minority go the other way. Forcing it the wrong direction can snap the arm or damage the damper.
Slide the correct wrench or a serpentine belt tool onto the tensioner's hex feature and rotate slowly until the belt goes slack. Slip the belt off the smallest pulley first, then lower the arm gently. Never let it snap back on its own.
Don't pry a belt over a pulley lip to save time. That trick stretches the cords and creates the exact chirp you're trying to eliminate.
Spin and wiggle every pulley
With the belt off, spin each pulley by hand and listen.
- Tensioner pulley. Should spin smooth and silent with a faint sealed-bearing feel. Grit, roughness, or a dry rasp means replacement.
- Idler pulleys. Same test. These are the most common look-alikes, and they cost less than a tensioner.
- Alternator decoupler (OAD/OAP). Should turn freely in one direction and lock in the other. If it spins both ways or feels notchy, that's your noise.
- Water pump and power steering pump. Any wobble, seep, or roughness here means the tensioner was innocent.
Then wiggle each pulley side to side. Any detectable play in the bearing means it's done. A healthy sealed bearing feels tight with zero rock.
While you're in there, run a straightedge across the pulley faces. A pulley sitting proud or recessed by even a couple of millimeters will make a belt walk and chirp no matter how good the tensioner is. A worn harmonic balancer can do the same thing, and it's easy to miss.
The spring return test and arm travel check
Push the tensioner arm through its arc by hand, slowly, then let it go. A healthy unit returns with authority and settles. A tired one feels lazy, and it may not return fully at all.
Check the arc itself. The arm should move smoothly through its full range without binding or crunching. A gritty pivot means corrosion in the bushing, which is common in salt-belt states after a few winters.
Finally, look at where the arm parks with the belt installed. Mid-travel is correct. Parked hard against the stop means the spring has collapsed and the belt is running loose.
That's a replace, not a repair.
If you need more clearance to reach the tensioner, getting the front end up on a solid set of wooden ramps is safer than trusting a scissor jack. Chock the rear wheels either way.
One safety note that isn't optional. Disconnect the battery before your hands go anywhere near the belt, and let the engine cool first. Electric cooling fans can start with the key off, and a tensioner spring stores enough energy to take a finger.
Is It Really the Tensioner? Ruling Out the Look-Alikes
Often it isn't. Four other parts share that belt and the same cramped corner of the engine, and every one of them can mimic tensioner failure well enough to fool a confident owner. Rule them out in this order before you spend a dollar.
Glazed or slipping belt vs. weak tensioner spring
Both of these squeal, and they get confused constantly. The belt is the cheaper suspect, so clear it first. Run a finger along the ribbed side.
A healthy belt feels slightly matte and grippy. A glazed one feels hard and polished, like a bar of soap that's been in the shower for a week.
Don't condemn a modern belt for cracks alone. Newer EPDM rubber barely cracks as it ages, so belt makers publish rib-wear gauges you hold against the ribs instead. What matters is material loss.
If the ribs sit visibly lower than a fresh belt's, or a chunk is missing, the belt is finished.
| Clue | Points to the belt | Points to the tensioner spring |
|---|---|---|
| Arm position | Sits mid-travel | Parked at the end of its range |
| Arm behavior | Still at idle | Bouncing or fluttering |
| Water mist test | Noise stops briefly | Noise unchanged |
| Belt surface | Shiny, hard, worn ribs | Belt looks and feels fine |
| Cold chirp pattern | Fades in under a minute | Grows longer as tension bleeds off |
Fluid contamination belongs on this branch too. A power steering drip or a valve cover leak softens rubber and glazes it within weeks. Follow the belt path and look for oily trails.
If oil is escaping elsewhere, like the oil-fouled plugs you'd pull from a leaking plug well, fix the source before you spend a cent on drive parts.
Tensioner pulley bearing vs. idler pulley bearing
The tell is what sits behind the pulley. A tensioner pulley bolts to the end of the moving arm. An idler pulley bolts to a fixed bracket on the block or to a stamped steel support.
You already spun and wobbled both with the belt off, so this check is about naming the culprit.
If you need to test with the belt still on, a mechanic's stethoscope isolates the noise in under a minute. Touch the probe to each bracket near the pulley, never to anything spinning. The screwdriver-to-the-ear trick works too, but it puts your hand beside moving machinery.
We'd skip it.
Get this split right and you save real money. An idler runs $15 to $45. Condemn a healthy tensioner instead and you'll spend two or three times that with no change in the noise.
Alternator OAD/decoupler pulley
The overrunning alternator decoupler, or OAD, is a one-way clutch built into the alternator pulley. It lets the alternator's heavy rotor freewheel when engine speed drops between power strokes. Without it, every dip in RPM would yank the belt forward and back.
That pulsing load is the same thing the tensioner damper fights, which is why their failures feel so similar.
A worn OAD chirps, growls, or flutters at idle, and it makes the belt vibrate in a way that looks identical to a dead damper. The belt-off test from earlier settles it. The pulley should freewheel smoothly one way and lock firmly the other.
Freewheeling both directions, or a notchy gritty feel, means the clutch is gone.
One practical note on the fix. Many OADs thread onto the alternator shaft with a pattern that needs a special holding tool. Price the tool against the pulley before you commit, because some engines bury the alternator deeply enough that a whole replacement unit is faster.
Pulley misalignment and the harmonic balancer
Belt tracking tells you about geometry, not tension. A belt that walks toward one edge, or wears one sidewall shiny, is being steered wrong. You already ran the straightedge with the belt off.
Now ask what's causing the offset.
The usual suspects are a bent accessory bracket, an idler installed at the wrong height, or a tensioner sitting slightly crooked on corrosion. Even 2 mm of offset is enough to make a belt climb and chirp. Cleaning the mounting face during installation prevents the self-inflicted version of this problem.
The harmonic balancer is the one nobody checks. It's the pulley on the crankshaft nose, built as a hub, a rubber isolation ring, and an outer ring bonded together. When that rubber delaminates, the outer ring wobbles, slips, or walks.
You get belt throw-off and a chirp that survives every new part you throw at it.
Watch it at idle. Any visible wobble, or a timing mark that wanders around, means the balancer itself is failing. No tensioner fixes that, and a separated balancer can come apart at speed.
What to Replace: Tensioner Only, Tensioner Plus Belt, or the Full FEAD Kit
It comes down to belt age and what the spin tests found. Match your situation to a row below before you buy anything.
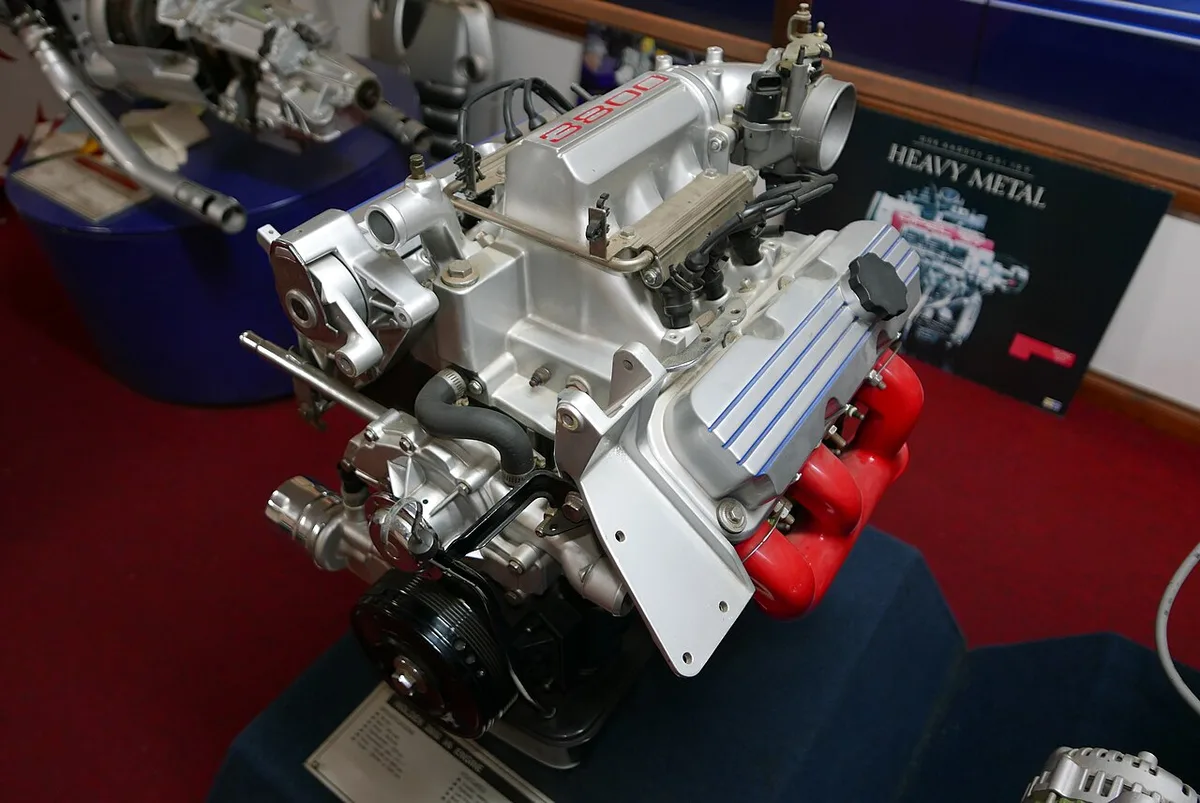
Image source: Wikimedia Commons / OSX
| Your situation | Replace | Why |
|---|---|---|
| Tensioner failed, belt under 30,000 miles and looks new | Tensioner only | The belt hasn't earned replacement yet |
| Tensioner failed, belt past 60,000 miles or glazed | Tensioner plus belt | The old belt absorbed the same wear cycles |
| Any other pulley spins rough or wobbles | Full FEAD kit | Chasing single pulleys costs more in the long run |
| A fluid leak soaked the belt | Fix the leak first, then the belt and any hit parts | New parts die fast in oil or coolant |
The most common regret we see is doing half the job. A belt that ran on a weak tensioner has been slipping microscopically for months, and its surface is polished exactly where it needs grip. Put that belt on a new tensioner and the chirp survives.
The owner blames the new part, but the belt was finished all along.
The full kit logic is about labor, not paranoia. The belt comes off either way, and at 100,000 miles every pulley on that drive is living on borrowed time. A kit bundling the tensioner, idlers, and belt runs $90 to $250 and turns the repair into a single event.
Chasing one pulley at a time means paying the labor, or giving up the Saturday, three separate times.
Brand tiers are real here. Litens supplies many factory lines outright, and Gates, Dayco, Continental, and ACDelco all make dependable aftermarket parts. The question of whether to pay for the good stuff comes up in every corner of car repair, and it's the same debate people have about pricier steering components.
Tensioners have a cleaner answer. A no-name unit with a weak spring fails early and takes the new belt down with it. Stick to a known manufacturer.
Dorman sits in its own niche. Their catalog coverage is wide and solves odd applications, but longevity reports vary more by engine family than with the tier-one names. For a daily driver, we'd spend the extra ten dollars.
What It Costs: Parts, Labor, and DIY vs. a Shop
Here are the ballpark numbers as of 2026. Prices move with region, engine, and parts brand, so treat these as planning figures rather than quotes.
| Item | Typical part cost | Notes |
|---|---|---|
| Automatic tensioner | $40 to $120 | European and truck units run higher |
| Serpentine belt | $20 to $60 | Rib count and length drive price |
| Idler pulley | $15 to $45 | Sometimes sold with its bracket |
| Alternator OAD | $40 to $90 | Special holding tool often needed |
| Full FEAD kit | $90 to $250 | Tensioner, idlers, and belt together |
Shop labor books at 0.5 to 1.5 hours for a tensioner and belt on most engines. At the $120 to $180 hourly rate most shops charge these days, the all-in job lands between $200 and $450. The DIY version costs the parts plus an afternoon.
| Factor | DIY at home | Professional shop |
|---|---|---|
| Out of pocket | Parts only, roughly $60 to $180 | $200 to $450 all-in |
| Time | 1 to 3 hours on a first attempt | Usually a half-day round trip |
| Tools needed | Socket set, breaker bar or belt tool | None |
| Main risk | Wrong diagnosis or a snapped bolt | Low, though misdiagnosis still happens |
| Best for | Confident owners with basic hand tools | Tight clearances, warranty coverage, no garage |
One honest caveat before you commit. Some engines hide the tensioner behind a motor mount, a fan shroud, or the upper radiator support. Book time doubles when ancillary parts come off, and the DIY case weakens with every extra bolt.
Swapping the Tensioner Yourself: Step by Step
The job is genuinely approachable on most engines. Budget two hours for the first attempt, work with the engine cold, and keep the battery disconnected until the belt is back on.
- Photograph the belt routing. Shoot it from two angles before anything moves. Then cross-check against the under-hood sticker, because stickers fall off.
- Relieve the tensioner and slip the belt off. Rotate the arm the correct direction using its hex or square drive slot. Walk the belt off the smoothest pulley.
- Compare old and new side by side. Match the pulley offset, arm length, and pulley diameter before the old unit comes off the car. Wrong-offset parts are a real risk on engines with multiple accessory options.
- Remove the tensioner pulley bolt if the new unit ships without a pulley. Caution: many of these bolts are left-hand thread. Check the stamp on the casting or the box label before you lean on it.
- Unbolt the tensioner from the bracket. Most designs use two or three fasteners. A breaker bar gives you the leverage, the same controlled force you'd want on stubborn wheel bolts.
- Clean the mounting surface. Belt dust and corrosion under the new unit can throw alignment off by a millimeter. That's enough to resurrect the chirp.
- Torque the tensioner bolts to spec. Most of these fasteners spec between 18 and 35 ft-lb, but the factory service manual number is the only one that counts. Borrow a torque wrench if you don't own one.
- Route the new belt using your photos. Start at the crank pulley and work outward. Seat every rib fully in its groove before you tension anything.
- Release the tensioner slowly. Never let it snap against the belt. Confirm the belt sits centered on every pulley it touches.
- Reconnect the battery and start the engine. Watch the arm settle at mid-travel, then rerun your load tests from earlier.
- Do the cold-start check the next morning. A silent first minute after an overnight sit is the real pass mark for this repair.
Torque the pulley bolt too, not just snug it. An undertorqued pulley bolt backs out with vibration, and it throws the belt at speed when it goes.
Mistakes That Lead to Repeat Repairs and Wasted Money
The same handful of mistakes show up in this repair over and over. Each one turns a $100 fix into a $300 one.
| Mistake | What happens next | The fix |
|---|---|---|
| Reusing the old belt on a new tensioner | The chirp returns within days | Pair belt and tensioner past 60,000 miles |
| Spraying belt dressing | The noise hides while both faces glaze | Fix the cause, never dress a belt |
| Ignoring dust packed into pulley grooves | The new belt chirps on dirty pulleys | Brush and wipe every groove before install |
| Condemning the tensioner for an idler growl | Expensive part, identical noise | Spin and wiggle every pulley first |
| Missing a failed OAD | New tensioner, belt still flutters | Run the one-way clutch test with the belt off |
| Leaving the fluid leak in place | The new belt glazes within weeks | Repair the leak before the drive parts |
| Forcing the tensioner the wrong way | Snapped arm or a crushed damper | Confirm the release direction first |
| Guessing bolt torque | The pulley bolt backs out on the road | Use the factory torque spec |
Belt dressing deserves its own warning. It's a sticky spray that adds temporary grip to a slipping belt, and it's a mask rather than a repair. The slip continues underneath while the belt and pulley polish each other smoother.
By the time it stops working, both contact faces are often ruined and the pulley goes with the belt.
The final trap is firing the parts cannon before diagnosing. A tensioner swapped on the strength of a video is a coin-flip repair. Ten minutes of driveway tests beats a $150 guess, every single time.
Safety First: Electric Fans, Spring Pressure, and Pinch Points
The belt drive looks harmless with the engine off. It isn't. Two things on that front end can hurt you badly: stored spring energy, and a cooling fan that can wake up without warning.
Start with the battery. Disconnect the negative cable before your hands go near the belt, and pocket the keys so nobody cranks it while you're working. On a hybrid or plug-in hybrid, that only kills the 12-volt side.
The high-voltage system stays live and the fans can cycle at any moment, so leave those to a trained tech unless you've worked on orange cables before.
Why the tensioner arm is the real pinch point
The torsion spring inside a tensioner carries serious preload even at rest. That arm doesn't know where your fingers are. If a wrench slips off the hex while you're levering, the arm snaps back to its stop in a fraction of a second.
Keep your knuckles on the outside of the tool's arc and move the arm in one slow, controlled sweep. Never wedge a finger between the belt and a pulley to hold tension. Gloves help with grip, but they also catch on sharp casting edges, so check the clearance around the arm before you pull.
Cooling fans run with the key off
Radiator fans are controlled by the engine computer, not the ignition switch. They cycle after shutdown to cool the condenser, and they can start minutes later while your forearm is inside the shroud. That's a live 12-volt motor with plastic blades and no clutch.
Let the car sit until the fan stops, then disconnect the battery before reaching in. Test the fan connector with the key out if you want certainty. Never trust a quiet engine bay as proof that nothing will spin.
| Hazard | What goes wrong | How to shut it down |
|---|---|---|
| Cooling fan | Starts with the key off, strikes hands | Battery negative off, engine cool |
| Tensioner spring | Arm snaps back, crushes fingers | Slow controlled release, correct rotation |
| Hot exhaust and block | Contact burns on forearms | Work cold, wear long sleeves |
| Belt tool slip | Knuckles into sharp brackets | Brace your stance, pull don't push |
| Jack-only support | Car drops when you pull hard | Jack stands plus wheel chocks |
| Loose jewelry and hair | Caught in a spinning pulley | Remove rings, tie hair back |
Two more habits worth building. Eye protection matters here because old belts shed hard rubber crumbs and rust flakes when they come free. And if the job needs the front end raised, chock the rear wheels and put the car on stands, not just a jack.
A hard pull on a breaker bar is enough to shift a car off a scissor jack.
Dispose of the old belt properly too. It's reinforced rubber with cord inside, and it doesn't belong in a burn barrel or a storm drain. Most auto parts stores take them with used oil.
Real-World Scenarios: Three Noises, Three Different Verdicts
The same three patterns come up over and over in owner reports and shop write-ups. Each one starts with a noise that sounds like a tensioner and ends somewhere else. Read them as templates, because one of them probably matches your car right now.
Scenario one: the cold chirp that outlived a new belt
A typical case is a four-cylinder sedan around 75,000 to 85,000 miles. The owner hears a chirp on the first start of the day, has the belt replaced at a quick-lube shop, and the noise is back within two weeks.
The giveaway is the arm position. With the new belt installed, the tensioner pointer sits at the far end of its travel window instead of mid-range. A fresh belt is slightly shorter than a stretched old one, so a tired spring that was borderline before is now completely out of adjustment.
The verdict here is a tensioner, plus a fresh belt since the new one has been slipping against a slack arm. Typical outcome: chirp gone, and the next cold morning is silent. The lesson is that the belt was the symptom, not the cause.
Scenario two: the growl that wasn't the tensioner
A V8 pickup past 120,000 miles develops a low growl that tracks engine RPM and gets louder with the A/C on. The owner assumes tensioner because that's the part everyone names first.
With the belt off, the tensioner pulley spins smooth. The idler pulley below the alternator feels like it's full of sand. That grit is a bearing that lost its grease 20,000 miles ago.
The tensioner was doing its job the whole time.
Cost difference matters here. A tensioner for that truck runs $70 to $110. The idler is $20 to $35.
Same noise, one third the price, and the wrong guess would have left the growl in place.
Scenario three: the squeal that came back after everything
A small hatchback squeals whenever the A/C compressor engages. The tensioner and belt both get replaced, and the noise returns within a month. This is the frustrating one, and it usually has two causes stacked on top of each other.
First, a power steering line is seeping onto the belt path, glazing the new belt exactly where it needs grip. Second, the alternator's overrunning decoupler is locked solid, so every RPM dip yanks the belt and makes the tensioner work overtime.
Fix the leak, replace the decoupler, and the third belt finally lasts. The pattern is worth remembering: when a repair fails twice, stop buying the same part and go looking for the thing that's killing it.
| Symptom | Mileage range | What it usually turns out to be | Rough parts cost |
|---|---|---|---|
| Cold chirp, worse after a new belt | 75,000 to 90,000 | Weak tensioner spring | $40 to $120 |
| RPM-tracking growl | 110,000+ | Idler pulley bearing | $15 to $45 |
| Squeal under A/C load, repeat repairs | Any | Fluid leak plus failed OAD | $40 to $90 plus the leak fix |
| Belt walking off the edge | Any | Misalignment or harmonic balancer | Varies widely |
| Rhythmic tick once per revolution | Any | Torn belt rib or nicked pulley | $20 to $60 |
Making the New Tensioner Last: Climate, Mileage, and Driving Habits
A replacement tensioner should run 60,000 to 100,000 miles. Whether it actually does depends far more on what's happening around it than on the part itself. Five factors decide the outcome.
Cold, salt, and dust all shorten the clock
Cold climates hit the spring hardest. Every overnight freeze stiffens the belt and asks the tensioner for maximum grip at the exact moment it has the least. That's why chirps show up in November and disappear in May.
Salt-belt states attack the bracket and pivot. Corrosion creeps into the mounting face and throws alignment off by a millimeter or two, which is enough to start a slow edge wear pattern. Coastal humidity does the same thing to bearing seals, just more gradually.
Dust and off-road use are the fastest route to a dry bearing. Fine grit works past a seal that grease can't, and the pulley starts to rasp within a few thousand miles. If you drive gravel regularly, shorten your inspection interval.
Driving style changes the load profile
Stop-and-go traffic means constant RPM changes, and every one of them works the damper. Short trips are worse in a different way. The engine never gets hot enough to boil off condensation, so moisture sits in the bearing and the belt stays damp.
High electrical load matters too. Big audio systems, added lighting, and heated seats all drag on the alternator, and that drag lands on the belt. If you've been adding your own electrical accessories to the vehicle, expect the charging system and the drive belt to work harder than the factory tune assumed.
| Condition | What degrades first | Practical prevention |
|---|---|---|
| Cold winters | Torsion spring preload | Expect a shorter service life, inspect each autumn |
| Salt and road brine | Bracket faces, pivot bushings | Rinse the engine bay in spring, avoid high pressure near bearings |
| Dust and gravel roads | Pulley bearings | Inspect every 30,000 miles, replace idlers with the tensioner |
| Stop-and-go city driving | Damper friction surface | Watch for arm bounce at idle during oil changes |
| Short trips under 5 miles | Bearings, belt surface | Take a longer drive weekly, check for glazing |
| Fluid leaks nearby | Belt rubber, pulley grip | Fix the leak source before it touches new parts |
Maintenance habits that actually help
Check the belt and tensioner every oil change, not every other one. It takes 30 seconds with a flashlight. Look at the arm position, glance at the belt ribs, and note any black dust on the timing cover.
Never pressure-wash directly at a pulley. Water forced past a bearing seal is the fastest way to ruin a good part. A gentle degreaser and a rag around the belt path is safer.
Replace the tensioner and belt as a pair past 60,000 miles, and add the idlers at 100,000. Those intervals come from manufacturer service schedules, and they exist because the parts wear together. Skipping one usually means paying labor twice.
FAQ: Belt Tensioner Diagnosis and Replacement
Can you drive with a bad belt tensioner?
Short distances at low speed, yes, with risk. A weak tensioner can let the belt slip off entirely, and that takes out power steering, charging, and cooling at once. If the belt has already walked or you hear grinding, park it and arrange a tow.
How long does a belt tensioner usually last?
Most automakers rate the tensioner for 60,000 to 100,000 miles, roughly matching the serpentine belt interval. Real-world life drops in cold climates, dusty conditions, and on engines with fluid leaks nearby. Past 100,000 miles, treat it as a wear item rather than a permanent part.
Does a bad tensioner always make noise?
No. A tensioner can lose spring tension and still run quietly for months, especially in warm weather. The arm position is the better clue.
If the indicator sits at the end of its travel with a correctly sized belt fitted, the spring is tired whether you can hear it or not.
Can I just tighten the belt instead of replacing the tensioner?
Only on a manual adjustable tensioner, which older V-belt and some truck setups still use. Automatic tensioners have no adjustment at all, so there's nothing to tighten. On those, a loose belt means a worn spring or the wrong belt length.
Will a bad tensioner trigger a check engine light?
Rarely directly, because the tensioner has no sensor. It can set codes indirectly. A slipping belt slows the alternator and can log a charging voltage fault, and it can stop the A/C compressor from engaging.
Diagnose the belt drive before you chase an electrical code.
How do I know if my car has a stretch-fit belt with no tensioner?
Check the routing diagram under the hood. If the layout shows no spring-loaded arm, the belt is stretch-fit and gets cut off and installed with a special tool. These have no tensioner to fail, so chirping points to the belt itself or an idler bearing.
The Decision Guide: Match Your Symptom to Your Next Move
Find your symptom in the left column, run the test in the middle, and follow the result to the action on the right. That's the whole diagnosis in one table.
| What you notice | Run this test | If the result is positive | Do this |
|---|---|---|---|
| Chirp for 60 seconds on cold start | Watch the arm and its travel indicator | Arm parked at the end of its range | Replace tensioner and belt |
| Continuous squeal at idle | Water mist on the ribs | Noise stops briefly | Belt is glazed, replace belt and inspect tensioner |
| Squeal with A/C or lights on | Load test, one accessory at a time | Noise appears under load only | Belt slip, check tension and belt surface |
| Growl that follows RPM | Belt off, spin each pulley | Any roughness or play | Replace that pulley, tensioner or idler |
| Belt walking off one edge | Straightedge across pulley faces | Any offset visible | Fix alignment or the worn balancer |
| Rhythmic tick once per revolution | Close look at belt ribs and pulley grooves | Torn rib or nicked groove | Replace the damaged part |
| Arm bouncing at idle | Visual with engine running | Visible flutter | Worn damper, replace tensioner |
| New belt still chirping | Check arm position again | Pointer at end of travel | Tensioner was the real fault |
Three quick rules cover most of it. If the arm is at the end of its travel, the tensioner is done. If the noise follows RPM and doesn't change with load, it's a bearing and you need to find which one.
If the belt looks polished, it's finished no matter how many miles are on it.
One last piece of judgment. If your car is past 100,000 miles and the belt is already coming off, do the whole drive in one sitting. Tensioner, idlers, and belt together.
It costs less than three separate repairs and you stop thinking about that corner of the engine for another five years.
